
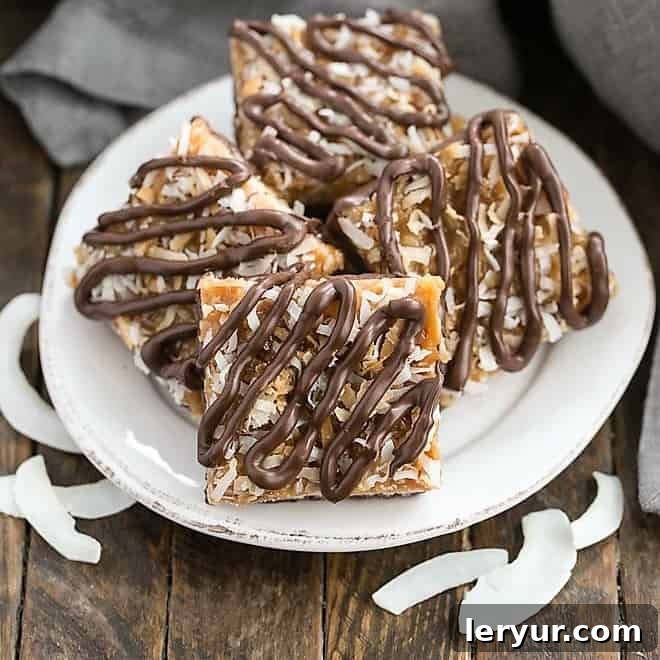
The moment that last delicious Girl Scout Samoa cookie vanishes from your freezer, a familiar craving kicks in. Those irresistible combinations of crisp shortbread, gooey caramel, toasted coconut, and rich chocolate are simply legendary. But what if you could enjoy that sensational flavor year-round, without waiting for cookie season? Say hello to your new favorite obsession: these incredible Homemade Samoa Bars!
As a devoted fan of Girl Scout cookies, I understand the annual anticipation for classics like Samoas (or Caramel deLites, as they’re also known), Thin Mints, and Tagalongs. My freezer is usually stocked, but inevitably, they disappear far too quickly. That’s why mastering a homemade version is a game-changer. This recipe for Samoa Bars captures every nuance of the original, delivering a satisfyingly decadent treat that will quickly become a cherished staple in your home.
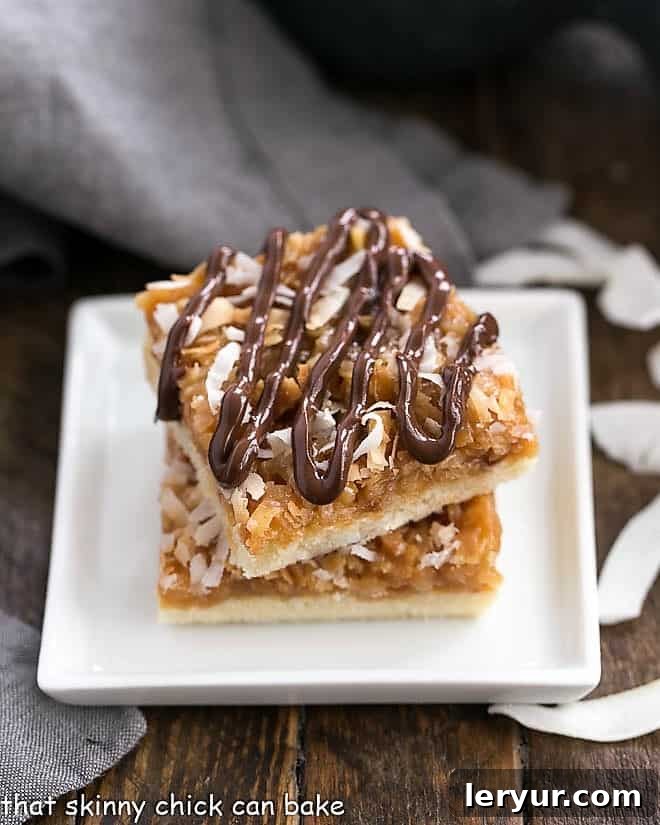
Why You Need to Make These Decadent Homemade Samoa Bars
If you’re still on the fence about diving into the world of homemade Samoa bars, let me convince you. This recipe isn’t just a substitute; it’s an elevated experience that offers numerous benefits:
- Year-Round Indulgence: Gone are the days of waiting for Girl Scout cookie season. With this recipe, you can satisfy your Samoa cookie cravings anytime, anywhere. Imagine biting into that perfect combination of flavors on a random Tuesday in July!
- A Symphony of Flavors and Textures: These bars are a masterclass in balance. The buttery, crisp shortbread crust provides the ideal foundation for the chewy, golden caramel. That caramel is generously studded with perfectly toasted coconut, adding both a textural crunch and an intensified tropical aroma. Finally, a lavish drizzle of semi-sweet chocolate ties all the elements together with its rich, smooth finish. It’s a multi-layered delight that engages every sense.
- Rave Reviews Guaranteed: Don’t just take my word for it! My book club, a notoriously discerning group of dessert connoisseurs, gave this Samoa bar recipe unanimous praise. These bars are a proven crowd-pleaser, perfect for parties, potlucks, or simply impressing your family and friends. Prepare for compliments and requests for the recipe!
- Customizable Perfection: Making them at home means you control the quality of ingredients. You can opt for your favorite brand of chocolate, choose the caramel consistency you prefer, and even adjust the amount of coconut to your liking. This level of customization ensures a truly personalized and superior dessert experience.
What Our Readers Are Saying
The feedback from those who’ve tried this Samoa bar recipe has been overwhelmingly positive. Here are just a few snippets from our delighted community:
“These are absolutely incredible. I’m on my third batch this week, and they disappear almost as soon as they cool!” – A satisfied home baker
“My husband’s favorite Girl Scout cookie is the Samoa, and his birthday is nowhere near cookie season. I made these for him, and he was so surprised and absolutely adored them! We all did – I should have doubled the recipe!” – Lisa K.
“I honestly think these homemade Samoa bars are even better than the originals. The freshness and quality are unmatched. Thank you for this fantastic recipe!” – Nicole G.
These testimonials highlight the pure joy and success people are experiencing with this recipe, confirming its status as a must-try for any Samoa cookie enthusiast.
Essential Ingredients for Perfect Samoa Bars
While the magic of these bars lies in their combination, selecting the right ingredients is key to achieving that authentic Samoa flavor and texture. Here’s what you’ll need and some helpful tips for each:
- Kitchen Staples: You’ll start with common pantry items like all-purpose flour, granulated sugar, high-quality unsalted butter, and a touch of vegetable oil. Ensuring your butter is fresh and at the right temperature (often softened, as specified in the instructions) is crucial for the shortbread crust.
- Shredded Coconut: This is a star ingredient, and toasting it is non-negotiable for superior flavor. Spread 2 cups of shredded coconut evenly on a baking sheet and toast at 350 degrees F (175 C) for about 15 minutes. Make sure to stir it every 4-5 minutes to ensure even browning and prevent burning. Toasting not only revitalizes the flavor by drawing out natural oils but also gives the coconut a beautiful golden hue and a delightful crunch that’s essential for a true Samoa experience.
- Caramels: For ultimate convenience, store-bought caramels are your best friend. My personal preference leans towards Werther’s Original Soft Caramels. Their soft, pliable texture melts beautifully and creates a wonderfully gooey topping. If you opt for Kraft caramels, which tend to be firmer, you might need to add an extra tablespoon of water when melting to achieve the desired smooth, spreadable consistency.
- Semisweet Chocolate Chips: The chocolate drizzle is the perfect finishing touch. I typically keep Ghirardelli brand chocolate chips on hand for their consistent quality and rich flavor, but Hershey’s also works wonderfully. The key is using a good quality semi-sweet chocolate to complement the sweetness of the caramel and coconut without overpowering it.
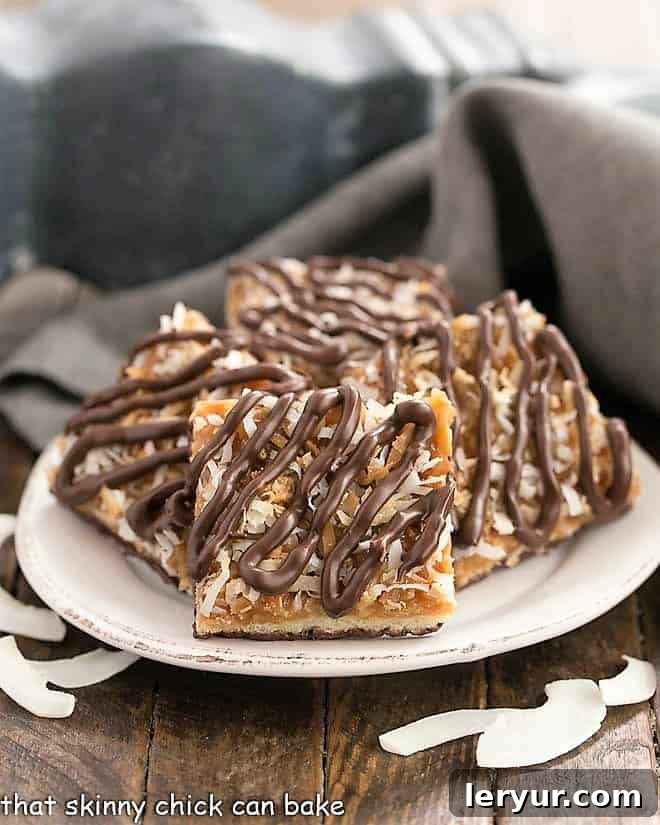
Expert Tips for Crafting Your Homemade Samoa Bars
Making these Samoa bars is a straightforward process, but a few expert tips can elevate your results from good to absolutely phenomenal. Pay attention to these details for a truly perfect batch:
- Perfecting the Shortbread Crust: While I love the convenience of making the crust in a food processor – which quickly transforms flour, sugar, and butter into fine, uniform crumbs that press beautifully into the pan – don’t fret if you don’t own one. If mixing by hand, ensure your butter is softened. Combine the ingredients using a handheld mixer or even a pastry cutter until a dough forms. This slightly softer dough will still press easily into an even, firm crust. The goal is a dense, buttery base that holds up to the generous topping.
- The Caramel Conundrum: As mentioned, your choice of caramel can impact the final texture. Werther’s Original Soft Caramels are generally more forgiving and melt into a smoother consistency. If you use Kraft caramels, which are firmer, add an extra tablespoon of water when melting to achieve that desired gooey, spreadable texture. This prevents the caramel from setting too hard and becoming difficult to cut.
- Toasting Your Coconut: This step is often overlooked, but it makes a significant difference. Sweetened “angel flake” coconut can be quite moist. Toasting it at 350°F (175°C) not only dries it out slightly, improving its texture, but also intensifies its natural oils and enhances its flavor, giving it a deeper, richer, and nuttier profile. Be vigilant, though, as coconut can go from perfectly golden to burnt in a flash! Stir frequently and remove it from the oven as soon as it’s fragrant and lightly golden.
- Embracing the Chocolate: The iconic Samoa cookie features both a chocolate-dipped base and a chocolate drizzle. For a truly authentic copycat, dipping the bottoms of your bars in melted chocolate is the way to go. However, if you prefer a simpler approach, a generous chocolate drizzle across the top will still deliver that essential chocolatey finish. I often find the drizzle alone is enough for my cravings, but if you’re aiming for full authenticity, get dipping!
- PRO-Tip for Drizzling Chocolate: No fancy piping equipment? No problem! Melt your chocolate (with a touch of vegetable oil for smoothness) and transfer less than half of it to a quart-sized Ziploc bag. Snip a tiny corner off the bag, and you have an instant piping tool. Gently squeeze and move the bag back and forth over the cooled bars to create those signature chocolate stripes.
- Cooling and Cutting for Perfection: After dipping and drizzling, it’s crucial to place your bars on a parchment-lined baking sheet and allow the chocolate to cool and firm up completely. Rushing this step will result in sticky, messy bars. Once firm, use a sharp, warm knife to achieve clean, crisp cuts. Running your knife under hot water and wiping it dry between cuts can prevent dragging and ensure beautiful squares.
- Storage and Freshness: Store your finished Samoa bars in an airtight container at room temperature for up to 3-4 days, or in the refrigerator for up to a week. For longer storage, these bars freeze exceptionally well. Wrap individual bars tightly in plastic wrap, then place them in a freezer-safe bag or container for up to 2-3 months. Thaw at room temperature for a delicious treat anytime!
Frequently Asked Questions About Samoa Bars
Samoas are one of the most beloved Girl Scout cookies, famous for their unique combination of flavors and textures. They feature a crisp shortbread cookie base, a chewy layer of caramel and toasted coconut, and a rich chocolatey drizzle. Depending on the bakery that produces them for the Girl Scout organization, they may also be known by the name “Caramel deLites.” While there might be slight variations in shape, the specific type of chocolate, or the exact amount of caramel between the two names, their core delicious components remain the same.
The precise origin of the name “Samoa” for these cookies isn’t definitively known, but many surmise that it draws inspiration from the tropical Samoan Islands in the South Pacific. The prominent use of coconut in the cookie, a staple ingredient in tropical cuisines, lends itself well to this exotic and evocative name. It suggests a taste of paradise in every bite!
Absolutely! These homemade Samoa bars freeze wonderfully. Once the chocolate has fully set, wrap individual bars tightly in plastic wrap, then place them in an airtight freezer-safe container or bag. They can be stored in the freezer for up to 2-3 months. When you’re ready to enjoy, simply thaw them at room temperature for about 30 minutes, or enjoy them chilled straight from the fridge.
When stored in an airtight container at room temperature, homemade Samoa bars will stay fresh and delicious for 3-4 days. If refrigerated, their shelf life extends to about a week. The refrigeration can make the caramel slightly firmer, which some people prefer. Always ensure they are in an airtight container to prevent them from drying out or absorbing other odors.
More Irresistible Treats You’ll Love
If you’ve fallen in love with these Homemade Samoa Bars, you’re in for a treat! Here are a few more recipes that feature similar flavor profiles or are simply perfect for satisfying your sweet tooth:
- If you’re looking for a cookie that truly mimics the classic circular shape of a Girl Scout Samoa, my Homemade Samoas Cookies recipe is a must-try. It offers that familiar ring shape with all the beloved caramel, coconut, and chocolate goodness.
- For an elegant and delightful coconut confection, don’t miss these Chocolate Dipped Coconut Macaroons. They’re refined enough for special occasions like baby showers or holiday gatherings, yet so simple to whip up whenever a coconut craving strikes.
- If you’re seeking a quick and easy coconut fix, these Chewy Coconut Cookies are incredibly straightforward to make. They deliver a satisfying chewy texture and rich coconut flavor in every bite.
- And for an abundance of simple-to-make, shareable desserts, explore all my Easy Bar Cookie Recipes. You’ll find a delightful assortment perfect for any occasion!
Stay in touch through social media @ Instagram, Facebook, and Pinterest. Don’t forget to tag me when you try one of my recipes! And if you love the results, please give it a 5-star rating in the recipe card.
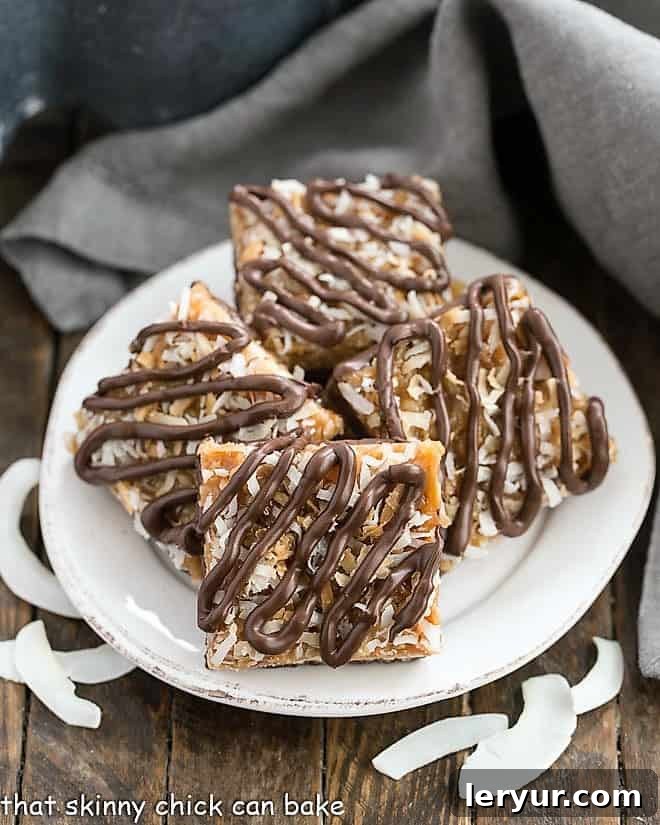
Homemade Samoa Bars Recipe
30 minutes
50 minutes
1 hour 20 minutes
16 bars
Decadent bar cookie with a shortbread crust, gooey caramel and coconut topping and chocolate drizzle like the famous Girl Scout Samoa Cookies.
Ingredients
Cookie Base:
- 1 cup all-purpose flour
- ⅓ cup granulated sugar
- ½ cup unsalted butter (one stick), cut into small pieces
Caramel Coconut Topping:
- 2 cups shredded coconut, toasted at 350 degrees for 15 minutes, stirring every 4-5 minutes
- 8 ounces soft caramels (e.g., an 8.1 oz bag of Werther’s Original Soft Caramels, unwrapped)
- 1-2 tablespoons water (use 2 tablespoons if using firmer Kraft caramels instead of Werther’s)
- 2 tablespoons unsalted butter
Chocolate Drizzle*:
- 8 ounces of semi-sweet chocolate chips
- 2 teaspoons vegetable oil
Instructions
- Preheat your oven to 350ºF (175ºC). Lightly grease a 9 × 9-inch baking pan, or for easier removal, line it completely with parchment paper or non-stick foil, leaving an overhang on the sides.
- In a food processor, combine the flour, sugar, and butter. Pulse until the mixture forms fine, sandy crumbs. If you don’t have a food processor, use softened butter and mix with a handheld mixer until a crumbly dough forms. Pour these crumbs into the prepared baking pan and press firmly and evenly into the bottom to create a compact crust.
- Bake the shortbread crust for 15 minutes, or until the base is set and the edges are lightly golden brown. Remove from the oven and cool completely on a wire rack before proceeding with the topping. A fully cooled crust prevents the caramel from melting prematurely.
- Prepare the caramel topping: Place the unwrapped caramels, water, and butter in a microwave-safe bowl. Microwave in 30-second intervals, stirring thoroughly after each, until the mixture is completely smooth and melted. This typically takes 1.5 to 2 minutes. Once smooth, fold in 1 ½ cups of the toasted coconut with a spatula until evenly combined.
- Evenly spread spoonfuls of the warm caramel-coconut topping over the cooled shortbread base. Using an offset spatula or the back of a spoon, carefully spread the topping into an even layer from edge to edge. Sprinkle the remaining ½ cup of toasted coconut evenly over the caramel layer, and gently press it down with your hand or the spatula to adhere. Let the topping set at room temperature until completely cooled and firm, which may take an hour or more.
- Once the bars are fully set, use the parchment paper or foil overhang to lift the entire block out of the pan and transfer it to a cutting board. Using a sharp, warm knife, cut the block into 16 uniform squares. Clean your knife between cuts for the neatest edges. In a medium microwave-safe bowl, gently melt the chocolate chips and vegetable oil together in the microwave. Heat in 30-second bursts, stirring frequently, until the chocolate is almost completely melted. Let the residual heat finish the melting process, stirring until silky smooth.
- Line a separate baking sheet with parchment paper. If you plan to drizzle only, remove less than half of the melted chocolate to a piping bag or a quart-sized Ziploc bag (for easy drizzling). Set this portion aside.
- For an authentic Samoa look, dip the bottom of each bar into the remaining melted chocolate. Allow any excess chocolate to drip off by gently scraping the bottom edge against the side of the bowl. Place the dipped bars onto the parchment-lined baking sheet. Repeat this process for all 16 bars, ensuring they are spaced apart. Let them firm up in a cool place for a few minutes.
- Take the reserved chocolate (in the piping bag or Ziploc bag with a tiny corner snipped off) and generously drizzle it in a zigzag pattern across the top of each bar. This adds the final iconic touch and an extra layer of chocolatey flavor.
- Allow all the chocolate to cool and firm up completely before serving. This can be done at room temperature or by placing the baking sheet in the refrigerator for about 15-20 minutes. Once firm, they are ready to be enjoyed!
Notes
* If you decide to only use the chocolate drizzle and not dip the bottoms of the bars, you can reduce the amounts to half of the chocolate chips and vegetable oil listed in the “Chocolate Drizzle” section for the topping.
Recommended Products
As an Amazon Associate and member of other affiliate programs, I earn from qualifying purchases.
- Nonstick Foil
- Small Offset Spatula
- 9 x 9-inch Baking Pan
Nutrition Information:
Yield:
16
Serving Size:
1 bar cookie
Amount Per Serving:
Calories: 284Total Fat: 16gSaturated Fat: 10gTrans Fat: 0gUnsaturated Fat: 5gCholesterol: 20mgSodium: 124mgCarbohydrates: 36gFiber: 2gSugar: 25gProtein: 2g
HOW MUCH DID YOU LOVE THIS RECIPE?
Please leave a comment on the blog or share a photo on Pinterest