
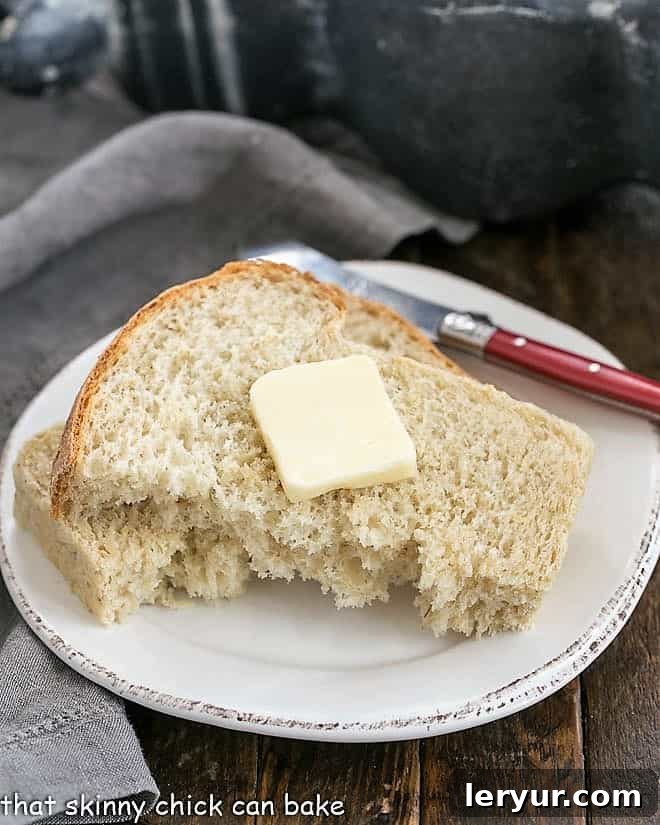
There’s nothing quite like the comforting aroma of freshly baked bread wafting through your home. This Classic Oatmeal Bread recipe doesn’t just fill your kitchen with an irresistible scent; it transports you back to simpler times. It reminds me of my own childhood, eagerly awaiting a warm slice of my mom’s homemade loaf, generously slathered with cold, creamy butter. This recipe promises to awaken your inner child and bring that same simple joy to your table.
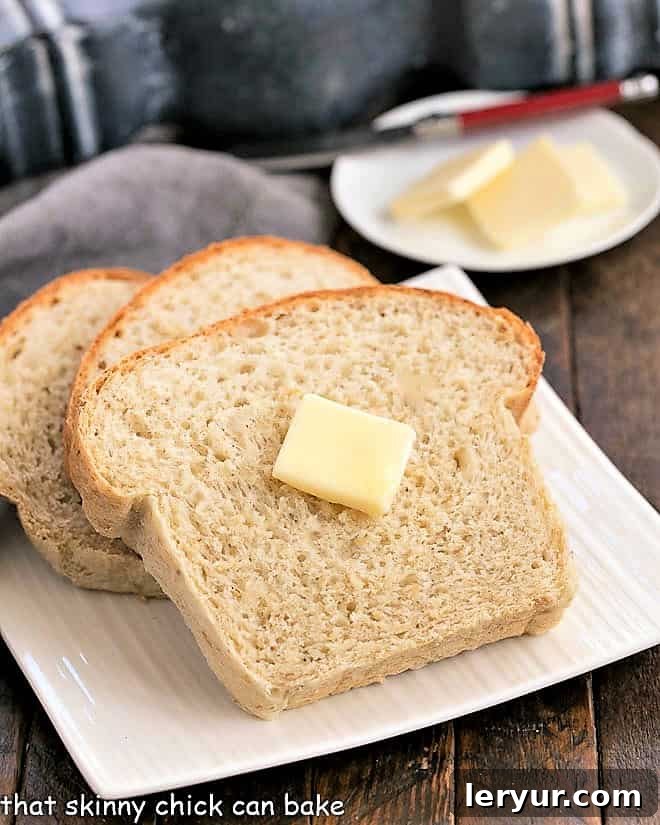
Soft, tender, and incredibly flavorful, this Homemade Oat Bread is a true masterpiece of home baking. It’s more than just a bread; it’s an experience. The delightful texture and subtle sweetness from brown sugar make it an instant favorite, perfect for breakfast, sandwiches, or simply enjoyed on its own. If you’ve been searching for a reliable and delicious yeast bread recipe, your quest ends here. Prepare to be comforted!
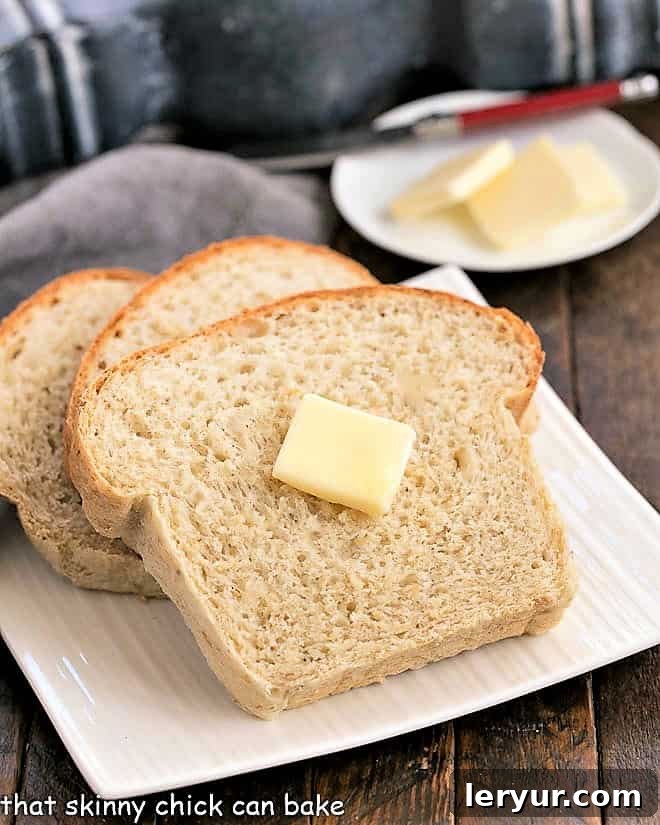
Why You Need to Bake This Oatmeal Bread
Baking bread at home is a rewarding culinary journey, and this Classic Oatmeal Bread stands out for several compelling reasons:
- Inspired by a Master Baker: This exceptional recipe is adapted from one of my all-time favorite baking authorities, Nick Malgieri. His expertise ensures a foolproof and utterly delicious result, even for those new to yeast baking. His meticulous approach to recipes means you’re in for a treat.
- Unmatched Comfort: There’s a special magic in sharing a good loaf of homemade bread with your loved ones. The experience is elevated when it’s still warm from the oven, filling the room with its inviting aroma and offering a soft, tender bite that instantly melts away any stress.
- Perfectly Balanced Sweetness: The addition of brown sugar gives this bread a delicate, slightly sweet profile that complements the earthy notes of oats beautifully. It’s not overly sweet, making it versatile enough for savory spreads or sweet jams. This is truly a standout homemade yeast bread recipe you’ll return to again and again.
The memory of my mom’s oatmeal bread is deeply etched in my mind, a culinary benchmark from my childhood. I may not know the exact secrets of her recipe, but I distinctly recall devouring slices fresh out of the oven, each one generously slathered with cool, creamy butter. That contrast – hot, fluffy bread against cold, melting butter – was pure bliss. Perhaps that was her secret ingredient! To recreate this cherished memory, I turned to a trusted baking guru, Nick Malgieri, whose culinary wisdom has guided me through many kitchen adventures.
Malgieri’s acclaimed cookbook, How to Bake (affiliate link), has been an invaluable resource for perfecting everything from my favorite cheesecake to classic apple pie, and now, this incredible oatmeal bread. As a budding baker, I found his precise instructions and detailed tips to be nothing short of priceless. Over the years, I’ve experimented with various oatmeal bread recipes, but this particular adaptation has emerged as my absolute favorite. It consistently delivers a loaf that is wonderfully soft, perfectly sweet, and incredibly tender – truly the ultimate oat bread experience.
Essential Ingredient Notes for Your Oatmeal Bread
Crafting this Classic Oatmeal Bread requires a few key ingredients, each playing a vital role in achieving its perfect texture and flavor. Using high-quality ingredients, especially for yeast bread, can make a significant difference in the final outcome. This is a delicious, basic bread recipe, but understanding your ingredients will elevate your baking.
- Rolled Oats: Opt for Old Fashioned Rolled Oats, not quick or instant oats. Old-fashioned oats retain their structure better, adding a chewy texture and a richer, nuttier flavor to the bread. Quick oats can become mushy and alter the desired consistency.
- Active Dry Yeast: You’ll need one envelope of active dry yeast, typically 2 ¼ teaspoons. I highly recommend using a reputable brand like Red Star Yeast for consistent and reliable results. Always check the expiration date; fresh yeast is crucial for a successful rise.
- All-purpose, Unbleached Flour: For the best texture and rise, use unbleached all-purpose flour. Brands like King Arthur are excellent choices, known for their consistent quality and protein content, which is important for gluten development in yeast breads.
- Table Salt: Never, ever omit the salt in any bread recipe. Salt is not just for flavor; it’s a critical component for yeast activity and dough structure. It slows down fermentation, allowing the dough to develop more flavor and a finer crumb. Without salt, your bread will taste flat and lack depth.
- Brown Sugar: This recipe calls for brown sugar, which contributes a subtle molasses flavor and helps keep the bread moist. The slight acidity in brown sugar also aids in yeast activation, contributing to a tender crumb.
- Butter: Use unsalted butter to control the salt content in your recipe. Butter adds richness, flavor, and contributes to the bread’s soft texture and golden crust.
Baking Your Best Oatmeal Bread: Expert Tips
Baking with yeast can seem daunting, but with these expert tips, you’ll master this Classic Oatmeal Bread recipe and achieve perfect results every time. Pay attention to these details, and your homemade bread will be the envy of all your friends and family.
- Yeast Activation Temperature is Key: PRO-Tip: Yeast is a living organism, and its activity is highly sensitive to temperature. If the water is too hot, you will kill the yeast, and your dough won’t rise. If it’s too cold, the yeast won’t activate properly, leading to a sluggish rise. Always use a kitchen thermometer to ensure your warm water is between 110ºF (43ºC) and 120ºF (49ºC). This range provides the ideal environment for yeast to thrive and activate effectively.
- Check Yeast Freshness: Before you even start, take a moment to check the expiration date on your yeast package. Expired yeast is inactive yeast, and it will prevent your bread from rising. If it’s past its prime, invest in a fresh batch – it’s a small expense for a successful loaf.
- Leverage Your Stand Mixer: A stand mixer fitted with a dough hook is an invaluable tool for kneading bread dough. It takes the heavy work out of kneading, ensuring your dough is properly developed to achieve a smooth, elastic texture. However, it’s essential to monitor your mixer during the kneading process to prevent overheating.
- Prevent Mixer Overheating: If your stand mixer feels very hot to the touch, turn it off immediately and allow it to cool down. Continuous operation when hot can damage the motor. You might need to finish the kneading process by hand if necessary, which can also be a good way to feel the dough’s texture development.
- Optimal Dough Proofing: Letting the dough rise, also known as proofing, is best done in a warm, draft-free location. After kneading, place the dough in a lightly greased bowl, flipping it once or twice to coat all sides, then cover it tightly with greased plastic wrap. This prevents a skin from forming and keeps the moisture in.
- Ideal Proofing Environment: PRO-Tip: The ideal temperature for proofing yeast dough is approximately 80-85ºF (27-29ºC). While warmth is good, forcing the dough to rise in an environment that is too hot (e.g., above 95ºF/35ºC) can cause it to rise too quickly, leading to an inferior texture and flavor. The yeast might over-ferment, producing off-flavors or a crumbly texture. A slow, steady rise is always preferable.
- Shaping for a Beautiful Loaf: Achieving a well-shaped loaf is key to even baking and presentation. Start by gently flattening the risen dough into a rectangle, slightly longer than your loaf pan. Fold the sides in to narrow the width slightly, then tightly roll the dough from one end to form a smooth, uniform cylinder. A tight roll ensures fewer air pockets and a better crumb.
- Ensure Adherence During Shaping: When rolling the dough into a cylinder, it should naturally adhere to itself. If you find the edges aren’t sticking, a very small amount of water lightly dabbed along the seam can help moisten the dough and improve adherence, creating a neatly sealed loaf.
- Creative Variations: This Classic Oatmeal Bread recipe is wonderful on its own, but it’s also a fantastic canvas for creativity. Consider adding dried fruits like raisins, cranberries, or chopped dates to the dough during the last minute of kneading for a touch of sweetness and chewiness. For a delightful twist, sprinkle the flattened dough with cinnamon and brown sugar before rolling and shaping it into a loaf to create a delicious cinnamon oatmeal bread.
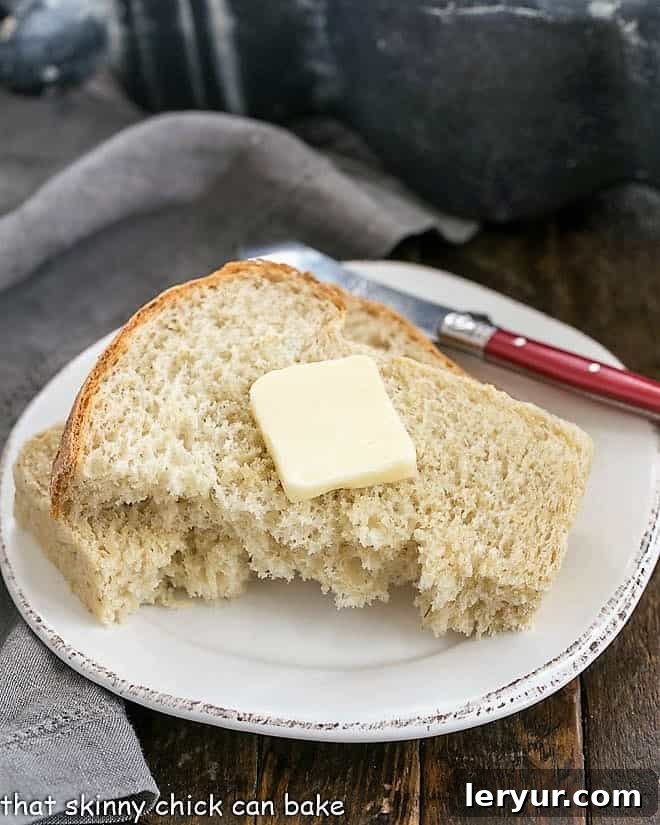
- My Simple Preference: While variations are fun, I confess a strong preference for this oatmeal bread plain and simple. Its inherent flavor shines through beautifully, especially when paired with a generous smear of good quality, lightly salted butter. The purity of the bread truly stands out.
Frequently Asked Questions About Oatmeal Bread
Oatmeal bread offers several nutritional benefits not typically found in plain white bread. Oats are a fantastic source of dietary fiber, which is crucial for digestive health and can help regulate blood sugar levels. They also contain essential minerals like magnesium, iron, and zinc, as well as B vitamins, particularly Vitamin B1 (thiamine). While it’s certainly a healthier choice than highly processed white bread, it’s important to remember that it’s still a carbohydrate-rich food. Enjoy it as part of a balanced diet, appreciating its added nutritional value rather than considering it a “health food” in itself.
For a rustic, oat-topped loaf, the stickiness of your dough often helps oats adhere naturally. If your dough feels a little dry or you want to ensure a more generous coating, there’s a simple trick: gently brush a very light, thin coat of water or milk over the surface of the loaf just before baking. Then, sprinkle your rolled oats evenly over the moistened surface. The liquid acts as a light adhesive. Keep in mind that using milk might result in a slightly darker crust due to its natural sugar content caramelizing during baking, which can add another layer of deliciousness.
Absolutely, but in the most delightful way! The rolled oats impart a distinct yet mild nutty, earthy flavor to the bread. It’s not overpowering, but rather a subtle undertone that adds complexity and a hearty character. Combined with the slight sweetness of brown sugar, the oat flavor creates a wonderfully balanced and comforting taste profile that makes this bread unique and satisfying.
To maintain optimal freshness, store your homemade oatmeal bread at room temperature in an airtight plastic bag or container for up to 2-3 days. This prevents it from drying out or becoming stale too quickly. For longer storage, freezing is an excellent option. Ensure the bread has completely cooled to room temperature before wrapping it tightly in plastic wrap, then aluminum foil, and placing it in a freezer-safe bag. It can be kept in the freezer for up to 2-3 months. When you’re ready to enjoy it, simply thaw at room temperature or warm slices gently in a toaster or oven for that fresh-baked feel.
Explore More Delicious Bread Recipes
If you’ve fallen in love with baking homemade bread, here are some other fantastic recipes to expand your repertoire:
- Basic White Bread from Magnolia Days – A fundamental recipe for any baker.
- Grandmom’s Dinner Rolls from One Sweet Mess – Perfect for special occasions or weeknight dinners.
- Rosemary Olive Oil Bread from Hip Foodie Mom – An aromatic and savory delight.
- Homemade Potato Bread – For an incredibly soft and moist crumb.
- No-Knead Bread Recipe – Effortless baking for impressive results.
- Cinnamon Twist Bread – A sweet, swirled treat for breakfast or dessert.
- Plus, discover even more of the Best Bread Recipes on my site!
Stay in touch through social media! Find me @ Instagram, Facebook, and Pinterest. Don’t forget to tag me when you try one of my recipes! If you loved the results, please consider giving it a 5-star rating in the recipe card below – your feedback is invaluable!
The Recipe:
Classic Oatmeal Bread
20 minutes
40 minutes
1 hour
16 servings
A marvelous oatmeal bread adapted from Nick Malgieri’s How to Bake.
Rated 4.6 out of 5 stars based on 138 reviews.
Ingredients
- 1 cup old-fashioned rolled oats (not quick oats)
- 1 cup boiling water
- ½ cup warm water (about 110ºF / 43ºC)
- 2 ¼ teaspoons active dry yeast (1 standard envelope)
- 2 ½ cups unbleached all-purpose flour
- 2 tablespoons brown sugar
- 1 teaspoon table salt
- 2 tablespoons unsalted butter, cut into about 12 small pieces, plus extra for greasing the bowl and pan
Instructions
- Grease an 8 ½ x 4 ¼ inch loaf pan thoroughly with butter and set it aside.
- In a medium bowl, pour the boiling water over the rolled oats. Stir well to combine, then set aside and allow it to cool completely to room temperature. This process softens the oats.
- In a small bowl, combine the warm water and yeast. Stir gently to dissolve the yeast and let it sit for about 5-10 minutes until foamy, indicating the yeast is active.
- In the bowl of a stand mixer, combine the flour, brown sugar, and salt. Stir these dry ingredients together to ensure they are well distributed.
- Attach the dough hook to your stand mixer. Add the cooled oatmeal mixture, the activated yeast mixture, and the butter pieces to the mixer bowl. Knead the dough on low speed for approximately 5 minutes, or until the dough becomes smooth and elastic.
- Lightly grease a clean large bowl. Transfer the kneaded dough to this bowl, turning it a couple of times to coat all sides with butter. Cover the bowl tightly with greased plastic wrap. Let the dough rise in a warm, draft-free place (ideally 80-85ºF / 27-29ºC) until it has doubled in bulk, which typically takes about one hour.
- Once risen, remove the dough from the bowl and place it onto a lightly floured work surface. Gently deflate the dough by pressing it down with the palm of your hand.
- Shape the dough: Form it into a rectangle that is slightly longer than the length of your loaf pan. Fold the sides in so that the dough’s length is now slightly less than the pan’s length, then carefully roll it tightly to form a uniform cylinder. This creates a good structure for your loaf.
- The dough should naturally stick to itself when rolled. If the seam doesn’t seal well, you may dab a very small amount of water along the edge to help it adhere more firmly.
- Place the shaped dough cylinder into the prepared loaf pan, seam side down.
- Cover the pan again with greased plastic wrap and let the dough rise a second time in a warm place until it has doubled in size, which should take approximately another hour.
- While the dough is on its second rise, preheat your oven to 375ºF (190ºC).
- Once the dough has fully risen, carefully remove the plastic wrap from the pan and place the pan into the preheated oven.
- Immediately decrease the oven temperature to 350ºF (175ºC). Bake for 30-40 minutes, or until the loaf is a rich golden brown, sounds hollow when gently tapped on the bottom, and/or its internal temperature reaches 210ºF (99ºC) with an instant-read thermometer.
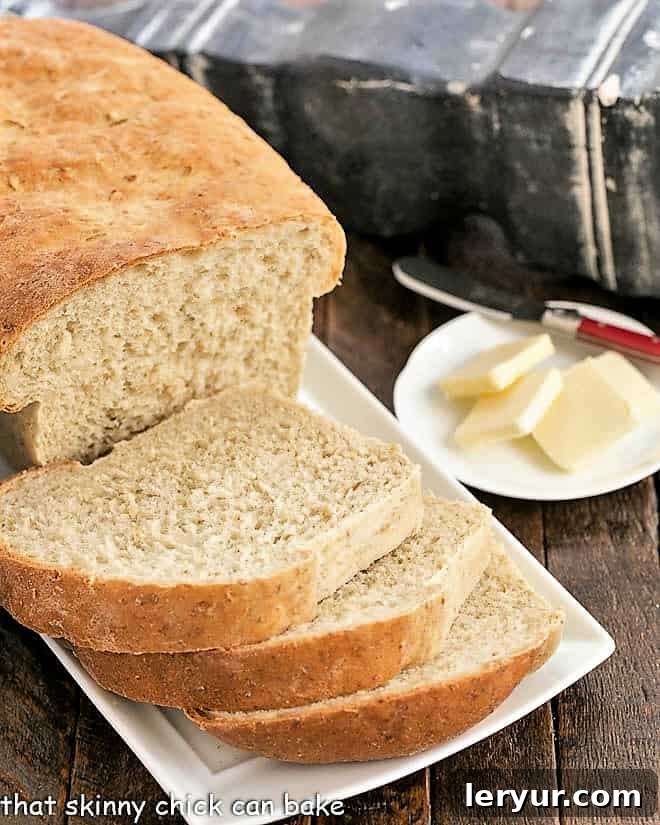
- Remove the loaf from the oven and immediately transfer it from the pan to a wire cooling rack. Allow the bread to cool completely before slicing to ensure the best texture and prevent gumminess. Enjoy!
Notes
This recipe yields one generously sized loaf of Classic Oatmeal Bread, perfect for sharing or enjoying over several days. For the best flavor and texture, ensure your yeast is fresh and active.
Recipe Video
Watch how to make this delightful Classic Oatmeal Bread.
Recommended Baking Products
As an Amazon Associate and member of other affiliate programs, I earn from qualifying purchases, at no extra cost to you.
- KitchenAid Artisan Tilt-Head Stand Mixer
- Roul’Pat Silicone Counter Mat
- Stainless Steel Loaf Pan
Nutrition Information:
Serving Size: 1
Amount Per Serving:
Calories: 101
Total Fat: 2g
Saturated Fat: 1g
Trans Fat: 0g
Unsaturated Fat: 1g
Cholesterol: 4mg
Sodium: 146mg
Carbohydrates: 18g
Fiber: 1g
Sugar: 1g
Protein: 3g
Share Your Baking Success!
We love to see your culinary creations! Please share a photo on social media and tag @thatskinnychickcanbake on Pinterest, Instagram, or Facebook. Your delicious bread could inspire others!