
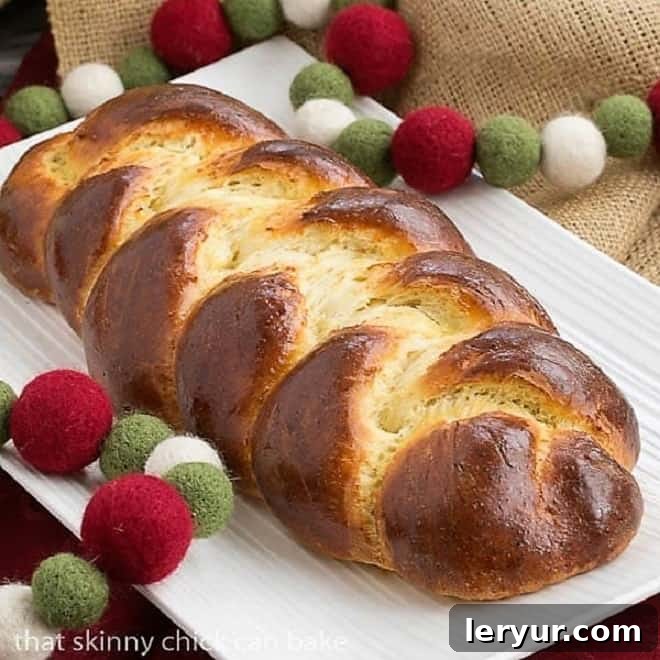
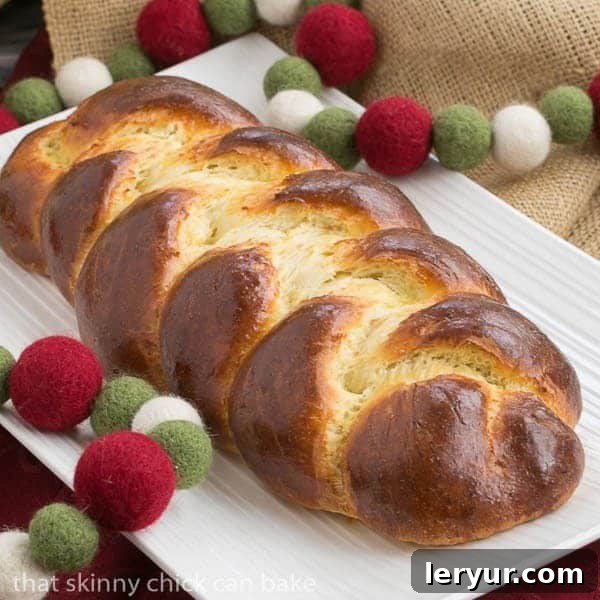
Swiss Butter Braid, famously known as Butterzopf, is much more than just a bread; it’s a culinary masterpiece. This slightly sweet, intricately plaited loaf holds a special place in Swiss tradition and hearts, perfect for elevating any occasion. Whether you’re planning a festive holiday gathering, seeking to impress guests, or simply craving a truly exceptional yeasted delight, Butterzopf delivers an unforgettable experience. Prepare to transform your kitchen into a fragrant bakery and discover the joy of crafting this magnificent braided bread from Switzerland.
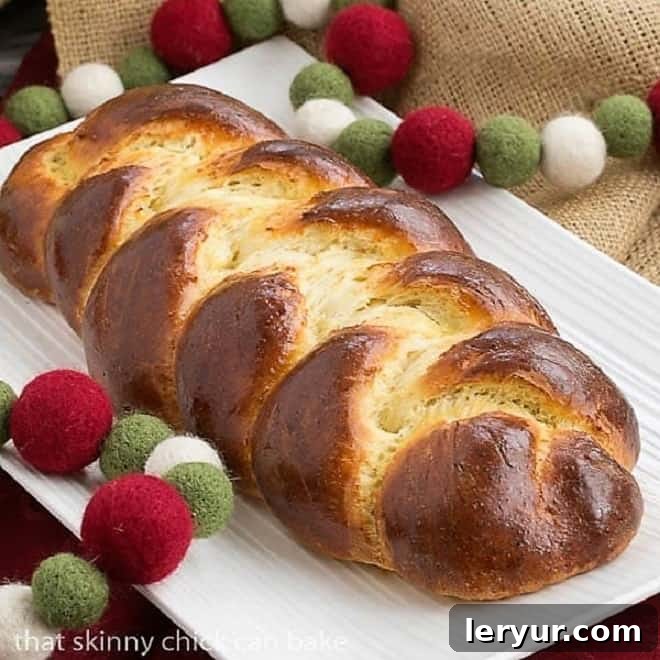
Why This Swiss Butter Braid Recipe (Butterzopf) Belongs in Your Kitchen
There’s an undeniable charm to braided breads, a visual artistry that makes them inherently festive and appealing. The simple act of braiding dough transforms a humble loaf into a centerpiece, and the Swiss Butter Braid, or Butterzopf, exemplifies this beauty. Here’s why you absolutely must try making this extraordinary bread:
- A Feast for the Eyes and Palate: Braided bread recipes have a special place in my heart, often evoking fond memories of festive gatherings. My mother would lovingly braid dyed hard-boiled eggs into our Easter bread, finishing it with a sweet icing drizzle. While I initially considered shaping this loaf into a wreath, its classic plaited form proved to be elegant enough on its own. The Butterzopf, despite being an everyday bread for many Swiss families, possesses an undeniable elegance that makes it appear quite fancy for any table.
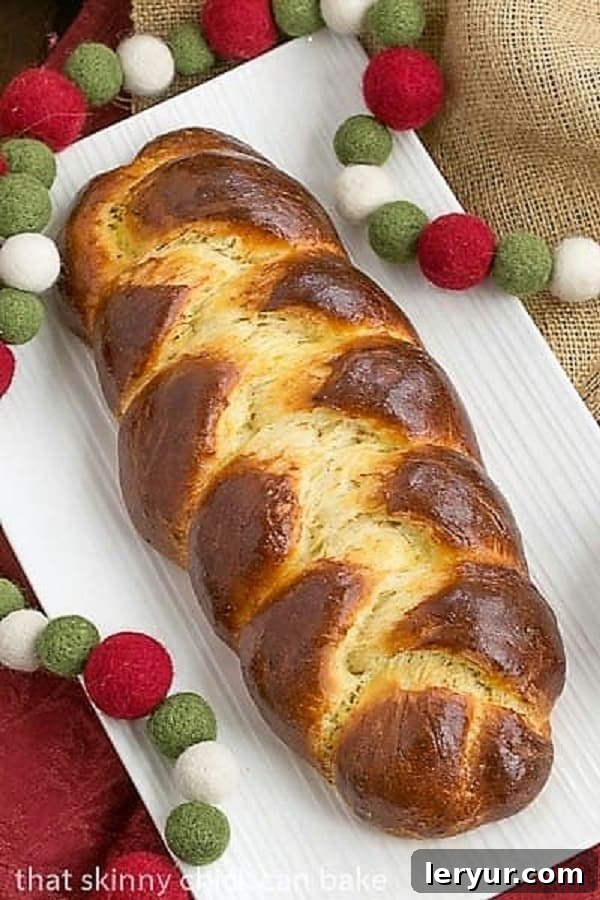
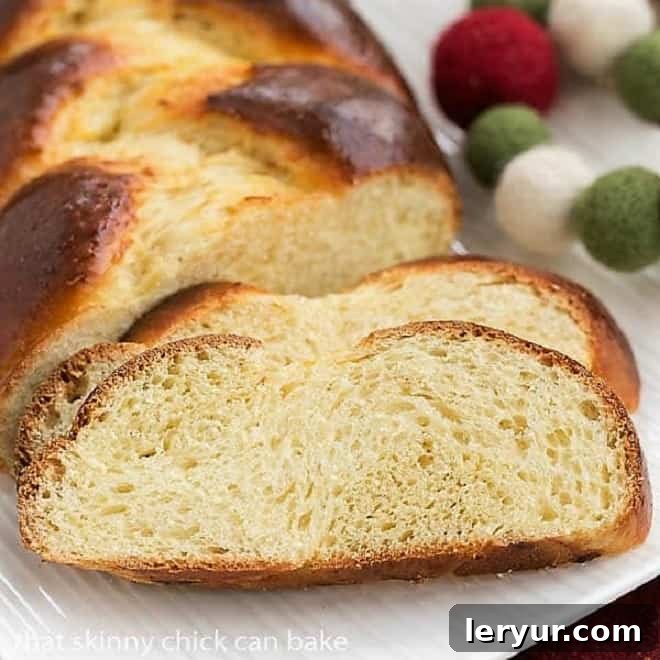
- Richness and Golden Perfection: This recipe calls for a generous amount of sugar, contributing a delightful sweetness that perfectly balances the rich, buttery flavor. The addition of two whole eggs plus an extra yolk not only enhances the bread’s tender texture but also imbues it with a gorgeous, deep golden hue, making it irresistible from the moment it emerges from the oven. This striking color and exquisite taste make it ideal for any holiday meal or special brunch.
- Unparalleled Versatility and Indulgence: Imagine starting your day with a slice of warm Butterzopf, perhaps with a smear of jam or honey. The thought itself is swoon-worthy! But the magic doesn’t end there. If (and that’s a big “if”) you happen to have any leftovers, they transform into the most divine French toast you’ll ever experience. The Butterzopf’s slightly sweet and rich profile makes it exceptionally suited for such a decadent breakfast. This bread was an enormous hit with my entire family, proving its universal appeal.
Essential Ingredients for Your Perfect Swiss Butter Braid
Crafting the perfect Butterzopf begins with a thoughtful selection of high-quality ingredients. While the list might seem straightforward, each component plays a crucial role in achieving the bread’s signature flavor and texture. Here’s a closer look at what you’ll need:
- Kitchen Staples:
- Milk: Provides necessary liquid, contributes to a tender crumb, and enriches the flavor of the dough. Using lukewarm milk helps activate the yeast effectively.
- Sugar: Not only sweetens the bread but also feeds the yeast, aiding in fermentation and providing that beautiful golden-brown crust.
- Melted Butter: The cornerstone of “Butterzopf.” Butter adds incredible richness, moisture, and a distinct depth of flavor that sets this bread apart.
- Eggs plus one Yolk: Eggs contribute to the bread’s structure, richness, and help tenderize the crumb. The extra yolk specifically enhances richness and adds to the vibrant golden color.
- Salt: A crucial ingredient in all baking, salt balances the sweetness, enhances the overall flavor profile, and helps regulate yeast activity.
- All-Purpose Flour: The primary structural component of the bread. Using good quality all-purpose flour will ensure a soft and airy texture.
- Instant Yeast: This recipe calls for one envelope of instant yeast, with Red Star Platinum Yeast being a preferred choice. Instant yeast is convenient because it can be mixed directly with dry ingredients without prior proofing, making the baking process smoother and faster. It ensures a consistent and reliable rise for your braided masterpiece.
Mastering the Art of Swiss Butter Braid: Expert Baking Tips
Baking a beautiful braided yeast bread like Butterzopf is a rewarding experience, and with a few expert tips, you can achieve professional-quality results right in your home kitchen. From kneading to braiding and baking, here’s how to perfect your Swiss Butter Braid:
- Efficient Kneading: If you’re fortunate enough to own a heavy-duty stand mixer (such as a KitchenAid or similar brand), utilize its dough hook attachment to knead the dough. This will significantly save you time and physical energy, ensuring a well-developed gluten structure with minimal effort. Knead until the dough is smooth, elastic, and pulls away cleanly from the sides of the bowl.
- Optional Flavor Enhancements: For those who enjoy a little extra complexity in their sweet bread, renowned baker Nick Malgieri suggests incorporating 1½ cups of raisins, currants, or other diced dried fruit (like candied orange peel) into the dough before the braiding stage. This adds bursts of fruity sweetness and texture, complementing the rich butter flavor.
- The Art of Proofing (Rising): Patience is key when it comes to yeast doughs. Avoid the temptation to force the proofing process by placing the dough in an excessively hot environment. An ideal temperature range of 80-90 degrees Fahrenheit (27-32 degrees Celsius) is perfectly sufficient. Any warmer, and the yeast activity might become suboptimal, potentially leading to an off-flavor or overly rapid rise. Remember, a slower rise typically develops a richer, more complex flavor in the finished bread. The dough should double in bulk during its first rise.
- Braiding Simplified: Braiding bread is very much like braiding hair – once you grasp the rhythm, it becomes surprisingly simple.
- Start by pinching three strands of equal length firmly together at one end.
- Take the leftmost strand and cross it over the middle strand. The original left strand is now the new middle.
- Next, take the rightmost strand and cross it over the new middle strand.
- Continue this alternating pattern: left over middle, then right over middle.
- When you reach the end and there isn’t enough dough left to braid, pinch the strands together securely.
- Tuck both pinched ends neatly underneath the loaf to create a clean, finished appearance.
Ensure your braids are firm enough to hold shape but not overly tight, as this could cause the loaf to split apart during the baking process as the dough expands.
- The Second Rise and Glaze: After braiding, allow your loaf to proof (rise) again until it has visibly increased in size and looks puffy. Just before baking, gently brush the entire surface with an egg wash (usually one beaten egg) for that beautiful, shiny golden-brown crust.
- Baking to Perfection: Bake the bread in a preheated oven. If, after about 30 minutes, you notice the loaf is browning too rapidly on top, loosely cover it with aluminum foil. This prevents over-browning while allowing the inside to cook thoroughly.
- Checking for Doneness: The bread is fully baked when it feels firm to the touch when gently pressed, and when you tap on the bottom of the loaf, it emits a hollow sound. An internal temperature of around 200-210°F (93-99°C) is also a reliable indicator of doneness.
- Cooling is Crucial: Always transfer the baked Butterzopf to a wire rack immediately after removing it from the oven. Allow it to cool completely before attempting to slice it. Cooling on a rack prevents the bottom from becoming soggy and allows the internal structure of the bread to set properly, resulting in a superior texture.
Frequently Asked Questions About Swiss Butter Braid (Butterzopf)
In Switzerland, Butterzopf is more than just a special occasion bread; it’s a cherished tradition. It is most commonly found on the breakfast table on Sunday mornings, becoming a weekly ritual for many families. Its rich, slightly sweet flavor also makes it a popular choice for festive brunches, holiday meals like Christmas and Easter, and other gatherings where a beautifully presented, delicious bread is desired. It’s truly versatile enough for everyday enjoyment or celebratory feasts.
While both Butterzopf and Challah are beautiful, braided yeast breads, their primary distinction lies in a key ingredient: fat. Challah bread, originating from Jewish culinary traditions, is typically made with oil (often olive oil or vegetable oil) to adhere to kosher dietary laws, making it pareve (neither meat nor dairy). Butterzopf, on the other hand, as its name suggests (“Butterzopf” literally means “butter braid”), always uses generous amounts of butter, which imparts a distinct richness, flavor, and tender texture that sets it apart from its challah counterpart.
The history of Butterzopf is quite fascinating and dates back to the mid-15th century in Switzerland. Its origins are rooted in a poignant tradition where, upon the burial of a husband, a grieving widow would cut off her hair braid and place it in his grave. Over time, this deeply symbolic act evolved, and the actual braid was eventually replaced by this beautifully braided loaf of bread, serving as a tangible symbol of remembrance and love. This tradition highlights the profound cultural significance of Butterzopf beyond its delicious taste.
Like most freshly baked breads, Butterzopf is at its absolute best when enjoyed on the day it’s made, still slightly warm from the oven. However, it can be stored to maintain its deliciousness for a few days. For short-term storage, keep the bread in an airtight container or a tightly sealed plastic bag at room temperature for 3-4 days. For longer preservation, you can refrigerate it for up to a week, or freeze it for up to 3 months. To enjoy frozen Butterzopf, simply thaw it at room temperature and warm it briefly in the oven for a “freshly baked” experience.
Yes, you can absolutely prepare the dough in advance! After the first rise, you can punch down the dough, form it into a ball, and place it in a greased bowl. Cover it tightly with plastic wrap and refrigerate it for up to 24 hours. The cold temperature will slow down the yeast activity, allowing for a longer, slower fermentation which can actually enhance the bread’s flavor. When you’re ready to bake, remove the dough from the refrigerator and let it come to room temperature for about 30-60 minutes before proceeding with dividing, shaping, and the second rise.
Beyond simply slicing and eating, Butterzopf offers numerous serving possibilities. It’s wonderful toasted and spread with butter, jam, or honey. For a truly indulgent treat, use stale slices to make the most exquisite French toast or bread pudding. It also pairs beautifully with soft cheeses, cold cuts, or simply enjoyed alongside a cup of coffee or tea. Its slightly sweet profile makes it versatile for both sweet and savory accompaniments.
More Braided and Sweet Bread Recipes You’ll Love
If you’ve fallen in love with the artistry and taste of Swiss Butter Braid, you might enjoy exploring other delightful braided and sweet bread recipes from around the world:
- Stollen Wreath from Cake Duchess – A festive German Christmas bread.
- Braided Easter Bread – A classic holiday loaf, often adorned with dyed eggs.
- Plaited Easter Bread with Cream Cheese Filling – A delicious twist on a traditional favorite.
- Easy King Cake – A vibrant and celebratory Mardi Gras treat.
- Spinach Onion Braid – A savory braided option for appetizers or light meals.
- Explore even more Bread Recipes for your baking adventures.
We love hearing about your baking successes! Stay in touch through social media: find us @ Instagram, Facebook, and Pinterest. Don’t forget to tag us when you try one of our recipes! And if you absolutely adore the results, please consider giving it a 5-star rating in the recipe card below.
Swiss Butter Braid (Butterzopf) Recipe
A delightfully sweet, rich, and buttery braided bread, perfect for elevating any special occasion or simply enjoying as a luxurious everyday treat. This traditional Swiss recipe, adapted from baking expert Nick Malgieri, yields a golden, tender loaf that’s as beautiful to look at as it is delicious to eat. Get ready to impress with this iconic yeast bread!
30 minutes
30 minutes
1 hour (plus 2-3 hours proofing)
1 large loaf (approx. 12 servings)
Ingredients
- ½ cup (120ml) whole milk, lukewarm (about 105-115°F / 40-46°C)
- ½ cup (100g) granulated sugar
- 6 tablespoons (85g) unsalted butter, melted and slightly cooled
- 2 large eggs, at room temperature
- 1 large egg yolk, at room temperature
- 2 ½ teaspoons (or one 7g/0.25oz packet) instant yeast (Red Star Platinum yeast preferred for best results)
- ¼ teaspoon fine sea salt
- 2 ¾ cups (330g) all-purpose flour, plus extra for dusting
- 1 large egg, lightly beaten (for egg wash/glaze)
Instructions
- Combine Wet Ingredients: In the bowl of a stand mixer fitted with the paddle attachment, combine the lukewarm milk, granulated sugar, and melted butter. Mix on low speed for about 30 seconds until well combined.
- Add Eggs and Yeast: Add the two whole eggs and the extra egg yolk to the mixture. Beat until fully incorporated. Then, sprinkle the instant yeast evenly over the wet ingredients and mix for another 30 seconds.
- Incorporate Dry Ingredients: With the mixer on its lowest speed, gradually add the salt and then the all-purpose flour, one cup at a time, mixing just until a soft, shaggy dough begins to form.
- Knead the Dough: Switch from the paddle attachment to the dough hook. Increase the mixer speed to medium-low and knead the dough for 8-10 minutes. Continue kneading until the dough becomes smooth, elastic, and pulls away cleanly from the sides of the bowl. If kneading by hand, transfer the dough to a lightly floured surface and knead for 10-15 minutes until it achieves a smooth, pliable, and elastic consistency. The dough will be soft.
- First Rise (Bulk Fermentation): Lightly grease a large clean bowl. Transfer the kneaded dough to the bowl, turning it over once to coat the entire surface with a thin layer of oil. Cover the bowl tightly with greased plastic wrap or a clean, damp kitchen towel. Let the dough rise in a warm, draft-free place (ideally around 75-80°F / 24-27°C) for 1 to 1½ hours, or until it has visibly doubled in bulk. A slower rise at a slightly cooler temperature will enhance the bread’s flavor.
- Prepare for Braiding: Gently deflate the risen dough by lightly pressing it down. Transfer the dough to a lightly floured work surface. Divide the dough into three equal pieces.
- Shape the Ropes: Roll each of the three dough pieces into a long, uniform rope, approximately 15 inches (38 cm) in length. Aim for consistent thickness across all three ropes for an even braid.
- Braid the Loaf: Line a large baking sheet with parchment paper. Place the three dough ropes parallel to each other. Pinch the ends of the three ropes firmly together at one end to secure them. Begin braiding: Take the leftmost strand and cross it over the middle strand. Then, take the rightmost strand and cross it over the new middle strand. Continue this pattern, always taking an outer strand and crossing it over the middle strand, working your way down the ropes. Keep the braid relatively loose to allow room for the bread to expand during its final rise and baking. Pinch the ends of the ropes tightly together at the other end and tuck both pinched ends neatly underneath the loaf to create a clean, finished appearance.
- Second Rise (Proofing): Carefully transfer the braided loaf to the prepared baking sheet. Cover it loosely with greased plastic wrap or a light kitchen towel. Allow the loaf to undergo a second rise (proofing) in a warm place for another 1 to 1½ hours, or until it looks visibly puffy, almost doubled in size, and springs back slowly when gently poked.
- Preheat Oven & Egg Wash: About 20 minutes before baking, preheat your oven to 375°F (190°C). Just before baking, whisk the remaining egg (for glaze) with a teaspoon of water to create an egg wash. Gently and evenly brush the entire surface of the risen butter braid with the egg wash. This will give the bread a beautiful, glossy, golden-brown crust.
- Bake the Bread: Bake the Butterzopf in the preheated oven for 30-35 minutes, or until the loaf is deeply golden brown on the outside and sounds hollow when tapped on the bottom. If the top of the bread begins to brown too quickly, loosely tent it with aluminum foil for the last 5-10 minutes of baking to prevent over-browning.
- Cool Completely: Carefully transfer the baked Swiss Butter Braid to a wire rack. Allow it to cool completely for at least 1 hour before slicing and serving. Cooling allows the internal structure to set, resulting in a perfectly tender and flavorful crumb.
Notes
This authentic Swiss Butter Braid (Butterzopf) recipe is thoughtfully adapted from Nick Malgieri’s esteemed cookbook, How to Bake. Please note that the total “Total Time” listed does not include the essential proofing times (first and second rises), which can add an additional 2 to 3 hours to the overall preparation.
Optional Add-ins: For a delightful variation, consider incorporating about ½ cup of golden raisins, dried cranberries, or finely diced candied orange peel into the dough during the last few minutes of kneading. This adds wonderful bursts of flavor and texture.
Nutrition Information (Approximate)
- Yield: 12 servings
- Serving Size: 1 slice
- Calories: 226
- Total Fat: 8g
- Saturated Fat: 4g
- Trans Fat: 0g
- Unsaturated Fat: 3g
- Cholesterol: 78mg
- Sodium: 115mg
- Total Carbohydrates: 33g
- Dietary Fiber: 1g
- Total Sugars: 11g
- Protein: 5g
Disclaimer: Nutritional information is an estimate based on common ingredient values and may vary depending on specific brands, preparation methods, and serving sizes. It is provided for informational purposes only.
© Liz Berg
/
Category: Bread, Baking, Yeast Bread, Braided Bread, Holiday Recipe, Dessert Bread
There’s something truly magical about bringing a beautifully braided loaf of Swiss Butter Braid, or Butterzopf, out of your oven. The aroma alone is enough to fill your home with warmth and comfort, promising a delightful treat. Whether shared during a special holiday meal, enjoyed with a leisurely Sunday breakfast, or simply savored as a comforting snack, this sweet and buttery bread is sure to become a beloved staple in your baking repertoire. Don’t hesitate – embrace the joy of baking this timeless Swiss classic and create delicious memories for yourself and your loved ones!