
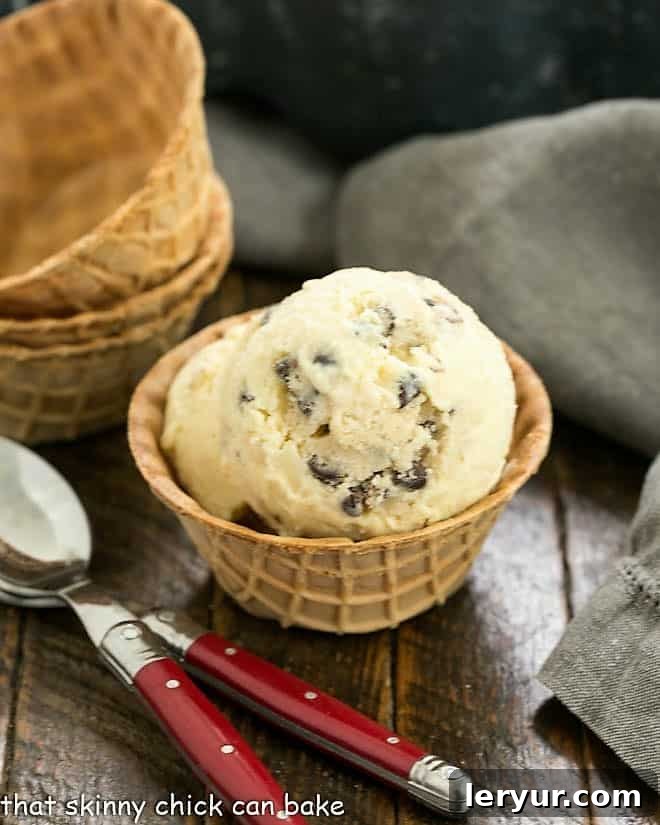
Indulge in the ultimate homemade treat: a smooth and luscious brown sugar ice cream generously filled with delectable pieces of safe-to-eat cookie dough. This **Cookie Dough Ice Cream** recipe isn’t just a dessert; it’s an experience that was an immediate and resounding hit with my entire family!
As a true cookie dough aficionado, I understand the irresistible allure of its sweet, buttery goodness. However, the traditional raw egg dilemma often puts a damper on enjoying spoonfuls straight from the bowl. That’s why I’m thrilled to share this safer, egg-free version, allowing you to fully savor every rich, chewy bite without a single worry. This recipe transforms that beloved raw cookie dough into the star of an unbelievably creamy ice cream, creating an absolutely irresistible **Cookie Dough Dessert** that will become a new household favorite.
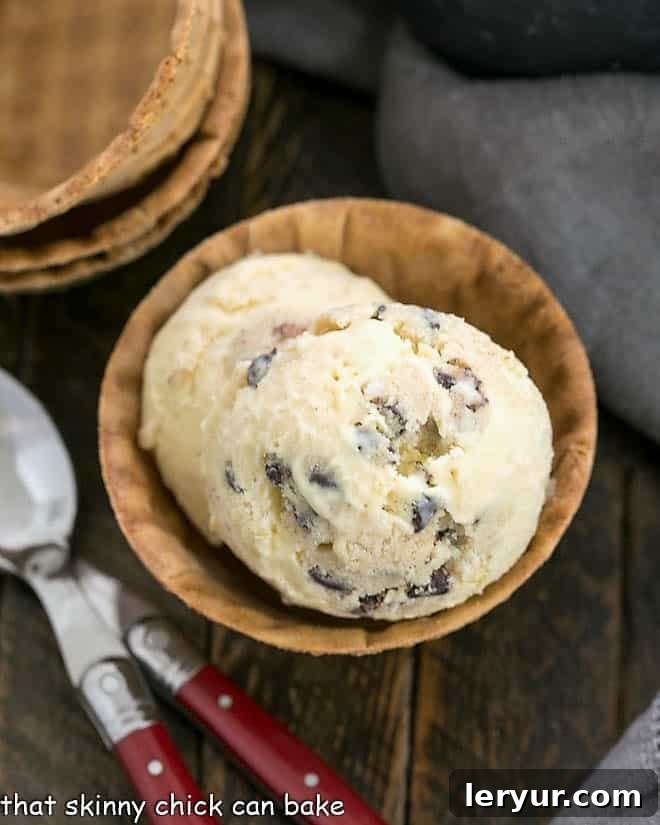
Why This Homemade Cookie Dough Ice Cream Will Be Your New Obsession
There’s something inherently magical about cookie dough, and when it’s suspended in perfectly churned ice cream, that magic amplifies tenfold. This recipe is designed to captivate your taste buds and earn a permanent spot in your dessert rotation for several compelling reasons:
- **Safely Indulgent:** If you’re a devout cookie dough lover, this recipe offers the ultimate guilt-free pleasure. Our cookie dough is prepared without raw eggs, and with a crucial step to heat-treat the flour, ensuring it’s completely safe to consume. Dive in with abandon!
- **A Symphony of Textures and Flavors:** Imagine soft, chewy bits of rich cookie dough generously studded throughout a velvety smooth, brown sugar-infused ice cream. The combination of the sweet, molasses-rich brown sugar base with the familiar, comforting taste of chocolate chip cookie dough creates a truly incredible and satisfying experience.
- **The Perfect Summer Cool-Down (and Year-Round Treat!):** While undeniably a delicious way to beat the heat on a scorching summer day, this decadent dessert transcends seasons. It’s equally perfect for a cozy movie night, a celebratory gathering, or simply when a serious sweet craving strikes. It’s comfort in every spoonful.
- **Unforgettable Homemade Quality:** Store-bought cookie dough ice creams simply can’t compare to the fresh, vibrant flavors and superior texture of a homemade batch. You control the quality of ingredients and the generous amount of cookie dough, making each bite an authentic delight.
The inspiration for this particular masterpiece struck during a grueling 10-hour drive home from Wisconsin. With a captive audience in the car (my family!), I seized the opportunity to brainstorm ideas for “Ice Cream Week.” Predictably, chocolate was the first suggestion, but then a delightful list began to form. My son, Nick, enthusiastically proposed cookie dough ice cream, and from his very first taste, he confirmed it was an undeniable winner. His excitement was contagious, and it quickly became clear that this recipe was destined for greatness, not just in our household, but hopefully in yours too.
Crafting Your Own Heavenly Cookie Dough Ice Cream: A Detailed Guide
Of all the ice creams churned this summer, this particular recipe emerged as the undisputed champion. Time and again, my family raved about its wonders, describing it as sweet, creamy, and utterly perfect. Honestly, it’s quite possibly the richest, most decadent ice cream I’ve ever tasted! And yes, I’m already anticipating making another batch very soon – the toes are tapping in eager anticipation of the next round. This fantastic recipe was originally inspired by Baked Bree, and I’ve refined it over the years to perfection.
- **Begin with the Cookie Dough – Safety First!** The first crucial step is preparing the star of our show: the cookie dough. This version is intentionally made without raw eggs, eliminating any concerns about salmonella. But we don’t stop there. As you’ll read below, making raw flour safe is paramount for preventing e-coli contamination. Always ensure your flour is properly heat-treated before mixing the dough. Once safe, you’ll combine butter, sugars, vanilla, and a touch of cream before incorporating the flour and, of course, plenty of mini chocolate chips.
- **Achieving the Perfect Cookie Dough to Ice Cream Ratio:** I found that the original recipe features a very generous amount of cookie dough – a high ratio indeed! However, there were absolutely no complaints from my family. This results in a very sweet and satisfying dessert. If you prefer a slightly less intense sweetness or a smoother ice cream experience, feel free to hold back some of the cookie dough bits. Remember, once the flour is cooked, the dough is safe to snack on directly!
- **PRO-Tip: The Essential Flour Safety Step:** Since I first shared this recipe in 2013, culinary awareness has grown regarding raw flour as a potential source of E. coli. To completely eliminate any risk of foodborne pathogens, I’ve added a vital step: cooking the flour. This can be done quickly in the microwave or oven, as long as the flour reaches an internal temperature of 160°F (71°C). This simple precaution ensures your cookie dough is delicious and entirely safe.
- **Creating the Rich Custard Base:** The foundation of truly luxurious ice cream is often a creamy custard base. For this, you’ll gently heat heavy cream, milk, brown sugar, and salt. Then comes the art of tempering the egg yolks: slowly drizzle about a cup of the hot cream mixture into the whisked egg yolk and sugar mixture, whisking constantly. This slow addition helps gradually raise the temperature of the yolks, preventing them from scrambling. Pour this tempered mixture back into the saucepan and cook, stirring continuously, until it thickens enough to beautifully coat the back of a spoon.
- **PRO-Tip: The Spoon Test for Custard Thickness:** To easily determine if your custard base has reached the ideal thickness, dip a wooden spoon into the mixture. Then, draw a clear line with your finger across the backside of the spoon. If the line holds without the custard running back together, it’s perfectly thick and ready!
- **PRO-Tip: The Secret to Ultra-Creamy Ice Cream:** Even with careful tempering, tiny bits of cooked egg yolk can sometimes form. To guarantee an ultra-creamy, perfectly smooth ice cream, always strain your custard mixture through a fine-mesh wire sieve after cooking. This extra step ensures a silky texture that elevates your homemade ice cream to professional levels.
- **Chilling for Optimal Churning:** Once strained, stir in the vanilla extract. Allow the custard to cool completely to room temperature, then cover it with plastic wrap and place it in the refrigerator to chill thoroughly. A minimum of 2 hours is required, but I highly recommend chilling it overnight. This extended chilling period is crucial for achieving the best texture during churning. After chilling, churn the base in your ice cream maker according to the manufacturer’s instructions. When the ice cream is still soft but adequately frozen, gently fold in your prepared cookie dough bits. Finally, transfer the ice cream to a freezer-safe container and return it to the freezer until it reaches a firm, scoopable consistency.
- **PRO-Tip: Preventing Ice Crystals:** To combat the formation of undesirable ice crystals on the surface of your homemade ice cream, always press a layer of plastic wrap directly onto the surface of the ice cream before securing the lid on your container. This creates a barrier against air, maintaining that smooth, creamy texture.
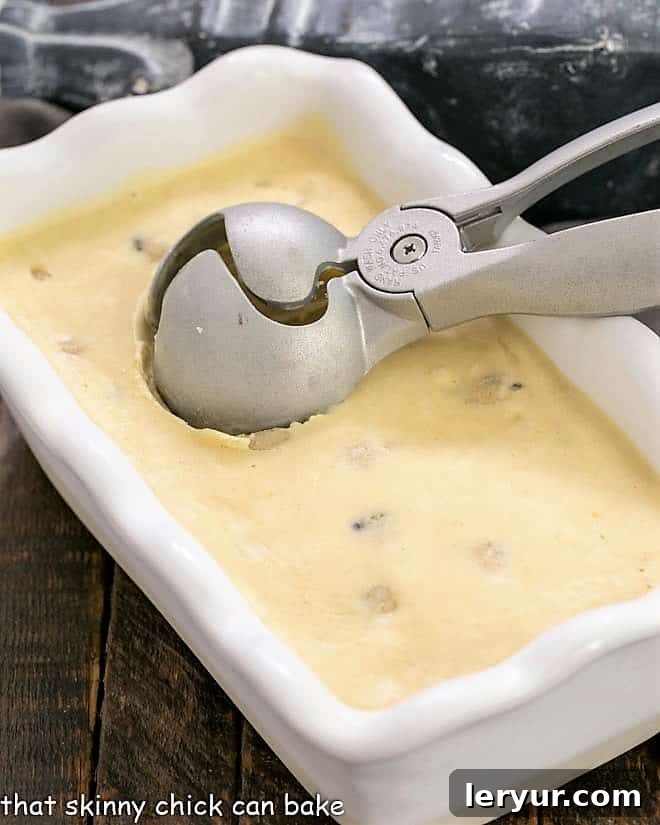
- **Scoopability and Customization:** While the abundance of cookie dough is a defining feature of this ice cream, it can sometimes make scooping a bit challenging when frozen solid. Don’t hesitate to adjust the amount of cookie dough to your personal preference. Remember, because you’ve cooked the flour, any leftover cookie dough is perfectly safe for a delightful snack on its own! For easier scooping, you can also take the ice cream out of the freezer 5-10 minutes before serving.

Essential Food Safety: How to Make Raw Flour Safe to Eat
As I touched upon earlier, it’s a relatively recent understanding that raw flour can be a potential source of foodborne illnesses, most notably E. coli. Unlike eggs, which carry risks of salmonella, flour can harbor bacteria picked up during harvesting or processing. However, by heating the flour to an internal temperature of 160°F (71°C), you can effectively eliminate this risk and ensure your cookie dough is completely safe for consumption. Here are two straightforward methods to achieve this:
- **Oven Method:** Preheat your oven to 350°F (175°C). Spread the required amount of flour for your recipe (plus a little extra, just in case) evenly onto a baking sheet. Bake for approximately 5 minutes, stirring the flour occasionally to ensure even heating. Critically, use an instant-read thermometer to check the flour’s temperature in several spots, making sure it consistently reaches or exceeds 160°F (71°C). This process is quick and simple.
- **Microwave Method:** Place slightly more flour than your recipe calls for in a heatproof bowl. Some flour might stick to the bowl, so having a little extra is helpful. Microwave the flour on high power for a total of one minute, stopping to stir every 15 seconds. Just like with the oven method, after the final stir, use an instant-read thermometer to verify that the flour has reached 160°F (71°C) in multiple spots. This temperature is vital for killing any potential E. coli bacteria.
- **Crucial Cooling Step:** Regardless of the method you choose, it’s imperative to allow the heat-treated flour to cool completely back to room temperature before incorporating it into your cookie dough recipe. Using warm flour can affect the texture and consistency of your dough.
Frequently Asked Questions About Homemade Ice Cream
Proper storage is key to maintaining the quality of your homemade ice cream. Always transfer your freshly churned ice cream to an airtight container before placing it in the freezer. To further prevent the formation of icy crystals and freezer burn, I highly recommend pressing a layer of plastic wrap directly onto the surface of the ice cream before sealing the container with its lid. This barrier prevents air from coming into contact with the ice cream, preserving its smooth texture.
Unlike commercial ice creams that often contain a multitude of preservatives and stabilizers, your homemade version is all-natural. Because of this, its shelf life will naturally be shorter than store-bought varieties. When stored properly in an airtight container with plastic wrap pressed to the surface, homemade ice cream will maintain its best quality for up to 1 to 2 months. Beyond that, while still safe to eat, its texture and flavor may begin to degrade.
Many store-bought ice creams include ingredients like guar gum, lecithin, and even various milk powders specifically designed to keep the ice cream softer and more scoopable by binding with free water and minimizing ice crystallization. For the home cook, incorporating ingredients like sugar, corn syrup, a small amount of liquor, fats (like butterfat in cream), and even gelatin can help create a softer, more pliable ice cream texture and reduce large ice crystal formation. As mentioned earlier, pressing plastic wrap over the surface before freezing helps minimize frost. Additionally, a simple trick is to pull your carton of homemade ice cream out of the freezer about 10-15 minutes before you plan to serve it. This allows it to soften slightly at room temperature, making it much easier to dish out perfect scoops.
Absolutely! This cookie dough ice cream recipe is a fantastic base for creativity. While mini chocolate chips are classic, feel free to experiment with other types of chocolate, such as milk chocolate chunks, white chocolate chips, or even chopped dark chocolate. You could also add a handful of chopped nuts like pecans or walnuts to the cookie dough for extra crunch. Swirls of caramel or hot fudge can be added during the final freezing stage for another layer of flavor. Don’t be afraid to make it your own!
More Delicious Frozen Dessert Recipes You’ll Love:
- Classic Root Beer Floats by Cravings of a Lunatic – a timeless fizzy delight.
- Coconut-Almond Fudge Ripple Ice Cream {No Machine Needed} by The Kitchen is My Playground – for those who prefer no-churn ease.
- Refreshing Chocolate Mint Swirl Ice Cream by SugarHero! – a cool and vibrant flavor combination.
- Decadent S’mores Ice Cream Sundae – bringing campfire flavors to your bowl.
- Creamy White Chocolate Ice Cream with Raspberry Sauce – an elegant and fruity option.
- Impressive Brownie Baked Alaska – a show-stopping dessert with a warm and cold contrast.
- Plus, make my delicate Egg White Cookies (meringues) or a stunning Chocolate Raspberry Pavlova with any leftover egg whites from your kitchen adventures!
- Discover even more of the Best Dessert Recipes right here on the blog.
This beloved recipe was originally shared in August 2013. The photos and text were comprehensively updated in 2020 to provide the most current information and best possible reader experience, including important food safety tips.
Stay connected and share your culinary creations with me through social media! You can find me @ Instagram, Facebook, and Pinterest. Don’t forget to tag me when you try one of my delicious recipes! And if you absolutely love the results, please consider giving it a 5-star rating in the recipe card below. Your feedback helps other dessert enthusiasts discover these amazing treats!
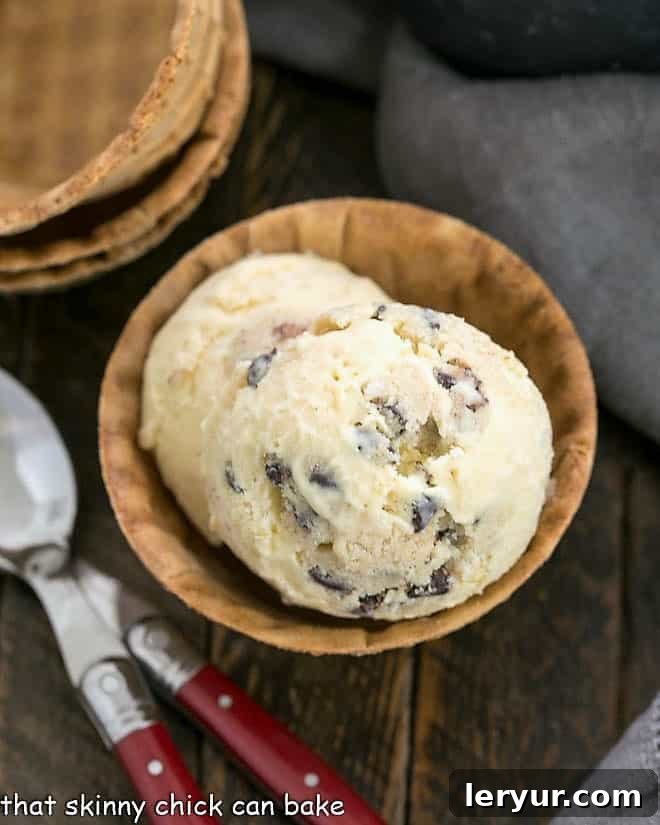
Cookie Dough Ice Cream
20 minutes
15 minutes
35 minutes
8 servings
Brown sugar ice cream with bites of cookie dough! The perfect way to beat the heat!
Ingredients
Ice cream base:
- 1 ¾ cup heavy cream
- ¾ cup milk
- ½ cup brown sugar, divided
- ¼ teaspoon salt
- 5 egg yolks
- 2 teaspoons vanilla extract
Cookie dough:
- ½ cup butter, room temperature
- ¼ cup sugar
- ½ cup brown sugar
- ¼ teaspoon salt
- ½ teaspoon vanilla
- 2 tablespoons heavy cream
- ¾ cup flour
- ½ cup mini chocolate chips (or more to taste)
Instructions
- In a medium saucepan, mix together heavy cream, milk, ¼ cup brown sugar, and salt. Heat the cream mixture till bubbles form around the edge of the pan. Remove pan from heat.
- In a large glass measuring cup, whisk egg yolks and remaining brown sugar until smooth.
- Slowly drizzle about a cup of the hot cream into the yolk mixture, whisking constantly.
- Pour the yolk mixture into the cream. Cook, stirring constantly until the mixture thickens enough to coat the back of a spoon.
- Strain the mixture to remove any cooked egg bits. Add vanilla. Let cool to room temperature.
- Cover with plastic wrap and refrigerate for 2 hours or overnight.
- To make cookie dough, cream together butter, both sugars, and salt.
- Add vanilla and cream.
- Mix in flour and stir until incorporated. Add chocolate chips.
- Cover and chill for about an hour.
- Line a baking sheet with parchment, and drop dough by half teaspoonfuls onto the sheet.
- Freeze dough bits till ready to use.
- Freeze the ice cream base according to the manufacturer’s instructions. When the ice cream is frozen (yet still soft), stir in the cookie dough bits and freeze until firm.
Notes
Adapted from Baked Bree.
Cook the flour as directed in the post to avoid the chance of e-coli contamination which may cause a food-borne illness (AKA food poisoning).
Recommended Products
As an Amazon Associate and member of other affiliate programs, I earn from qualifying purchases.
- Ice Cream Scoop
- Cuisinart Fine Mesh Strainers
- Ice Cream Maker
Nutrition Information:
Yield:
8
Serving Size:
1
Amount Per Serving:
Calories: 547Total Fat: 38gSaturated Fat: 23gTrans Fat: 1gUnsaturated Fat: 12gCholesterol: 211mgSodium: 264mgCarbohydrates: 48gFiber: 1gSugar: 36gProtein: 6g
Thatskinnychickcanbake.com occasionally offers nutritional information for recipes contained on this site. This information is provided as a courtesy and is an estimate only. This information comes from online calculators. Although thatskinnychickcanbake.com attempts to provide accurate nutritional information, these figures are only estimates.
Varying factors such as product types or brands purchased can change the nutritional information in any given recipe. Also, many recipes on thatskinnychickcanbake.com recommend toppings, which may or may not be listed as optional and nutritional information for these added toppings is not listed. Other factors may change the nutritional information such as when the salt amount is listed “to taste,” it is not calculated into the recipe as the amount will vary. Also, different online calculators can provide different results.
To obtain the most accurate representation of the nutritional information in any given recipe, you should calculate the nutritional information with the actual ingredients used in your recipe. You are solely responsible for ensuring that any nutritional information obtained is accurate.
HOW MUCH DID YOU LOVE THIS RECIPE?
Please leave a comment on the blog or share a photo on Pinterest