
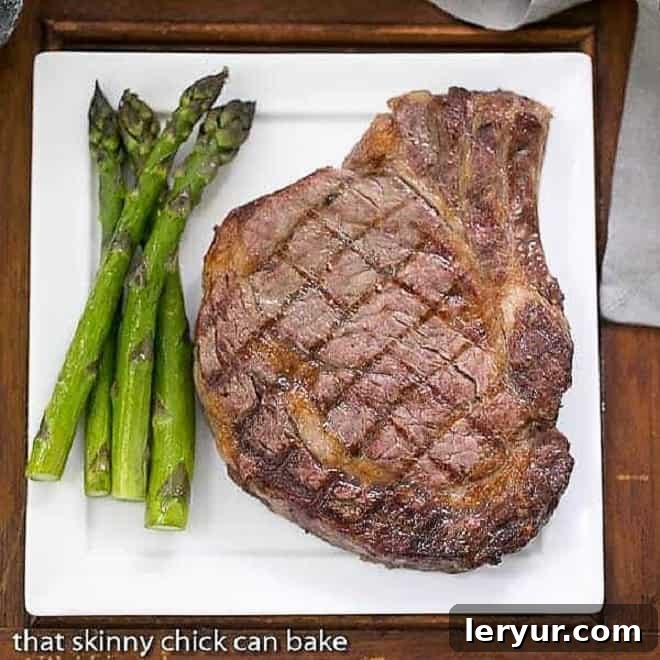
Welcome to the definitive guide on mastering the art of grilling! If you’ve ever dreamt of serving a steak so tender and flavorful it rivals your favorite steakhouse, you’re in the right place. We’re about to unlock the secrets to grilling a perfect steak right in your backyard, transforming you into a true grill master. Get ready to impress your family and friends with consistently delicious results, every single time.
Over the years, we’ve honed the techniques for how to grill steak to achieve unparalleled tenderness and rich flavor. While there’s certainly an artistic touch involved in grilling steak, it’s a skill that’s surprisingly easy to learn and incredibly rewarding. From selecting the finest cuts to perfecting the sear and achieving ideal doneness, this guide covers everything you need to know for an unforgettable steak experience.
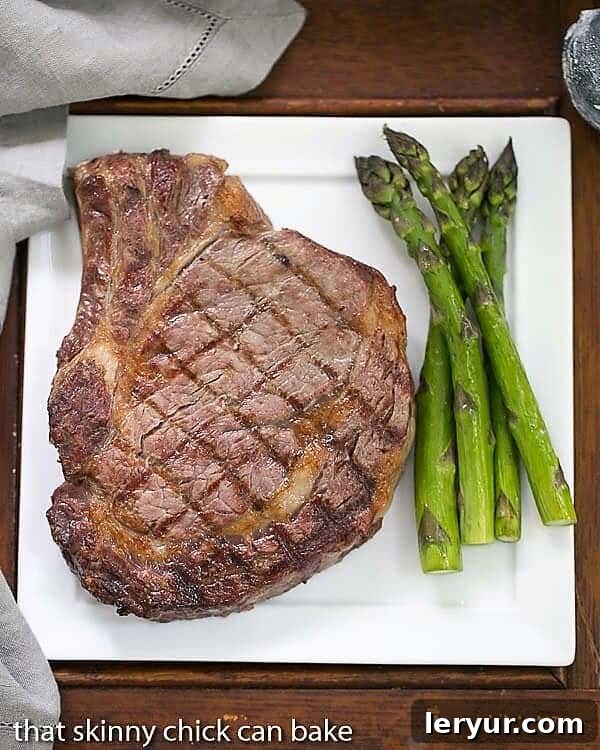
Why You’ll Love Grilling the Perfect Steak
Grilling steak isn’t just about cooking; it’s about crafting an experience. Here’s why mastering this skill will be a game-changer:
- Economical Elegance: High-quality steaks are a significant investment. Learning to grill them perfectly ensures you never waste money on an overcooked or undercooked cut, bringing restaurant-quality dining to your home for a fraction of the price.
- Become a Grill Master: This method empowers you with the confidence and expertise to cook any steak to perfection, consistently delivering mouth-watering results that will earn you a reputation as the go-to grill enthusiast.
- Effortless Entertaining: Whether it’s a casual family dinner or a special gathering with company, a perfectly grilled steak elevates any occasion. This “recipe” provides a straightforward path to an impressive main course that requires minimal fuss but yields maximum flavor.
- Unmatched Flavor Profile: The grill imparts a unique smoky char that oven-cooking simply can’t replicate. When combined with proper seasoning and cooking techniques, you achieve a depth of flavor that is truly irresistible.
- Customized Perfection: Everyone has their preference for steak doneness. This guide gives you the tools to achieve rare, medium-rare, medium, or well-done with precision, satisfying every palate at your table.
How to Grill Steak: Master the Fundamentals
A beautifully cooked steak or beef roast is a universal crowd-pleaser. While I might splurge on dry-aged rib-eye steaks from a local butcher for special occasions, these foundational techniques apply universally. Whether you’re grilling beef tenderloin, New York strips, sirloin, or your personal favorite cut, these principles will guide you to perfection.
Selecting the Best Beef
- Quality Matters: Always purchase the highest quality beef you can reasonably afford. Look for excellent marbling – the fine streaks of fat within the lean muscle. This intramuscular fat is key to a tender, juicy, and incredibly flavorful steak. Leaner cuts will naturally be less succulent and flavorful.
- Understanding USDA Grades: The USDA assigns grades based on marbling and maturity.
- Prime: The highest grade, boasting abundant marbling, typically found in high-end restaurants. It offers exceptional tenderness and juiciness.
- Choice: A widely available and excellent quality grade with less marbling than Prime but still very flavorful and tender. This is often the best balance of quality and cost for home grilling.
- Select: The leanest and least expensive grade. It has very little marbling, making it prone to dryness and less flavor. We generally do not recommend Select grade for grilling unless you plan to marinate extensively or wrap it in bacon for added fat.
- Choose Your Cut Wisely: The cut significantly impacts texture and flavor profile.
- Rib-Eye: A favorite for its rich marbling and robust flavor. It cooks up incredibly juicy and tender.
- New York Strip: Known for its fine texture, distinct beefy flavor, and a good balance of lean meat and marbling, often with a strip of fat on one side.
- Filet Mignon (Beef Tenderloin): Exceptionally tender with a buttery texture, but it’s very lean. For grilling, it benefits from a light coating of olive oil or, for extra decadence, wrapping it in bacon to add crucial fat and prevent drying out.
- Sirloin: A versatile and economical cut, lean but flavorful. Best enjoyed medium-rare to avoid toughness.
- Flank & Skirt Steaks: Leaner, tougher cuts best suited for marinades and quick, high-heat grilling. Always slice against the grain for maximum tenderness.
Essential Preparation Techniques
- PRO-Tip: Season Early for Maximum Flavor: Salt your beef at least 30 minutes before cooking, or even better, the day before. This technique, known as “dry brining,” allows the salt to draw out moisture from the steak, dissolve into that moisture, and then reabsorb back into the meat. This process seasons the steak from within, tenderizes it, and helps create an incredible crust. Store seasoned steaks uncovered in the refrigerator overnight.
- PRO-Tip: Bring Steaks to Room Temperature: Remove your steaks from the refrigerator about 30 to 60 minutes before you plan to grill. Grilling a cold steak can lead to uneven cooking, where the outside cooks too quickly while the center struggles to reach the desired temperature. Allowing the steak to warm up slightly ensures more uniform cooking throughout.
- Pat Dry: Before seasoning, pat your steaks thoroughly dry with paper towels. Excess surface moisture hinders the Maillard reaction, which is essential for developing that desirable crispy, flavorful crust.
- Light Oil Coating: Just before grilling, a thin coat of high-smoke-point oil (like canola, grapeseed, or avocado oil) can help prevent sticking and promote a beautiful sear.
Setting Up Your Grill for Success
- Charcoal vs. Gas – The Debate:
- Charcoal Grill: If available, charcoal imparts an unparalleled smoky depth of flavor that can elevate your steak. Aim for a scorching hot fire, ideally 450-500ºF (230-260ºC). Arrange your coals to create two zones: a direct heat zone for searing and an indirect heat zone for finishing.
- Gas Grill: Gas grills offer precision and convenience. Preheat all burners to high, then turn one or two burners off to create distinct direct and indirect heat zones. This allows you to sear over high heat and then move the steak to a cooler zone to finish cooking without burning the exterior.
- Clean and Oil Your Grates: Always start with clean grill grates to prevent sticking and transfer old char flavor. Once preheated, brush the grates with a wire brush, then lightly oil them with a folded paper towel dipped in high-smoke-point oil (held with tongs).
Mastering the Grilling Process
- Sear First: Place your well-prepared steaks over the direct, hottest part of the grill. You want to achieve a beautiful, deep brown crust on both sides. This searing locks in juices and develops complex flavors through the Maillard reaction.
- Strategic Flipping: While some purists advocate for a single flip, don’t be afraid to move your steaks 2-4 times during the cooking process. For perfect cross-hatch grill marks, sear for 1-2 minutes, then rotate the steak 45 degrees on the same side for another 1-2 minutes before flipping. Repeat on the second side. Frequent flipping can actually help cook the steak faster and more evenly, creating a better crust on both sides.
- Use Two Zones: After searing both sides over direct heat, move your steaks to the indirect heat zone to finish cooking to your desired doneness. Close the lid if using a gas grill to help maintain even temperature.
- Allow for Carryover Cooking: Remember that steak continues to cook after it’s removed from the heat (this is called carryover cooking). Always pull your steaks off the grill when they are approximately 5-10ºF (3-5ºC) below your target internal temperature.
- Rest Your Steak: This is a non-negotiable step! Allow your grilled steak to rest for at least 5-10 minutes (depending on thickness) on a cutting board, loosely tented with foil. This critical resting period allows the muscle fibers to relax and reabsorb the juices that have migrated to the center during cooking. Cutting into the steak too soon will result in a dry steak, as all those delicious juices will run out onto your plate.
How to Tell When Steak is Done: Achieving Perfect Doneness
Understanding when your steak is perfectly cooked is paramount. My family has diverse preferences – my husband enjoys his steak “just shy of mooing” (rare!), while I lean towards a perfect medium-rare. Knowing exactly how long to grill steak to cater to these different tastes requires reliable methods.
Many experienced grillers swear by the “hand test” for assessing steak doneness. This tactile technique involves comparing the firmness of the cooked steak to the fleshy part of your hand beneath your thumb. For example:
- Rare: Gently press the fleshy part of your palm below your thumb while your thumb and forefinger lightly touch (forming an “OK” sign). This soft, yielding sensation mimics a rare steak.
- Medium-Rare: Touch your thumb to your middle finger. The fleshy part of your palm will feel slightly firmer, similar to a medium-rare steak.
- Medium: Connect your thumb to your ring finger. The increased firmness of your palm corresponds to a medium-cooked steak.
- Well-Done: Finally, press your thumb to your pinky finger. This firmest point on your palm represents a well-done steak.
While the hand test is a useful trick for seasoned cooks, for consistent and precise results, especially when cooking for varying preferences, a reliable meat thermometer is your best friend. It eliminates guesswork and ensures your expensive steaks are cooked exactly as desired.
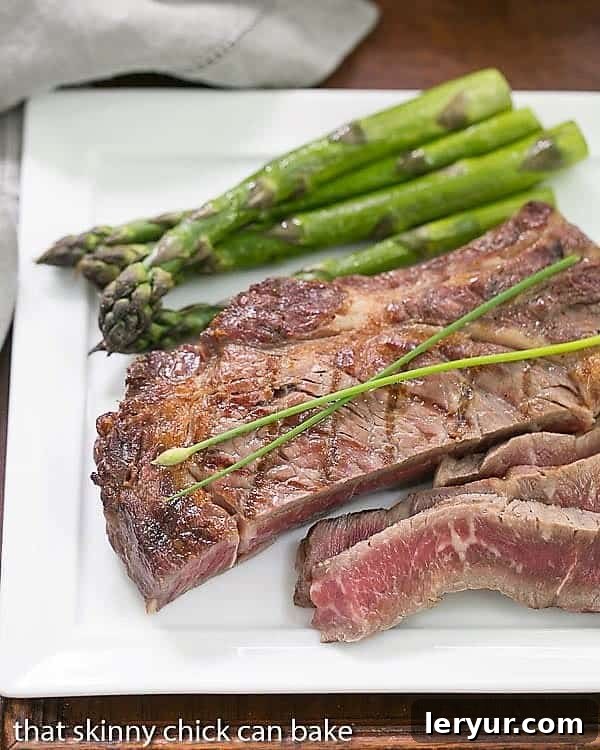
How Long to Grill a Steak: The Ultimate Temperature Guide
The internal temperature is the most accurate indicator of steak doneness. Remember to account for the resting period, during which the temperature will continue to rise (carryover cooking). The following temperatures are ideal after a 10-minute resting period, as recommended by culinary experts and organizations like Certified Angus Beef:
- Rare (cool red center): 125ºF (52ºC)
- Medium-Rare (warm red center): 135ºF (57ºC)
- Medium (warm pink center): 145ºF (63ºC)
- Medium-Well (slightly pink center): 150ºF (66ºC)
- Well (little or no pink): 160ºF (71ºC)
PRO-Tip: The Golden Rule of Carryover Cooking: Always remove your meat from the grill when its internal temperature is 5-10ºF (3-5ºC) *less* than your desired final temperature listed above. Then, allow the beef to rest. During the crucial 10-minute resting period, the internal temperature of your steak will continue to rise by approximately 5-10ºF, ensuring perfect doneness without overcooking.
Frequently Asked Questions: Grilling Steak
The grilling time for a perfect steak is not a one-size-fits-all answer, as several variables come into play. Firstly, the heat of your grill is critical; gas grills offer more consistent control than charcoal, though both can experience temperature fluctuations due to flare-ups or uneven heat distribution. Secondly, the initial temperature of your beef significantly impacts cooking time. Bringing steaks out of the fridge 30-60 minutes before grilling ensures they cook more evenly and quickly. Lastly, the thickness of your steak is a major factor – a thin cut will cook much faster than a thick, two-inch steak. Therefore, there’s no fixed answer. For optimal results and precise doneness, continuously monitoring your steaks with an accurate meat thermometer is absolutely imperative as they cook.
To cook steak on a charcoal grill, begin by lighting your charcoal and allowing it to heat until it’s glowing and covered in a light ash, reaching an internal grill temperature of 450°-500°F (230-260°C). Arrange your coals to create two distinct heat zones: a direct, hot zone for searing and an indirect, cooler zone for finishing. Start by searing the steak directly over the hot coals for approximately 2-3 minutes per side to develop a beautiful crust. Once seared, move the steaks to the indirect heat zone, close the grill lid, and continue grilling until they reach your desired internal temperature, as measured with a meat thermometer.
Cooking steak on a gas grill also requires the creation of two heat zones – direct and indirect. Preheat your gas grill with all burners on high until it reaches a temperature of 450°-500°F (230-260°C). Once hot, turn off one or two burners to establish an indirect heat zone, leaving other burners on high for direct heat. Sear the steaks over the direct high heat for about 2-3 minutes per side, similar to the charcoal method, to achieve a rich, flavorful crust. After searing, transfer the steaks to the indirect heat zone, close the grill lid, and allow them to finish cooking gently until they reach your preferred level of doneness, using a meat thermometer for accuracy.
Both marinades and dry rubs offer distinct flavor profiles for steak. Marinades, typically acidic, are excellent for tenderizing tougher cuts like flank or skirt steak and infusing them with moisture and flavor. They usually contain oil, acid (like vinegar or citrus juice), and various herbs and spices. Dry rubs, on the other hand, create a delicious crust and enhance the natural beefy flavor without adding moisture. They’re ideal for thicker, tender cuts like rib-eyes or New York strips. For best results with dry rubs, consider applying them hours in advance, or even overnight (dry brining), to allow the salt and spices to penetrate the meat deeply.
A perfectly grilled steak pairs wonderfully with a variety of sides. Classic choices include grilled asparagus, baked potatoes, creamy mashed potatoes, or a fresh garden salad with a light vinaigrette. For something more adventurous, consider a chimichurri sauce, a compound butter (garlic herb butter is a fantastic option), grilled corn on the cob, or even roasted root vegetables. The key is to choose sides that complement the rich flavor of the steak without overpowering it.
You May Also Like:
If inclement weather hampers your grilling plans, don’t fret! Try this fantastic recipe for Pan-Seared Steak from 15 Spatulas for an equally delicious result indoors.
- Grilled Steak with Garlic Butter
- Italian Pesto Burger
- Grilled Flank Steak with Soy, Garlic, and Ginger
- Flank Steak with Chimichurri
- Grilled Flank Steak Fajitas
- More Delicious Beef Recipes
Stay in touch through social media @ Instagram, Facebook, and Pinterest. Don’t forget to tag me when you try one of my recipes! And if you love the results, please give it a 5-star rating in the recipe card.
Perfect Rib Eye Steaks
5 minutes
8 minutes
13 minutes
1 Serving
An easy recipe for perfectly grilled rib eye steaks.
Ingredients
- One 1½ inch thick, 8-ounce rib eye steak per person, prime or the best quality you can afford
- Kosher salt
- Freshly ground black pepper
- 2 garlic cloves, cut in half
Instructions
- A couple of hours or the night before grilling, pat steaks dry with a paper towel. Sprinkle each side with a scant ½ teaspoon of kosher salt and return to the refrigerator, uncovered.
- Bring steaks out to sit at room temperature one hour prior to grilling. Rub each with a garlic half and re-season with salt and pepper.
- Grill over hot coals (or set your gas grill to high heat) with the lid open for about 3-4 minutes per side for rare.
- If you want the classic cross-hatch sear marks, turn the steak 45º (one ⅛ turn) at the 1½-2 minute mark, then grill for a couple more minutes before flipping.
- Repeat on the other side and grill for 3-4 minutes total. Use an instant-read thermometer to check the internal temperature: remove at 120º for rare and 125º for medium-rare. There will be carry-over cooking and the temperature will rise during the resting period.
- Let rest for 5 minutes before serving.
Notes
Grilling times will vary depending on the heat of your grill along with the temperature and thickness of your steak. Use an instant read thermometer for the best results.
Your meat will continue to cook after it’s removed from the grill. Pull it off before it reaches the desired temperature, cover and let rest 10 minutes before serving. It’s best to remove your steak when it’s 10° below your desired finished temperature.
Recommended Products
As an Amazon Associate and member of other affiliate programs, I earn from qualifying purchases.
- Santoku Knife
- OXO Cutting Board
- Thermapen Instant Read Thermometer
Nutrition Information:
Yield:
1
Serving Size:
1 steak
Amount Per Serving:
Calories: 629Total Fat: 43gSaturated Fat: 19gTrans Fat: 0gUnsaturated Fat: 23gCholesterol: 177mgSodium: 447mgCarbohydrates: 3gFiber: 1gSugar: 0gProtein: 57g
Thatskinnychickcanbake.com occasionally offers nutritional information for recipes contained on this site. This information is provided as a courtesy and is an estimate only. This information comes from online calculators. Although thatskinnychickcanbake.com attempts to provide accurate nutritional information, these figures are only estimates.
Varying factors such as product types or brands purchased can change the nutritional information in any given recipe. Also, many recipes on thatskinnychickcanbake.com recommend toppings, which may or may not be listed as optional and nutritional information for these added toppings is not listed. Other factors may change the nutritional information such as when the salt amount is listed “to taste,” it is not calculated into the recipe as the amount will vary. Also, different online calculators can provide different results.
To obtain the most accurate representation of the nutritional information in any given recipe, you should calculate the nutritional information with the actual ingredients used in your recipe. You are solely responsible for ensuring that any nutritional information obtained is accurate.
HOW MUCH DID YOU LOVE THIS RECIPE?
Please leave a comment on the blog or share a photo on Pinterest
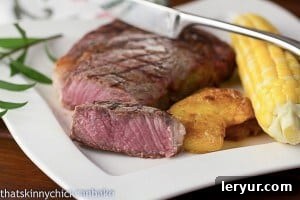
Photo circa 2012
Armed with these comprehensive tips and techniques, you’re now ready to confidently step up to the grill and cook a steak that’s not just good, but truly perfect. Remember, practice makes perfect, so don’t be afraid to experiment and fine-tune your methods. Enjoy the process, savor the incredible flavors, and delight in becoming the ultimate grill master your family and friends will rave about!