
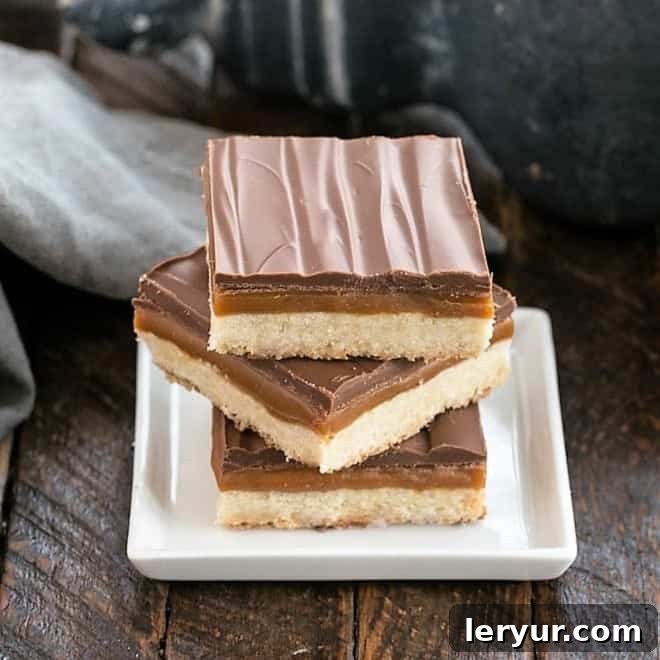
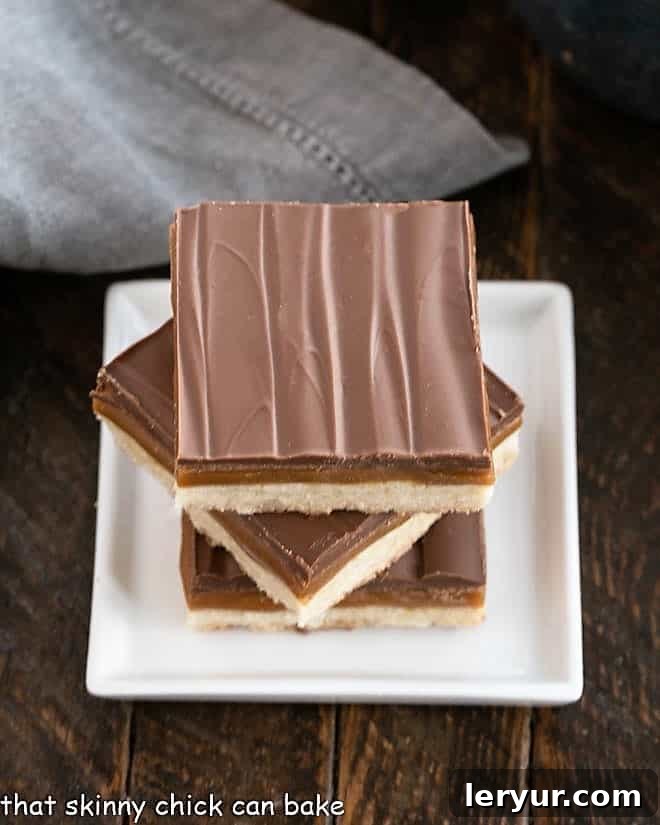
Indulge in the ultimate homemade treat with these outrageously delicious Homemade Twix Bars. Featuring a buttery shortbread crust, a luscious layer of soft, chewy caramel, and a decadent blanket of smooth milk chocolate, these bars are the perfect way to satisfy your deepest sweet tooth cravings. Forget the store-bought version – once you taste these, you’ll never go back!
If you’re a devoted fan of the classic Twix Bar, prepare to have your world rocked by this homemade rendition. These gooey caramel bars offer an unforgettable indulgence, transforming a beloved candy bar into a sublime dessert experience right in your own kitchen. They capture the iconic three-layer magic of Twix with unparalleled freshness and flavor, ensuring every bite is pure bliss.
Why You Must Make These Homemade Twix Bars
There are countless reasons why this recipe deserves a prime spot in your baking repertoire. From their irresistible flavor profile to the sheer joy of creating a beloved treat from scratch, these bars are a winner:
- A Caramel Lover’s Dream: For anyone who could happily eat caramel straight from the jar, this layered caramel chocolate bar recipe is an absolute revelation. It was a clear choice for our annual cookie exchange, guaranteeing wide smiles and satisfied sighs from everyone who tasted them. The generous, rich caramel layer is truly the star of the show.
- Surprisingly Simple to Master: Despite their impressive appearance and complex flavor, none of the steps in this recipe are overly difficult. You don’t need advanced baking skills or specialized equipment to achieve perfection. The biggest challenge you might encounter is cutting them into perfectly neat bars, as the buttery shortbread crust can be a bit crumbly. However, this is usually only an issue for presentation; when it comes to devouring them, a rustic slice tastes just as incredible!
- A Symphony of Textures and Flavors: Each bite delivers a harmonious blend of sensations. You’ll experience the delightful crunch and melt-in-your-mouth goodness of the buttery shortbread base, followed by the sweet, gooey embrace of the caramel center, all finished with a satisfying snap of smooth milk chocolate topping. These three distinct textures and flavors combine to create an experience worthy of two enthusiastic thumbs up!
- The Ultimate Crowd-Pleaser: Whether you’re baking for a holiday party, a casual get-together, or simply treating your family, these homemade Twix bars are guaranteed to be a hit. They appeal to all ages and are often the first dessert to disappear from any platter.
- Customizable Delight: Making them at home means you have control over the quality of ingredients and can even experiment with variations to suit your taste, from different types of chocolate to a hint of sea salt on top.
Ingredient Notes for Perfect Homemade Twix Bars
Achieving the perfect balance of flavors and textures in your homemade Twix bars starts with selecting the right ingredients. Here’s a closer look at what you’ll need and why each component matters:
- Kitchen Staples: Sugar, All-Purpose Flour, and Real Vanilla Extract – These foundational ingredients are likely already in your pantry. Use good quality vanilla extract for the best flavor, as it plays a subtle but important role in enhancing the shortbread’s sweetness.
- Cold Butter – For the shortbread crust, using cold butter is absolutely crucial. Cold butter, cut into small pieces, creates pockets of steam as it bakes, which results in a tender, flaky, and crumbly shortbread texture. Salted butter works perfectly fine here, adding a lovely contrast to the sweetness of the caramel and chocolate.
- Werther’s Original Chewy Caramels – While Kraft caramels are an option, I highly recommend Werther’s Original Chewy Caramels for their superior flavor and consistency. They melt beautifully and create a rich, buttery, and authentically chewy caramel layer that truly elevates these bars. Remember to unwrap them all before you start melting!
- Heavy Cream – This is essential for transforming the caramels into a smooth, pourable, and ultimately rich caramel layer. The cream adds lusciousness and prevents the caramel from becoming too stiff or grainy. Do not substitute with milk or half-and-half, as the fat content is necessary for the desired texture.
- Milk Chocolate – For the topping, a good quality milk chocolate is key to replicating the classic Twix taste. I prefer using Ghirardelli Milk Chocolate Bars, chopped into pieces, as they melt smoothly and have a fantastic flavor. However, high-quality milk chocolate chips are a perfectly acceptable alternative and often easier to work with.
- Vegetable Shortening (Optional) – Adding a tablespoon of vegetable shortening to your melted chocolate is an optional step, but one I highly recommend. It helps to thin out the chocolate slightly, making it easier to spread evenly, and most importantly, it imparts a beautiful, glossy finish to your chocolate topping, giving your bars a professional, appealing look.
How to Make Homemade Twix Bars: Step-by-Step Guide
Crafting these delectable homemade Twix bars is a straightforward process, broken down into three main layers and corresponding steps. Follow these instructions carefully for the best results:
- Prepare the Shortbread Crust: Begin by preheating your oven to 350°F (175°C). Line a 9×13-inch baking pan with nonstick foil, leaving an overhang on the sides to create a “sling” later for easy removal. In a large bowl, or using a food processor, combine your cold, cubed butter with the sugar. If using a bowl, use a pastry blender to cut the butter into the sugar until the mixture resembles coarse cornmeal. If using a food processor, pulse until the butter is evenly distributed and the mixture is crumbly.
- Incorporate Vanilla and Flour: Add the vanilla extract to the butter-sugar mixture, then gradually add the all-purpose flour. Mix until the flour is just incorporated and the mixture is crumbly. Be careful not to overmix, as this can lead to a tough crust.
- Press and Bake the Crust: Firmly and evenly press the crumbly shortbread mixture onto the bottom of your prepared baking pan. Lightly flouring your fingertips can prevent sticking and make this step easier. Once pressed, prick the entire surface of the crust with a fork. Bake for 15 minutes, or until the crust is lightly golden brown on top and the edges are a deeper golden hue. Allow the baked crust to cool completely in the pan on a wire rack before proceeding.
- PRO-Tip for Easy Removal: Lining your baking pan with nonstick foil is a game-changer. The foil not only prevents the gooey caramel from sticking to the pan but also creates a convenient sling. Once the bars are chilled and firm, you can use this foil sling to lift the entire batch out of the pan, making slicing much easier and cleaner.
- Prepare the Caramel Layer: While the crust cools, unwrap all your Werther’s Original Chewy Caramels. In a small saucepan, combine the unwrapped caramels with the heavy cream over low heat. Stir continuously until the caramels are completely melted and the mixture is smooth and cohesive. Alternatively, you can melt the caramels and cream in a microwave-safe bowl, heating in 30-60 second intervals and stirring well after each interval until fully melted and smooth.
- Spread and Chill the Caramel: Pour the warm, melted caramel evenly over the cooled shortbread crust. Use an offset spatula to gently spread it to the edges. Place the pan in the refrigerator for at least 30 minutes to allow the caramel layer to chill and firm up. This step is crucial for the layers to set properly before adding the chocolate.
- Prepare the Chocolate Topping: In a microwave-safe bowl, combine your chopped milk chocolate (or chocolate chips) with the vegetable shortening (if using). Microwave in 30-second increments, stirring thoroughly after each interval, until the chocolate is completely melted and smooth. The shortening will help achieve a glossy finish and a smoother consistency for spreading.
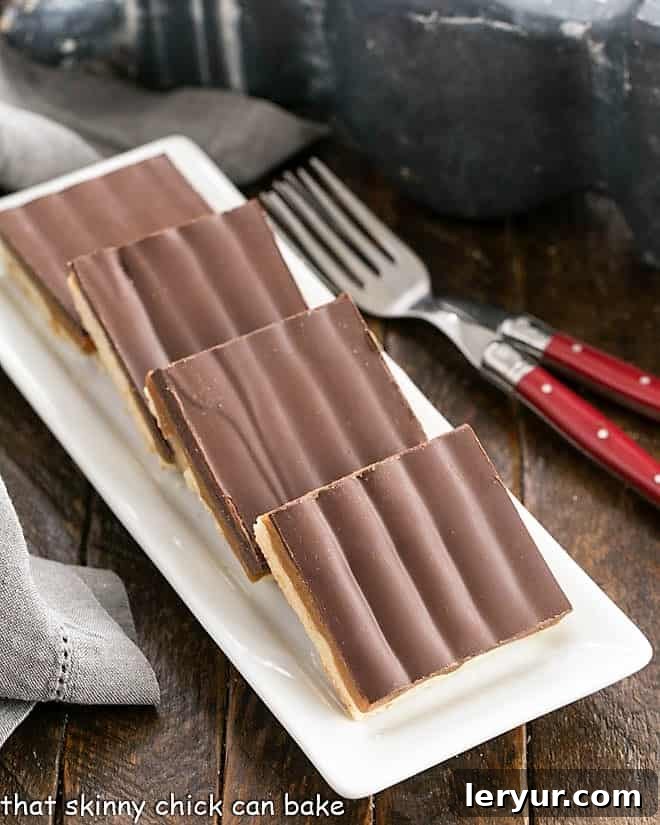
- Apply and Chill the Chocolate Layer: Carefully pour the melted chocolate over the chilled caramel layer. Use an offset spatula to spread the chocolate evenly across the entire surface. If desired, before the chocolate cools and sets, use a frosting tool or the tines of a fork to create a decorative striated design across the top for visual appeal.
- Final Chill and Slice: Return the pan to the refrigerator and chill the bars until the chocolate topping is completely set and firm. This usually takes at least 1-2 hours. Once fully chilled, use the foil sling to lift the entire slab of bars onto a cutting board. For the cleanest cuts, use a large, sharp knife that has been warmed under hot water and thoroughly dried. Wipe the knife clean between each slice to prevent sticking and ensure crisp edges.
- Serve and Enjoy: Slice into individual bars of your desired size. Serve immediately or store as recommended below. Prepare for rave reviews!
Expert Recipe Tips for Flawless Homemade Twix Bars
Even though this recipe is relatively simple, these additional tips and tricks will help you achieve perfection and make your baking experience even smoother:
- The Non-Stick Foil Advantage: As mentioned, lining your baking pan with non-stick foil is indispensable. It not only minimizes any sticking from the incredibly gooey caramel layer but, more importantly, it allows you to easily lift the entire slab of bars out of the pan onto a cutting board. This makes slicing into neat squares significantly less messy and more efficient.
- Mastering the Shortbread Crust: Using a pastry blender (or pulsing in a food processor) to cut the cold butter into the flour and sugar helps disperse tiny pieces of butter evenly throughout the dough. This creates a more tender, delicate, and authentically crumbly shortbread texture that is key to these bars. Avoid overworking the dough, which can develop the gluten and make the crust tough.
- Choosing Your Caramels Wisely: Opting for bagged caramels for the filling is a fantastic shortcut that saves you the time and effort of making caramel from scratch. While various brands work, I highly recommend using Werther’s Soft Caramels (the chewy variety) for their rich, buttery flavor and smooth melting consistency. They truly make a difference in the final taste and texture of your caramel layer.
- Achieving a Flawless Chocolate Top: A small offset spatula is your best friend for spreading the melted chocolate smoothly and evenly over the caramel layer. For an extra touch of visual interest, I often use a cake decorating comb or tool to create elegant lines or patterns across the chocolate surface before it sets. This adds a professional and appealing finish to your homemade treats.
- The Art of Clean Slicing: Chilling the bars thoroughly before cutting is non-negotiable. This allows the caramel to solidify properly, preventing it from oozing and making a sticky mess. For the cleanest possible cuts, I like to use a large, sharp chef’s knife that has been run under hot water and then completely wiped dry. The warm blade helps to glide through the chocolate and caramel. Remember to wipe the knife clean between each slice to ensure consistently neat edges.
- Don’t Rush the Cooling Process: Patience is a virtue in baking, especially with layered desserts. Ensure each layer (crust, caramel, chocolate) is sufficiently cooled or chilled before adding the next. This prevents layers from merging or melting into each other, ensuring distinct textures and a beautiful presentation.
Frequently Asked Questions About Homemade Twix Bars
Here are some common questions about Twix bars and how to best enjoy your homemade version:
What are Twix Bars?
If you’re not entirely familiar with Twix Bars, they are an iconic candy bar that first emerged in 1967 in the United Kingdom and later made their way to the U.S. in 1979. Produced by Mars, Inc., the original Twix featured a crisp shortbread biscuit (cookie) topped with a layer of chewy caramel, all enveloped in a smooth coating of milk chocolate. Over the years, Mars has introduced various flavor combinations, along with different sizes and packaging options, but the core concept of shortbread, caramel, and chocolate remains a timeless favorite.
How Should You Store These Bars?
Caramel bars, due to their gooey nature, can present a bit of a challenge when it comes to storage, as the caramel layer can soften and ooze once they’re cut. To maintain their structure and freshness, I highly recommend storing these bars in a single layer in an airtight container in the refrigerator. This keeps the caramel firm and prevents the chocolate from becoming too soft. For optimal texture, you might want to cut them into squares just before serving.
Can Homemade Twix Bars be Frozen?
Yes, these delicious bars can be frozen for longer storage, lasting for up to 2 months. To freeze, arrange the fully chilled and sliced bars in a single layer on a parchment-lined baking sheet and freeze until solid. Once frozen, you can transfer them to an airtight freezer-safe container or bag, stacking them with layers of parchment paper in between to prevent sticking. Be aware that while they freeze well, the chocolate layer may not retain its pristine, glossy appearance when defrosted, sometimes developing a slight bloom (a whitish film) due to temperature changes. Defrost the bars slowly in the refrigerator in the same container they were frozen in to minimize condensation.
Can I Use Dark Chocolate Instead of Milk Chocolate?
Absolutely! If you prefer a less sweet and more intense chocolate flavor, feel free to substitute milk chocolate with dark chocolate. Semisweet chocolate would also work well. Keep in mind that dark chocolate can be a bit thicker when melted, so ensure you add the vegetable shortening (or a tiny bit of coconut oil) to help it spread smoothly.
Can I Make These Gluten-Free?
While this specific recipe calls for all-purpose flour, you can experiment with a 1:1 gluten-free baking flour blend for the shortbread crust. Ensure the blend contains xanthan gum, which helps with structure. Results may vary slightly in texture, but many readers have successfully adapted similar shortbread recipes to be gluten-free.
You May Also Like: Discover More Caramel and Chocolate Delights
If you’ve fallen in love with these Homemade Twix Bars, you’ll be thrilled to explore more of my dessert creations that feature the irresistible combination of chocolate and caramel, often with a shortbread twist:
- Chocolate Caramel Twix Cheesecake
- Twix Cheesecake Bars
- Chocolate Caramel Shortbread Cookies (aka Twix Cookies)
- Double Chocolate Twix Cookies
- Milky Way Brownies
- Plus, explore even more of my Best Cookie Recipes for endless baking inspiration!
This beloved recipe was first shared in January 2013. The photos and text were thoughtfully updated in 2021 to provide an even better baking experience for you.
The Recipe:
Homemade Twix Bars
30 minutes
15 minutes
45 minutes
24 bars
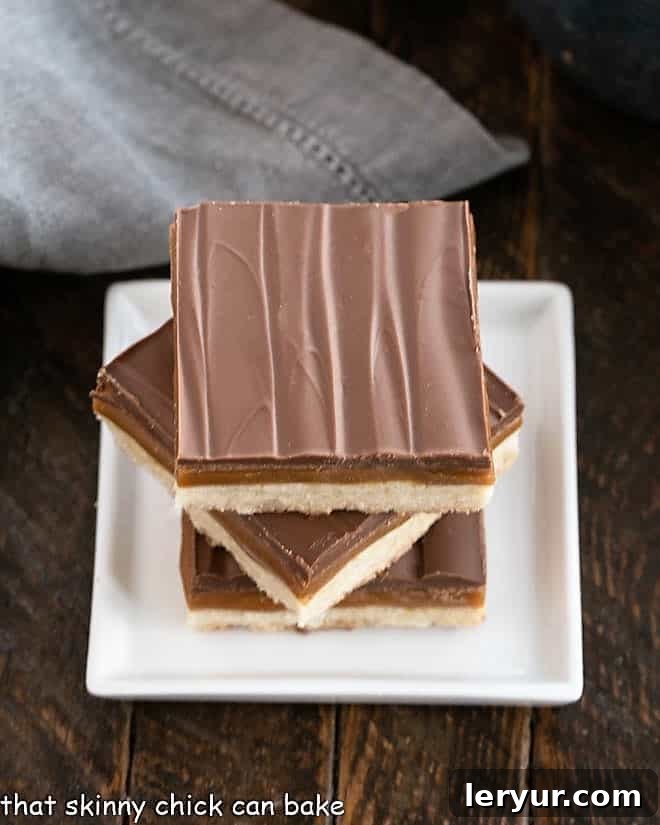
Decadent shortbread bars topped with a rich caramel layer and smooth milk chocolate glaze. A perfect copycat of your favorite candy bar!
Ingredients
For the Shortbread Layer:
- 2 sticks (1 cup) cold butter, cut into small pieces
- ½ cup granulated sugar
- 2 teaspoons pure vanilla extract
- 2 cups all-purpose flour
For the Caramel Layer:
- 20 ounces Werther’s Original Chewy Caramels, unwrapped
- 3 tablespoons heavy cream
For the Chocolate Layer:
- 18 ounces milk chocolate, chopped (Ghirardelli Bars recommended, or high-quality chocolate chips)
- 1 tablespoon vegetable shortening (optional, for glossiness and smoother spreading)
Instructions
- Prepare the Crust: Preheat your oven to 350°F (175°C). Line a 9″ x 13″ baking pan with nonstick aluminum foil, ensuring an overhang on the sides for easy lifting. Set aside.
- Mix Crust Ingredients: In a large bowl, use a pastry blender to cut the cold butter into the sugar until crumbly and resembling coarse cornmeal. Alternatively, you can use a food processor to pulse the butter and sugar.
- Add Remaining Crust Ingredients: Stir in the vanilla extract, then gradually add the all-purpose flour. Mix until the flour is just incorporated and the mixture is crumbly. Do not overmix.
- Press and Bake Crust: Press the crumbly mixture evenly into the bottom of the prepared pan. Lightly flouring your fingertips can help prevent sticking. Prick the entire surface of the crust with a fork.
- Bake Crust: Bake for 15 minutes, or until the crust is lightly golden brown on top and the edges are a deeper golden brown. Remove from oven and let cool completely in the pan on a wire rack.
- Prepare Caramel Layer: In a small saucepan, combine the unwrapped caramels and heavy cream. Melt over low heat, stirring constantly until the caramel is smooth and fully melted. Alternatively, microwave in 30-60 second intervals, stirring well after each, until smooth.
- Spread Caramel: Pour the warm caramel evenly over the completely cooled shortbread crust. Use an offset spatula to spread it to the edges. Place the pan in the refrigerator for at least 30 minutes to chill and firm up the caramel.
- Prepare Chocolate Layer: In a microwave-safe bowl, melt the chopped milk chocolate and vegetable shortening (if using) in 30-second increments, stirring after each, until smooth and glossy.
- Spread Chocolate: Pour the melted chocolate over the chilled caramel layer. Use an offset spatula to spread it evenly. If desired, use a plastic frosting tool or the tines of a fork to create striations on the chocolate surface before it sets.
- Chill and Serve: Return the pan to the refrigerator and chill for at least 1-2 hours, or until the chocolate topping is completely set. Once firm, use the foil sling to lift the entire slab onto a cutting board. Use a hot, dry knife (wiped clean between cuts) to slice into bars. Store in an airtight container in the refrigerator to prevent the caramel from oozing.
Chef’s Notes
You can use Kraft caramels, but I genuinely prefer the taste and melting consistency of Werther’s Original Chewy Caramels for a richer caramel layer.
I’ve tested various shortbread crust recipes, and while they all taste amazing, some crumbling at the edges when slicing is common. Don’t worry, it won’t affect the deliciousness!
The caramel layer will naturally soften at room temperature, making these bars best stored in the refrigerator. For the cleanest slices and best presentation, cut them into individual squares just before you plan to serve them.
Nutrition Information:
Yield:
24 bars
Serving Size:
1 bar
Amount Per Serving (estimated):
Calories: 338
Total Fat: 17g
Saturated Fat: 10g
Trans Fat: 0g
Unsaturated Fat: 6g
Cholesterol: 29mg
Sodium: 136mg
Carbohydrates: 43g
Fiber: 1g
Sugar: 31g
Protein: 4g
HOW MUCH DID YOU LOVE THIS RECIPE?
Please leave a comment on the blog or share a photo on Pinterest. Your feedback is greatly appreciated!
Stay in touch through social media @ Instagram, Facebook, and Pinterest. Don’t forget to tag me when you try one of my recipes! And if you love the results, please give it a 5-star rating in the recipe card.