
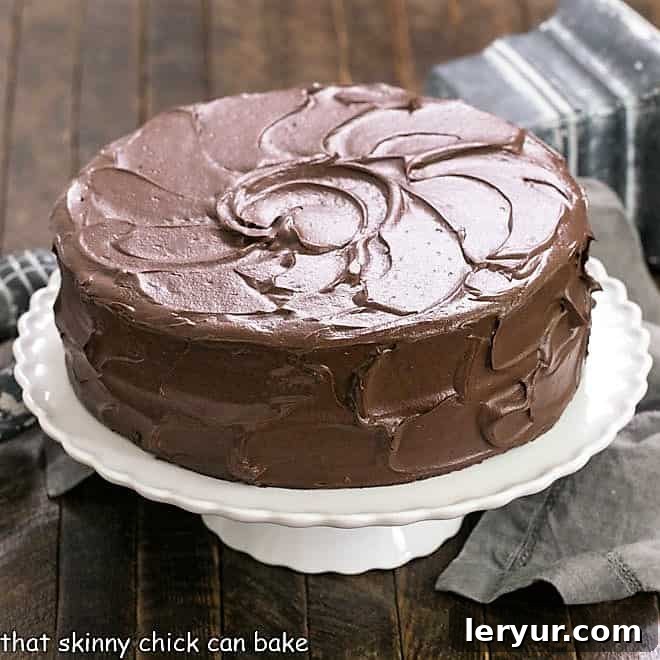
Decadent Devil’s Food Cake: The Ultimate Rich Chocolate Layer Cake Recipe
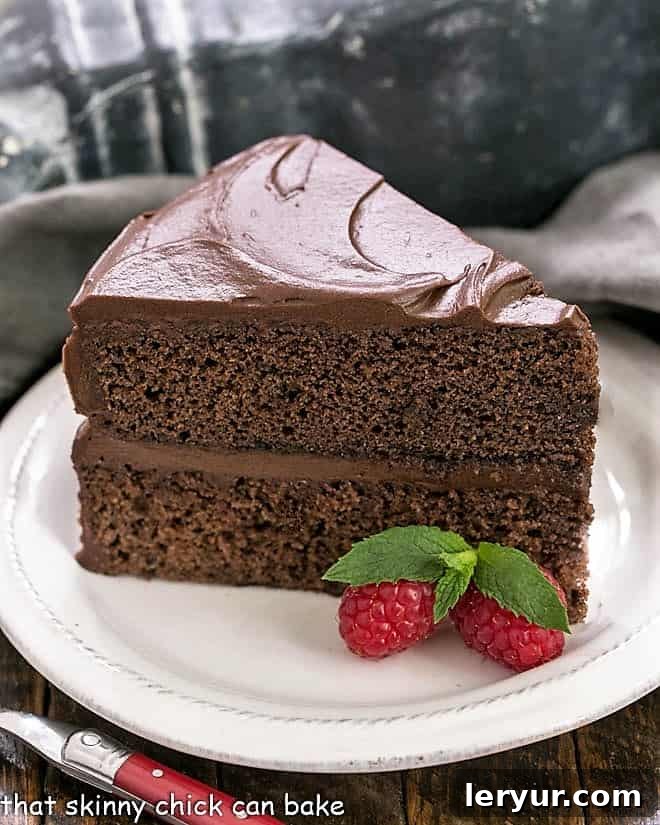
Indulge in one of the most classic and irresistibly luscious chocolate cakes: this spectacular Devil’s Food Cake. It’s a supremely rich, dark, and intensely chocolaty masterpiece, generously crowned with a silky smooth chocolate buttercream frosting. This isn’t just any chocolate cake; it’s an experience, a tradition, and a guaranteed crowd-pleaser that will leave everyone craving another slice.
Prepare for pure chocolate bliss! This chocolate layer cake is incredibly moist, wonderfully fluffy, and boasts a depth of flavor that is truly unparalleled. It quickly became an enormous hit with my entire family – a rare feat for any dessert. We were practically battling over the last piece, a testament to its exceptional deliciousness. Without a doubt, this stands as one of the best chocolate cake recipes I have ever had the pleasure of baking. Its deep, dark hue and tender crumb are what set it apart, making it impossible to resist just one more bite.
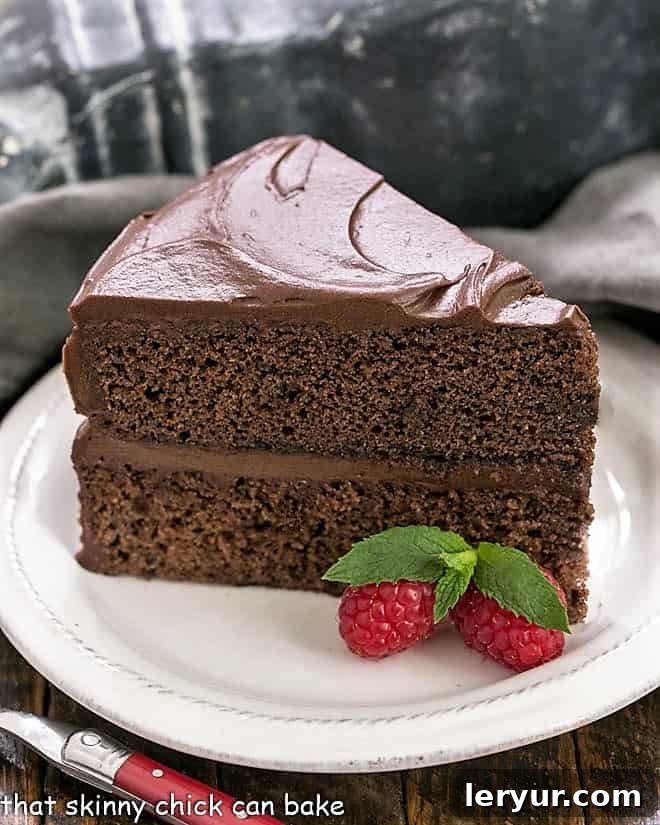
Why This Devil’s Food Cake Recipe is a Must-Make
There are countless reasons why this particular Devil’s Food Cake will become your go-to recipe for every special occasion, or simply when a deep chocolate craving strikes. Here’s why it stands out:
- The Epitome of Celebration Cakes: A stunning chocolate layer cake is the quintessential dessert for any celebration, making it especially perfect for birthdays, anniversaries, holidays, or any event that calls for something truly special. Its impressive appearance and unforgettable taste will make it the centerpiece of your dessert table.
- A Timeless Classic with Unmatched Depth: Devil’s Food Cake is renowned for its signature dark, dense, and incredibly moist crumb. This classic chocolate cake has captivated palates for well over a century, and for good reason. It’s distinctly richer and darker than a standard chocolate cake, achieving its depth of color and flavor through a generous amount of cocoa powder and specific leavening agents that contribute to its unique texture.
- Irresistible Chocolate Buttercream Frosting: Each bite of this cake is elevated by a rich, glossy, and intensely chocolaty buttercream frosting. The frosting is not just a topping; it’s an integral part of the experience, providing the perfect creamy counterpoint to the deep chocolate cake. Its luscious texture and decadent flavor make every single forkful absolutely irresistible, leaving you wanting more.
- Easier Than You Think: Despite its impressive appearance, this Devil’s Food Cake is surprisingly straightforward to make. With clear instructions and readily available ingredients, even novice bakers can achieve a show-stopping dessert. The joy of baking something so magnificent from scratch is incredibly rewarding.
Essential Ingredient Notes for Perfection
Achieving the perfect Devil’s Food Cake starts with understanding your ingredients. Here are some detailed notes to ensure your cake turns out flawlessly:
- Kitchen Staples: You’ll need high-quality butter (always at room temperature for creaming), granulated sugar, large eggs, all-purpose flour, baking soda, salt, and milk. These form the foundational structure and flavor of your cake.
- Vanilla Extract: Opt for real vanilla extract, not imitation. The difference in flavor is significant, with real vanilla adding a warm, complex note that complements the chocolate beautifully.
- Cocoa Powder: For the signature deep color and robust chocolate flavor, unsweetened cocoa powder is key. I highly recommend a reputable brand like Ghirardelli or Dutch-processed cocoa for an even darker cake. Always sift your cocoa powder before using it to prevent lumps and ensure even distribution throughout the batter.
- Baking Powder: This leavening agent is crucial for the cake’s fluffy texture. Baking powder can lose its potency over time, so it’s vital to check its expiration date. If you’re unsure if it’s still active, perform a quick test: pour about a teaspoon of baking powder into a bowl of very hot water. If it bubbles vigorously, it’s still good to use. If not, it’s time to replace it.
- Buttermilk: The acidity in buttermilk plays a critical role in creating a tender, moist cake crumb. It reacts with the baking soda, contributing to the cake’s rise and overall texture. If you don’t have buttermilk on hand, don’t worry – you can easily make a substitute. In a one-cup liquid measuring cup, add one tablespoon of lemon juice or a neutral-colored vinegar (like white vinegar or apple cider vinegar). Fill the rest of the cup to the one-cup mark with 2% or whole milk. Stir gently and let it stand for a few minutes until it curdles slightly. This homemade buttermilk substitute can be used cup for cup in your recipe. Remember, this recipe requires more than 1 cup, so adjust accordingly.
- Powdered Sugar (Confectioners’ Sugar): For the smoothest, silkiest buttercream frosting, sifting your powdered sugar is an absolute must. This removes any lumps, ensuring a uniformly creamy texture.
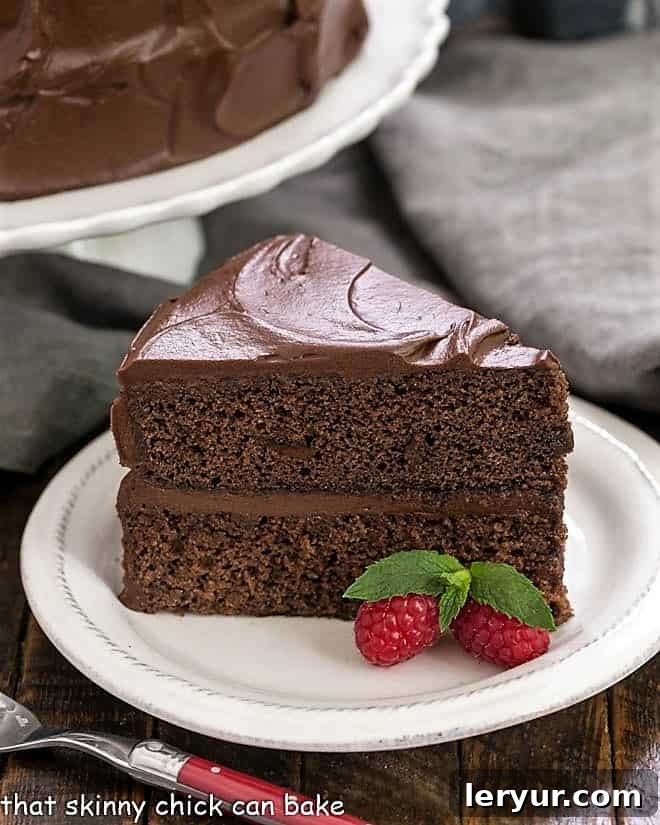
Mastering a Four-Layer Devil’s Food Cake
While this recipe works beautifully as a classic two-layer cake, elevating it to a show-stopping four-layer creation adds an extra touch of elegance and indulgence. The process is simpler than it sounds, and the visual impact is truly rewarding.
- I’ve successfully made this cake in both two-layer and four-layer versions, and both are equally delicious. To transform your two cake layers into a magnificent four-layer cake, simply bake the two layers as directed. Once they have completely cooled, carefully slice each layer in half horizontally. You’ll then have four thinner cake layers ready for stacking.
- Begin stacking, adding a generous layer of chocolate buttercream frosting between each cake layer. This method creates more layers of cake and frosting, resulting in an even more decadent and impressive dessert.
- PRO-Tip for Perfect Slicing: Achieving evenly sliced cake layers can be tricky, but this tip makes it much easier. Before you start cutting, insert toothpicks around the perimeter of each cooled cake layer, positioning them a little more than halfway down the sides. These toothpicks will act as a guide for your knife, helping you cut a straight, even line all the way around the cake. While it might not always result in a perfectly surgical cut, it significantly improves the outcome and confidence when slicing.
I typically have a strong will when it comes to sweets, but this Devil’s Food Cake is a game-changer. It’s hands down one of the best chocolate cake recipes I’ve encountered in years, proving too irresistible even for my usual willpower. Even Katie, my notoriously picky daughter, eagerly devoured her share. When a single dish, especially a dessert, earns unanimous approval from the entire family, you know you’ve struck gold. This cake isn’t just a dessert; it’s a star that truly deserves to be on a pedestal—it has absolutely earned it.
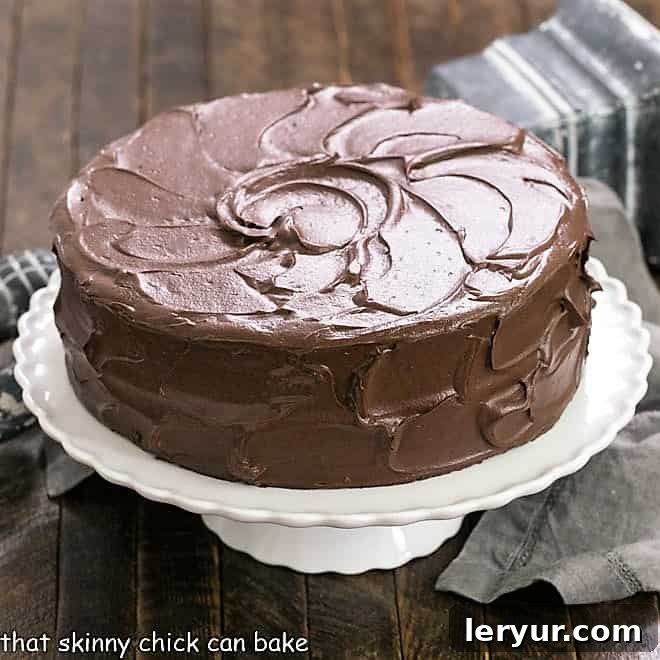
Expert Tips for Flawlessly Frosting a Layer Cake
Frosting a layer cake can seem daunting, but with a few professional tips, you can achieve a beautifully smooth and impressive finish. Here’s how to ensure your Devil’s Food Cake looks as incredible as it tastes:
- Achieve Even Layers from the Start: The foundation of a well-stacked cake begins even before baking. Strive to make each cake layer the same height and density. You can achieve this by weighing the batter evenly between your cake pans or by carefully checking the depth of the batter with a ruler or even a toothpick before baking. Even layers make stacking and frosting significantly easier.
- Ensure Ample Frosting: There’s nothing worse than running out of frosting midway through. This recipe provides enough frosting for a relatively thin, yet delicious, coating between the layers and a good coverage on the exterior. If you opt for the more impressive four-layer cake, or if you simply prefer a thicker frosting on your standard two-layer cake, consider making a batch and a half or even doubling the frosting recipe. It’s always better to have a little extra than not enough!
- Secure the Base: For a stable foundation, Real Simple magazine suggests placing a small dab of frosting directly onto the center of your cake stand or serving plate before setting down the first cake layer. This acts as a “glue,” preventing the bottom layer from shifting while you work.
- Keep Your Workspace Clean: To maintain a pristine cake stand or plate, tuck strips of parchment paper or wax paper under the perimeter of your bottom cake layer. Once you’re finished frosting and the cake is set, gently pull out the strips, and any excess frosting will lift away, leaving a clean edge.
- Start with the First Layer: Place your first cake layer flat side down on the secured cake stand. “Eyeball” the frosting and add just enough to create a relatively thin, even layer across the entire surface, extending to the edges. Use an offset spatula – its angled blade makes spreading smooth and effortless – to gently spread the frosting.
- Repeat and Build: Continue this process with the remaining layers, ensuring each is evenly coated with frosting. Remember to reserve a significant amount of frosting for covering the sides and top of the entire cake.
- Smooth and Decorate: Once all layers are stacked and filled, apply the remaining frosting to the sides and top of the cake. Use your offset spatula or a bench scraper to smooth the frosting for a clean, polished look. For a more rustic or decorative finish, you can create various textured patterns with your spatula or the back of a spoon.
Frequently Asked Questions About Devil’s Food Cake
According to The Food Lover’s Companion, Devil’s Food Cake is described as a dark, dense baked chocolate item. It stands in direct contrast to the airy, white angel food cake, hence the “devil” in its name. What truly sets Devil’s Food Cake apart from other chocolate cakes is its use of cocoa powder (often in generous amounts) rather than melted chocolate, combined with a higher proportion of baking soda or other leavening agents. This specific combination results in a cake that is exceptionally rich, boasts a deep, dark brown color, and has a characteristically fluffy and tender crumb that’s incredibly moist.
The exact origin of the name “Devil’s Food Cake” is shrouded in a bit of mystery, though it likely emerged in the early 1900s when giving cakes fancy and evocative names was a popular trend. There are a few widely accepted speculations. One theory suggests that the name was chosen to highlight its striking contrast with “angel food cake” – an airy, light, and white cake. The dark, rich, and dense nature of Devil’s Food Cake represented the opposite, playing on the angelic and devilish opposition. Another popular idea is that the cake was deemed “devilishly” rich, decadent, and irresistible, especially when compared to the simpler chocolate cake options available at the time. Its intense flavor and dark appearance were considered almost sinful in their deliciousness.
While both Red Velvet Cake and Devil’s Food Cake share cocoa powder as an ingredient, they are distinctly different cakes. Red Velvet Cake is known for its signature red hue, which is achieved through a combination of a small amount of cocoa powder reacting with acidic ingredients (like buttermilk and vinegar) and often a significant addition of red food coloring. The result is a cake that is typically lighter in color and flavor than a true Devil’s Food Cake, which aims for a deep, dark brown and intense chocolate flavor. Furthermore, Red Velvet Cake is traditionally frosted with either a vanilla buttercream or, more famously, a tangy cream cheese frosting, rather than the rich chocolate buttercream characteristic of Devil’s Food Cake. Although adding red coloring to a Devil’s Food Cake would indeed make it red, it wouldn’t quite be a traditional Red Velvet Cake; it would likely result in a cake with a much more muted red appearance and a significantly richer chocolate taste.
You May Also Love These Cake Creations
While chocolate seems to be the most requested flavor in our household, and we absolutely adore this Devil’s Food Cake Recipe, it’s always fun to explore new flavors and textures from time to time! Layer cakes, typically reserved for birthdays and grand celebrations at our house, are truly worthy of any occasion. If you’re looking to shake things up or expand your baking repertoire, consider these delightful alternatives:
- Best Banana Cake Recipe from Saving Room for Dessert
- Death by Chocolate Cake
- The Best Red Velvet Cake
- Perfect Yellow Cake
- Best Chocolate Layer Cake
- Classic White Layer Cake
- Lemon Layer Cake
- Explore more of the Best Cake Recipes
Stay in touch and share your baking adventures with me through social media! You can find me on Instagram, Facebook, and Pinterest. Don’t forget to tag me (@thatskinnychickcanbake) when you try one of my recipes! And if you love the results as much as my family does, please consider giving it a 5-star rating in the recipe card below – your feedback means the world to me.
Devil’s Food Cake Recipe
40 minutes
35 minutes
1 hour 15 minutes
12 servings
A terrific celebratory cake you can make with 2 or 4 layers sandwiched with rich chocolate buttercream frosting, perfect for any occasion.
Ingredients
For the cake:
- ⅔ cup butter, at room temperature
- 1 ¾ cups sugar
- 3 eggs
- 1 teaspoon vanilla extract
- 2 cups all-purpose flour
- ½ cup unsweetened cocoa powder
- 1 teaspoon baking powder
- ¾ teaspoon baking soda
- ½ teaspoon salt
- 1 ½ cups buttermilk
For the frosting:
- ¾ cup butter, softened
- 1 cup cocoa powder, sifted
- 4 ½ cups powdered sugar, sifted
- ½ cup milk
- 1 ½ teaspoons vanilla extract
Instructions
- Preheat your oven to 350°F (175°C).
- Grease and flour two 9-inch round cake pans, ensuring an even coating to prevent sticking.
- In the bowl of a stand mixer fitted with the whisk attachment, beat the softened butter and sugar together until the mixture is light, fluffy, and pale in color. This usually takes about 3-5 minutes. Beat in the eggs one at a time, incorporating each fully before adding the next, then stir in the vanilla extract.
- In a separate mixing bowl, thoroughly whisk together the all-purpose flour, sifted cocoa powder, baking powder, baking soda, and salt. Ensure all dry ingredients are well combined.
- Switch to the paddle attachment on your stand mixer. Gradually add the dry flour mixture to the wet butter mixture alternately with the buttermilk, beginning and ending with the dry ingredients. Mix just until the batter is smooth and no streaks of flour remain. Be careful not to overmix. Periodically scrape down the sides and bottom of the bowl with a spatula to ensure everything is fully incorporated.
- Divide the batter evenly between your two prepared cake pans.
- Bake for 30 to 35 minutes, or until a wooden pick inserted into the center of the cakes comes out clean.
- Allow the cakes to cool in their pans for 10 minutes before carefully inverting them onto wire racks to cool completely. Cooling completely is crucial before frosting.
- Once fully cooled, you can either leave them as two full layers for a standard cake or, for a magnificent 4-layer cake, carefully slice each piece horizontally in half using the toothpick guide method mentioned above.
- When the cake layers are cool to the touch, proceed to make the rich chocolate buttercream frosting.
- In a large microwave-safe bowl, melt the butter until just liquid. Stir in the sifted cocoa powder until smooth.
- Alternatively, in a large mixing bowl (or using your stand mixer), gradually add parts of the sifted powdered sugar and parts of the milk to the butter-cocoa mixture, beating until the frosting reaches a smooth, spreadable consistency. Add the vanilla extract and beat until light and fluffy. Adjust milk quantity slightly if needed to achieve desired thickness.
- Use the frosting immediately to assemble and decorate your cake. If you need to store it, cover tightly and refrigerate. Bring to room temperature and re-beat before using.
Notes
This delightful Devil’s Food Cake recipe is a beloved adaptation inspired by a classic from Hershey’s, renowned for its rich chocolate flavor.
For those times you find yourself without buttermilk, creating a homemade substitute is incredibly simple. Just add a tablespoon of fresh lemon juice or a neutral vinegar, such as white or apple cider vinegar, to a one-cup liquid measuring cup. Then, fill the cup with milk (2% or whole milk works best) up to the one-cup mark. Give it a gentle stir and allow it to sit for approximately 5-10 minutes. You’ll notice it will curdle and thicken slightly, indicating it’s ready to be used cup for cup as a perfect buttermilk alternative. If your recipe calls for more than one cup, simply repeat this process for each additional cup needed.
If you’re opting to create a show-stopping 4-layer cake instead of the standard 2-layer version, you’ll likely desire more frosting for those extra layers and impressive presentation. In this case, I highly recommend making a batch and a half or even doubling the chocolate buttercream frosting recipe. The exact amount will depend entirely on your personal preference and how much of a “frosting lover” you truly are!
Nutrition Information:
Yield:
12
Serving Size:
1 slice
Amount Per Serving:
Calories: 621Total Fat: 25gSaturated Fat: 15gTrans Fat: 1gUnsaturated Fat: 7gCholesterol: 106mgSodium: 462mgCarbohydrates: 95gFiber: 3gSugar: 72gProtein: 7g
Thatskinnychickcanbake.com occasionally offers nutritional information for recipes contained on this site. This information is provided as a courtesy and is an estimate only. This information comes from online calculators. Although thatskinnychickcanbake.com attempts to provide accurate nutritional information, these figures are only estimates. Varying factors such as product types or brands purchased can change the nutritional information in any given recipe. Also, many recipes on thatskinnychickcanbake.com recommend toppings, which may or may not be listed as optional and nutritional information for these added toppings is not listed. Other factors may change the nutritional information such as when the salt amount is listed “to taste,” it is not calculated into the recipe as the amount will vary. Also, different online calculators can provide different results. To obtain the most accurate representation of the nutritional information in any given recipe, you should calculate the nutritional information with the actual ingredients used in your recipe. You are solely responsible for ensuring that any nutritional information obtained is accurate.
HOW MUCH DID YOU LOVE THIS RECIPE?
Please leave a comment on the blog or share a photo on Pinterest
I had originally planned to make beef tenderloin for a special dinner, and what better way to celebrate than with this show-stopping chocolate birthday cake? I decided to invite Tom, our oldest son, over for dinner to celebrate his birthday a little early. Being the witty individual he is, Tom playfully posted a photo of this chocolate layer cake on Instagram with the comment: “My birthday cake 20 days early because my parents are bad at calendars. Or maybe it’s for Pearl Harbor Day, I dunno.” The best response to his humorous post came swiftly: “You can be bad at calendars when you’re that fabulous at baking.”
Indeed, Tom has some wonderful friends! But there was, in fact, a perfectly rational reason for the premature birthday bash. We were scheduled to board an early flight to LA on the actual morning of his birthday, and most likely would have been eating Christmas leftovers from the day before. So, if he wanted a day truly dedicated to him and his favorite dessert, this was the absolute best I could do! I don’t think he had a single complaint, and the joyful celebration proved just how universally adored this Devil’s Food Cake truly is.