
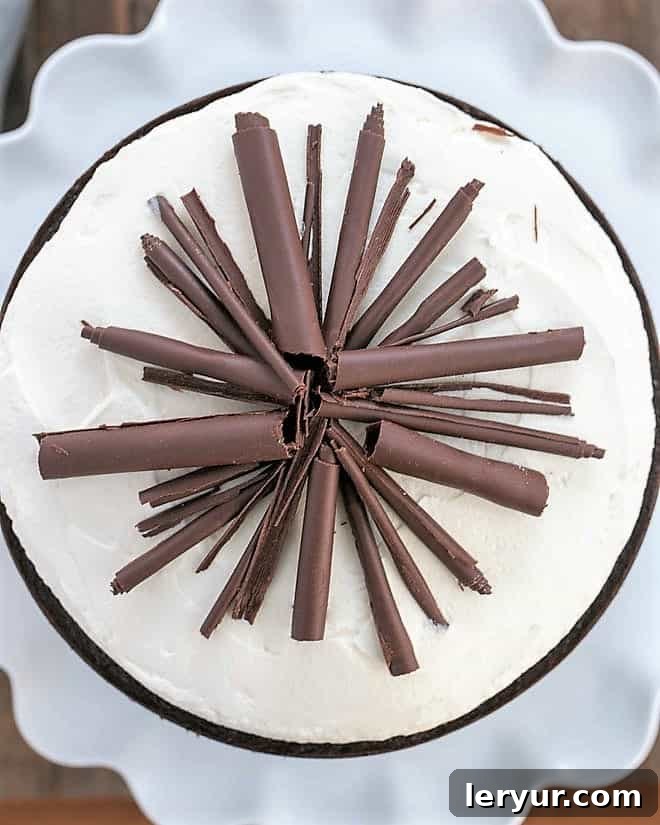
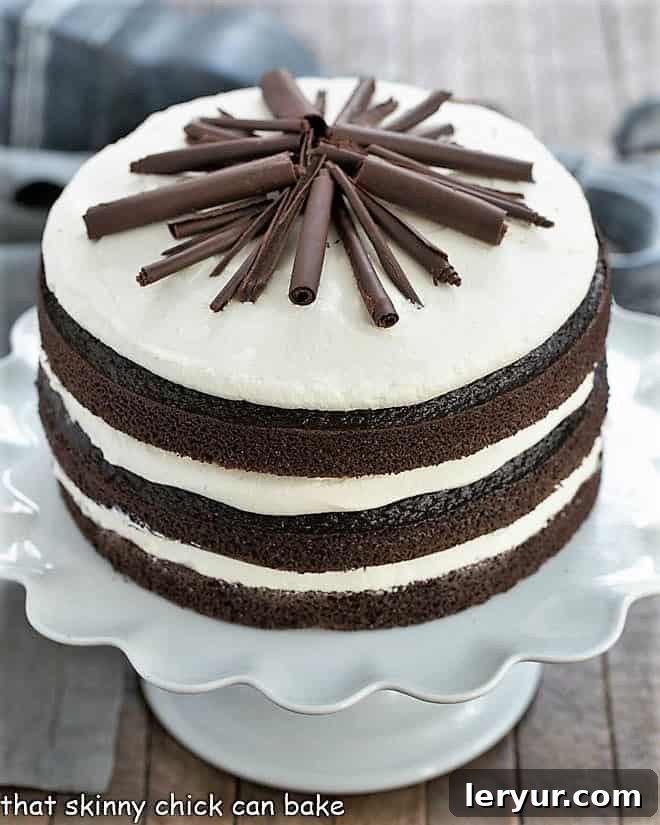
Prepare to be captivated by the ultimate dessert experience: a magnificent Triple Layer Chocolate Cake that promises to be the centerpiece of any celebration. What started as an inspiration from an old Fine Cooking Magazine photo, originally intended as a birthday cake for my eldest, has evolved into a perfected recipe. We’ve made some delightful tweaks along the way, most notably filling it with a luscious cream cheese whipped cream frosting and subtly adjusting the espresso powder for a universally appealing flavor profile. This isn’t just a cake; it’s a testament to the joy of baking and the magic of a truly decadent treat.
A multi-layered cake inherently possesses an air of grandeur, transforming any ordinary occasion into something extraordinary. This particular chocolate creation was an absolute showstopper, garnering rave reviews from my entire family, especially the birthday boy who declared it his favorite. Its towering presence, rich chocolate aroma, and the promise of a moist, tender crumb made it an instant legend in our kitchen. Get ready to bake a cake that will impress, delight, and leave everyone asking for more.
Why You Must Make This Chocolate Masterpiece
There are countless reasons why this particular chocolate cake stands head and shoulders above the rest, making it a must-bake for any chocolate enthusiast or aspiring home baker:
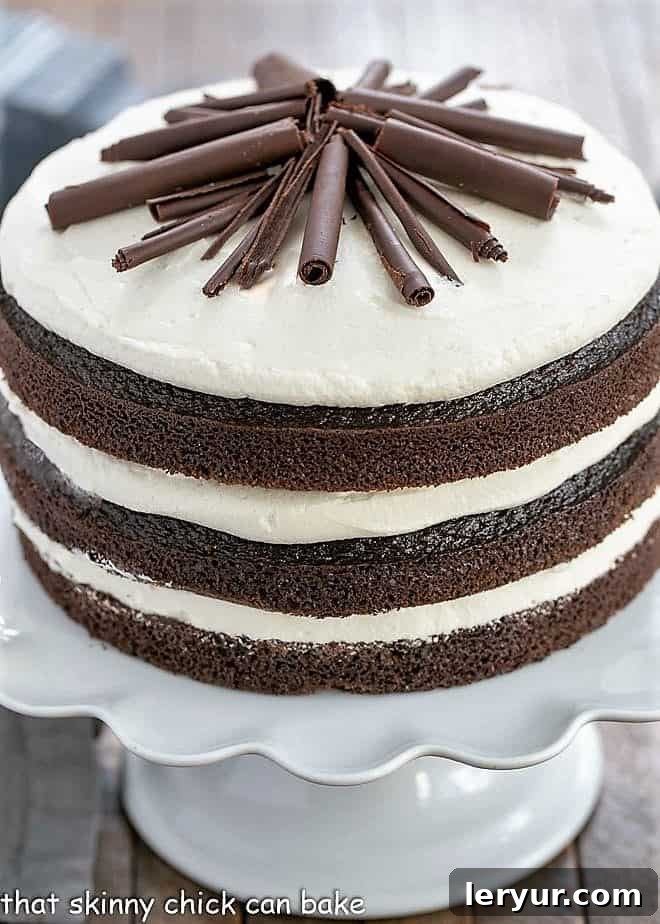
- Unrivaled Perfection in Every Bite: This recipe delivers a chocolate cake that is nothing short of perfect. Each layer boasts an incredibly moist and tender crumb, dissolving delicately on the palate. The balance of rich cocoa and just the right amount of sweetness creates a harmonious flavor profile that is deeply satisfying without being overly cloying. It’s the kind of chocolate cake that makes you close your eyes in bliss with every forkful.
- The Dreamy Cream Cheese Frosting: The magic truly happens when this exquisite chocolate cake meets its ideal companion: a light, airy, and tangy cream cheese whipped cream frosting. Unlike heavy buttercreams, this frosting offers a refreshing contrast, its subtle tang cutting through the richness of the chocolate and adding a delightful creaminess. It’s a match made in culinary heaven, elevating the entire dessert experience to an ethereal level.
- A Guaranteed Crowd-Pleaser: Forget picky eaters; this cake is universally adored. The birthday boy, whose special day inspired this creation, was utterly thrilled, and indeed, every single member of the family (and any guests fortunate enough to try it) fell in love with its irresistible charm. It’s the perfect cake to ensure smiles and satisfied sighs all around, making any gathering instantly more special.
- Inspired by a Culinary Icon: The original inspiration for this recipe comes from none other than Gale Gand, a celebrated Chicago-based pastry chef renowned for her exquisite desserts and her own Food Network show. When you’re baking a recipe from someone with her caliber and expertise, you can trust it implicitly. Discovering her gorgeous chocolate Irish whiskey cake on the cover of a December 2012 Fine Cooking magazine was an irresistible call to the kitchen, a promise of something truly spectacular. While the original called for Irish whiskey, we tailored it to suit our family’s preferences, proving the versatility and foundational excellence of Gand’s work.
The original recipe’s inclusion of Irish whiskey and a generous tablespoon of espresso powder in the whipped cream prompted my initial modifications. While I appreciate the depth these ingredients can add, I wasn’t entirely sure how a whiskey-infused cake would be received by my family. Similarly, my discerning husband often prefers very subtle coffee notes, so dialing down the espresso was a practical adjustment to ensure everyone could fully enjoy this decadent dessert. The goal was to enhance the chocolate without it becoming a mocha cake, a delicate balance that was perfectly achieved through careful moderation.
Mastering Your Bake: Essential Recipe Tips
Creating this magnificent cake is an incredibly rewarding experience, and with a few expert tips, you can ensure your result is as splendid and delicious as you envision. The quality of the original recipe provided a fantastic foundation, resulting in cake layers that were consistently moist and bursting with flavor, perfectly complemented by the light and decadent frosting.
- Essential Equipment: The Right Cake Pans: For perfect three-tiered cakes, you will absolutely need three 9-inch round cake pans. Most home kitchens might have one or two, so it’s a good idea to check your inventory before you begin. Investing in a third pan, or borrowing one, will make the baking process much smoother and ensure all your layers bake evenly and simultaneously, contributing to the cake’s impressive final presentation.
- PRO-Tip for Perfectly Even Layers: Achieving uniformly thick cake layers is crucial for both aesthetic appeal and consistent baking. The easiest and most precise way to do this is by using a kitchen scale. After mixing your batter, weigh the empty mixing bowl, then weigh it again with the batter inside. Subtract the bowl’s weight to find the total batter weight, then divide that number by three. Distribute this exact amount into each of your prepared cake pans. Typically, each pan will need about 1 pound and 1 ounce of batter. This method ensures each layer bakes identically and creates a professional-looking cake. If you don’t have a scale, try your best to eyeball it, but be mindful that slight variations can lead to uneven baking times and layers.
- The Secret to Supreme Moistness: Oil in the Batter: While butter offers unparalleled flavor in many baked goods, the inclusion of oil in this chocolate cake batter is a game-changer for moisture. Oil contributes a tenderness and moistness that butter alone cannot always achieve, resulting in a cake that stays fresh and delectable for longer. It helps create a fine, soft crumb that is characteristic of truly outstanding chocolate cakes.
- PRO-Tip: Enhancing Chocolate with Coffee: One of the best-kept secrets to intensifying chocolate flavor without making the dessert taste overtly like coffee is to add a touch of brewed coffee or espresso powder to the batter. Coffee acts as a flavor enhancer, deepening the cocoa notes and making the chocolate taste richer and more pronounced. If you desire a stronger coffee flavor, feel free to incorporate about a teaspoon of espresso powder or instant coffee into the milk before adding it to the batter. This simple step will significantly dial up the chocolate intensity and add a subtle complexity.
- Perfect Frosting Consistency: Room Temperature Cream Cheese: For a smooth, lump-free, and perfectly creamy frosting, it’s absolutely crucial to start with room temperature cream cheese. Cold cream cheese will resist blending evenly, leading to a lumpy texture that is hard to spread. Allowing it to soften on the counter for at least an hour before you begin will ensure it whips up beautifully with the sugar and heavy cream, creating that irresistible light and decadent frosting.
- Smart Frosting Application for Clean Edges: When you’re spreading the cream cheese whipped cream frosting between the bottom two layers, resist the urge to spread it all the way to the very edge of the cake. Instead, stop at least a ½-inch from the perimeter. As you add subsequent layers and the weight of the cake settles, the frosting will naturally spread outwards. This technique prevents the filling from squishing out excessively, keeping your cake’s sides clean and tidy. An offset spatula is an invaluable tool for this task, allowing you to spread the frosting with precision and ease.
Frequently Asked Questions
While our cream cheese whipped cream filling is undeniably delicious, the beauty of a chocolate cake lies in its versatility. You have several other fantastic options to consider, each offering a unique flavor and texture profile. A classic chocolate buttercream frosting provides a rich, dense, and sweet experience, perfect for those who love traditional flavors. For a more sophisticated and intensely chocolatey option, a smooth chocolate ganache offers a luxurious, glossy finish and deep cocoa flavor. Alternatively, a light and airy chocolate mousse can provide an elegant contrast to the dense cake layers, making for a decadent yet surprisingly light dessert. Experiment with these alternatives to find your perfect pairing!
The quest for a perfectly moist chocolate cake is a common one, and thankfully, there are several key strategies to ensure your cake is never dry. First and foremost, the golden rule is to never overbake. Overbaking is the quickest way to dry out a cake. Begin checking your cake a few minutes before the recipe’s suggested bake time using the toothpick test—insert it into the center; if it comes out clean or with a few moist crumbs, the cake is done. Remember that all ovens vary, so rely on your cake’s cues rather than strictly adhering to the clock. Additionally, you can brush each cooled cake layer with a simple syrup before assembly. Simple syrup is incredibly easy to make: just simmer equal parts granulated sugar and water until the sugar fully dissolves. Once cooled, lightly brush this syrup onto your cake layers. This step adds an extra boost of moisture, ensuring a tender, delectable cake that stays fresh longer.
More Decadent Chocolate Delights: You May Also Like
If your heart beats for chocolate, you’re in for a treat! Beyond this spectacular Triple Layer Chocolate Cake, there’s a whole world of rich, cocoa-infused desserts waiting to be explored. Here are some other favorites that are sure to satisfy your cravings:
- For a more modest yet equally fabulous chocolate fix, this Black Magic Snack Cake is an excellent choice, perfect for smaller gatherings or when you just need a personal slice of heaven.
- If you or your guests have gluten sensitivities, this exquisite Torta Caprese, an Italian flourless chocolate cake, offers intense chocolate flavor with a delightfully dense texture, proving that gluten-free can be absolutely decadent.
- Craving a cool, creamy treat without turning on the oven? The Mocha Chocolate Chip Cookie Icebox Cake is the ultimate no-bake dessert, combining layers of cookies, mocha cream, and chocolate chips for an irresistible experience.
- Don’t overlook a true retro classic: the Chocolate Mayonnaise Cake. If you haven’t tried this surprisingly moist and rich cake, prepare to be amazed – it’s truly out of this world!
- To elevate your cake presentation with stunning garnishes, learn how to make elegant chocolate curls and dramatic chocolate shards (complete with a helpful video tutorial). These simple additions can transform any dessert into a work of art.
- And for another comforting classic, this Easy German Chocolate Cake from Barbara Bakes is a reliable recipe that delivers on all fronts – rich chocolate, coconut-pecan frosting, and pure joy.
Stay connected with us for more delicious recipes and baking inspiration! Find us on social media @ Instagram, Facebook, and Pinterest. Don’t forget to tag us when you whip up one of our recipes! And if you absolutely love the results, please consider giving it a 5-star rating in the recipe card below – your feedback means the world to us.
Triple Layer Chocolate Cake Recipe
40 minutes
23 minutes
1 hour 3 minutes
12 servings
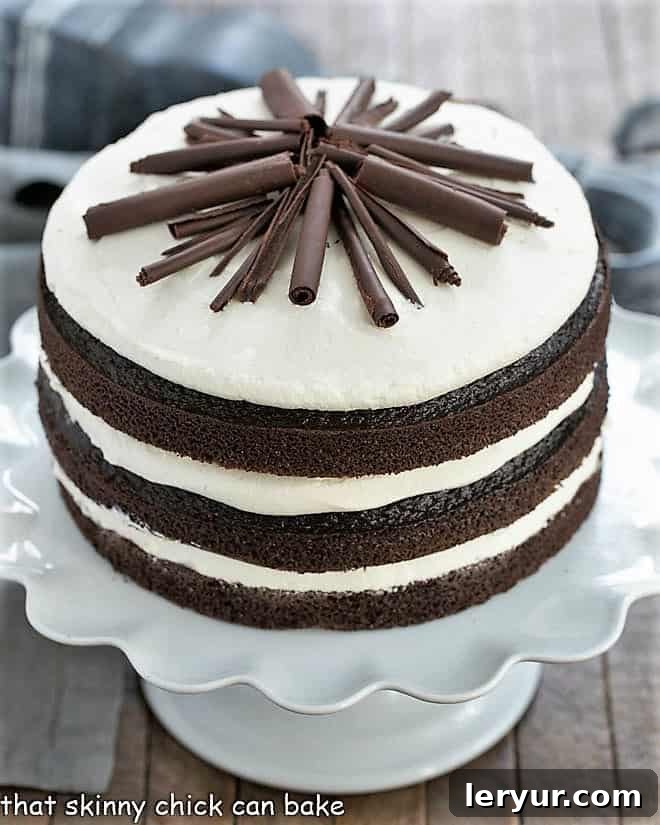
A magnificent Triple Layer Chocolate Cake, exquisitely moist and rich, crowned with a delicate whipped cream cheese frosting.
Ingredients
For the Cake:
- 2 ¼ cups all-purpose flour
- 2 cups granulated sugar
- ¾ cup unsweetened cocoa powder
- 1 ½ teaspoons baking powder
- 1 ½ teaspoons baking soda
- 1 teaspoon salt
- 2 large eggs
- 1 cup whole milk
- ½ cup canola oil
- 1 ½ teaspoons vanilla extract
- 1 cup hot brewed coffee
For the Cream Cheese Whipped Cream Frosting:
- 8 ounces cream cheese, softened to room temperature
- 1 cup granulated sugar
- 3 cups heavy cream, very cold
- 2 teaspoons vanilla extract
- Chocolate shavings or curls to garnish, optional
Instructions
- Preheat your oven to 350°F (175°C). Prepare three 9-inch round cake pans by thoroughly greasing and flouring them. For best results, line the bottoms with parchment paper rounds and grease the parchment as well. Set these prepared pans aside.
- In a large mixing bowl, whisk together the dry ingredients: granulated sugar, all-purpose flour, unsweetened cocoa powder, baking powder, baking soda, and salt. Ensure they are well combined.
- To the dry ingredients, add the eggs, whole milk, canola oil, and vanilla extract. Using an electric mixer, beat the mixture on medium speed for about 2 minutes until the batter is smooth and well incorporated.
- Carefully pour in the hot coffee and gently stir until just combined. The batter will be quite thin at this stage, which is perfectly normal for this recipe.
- Divide the thin batter evenly among the three prepared cake pans. For consistent layer heights, it’s highly recommended to use a kitchen scale to measure the batter accurately into each pan.
- Bake for 20-23 minutes, or until a wooden toothpick inserted into the center of a cake comes out clean. Let the cakes cool in their pans on a wire rack for 10 minutes before carefully inverting them onto the cooling racks to cool completely. It’s crucial that the cakes are fully cooled before frosting.
- To prepare the frosting, beat the room temperature cream cheese in a large bowl with an electric mixer until it is completely smooth and creamy. Gradually add the granulated sugar and continue beating until light and fluffy. Slowly pour in the very cold heavy cream and vanilla extract, then beat on high speed until the frosting reaches medium peaks – it should hold its shape but still be light and spreadable.
- To assemble your cake, place the first cooled cake layer onto your chosen serving plate or cake stand. Spread approximately one-third of the cream cheese frosting over this layer. Remember to leave about a ½-inch border around the perimeter, as the weight of the subsequent layers will cause the frosting to gently spread outwards.
- Carefully place the second cake layer on top of the first, pressing down gently. Repeat the frosting process with another one-third of the frosting, again leaving a small border. Finally, top with the third and final cake layer.
- Spread the remaining frosting over the top and sides of the entire cake, decorating as desired. Garnish with chocolate shavings or curls for an extra touch of elegance, if using. Serve immediately or refrigerate until ready to enjoy.
Notes
Adapted from a cherished recipe found in Fine Cooking magazine.
Nutrition Information:
Yield:
12
Serving Size:
1 slice
Amount Per Serving:
Calories: 680Total Fat: 39gSaturated Fat: 19gTrans Fat: 1gUnsaturated Fat: 17gCholesterol: 119mgSodium: 492mgCarbohydrates: 75gFiber: 2gSugar: 54gProtein: 8g
HOW MUCH DID YOU LOVE THIS RECIPE?
Please leave a comment on the blog or share a photo on Pinterest