
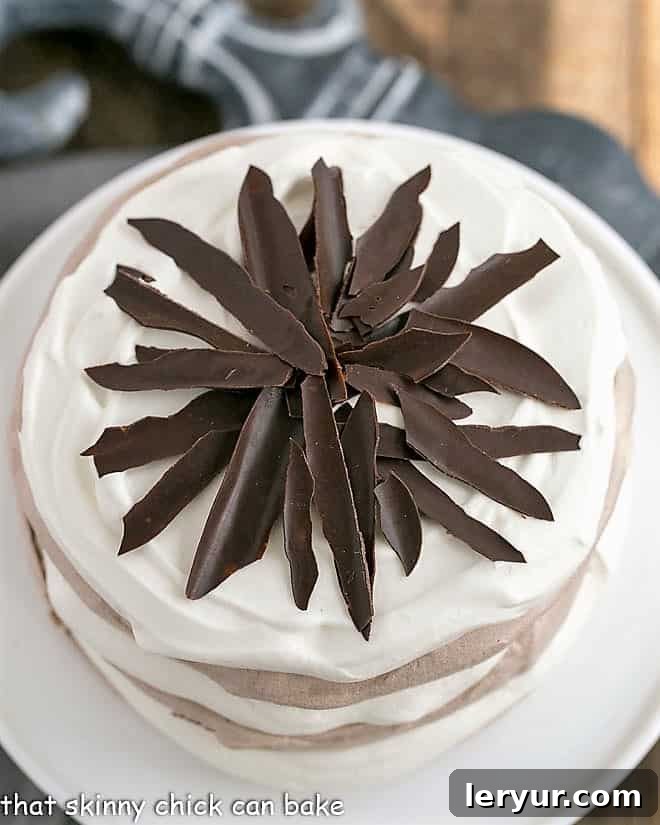
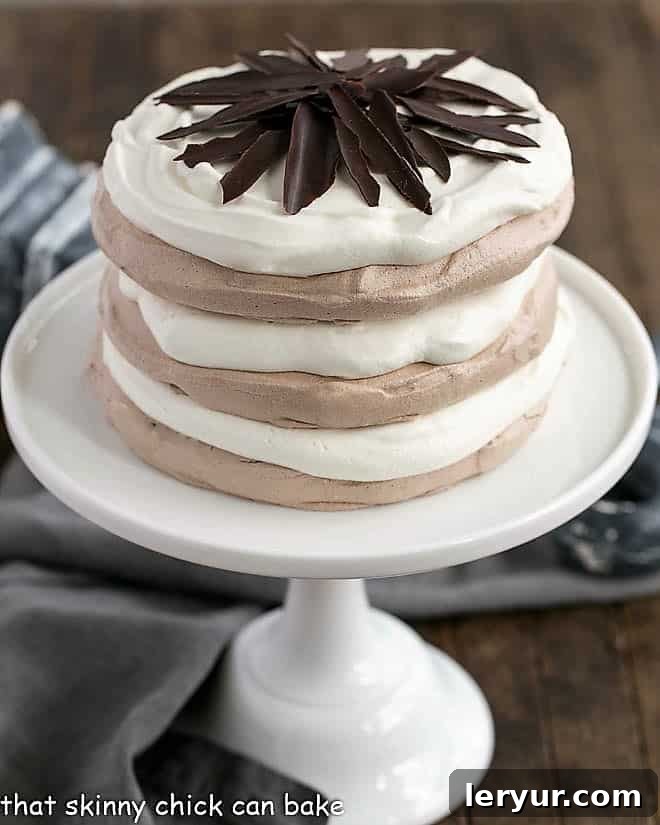
Imagine a dessert that’s both decadently chocolatey and incredibly light, a masterpiece inspired by a dreamy magazine photo. This Layered Chocolate Meringue Cake, often referred to as a Chocolate Pavlova Cake, delivers exactly that. It features three airy chocolate pavlovas, delicately crisp on the outside and wonderfully chewy within, generously layered with sweet, cloud-like whipped cream. Crowned with elegant chocolate shards, this cake isn’t just a dessert; it’s a magnificent culinary experience that promises to impress.
Elevate Your Dessert Game: Why This Layered Chocolate Pavlova Cake is a Must-Try
This exquisite dessert is a revelation, especially for those who adore chocolate but sometimes find traditional chocolate cakes too rich or heavy. Its gluten-free nature makes it a perfect choice for a wider audience, ensuring everyone can indulge in its unique charm. Here’s why this Layered Chocolate Meringue Cake will become your new go-to:
- Perfectly Balanced Chocolate Indulgence: Unlike dense chocolate cakes with overpowering frostings, these chocolate meringues offer a subtle yet satisfying cocoa flavor. The light touch of cocoa powder in the pavlova layers is beautifully complemented by vanilla whipped cream and a topping of crisp chocolate shards. It’s a harmonious blend that provides a genuine chocolate fix without being overwhelming, making it a scrumptious and sophisticated combination.
- Ideal for Any Season, Especially Warmer Months: With its cool and light texture, this cake is an impressive hot weather treat. The airy meringue and fresh whipped cream create a refreshing dessert experience, offering a delightful contrast to heavier baked goods. It’s perfect for summer gatherings, garden parties, or whenever you crave something elegant yet refreshingly sweet.
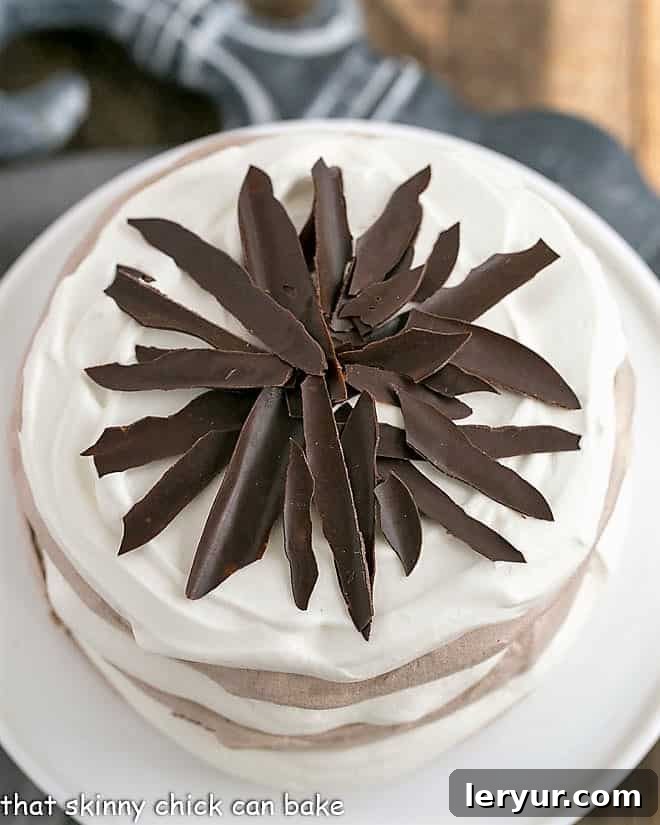
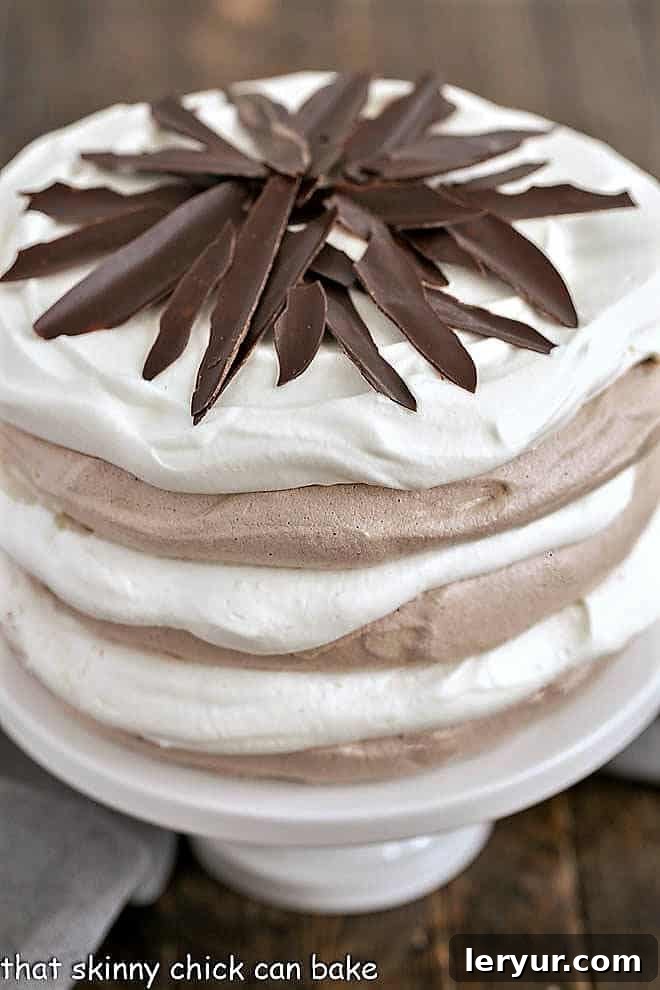
- A Feast for the Senses: Light, Luscious, and Visually Stunning: This chocolate meringue cake is truly a masterpiece of texture and flavor. Each bite offers a delightful crunch from the meringue exterior, yielding to a soft, marshmallow-like center, all enveloped in smooth, creamy whipped cream. The visual appeal is undeniable – three perfectly stacked layers crowned with chocolate shards make for an exceptionally lovely and show-stopping presentation that will earn you endless compliments.
- Naturally Gluten-Free Elegance: For those with dietary restrictions or simply seeking a lighter alternative, this pavlova cake is a dream come true. Crafted without flour, it offers a sophisticated gluten-free dessert option that doesn’t compromise on taste or elegance, allowing everyone to enjoy a slice of this magnificent creation.
Mastering the Art: Essential Tips for Perfect Meringues and Pavlovas
Creating beautiful meringues and pavlovas can seem intimidating, but with a few key techniques and careful attention to detail, you’ll achieve stunning results every time. While they have distinct characteristics, many foundational rules apply to both light and airy desserts.
The Foundation: Perfecting Your Egg Whites
- PRO-Tip: Room Temperature Egg Whites Are Non-Negotiable. For optimal volume and stability when whipping, your egg whites must be at room temperature. This allows the proteins to relax and incorporate more air, resulting in a lighter, fluffier meringue. However, separating eggs is much easier when they are cold, as the yolks are less prone to breaking.
- The Smart Separation Method: To combine the best of both worlds, I highly recommend separating your eggs while they are cold, directly out of the refrigerator. Once separated, cover the egg whites with plastic wrap and let them come to room temperature for about 30-60 minutes before you begin whipping. Save your precious yolks for other culinary delights like rich ice creams, creamy puddings, or decadent custards such as crème brûlée.
- The Three-Bowl Rule for Purity: Fat is the sworn enemy of whipped egg whites. Even a minuscule speck of yolk can prevent your whites from whipping properly, leaving you with a sad, soupy mixture. To guarantee absolutely yolk-free whites, employ the three-bowl method:
- Designate one bowl for your clean egg whites.
- Have another bowl ready for your separated yolks.
- Use a third, smaller bowl to crack and separate each egg individually. After successfully separating a white in this individual bowl, transfer it to your designated whites bowl. Add the yolk to the yolks bowl, and then proceed with the next egg in the clean separation bowl.
This meticulous process acts as a safeguard. If a yolk breaks during separation, you can simply set aside that single contaminated white for scrambled eggs or another use, rather than spoiling your entire batch of egg whites.
- Scrupulous Cleanliness is Key: Your mixing bowls and beaters must be impeccably clean and completely grease-free. Residue from previous baking, even an invisible film, will prevent egg whites from aerating. I always ensure my mixer bowl and beaters have been thoroughly washed, ideally in a dishwasher, to eliminate any trace of fat. This critical step ensures your egg whites can achieve maximum volume and stiffness.
The Transformation: Achieving Stiff, Glossy Whites
- PRO-Tip: Opt for Superfine Sugar for Best Results. Using superfine sugar, often labeled as caster sugar, is highly recommended as it dissolves much more easily and quickly into the egg whites than regular granulated sugar. This helps prevent a gritty texture in your finished meringue. While not strictly required, it significantly contributes to a smoother, more stable meringue.
- The Truth About Homemade Superfine Sugar: You might be tempted to make your own superfine sugar by processing granulated sugar in a food processor. However, professional bakers often advise against this. The sharp, irregularly shaped grains produced by home processing don’t dissolve as smoothly as commercially milled superfine sugar, which can still lead to a slightly gritty meringue.
- Slow and Steady Sugar Addition: Patience is a virtue when adding sugar to egg whites. Introduce the sugar slowly, about 2 tablespoons at a time, while continuously beating. This gradual addition gives the egg whites ample opportunity to fully dissolve the sugar, preventing the meringue from weeping or becoming grainy. To check for dissolution, rub a tiny bit of the mixture between your thumb and index finger. If it feels gritty, continue mixing for a bit longer. Remember, a slight grit is preferable to an overbeaten, dry meringue.
- Know When to Stop: Your meringue is perfectly whipped when it is thick, glossy, and holds stiff peaks. When you lift the beaters, the peaks should stand firm and upright without collapsing. The mixture should also have a beautiful sheen, indicating that the sugar has fully dissolved and the air is well incorporated.
The Gentle Bake: Achieving Pavlova Perfection
- Low and Slow for Ideal Texture: Unlike typical cakes or cookies that bake at higher temperatures, pavlovas require a significantly lower oven temperature over a longer period. This gentle baking process allows the meringue to slowly dry out and crisp on the outside while maintaining its characteristic soft, chewy, marshmallow-like interior. For this recipe, expect a 3-hour bake time.
- The Crucial Cool-Down Period: The baking process doesn’t end when you turn off the oven. This recipe necessitates an additional 3-hour cooling and drying period *inside* the oven after the initial baking time. This extended cooling ensures the pavlovas fully set and dry without cracking excessively or collapsing due to a sudden temperature change. It’s vital to resist the urge to open the oven door during this time.
- PRO-Tip: Prevent Accidental Oven Use. To avoid inadvertently turning on the oven or opening the door during the critical cooling phase, place a visible reminder, such as a Post-It note, on your oven door. This simple trick can save your perfectly baked pavlovas from an untimely demise.
- Uniformity for Elegant Stacking: The 7-inch circles you drew on each piece of parchment paper are your guide for creating uniformly sized meringue layers. This ensures a stable and visually appealing stacked cake. An offset spatula is an invaluable tool for spreading the meringue evenly within these circles and smoothing the tops and sides for a polished finish.
- Managing Multiple Baking Sheets: If you only have two baking sheets, don’t fret. You can easily bake one meringue on one sheet and the remaining two on the second sheet. Just ensure there’s adequate space between them for even air circulation, which is crucial for proper drying.
Presentation Prowess: Serving Your Elegant Meringue Cake
- Choosing the Right Platform: While a tall cake stand makes for a beautiful photograph, slicing this delicate, layered dessert on a pedestal can be challenging. For ease of serving and to prevent spills, I highly recommend transferring the assembled cake to a flat cake plate or a large, sturdy platter before slicing. This provides a more stable surface and makes serving each slice much simpler.
- PRO-Tip: The Heated Serrated Knife Technique. Attempting to slice through crisp meringue and creamy whipped cream can be messy, leading to oozing cream and crumbly layers. My secret to achieving clean, elegant slices is to use a heated serrated knife. Simply run your serrated knife under very hot water for about 30 seconds, then quickly dry it off with a clean towel. The warmth of the blade will glide effortlessly through the meringue and cream, creating neat, beautiful portions without crushing the delicate layers. Repeat this heating and drying process for each slice as needed.
- Garnish Just Before Serving: For the freshest look and best texture, add your final garnishes, like chocolate shards or fresh berries, just before serving. This ensures the chocolate remains crisp and any fruit looks vibrant.
Frequently Asked Questions About Meringues and Pavlovas
Both meringues and pavlovas are exquisite desserts made primarily from whipped egg whites and sugar. However, they are not entirely interchangeable culinary terms, and their textures are distinct. A classic meringue is typically crisp and brittle throughout, baked until completely dry. In contrast, a traditional pavlova boasts a unique dual texture: a beautifully crisp, shell-like exterior that gives way to a soft, fluffy, marshmallow-like, and delightfully chewy center. This characteristic “squidgy” interior, as Nigella Lawson famously describes it, is what truly sets a pavlova apart.
If we adhere strictly to the classic definitions, this cake is indeed made of three pavlovas, hence making it a magnificent pavlova cake. The key distinction lies in the ingredients. While meringues are typically composed solely of egg whites and sugar, pavlovas include the addition of a small amount of cornstarch and an acidic component (often vinegar or lemon juice). These extra ingredients are crucial for creating the signature soft, chewy, marshmallow-like interior that defines a pavlova. In this particular recipe, my additions of cornstarch and lemon juice provide the necessary acid and structure for that classic pavlova texture. That said, both terms are often used somewhat interchangeably in home kitchens, so whether you call it a “Layered Chocolate Meringue Cake” or a “Chocolate Pavlova Cake,” its deliciousness remains undisputed!
Absolutely! The beauty of pavlova layers is that they can be prepared ahead of time, which makes this dessert perfect for entertaining. The baked and thoroughly cooled pavlova discs, once completely dry, can be stored in an airtight container at room temperature for up to 2-3 days. Make sure they are fully cool before storing to prevent condensation. The whipped cream, however, should be prepared and the cake assembled no more than a few hours before serving. This ensures the cream remains fresh and voluminous, and the pavlova layers retain their crispness. Assembled cakes are best enjoyed within a few hours to prevent the meringue from softening too much from the moisture of the cream.
Leftovers of the assembled cake should be stored in an airtight container in the refrigerator. While the pavlova may soften slightly from the moisture of the whipped cream, it will still be delicious. It’s best consumed within 1-2 days for optimal texture and flavor. If you anticipate having leftovers, consider assembling only a portion of the cake and storing the remaining pavlova layers and whipped cream separately until ready to serve. This way, you can enjoy freshly assembled slices later!
Explore More Meringue & Pavlova Delights:
- Chocolate Raspberry Pavlova
- Individual Raspberry Pavlovas
- Lemon on a Cloud
- Easy Meringue Cookies
- Plus, discover all my other incredible Best Dessert Recipes!
Stay connected with us for more delicious recipes and baking inspiration! Follow on Instagram, Facebook, and Pinterest. Don’t forget to tag us when you create one of our recipes! And if you absolutely adore the results, please consider leaving a 5-star rating in the recipe card below.
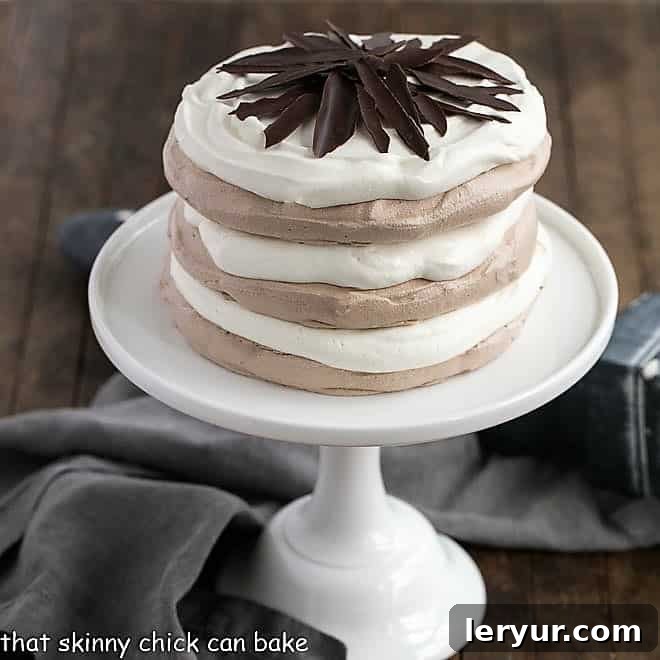
Layered Chocolate Meringue Cake (Chocolate Pavlova Cake)
30 minutes
3 hours
3 hours 30 minutes
12 servings
Three exquisite, light chocolate pavlova layers embrace sweet whipped cream, crowned with elegant chocolate shards for a truly unforgettable and impressive dessert!
Ingredients
- 6 large egg whites, at room temperature
- 1 ½ cups superfine sugar (caster sugar; granulated sugar can be used if superfine is not available)
- 1 ½ tablespoons of cornstarch
- 3 tablespoons good quality unsweetened cocoa powder
- 1 teaspoon fresh lemon juice
- 2 cups heavy cream (cold)
- ½ cup powdered sugar (confectioners’ sugar)
- 1 teaspoon pure vanilla extract
- Chocolate shards, curls, or grated chocolate for garnish
Instructions
- Prepare Baking Sheets: Preheat your oven to 225°F (107°C). Line three separate baking sheets with parchment paper. Using a pencil, draw a 7-inch (approx. 18 cm) circle on each piece of parchment, then flip the paper over so the pencil mark is on the underside (this prevents transfer to your meringue). Set these prepared sheets aside.
- Combine Dry Ingredients: In a small bowl, whisk together the superfine sugar and cornstarch until well combined. This mixture will be added to the egg whites. Set aside.
- Whip Egg Whites: In the very clean bowl of a stand mixer fitted with a whisk attachment (or using a hand mixer), beat the room temperature egg whites on medium-high speed until they become frothy and then satiny in appearance, forming soft peaks. Gradually, about 2 tablespoons at a time, add the sugar and cornstarch mixture, continuing to beat on high speed. Continue beating until the meringue is very thick, glossy, and holds stiff, firm peaks. Gently sift the cocoa powder over the meringue and fold it in with a spatula until just combined, being careful not to deflate the mixture. Finally, add the lemon juice and fold in briefly.
- Shape and Bake Pavlovas: Divide the chocolate meringue mixture evenly among the three prepared baking sheets, carefully spreading it within the 7-inch circles you drew. Use an offset spatula to smooth the tops and edges of each pavlova disc for an even appearance. Place the baking sheets in the preheated oven and bake for 3 hours. After 3 hours, the pavlovas should be dry to the touch on the edges and top, and may show some characteristic cracks. Turn off the oven, but leave the pavlova discs inside for an additional 3 hours (or even overnight) to cool down and dry out completely. Do NOT open the oven door during this crucial cooling period.
- Prepare Whipped Cream: Once the pavlova layers are completely cool, prepare the whipped cream. In a chilled large bowl, whip the cold heavy cream with powdered sugar and vanilla extract until stiff peaks form. Be careful not to overbeat, or it will turn grainy.
- Assemble the Cake: To serve, carefully place one cooled pavlova disc on your chosen serving plate. Spread about 1 to 1⅓ cups of the prepared whipped cream evenly over the first pavlova layer. Gently place the second pavlova disc on top, repeating with another layer of whipped cream. Place the third pavlova disc on top, and finish with the remaining whipped cream.
- Garnish and Serve: Garnish the top of the cake with an abundant scattering of chocolate shards, chocolate curls, or grated chocolate, as desired. For the best presentation and texture, assemble the cake no more than a few hours before serving. Use a heated serrated knife (warmed under hot water and dried) to slice the cake cleanly. Enjoy this magnificent dessert!
Notes
The absolute cleanliness of your mixing bowl and beaters is paramount, and ensure there is no trace of egg yolk in your egg whites. Any fat will prevent your egg whites from whipping properly to their full volume.
This impressive recipe draws inspiration from Nigella Lawson’s renowned chocolate pavlova and the delightful Chocolate-Coconut Pavlova Cake featured in Southern Living, combining the best elements for an unparalleled dessert experience.
Recommended Baking Tools
As an Amazon Associate and member of other affiliate programs, I earn from qualifying purchases.
- KitchenAid KSM150PSER Artisan Tilt-Head Stand Mixer with Pouring Shield, 5-Quart, Empire Red
- Reynolds Kitchens Non-Stick Baking Parchment Paper Sheets – 12×16 Inch, 22 Count
- USA Pan Bakeware Half Sheet Pan
Nutrition Information:
Yield:
12
Serving Size:
1 slice
Amount Per Serving:
Calories: 267Total Fat: 15gSaturated Fat: 9gTrans Fat: 0gUnsaturated Fat: 4gCholesterol: 45mgSodium: 39mgCarbohydrates: 32gFiber: 0gSugar: 31gProtein: 3g
HOW MUCH DID YOU LOVE THIS RECIPE?
Please leave a comment on the blog or share a photo on Pinterest