
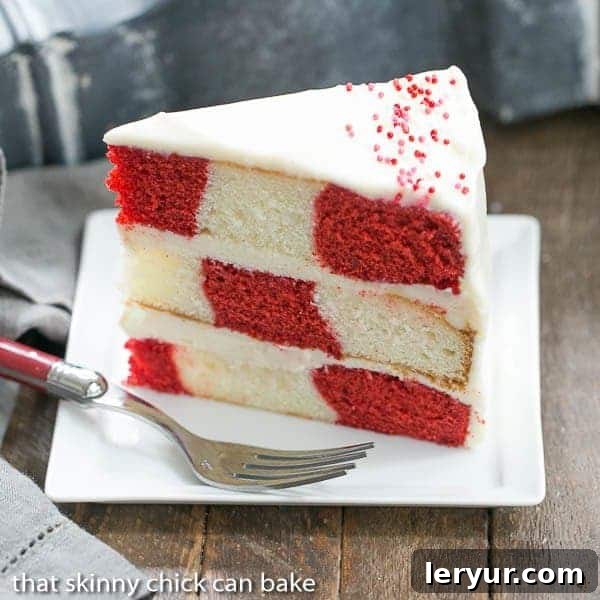
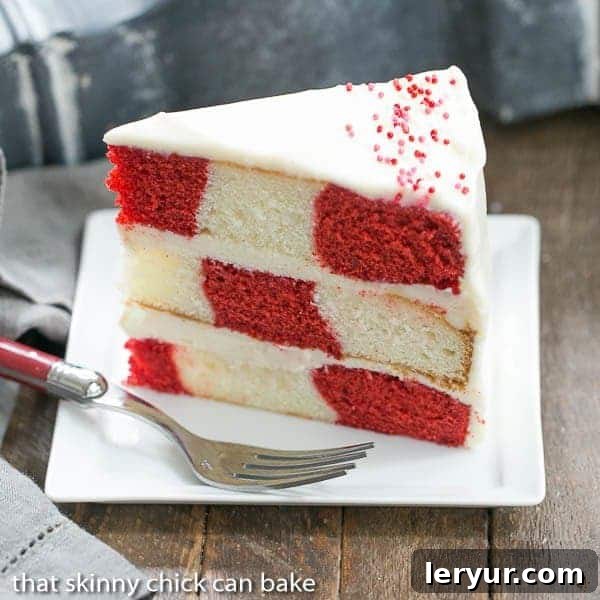
Every special occasion calls for a showstopping dessert, and few cakes capture attention quite like a beautifully crafted checkerboard cake. This year, for a memorable birthday celebration, the challenge was set: to create a stunning Red Velvet Checkerboard Cake. While the thought of tackling such an intricate design might seem daunting, the impressive result is truly worth every moment spent in the kitchen. Imagine slicing into a moist, vibrant red velvet cake interwoven with contrasting white cake, all enveloped in a rich, tangy cream cheese frosting – it’s a visual and culinary delight that promises to be the highlight of any festive table.
A Checkerboard Cake, especially one featuring the beloved combination of red velvet and white cake, crowned with classic cream cheese frosting, transforms an ordinary dessert into an unforgettable experience. Each bite delivers a perfect balance of flavors and textures, making this Red Velvet Cake Design a definitive winner for birthdays, holidays, or any celebratory gathering.
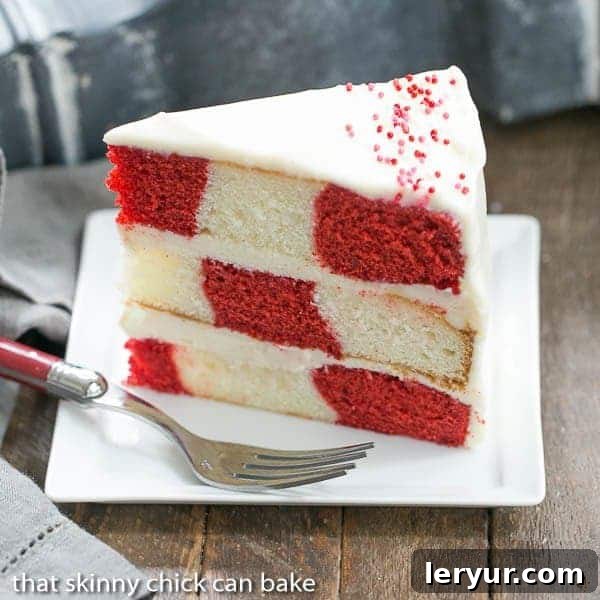
Why You Must Make This Stunning Red Velvet Checkerboard Cake
The journey to creating this spectacular cake often begins with inspiration. For many home bakers, a visit to a craft store can spark creativity. That’s precisely what happened when a Wilton Checkerboard Cake Pan Set caught my eye. Faced with the delightful challenge of bringing a stunning vision to life, I knew this specialized equipment would be invaluable, quickly finding its way into our shopping cart.
Venturing into a checkerboard cake was a new experience for me, and I approached it with a mix of excitement and trepidation. While no first attempt is ever absolutely perfect, I was incredibly proud that this Red Velvet Checkerboard Cake came together beautifully and was far from a “disaster.” The ultimate judge, the birthday girl herself, was absolutely thrilled, and that’s truly what matters most. The joy on her face made every step of the baking process worthwhile.
Beyond personal satisfaction, there are several compelling reasons why this cake belongs on your baking bucket list:
- A Rewarding Baking Project: If you possess a passion for baking and enjoy a creative challenge, this recipe offers immense satisfaction. It’s a project that builds confidence and produces spectacular results.
- Unforgettable Presentation: Without a doubt, this is one of the most impressive cakes to ever emerge from my kitchen. When sliced, the striking checkerboard pattern elicits gasps of delight and is an instant conversation starter. For any upcoming celebration, a homemade checkerboard cake makes an elegant and beautiful statement.
- Endless Customization: The beauty of the checkerboard design lies in its versatility. While red velvet and white cake is a classic pairing, you can easily experiment with different cake flavors and vibrant food colorings to match any theme or occasion. Imagine a chocolate and vanilla checkerboard, or perhaps a festive green and red for the holidays!
- Mastering a New Skill: Successfully creating a checkerboard cake elevates your baking prowess. It teaches precision and patience, and the techniques learned can be applied to other intricate cake designs.
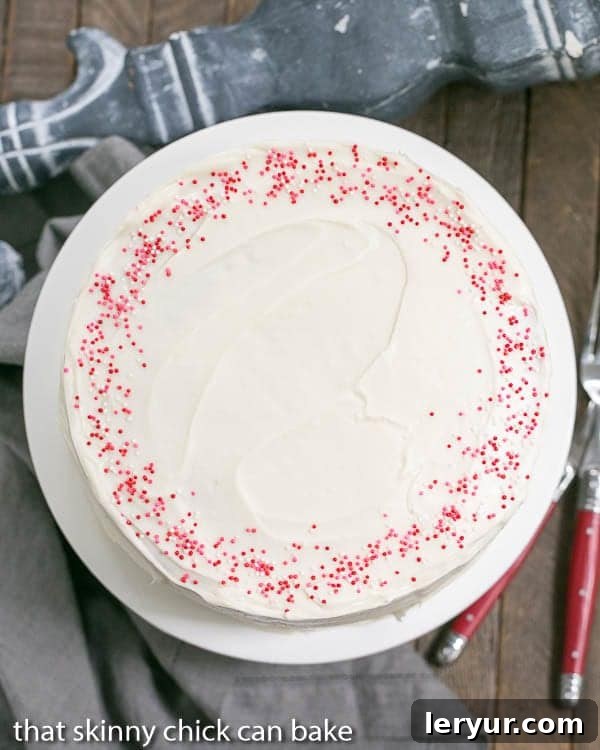
Expert Tips for a Flawless Checkerboard Cake
Creating a stunning checkerboard cake is achievable with a little patience and the right techniques. These expert tips will guide you through the process, helping you achieve beautiful, defined patterns every time:
- Efficient Batter Application: For precise and clean lines, transfer each of your colored batters into large piping bags or sturdy gallon-sized zip-top bags. Snip off about a half-inch from one corner of the bag. This method allows for controlled piping into the sections of the plastic divider ring, preventing colors from bleeding. Remember not to overfill your cake pans; aim for approximately two-thirds full to prevent spillage and ensure even baking.
- The Divider Lift Technique: This is perhaps the most crucial step for a crisp checkerboard. After carefully adding your batters, gently but firmly pull the divider straight up and out of the pan. Avoid wiggling or twisting, as this can blur the distinct lines between the colors. A swift, upward motion helps the batter settle into sharp blocks rather than wavy patterns. Don’t worry if it’s not absolutely perfect the first time; practice makes perfect, and once the divider is removed, there’s no going back!
- Cleanliness is Key: To maintain vibrant, unmarred colors, it’s essential to wash and thoroughly dry the plastic divider ring after each use. This prevents any leftover batter from mixing with the next batch and ensures that each cake layer features distinct, clean patterns.
- Leveling Your Cake Layers: Baked cake layers often have slightly domed tops. While you can trim a bit off to even them out, be mindful not to remove too much, which could result in very thin layers. For perfectly flat cakes, a serrated knife and a steady hand work wonders. Even layers are vital for a stable, attractive stacked cake.
- Simplify with Box Mixes: If you’re looking to streamline the baking process, feel free to use two different flavored or colored box cake mixes. This saves time without sacrificing the impressive visual effect. Any excess batter from your cake pans can be baked into delightful cupcakes – a bonus treat!
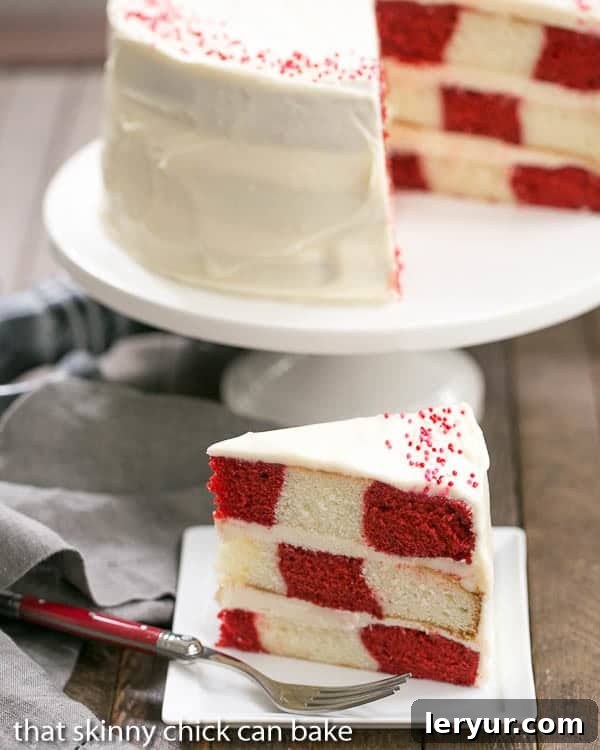
- Strategic Layer Arrangement: To achieve the iconic checkerboard pattern when the cake is sliced, you need to alternate your layers strategically. Make two of your cake layers with the same pattern (e.g., dark outer ring, light middle ring, dark center ring). Then, create one layer with the opposite pattern (e.g., light outer ring, dark middle ring, light center ring).
- Assembling the Masterpiece: When stacking your cake, place one of the two identically patterned layers on the bottom. Follow this with the oppositely patterned layer in the middle. Finally, top it with the remaining identically patterned layer. This arrangement ensures that when sliced, each piece reveals the stunning, alternating checkerboard design.
Helpful Tools for Baking Your Checkerboard Cake
Having the right tools can make all the difference in creating a successful and enjoyable baking experience, especially with a cake as unique as the checkerboard. Here are some indispensable items that will assist you:
- Wilton Checkerboard Cake Pan Set: This specialized set is highly recommended for beginners and experienced bakers alike, simplifying the process of creating the distinct colored layers. (All Amazon links)
- Norpro Checkerboard Cake Pan Set: An alternative, often praised for its sturdier design and positive reviews, offering another excellent option for achieving perfect checkerboard patterns.
- OXO Offset Spatula: Essential for smoothly spreading batter into the pan sections and for effortlessly frosting your finished cake.
- Cooling Rack: Crucial for allowing your cake layers to cool completely and evenly, preventing them from becoming soggy.
- Vanilla Bean Paste: Elevates the flavor of your white cake and cream cheese frosting with its rich, aromatic vanilla essence and visible vanilla bean specks.
Now that I own the necessary equipment, I’m certainly looking forward to trying another checkerboard cake in the future. However, it might take a little while to recover from the delightful, flour-dusted “disaster zone” my kitchen became during this fun and ambitious project!
The Magic of Red Velvet and Cream Cheese Frosting
Red Velvet cake holds a special place in the hearts of dessert lovers, famed for its striking color, subtly chocolatey flavor, and incredibly moist crumb. The vibrant hue, traditionally achieved with a hint of cocoa and a generous amount of red food coloring, makes it visually captivating. When paired with a contrasting white cake, the effect is truly magnificent. But what truly completes any Red Velvet creation is the decadent cream cheese frosting. Its slight tang beautifully cuts through the sweetness of the cake, creating a harmonious flavor profile that is utterly irresistible. This frosting isn’t just a topping; it’s an integral part of the Red Velvet experience, providing a luxurious finish and binding the layers together with its creamy texture.
Frequently Asked Questions About Checkerboard Cakes
There are two primary methods for creating the captivating checkerboard pattern within your cake. The first, and often most straightforward, is to purchase a specialized checkerboard cake pan set. These kits typically include three round cake pans and a plastic divider ring that fits into the pans. This divider helps separate your different colored batters into concentric rings as you fill each pan. Once the batter is poured, the divider is carefully removed, leaving distinct colored sections. This method is excellent for achieving consistent results with minimal fuss.
Alternatively, for those without a specialized pan, you can bake 3-4 standard cake layers using two different colored batters (e.g., red and white). After baking and cooling, you would use various sized round cookie cutters (typically 2-inch, 4-inch, and 6-inch diameters) to cut rings from each layer. For example, you might cut a small round from the center of a red layer, and then use a larger cutter to make two rings. You then reassemble each layer, alternating the colors of the rings. For instance, a red outer ring, a white middle ring, and a red center. When stacking, it’s crucial to alternate the patterns of your assembled layers to ensure the checkerboard effect. For this recipe, I opted for the easier route by using a Checkerboard Cake Pan Kit, which simplified the process considerably. Remember to vary the color arrangement in your individual layers so that not all three cakes have the exact same pattern; this is key for the final checkerboard assembly.
Checkerboard cake pans operate on a simple yet ingenious principle. The kit usually includes standard round cake pans along with a removable plastic divider. This divider typically has three concentric rings, creating three distinct sections within the pan. To use it, you place the divider into a greased and floured cake pan. Then, you alternate piping your different colored batters into these sections. For example, you might pipe red batter into the outermost and innermost rings, and white batter into the middle ring. Once the batter is evenly distributed, you carefully lift the divider straight up and out of the pan, leaving the batters in their distinct ring patterns. This process is then repeated for the remaining cake layers, ensuring you vary the color placement in each layer to create the alternating pattern needed for the final checkerboard effect. The cakes are then baked, cooled, and stacked with alternating patterns to reveal the impressive design when sliced.
You May Also Like: These Delicious Red Velvet Desserts
- Red Velvet Marble Cake Recipe from Grandbaby Cakes
- Gooey Red Velvet Brownie Cake from Beyond Frosting
- Red Velvet Crepes from Tidy Mom
- Easy Red Velvet Fudge
- Red Velvet Thumbprints
- Red Velvet Brownies with White Chocolate Icing
- More of the Best Dessert Recipes
- More of the Best Cake Recipes
Stay connected and share your baking adventures with me through social media! Find me on Instagram, Facebook, and Pinterest. Don’t forget to tag me when you try one of my delicious recipes! If you love the results, please consider giving it a 5-star rating in the recipe card below – your feedback means the world to me.
Red Velvet Checkerboard Cake Recipe
1 hour
28 minutes
1 hour 28 minutes
16 servings
With the right equipment and a few tips, you can make this impressive Red Velvet Checkerboard Cake at home!
Ingredients
Red Velvet Cake:
- 3 cups cake flour
- 2 tablespoon unsweetened cocoa
- 1 teaspoon baking soda
- 1 teaspoon baking powder
- 1/2 teaspoon salt
- 1-2/3 cups sugar
- 1/2 cup butter (4 ounces), at room temperature
- 4 egg whites
- 2 cups buttermilk
- 1 (1 oz) bottle red food coloring
- 1 tsp vanilla
White Cake:
- 2-1/4 cups cake flour
- 2 teaspoons baking powder
- 1/2 teaspoon baking soda
- 1/4 teaspoon salt
- 1/4 cup whole milk
- 1/2 teaspoon vanilla bean paste
- 1/2 cup buttermilk
- 1 tablespoon fresh lemon juice
- 1-3/4 sticks butter (7 ounces), at room temperature
- 1-1/2 cups sugar
- 4 egg whites, lightly beaten
Cream Cheese Frosting:
- 16 ounces cream cheese, cold
- 12 tablespoons butter, at room temperature
- 4 teaspoons vanilla
- 6 cups powdered sugar
Instructions
- Preheat the oven to 350ºF (175ºC). Grease 3 9-inch cake pans (I used the ones in the checkerboard cake kit). Line bottoms with parchment paper and grease the top of the parchment. Set aside.
- Prepare the red velvet cake batter.
- In a medium bowl, combine the flour, cocoa, baking soda, baking powder, and salt. Whisk thoroughly to combine. Set aside.
- In the bowl of a stand mixer fitted with the paddle attachment, beat granulated sugar and butter at medium speed for 4 minutes or until well blended and creamy.
- Add egg whites to the sugar mixture; beat at medium speed for 5 minutes or until the mixture is light and fluffy.
- In a small bowl, combine buttermilk, red food coloring, and vanilla. Stir well with a whisk.
- With the mixer on medium speed, gradually add one-third of the flour mixture, then half of the buttermilk mixture, followed by another third of the flour mixture, and then the rest of the buttermilk mixture. Add the remaining flour mixture last and mix just until moistened and no dry streaks remain. Be careful not to overmix.
- Spoon the red velvet batter into a gallon-size zip-top bag or a large pastry bag. Seal the bag. When you’re ready to pipe the batter, cut off about ½-inch from one corner.
- Wash your mixer bowl and beater thoroughly before proceeding to the next batter.
- Prepare the white cake batter.
- In a medium bowl, whisk together the flour, baking powder, baking soda, and salt. Set aside.
- In a separate small bowl, mix together the whole milk, vanilla bean paste, buttermilk, and fresh lemon juice. Set aside.
- In the clean bowl of a stand mixer fitted with the paddle attachment, beat the butter on medium speed until it lightens in color and becomes creamy, about 1 minute.
- Gradually add the sugar in a steady stream while the mixer is running, stopping to scrape down the sides of the bowl after all is added. Continue to beat on medium speed until the mixture is very light in color and fluffy, about 3 to 4 minutes.
- With the mixer on medium speed, add the egg whites, approximately a tablespoon at a time, beating after each addition until fully incorporated before adding more. If the batter appears watery at any point, stop adding egg whites, increase mixer speed, and beat until the batter looks smooth again. Continue to beat, scraping down the sides and bottom of the bowl once or twice, until all of the egg whites are added and the mixture is fluffy.
- With the mixer on low speed, add the flour mixture in three additions, alternating with the buttermilk mixture in two additions. Begin and end with the flour mixture. Stop the mixer after each addition to scrape down the sides of the bowl. Mix just until combined.
- Transfer enough white batter to fill a pastry bag about halfway full, similar to the red velvet batter.
- To make the cream cheese frosting, in a stand mixer, beat together the cold cream cheese and room temperature butter just until blended and smooth. Add the vanilla extract and mix until combined. Gradually mix in the powdered sugar, about 2 cups at a time, beating until the frosting is smooth and light.
- To create the cake layers, place the divider into one of the prepared 9-inch cake pans. Using the piped bags, start with the red batter and pipe it into the outside ring and the center ring, filling only about two-thirds full.
- Next, pipe the white cake batter into the middle ring of the same pan. Carefully pull the divider straight up and out of the pan. Wash and thoroughly dry the divider before repeating this process with the second cake pan.
- For the third layer, remove the divider, wash and dry it again. Then, pipe the white batter into the outside and middle rings, and pipe the red batter into the center ring. Remove the divider.
- If you have any extra batter, use it to bake delightful cupcakes (these typically bake in about 20 minutes).
- Bake the cake layers in the preheated oven for about 28 minutes, or until a wooden toothpick inserted into the center of a cake comes out clean. Cool the cakes in their pans for 10 minutes, then invert them onto wire racks to finish cooling completely.
- To assemble your Red Velvet Checkerboard Cake, place one of the two identically patterned cake layers onto your chosen cake plate or serving stand. If your cake layers are slightly rounded, gently level them by carefully slicing off the rounded top with a serrated knife for a flat surface.
- Spread a generous layer of cream cheese frosting evenly over the first cake layer.
- Carefully place the non-matching patterned layer on top of the frosted layer, ensuring it is centered.
- Spread another layer of frosting evenly over the middle cake layer.
- Finally, top with the last remaining identically patterned cake layer.
- Frost the top and sides of the entire cake smoothly with the remaining cream cheese frosting. Garnish with sprinkles or additional red velvet crumbs if desired for an extra festive touch.
- Store the finished cake in the refrigerator. Allow it to come to room temperature for about 15-20 minutes before serving for the best flavor and texture.
Notes
This recipe is adapted from Cookie Baker Lynn.
Nutrition Information:
Yield:
16
Serving Size:
1 slice
Amount Per Serving:
Calories: 1227Total Fat: 48gSaturated Fat: 30gTrans Fat: 2gUnsaturated Fat: 14gCholesterol: 129mgSodium: 798mgCarbohydrates: 193gFiber: 1gSugar: 144gProtein: 10g
HOW MUCH DID YOU LOVE THIS RECIPE?
Please leave a comment on the blog or share a photo on Pinterest