
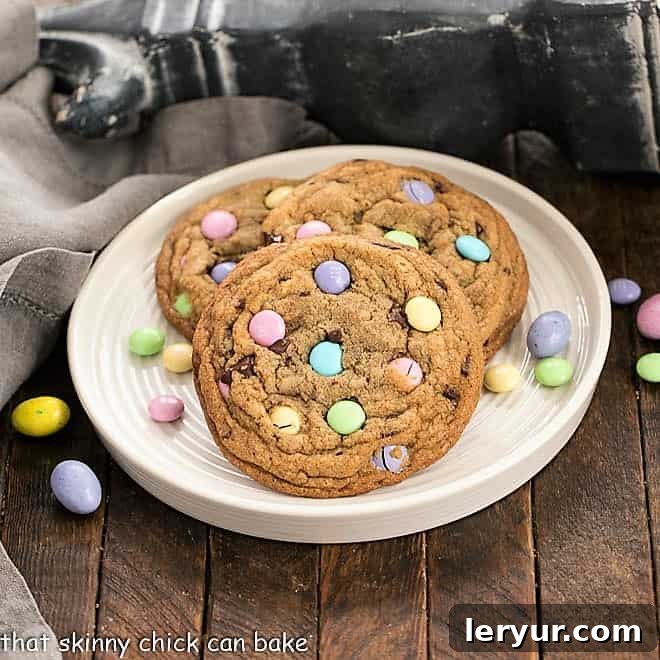
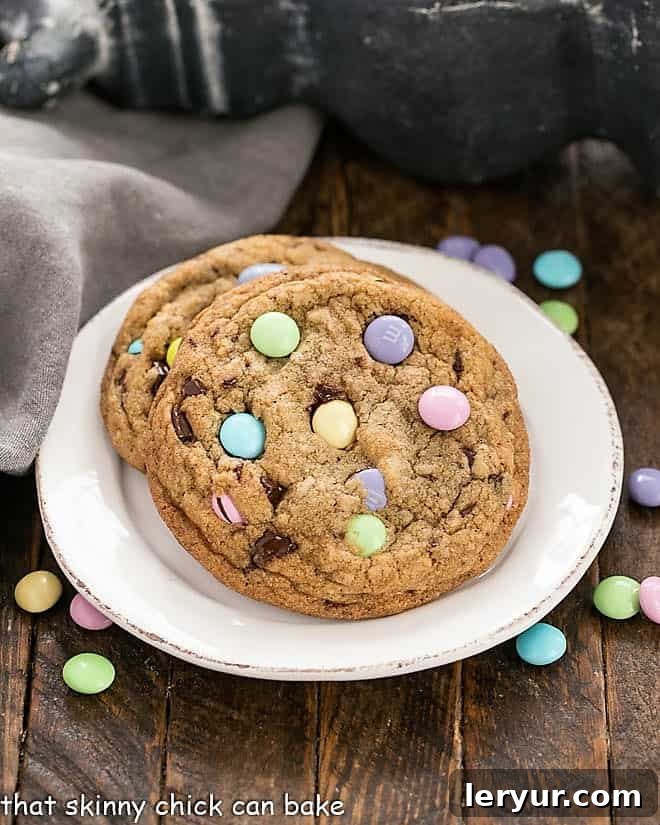
Indulge in the ultimate Easter treat with these effortless, bakery-worthy Brown Butter Easter Cookies. Crafted from a classic chocolate chip cookie dough base and studded with vibrant pastel M&M’s, these cookies come with expert baking tips to ensure a flawless finish every time. Prepare to elevate your holiday baking and impress everyone with these truly marvelous creations!
With just a few simple tricks, your homemade M&M Cookies will not only rival those from a professional bakeshop but will taste even better, infused with a depth of flavor only brown butter can deliver. This recipe transforms ordinary ingredients into an extraordinary festive delight, perfect for celebrating the season or simply enjoying a delightful sweet treat.
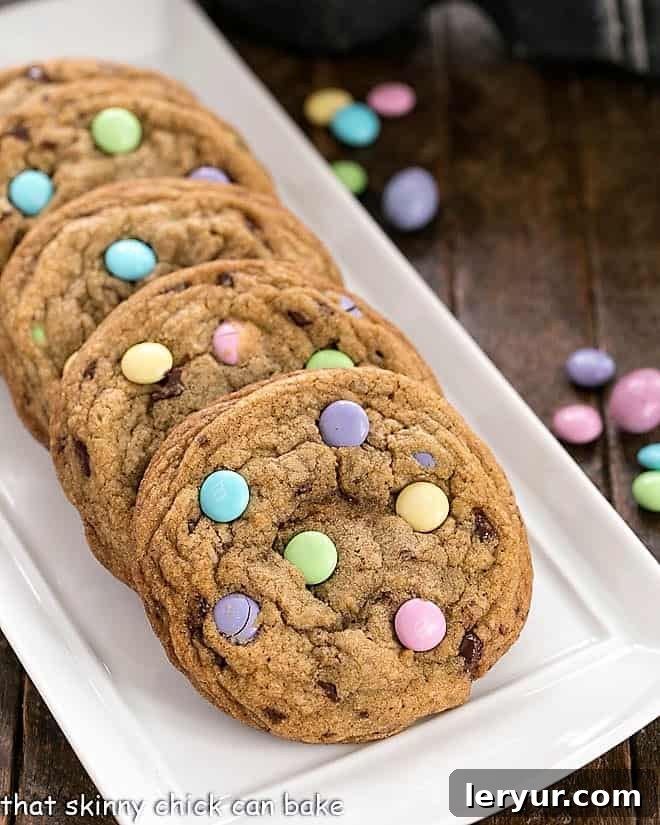
Why These Brown Butter Easter Cookies Are a Must-Make
If you’re searching for a cookie recipe that’s not only incredibly simple but also incredibly festive for the Easter holiday, look no further. These Brown Butter Easter Cookies are designed to be a showstopper without requiring hours in the kitchen. Here’s why they should be at the top of your baking list:
- **Effortlessly Festive & Delicious:** This recipe provides a straightforward path to creating gorgeous, delicious cookies that perfectly capture the spirit of Easter. The pastel M&M’s instantly add a celebratory touch, making these ideal for holiday gatherings or as a charming gift.
- **The Magic of Brown Butter:** The inclusion of brown butter (also known as beurre noisette) is the secret ingredient that elevates these cookies from great to truly exceptional. This simple technique imbues the cookies with a rich, nutty, and complex flavor profile that sets them apart from standard chocolate chip cookies. It’s a subtle but powerful enhancement that will have everyone asking for your secret.
- **Perfect for Pastel M&M’s (or any M&M’s!):** While pastel-colored M&M’s are fantastic for Easter, adding a whimsical touch of spring color, this recipe is incredibly versatile. You can easily adapt it for any holiday or occasion by swapping in different colored M&M’s. During my testing, I even came across some delightful white chocolate M&M’s which worked wonderfully, but classic milk chocolate M&M’s are always a crowd-pleaser.
- **Generous, Satisfying Portions:** This recipe yields 12 generously sized cookies. They are substantial, satisfying, and perfect for sharing (or not!). My dear husband, a true cookie connoisseur, quickly noted how quickly these delightful treats disappear from the cookie jar – a testament to their irresistible appeal. Each bite is a wonderful experience to savor.
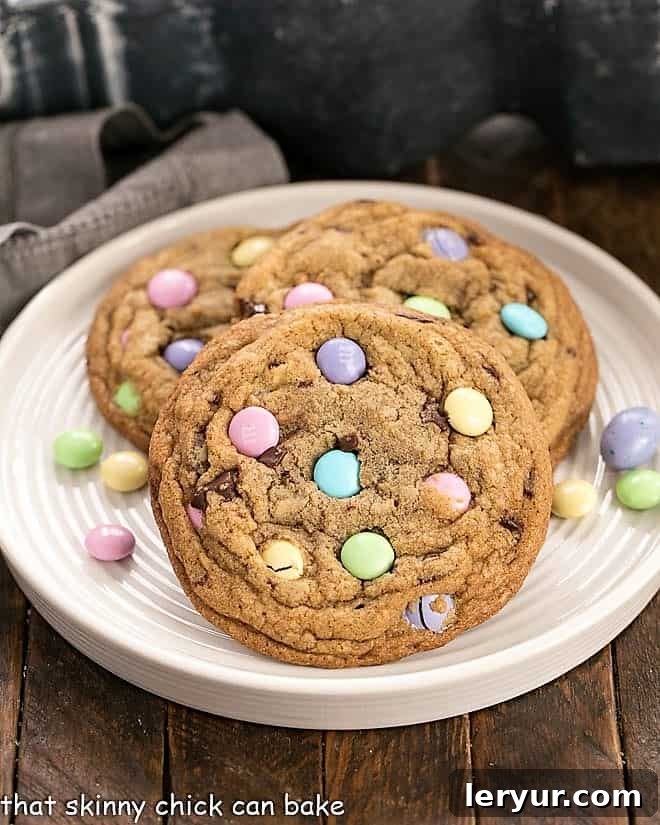
Mastering Your Brown Butter Easter Cookies: Pro Baking Tips
Achieving bakery-quality cookies at home is simpler than you might think. Follow these expert tips to ensure your Brown Butter Easter Cookies turn out perfectly golden, chewy, and irresistibly delicious every time:
- **Brown Sugar Selection & Substitution:**
- While dark brown sugar lends a richer molasses flavor and chewier texture, you can certainly use light brown sugar if that’s what you have on hand.
- **PRO-Tip: Make Your Own Dark Brown Sugar!** Don’t have dark brown sugar? No problem! Simply mix one tablespoon of molasses into 1 cup of light brown sugar. Continue mixing until the molasses is thoroughly dispersed and the sugar has a uniform dark color. Measure and use as directed in the recipe. This is a fantastic trick for when a recipe calls for dark brown sugar and you’re in a pinch.
- **Room Temperature Eggs Are Key:**
- Always aim to have your eggs at room temperature before incorporating them into your cookie dough. Room temperature eggs emulsify better with the butter and sugar, leading to a smoother, more uniform dough and a better-textured cookie.
- Note that eggs are easier to separate when cold, with less chance of the yolk breaking. If you’re not experienced in separating eggs, try separating them while cold, then let the yolk (and white, if using) come to room temperature before baking.
- **Choose Your M&M’s Wisely (or Wildly!):**
- For a truly festive Easter presentation, seek out pastel-colored M&M’s. Their soft hues perfectly complement the spring season. However, this recipe is wonderfully adaptable. For other times of the year, feel free to use regular milk chocolate M&M’s, peanut M&M’s, or even seasonal variations to create delightful M&M Cookies that suit any celebration.
- **PRO-Tip: For Picture-Perfect Cookies:** To make your cookies look extra appealing, save a handful of M&M’s and gently press them onto the surface of the cookies immediately after they come out of the oven. The warmth of the cookies will help them adhere, creating that iconic “bakery-style” look.
- **Achieve Consistent Sizes with a Cookie Scoop:**
- **PRO-Tip:** For uniformly sized cookies that bake evenly and look professional, use a 1/4 cup cookie scoop (or a 4-tablespoon scoop). This ensures each cookie is the same size, preventing some from burning while others are underbaked. Consistent size also means consistent appearance, a hallmark of professionally baked goods.
- **The Spatula Trick for Perfect Rounds:**
- Even with a scoop, cookies loaded with chocolate chunks and candies can sometimes bake into irregular shapes. A trick I’ve used for years is to take a spatula and gently tap the edges of the freshly baked, hot cookies back into perfect rounds. Do this right after taking them out of the oven, while they are still warm and pliable. This simple step makes a huge difference in the final presentation.
- **Adjust for Smaller Cookies:**
- If you prefer smaller cookies, use a tablespoon-sized scoop instead of a 1/4 cup scoop. Remember to decrease the baking time accordingly, usually by a few minutes, as smaller cookies will cook faster. Keep a close eye on them to prevent overbaking.
Frequently Asked Questions About Brown Butter
Brown butter is a game-changer in baking, but if you’re new to it, you might have some questions. Here’s everything you need to know about this wonderful ingredient:
Brown butter, famously known as “beurre noisette” in French (meaning “hazelnut butter”), is simply butter that has been melted and cooked gently until its milk solids caramelize and turn golden brown. This magical process completely transforms the butter, developing a rich, nutty, and complex flavor with a delightful aroma reminiscent of toasted hazelnuts. It adds incredible depth to both sweet and savory dishes, turning ordinary recipes into gourmet experiences. It’s used widely in French cuisine for sauces, but also excels in enhancing the flavor of desserts like these cookies, cakes, or banana bread.
Making brown butter is a straightforward but attentive process. Start by cutting your butter into even pieces and placing them in a heavy-bottomed saucepan. A stainless steel pan is ideal, as its light interior allows you to easily monitor the color change. Melt the butter over moderate heat, swirling the pan occasionally to ensure even cooking and prevent hot spots from burning the butter too quickly. The butter will first melt, then foam, and gradually change color from a pale butter yellow to tan, and finally to a beautiful toasty brown. Keep a very careful watch during the last stage, as it can go from perfectly browned to burnt in a matter of seconds. If it burns, you’ll have to start over. This process not only evaporates about 20% of the butter’s water content but, more importantly, triggers the Maillard reaction. This same reaction is responsible for the incredible flavors in seared meats and toasted bread, creating hundreds of new flavor compounds that make brown butter so delicious!
Once you’ve made brown butter, you have a few options for storage and use. You can use it immediately in its liquid form for recipes like these cookies or various sauces. If you need it in a solid form, simply pour it into a heat-proof container and chill it in the refrigerator until it solidifies. Leftovers, whether liquid or solid, should be covered tightly and stored in the refrigerator for up to two weeks. For longer storage, brown butter freezes exceptionally well. When wrapped airtight, it can keep in the freezer for several months, making it convenient to have on hand for future culinary adventures.
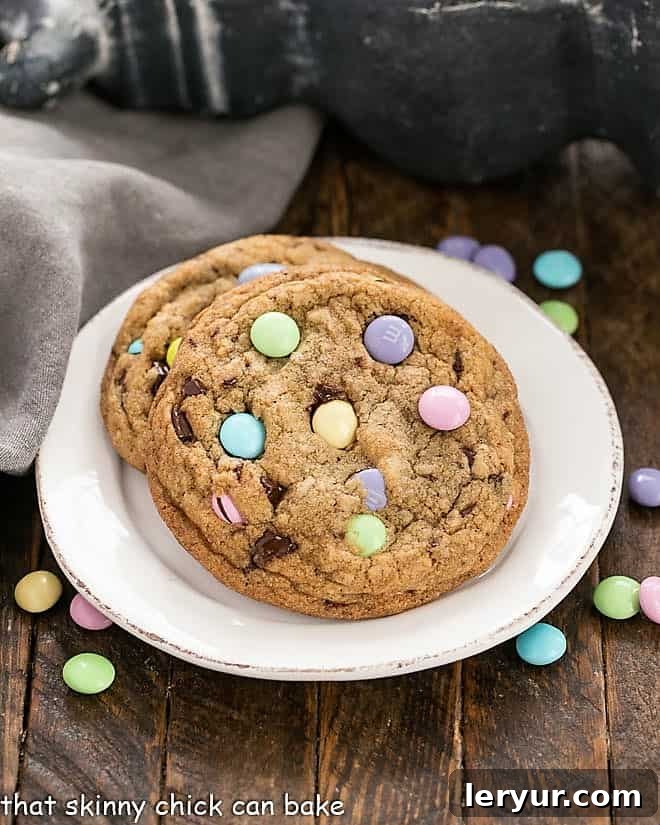
The Joy of Easter Baking & More Holiday Desserts
While these Brown Butter Easter Cookies are truly a delight, Easter offers a wonderful canvas for a variety of desserts. Whether you’re looking for something beyond cookies for a grand family dinner or need small favors for the Easter bunny, we have you covered. These cookies are also perfect for wrapping individually in cellophane bags with pretty ribbons, making charming Easter favors or delightful gifts. Here are a few more inspiring ideas for your Easter Dessert spread:
- Easter Bunny Cut Out Cookies from Princess Pinky Girl – A fun, interactive baking project.
- Classic Carrot Cake – A timeless Easter favorite, moist and spiced perfectly.
- Lemon Meringue Pie – Bright, tangy, and visually stunning, perfect for spring.
- Coconut Cupcakes – Light and fluffy, bringing tropical flair to your table.
- Hummingbird Cake – A Southern classic, rich with pineapple, banana, and pecans.
- Classic Strawberry Shortcake – Fresh and vibrant, celebrating seasonal berries.
- Discover more of the Best Holiday Recipes to complete your festive menus.
- Explore our collection of the Best Cookie Recipes for year-round baking inspiration.
Beyond Cookies: More Recipes Using Brown Butter
If these Brown Butter Easter Cookies have opened your eyes to the incredible flavor of brown butter, you’ll be thrilled to know its versatility extends far beyond just cookies! Brown butter can enhance a multitude of dishes, adding a gourmet touch to both sweet and savory recipes. For those eager to explore more brown butter creations, I highly recommend trying these:
- Brown Butter Chocolate Chip Cookies – The ultimate classic, made even better with brown butter.
- Roasted Asparagus with Balsamic Brown Butter – A sophisticated side dish bursting with flavor.
- Easy Brown Butter Chocolate Chunk Bars – Chewy, decadent bars that are simple to make and irresistible.
- Brown Butter Crepes – Delicate crepes with a nutty aroma, perfect with fresh berries for breakfast or dessert.
Stay connected and share your baking journey with us! Follow us on social media Instagram, Facebook, and Pinterest. Don’t forget to tag us when you try one of our recipes! Your creations inspire us. If you love the results, please consider giving this recipe a 5-star rating in the recipe card below. Your feedback helps other bakers find and enjoy these delicious treats!
Brown Butter Easter Cookies
20 minutes
14 minutes
34 minutes
12 large cookies
Brown butter chocolate chunk cookies filled with pastel-colored white chocolate M&M’s. for a fun Easter or spring treat! These are easy to make and guaranteed to be a hit!
Ingredients
- 14 tablespoons unsalted butter, divided
- ½ cup granulated sugar
- ¾ cup dark brown sugar (see blog post for homemade substitute)
- 2 teaspoons pure vanilla extract
- 1 large egg
- 1 large egg yolk
- ½ teaspoon salt
- ½ teaspoon baking soda
- 1 ¾ cup all-purpose flour
- ¾ cup white chocolate M&M’s (or your favorite flavor), pastel-colored, plus extra for garnish
- 4 ounces semi-sweet chocolate, chopped into small chunks
Instructions
- Preheat your oven to 375ºF (190ºC).
- In a heavy-bottomed saucepan, melt 10 tablespoons of the butter over medium-high heat. Continue cooking, stirring occasionally, for 2-4 minutes until the butter turns golden brown and emits a rich, nutty fragrance. Be careful not to burn it. Pour the hot brown butter into a heat-proof bowl and immediately add the remaining 4 tablespoons of cold butter. Stir until the cold butter has completely melted into the warm brown butter mixture.
- To the butter mixture, add both granulated and dark brown sugars, then stir in the vanilla extract. Mix well. Incorporate the egg and egg yolk one at a time, beating until fully combined. Add the baking soda and then the flour, mixing until the ingredients are just combined and no dry streaks of flour remain. Fold in the M&M’s and chocolate chunks until evenly distributed throughout the dough.
- Using a 4-tablespoon (or 1/4 cup) scoop, form uniform dough balls. Place these dough balls approximately 2 inches apart on parchment-lined cookie sheets. This spacing allows the cookies to spread without touching.
- Bake for 10-14 minutes, or until the edges of the cookies are golden brown and the centers are still slightly soft. For an even more professional look, gently press a few extra M&M’s onto the surface of each warm cookie immediately after removing them from the oven. Allow the cookies to cool on the baking sheet for a few minutes before transferring them to a wire rack to cool completely.
Notes
For perfectly sized cookies, always use a 1/4 cup cookie scoop.
To achieve perfectly round, bakery-style cookies, use a spatula to gently tap the edges of the hot cookies into shape immediately after they come out of the oven.
Enhance the visual appeal by carefully pressing extra M&M’s onto the surface of the hot cookies right after baking.
This recipe is adapted from the renowned Cook’s Illustrated Perfect Chocolate Chip Cookies, ensuring a reliable and delicious outcome.
For best results, ensure your butter is browned to a nutty aroma but not burnt. Watch it carefully!
Store leftover cookies in an airtight container at room temperature for up to 3-4 days, or freeze for longer enjoyment.
Recommended Products
As an Amazon Associate and member of other affiliate programs, I earn from qualifying purchases.
- 1/4 cup scoop
- Black Spatula
- USA Pan Bakeware Half Sheet Pan
Nutrition Information:
Yield:
12
Serving Size:
1
Amount Per Serving:
Calories: 396Total Fat: 21gSaturated Fat: 13gTrans Fat: 1gUnsaturated Fat: 7gCholesterol: 69mgSodium: 270mgCarbohydrates: 49gFiber: 1gSugar: 34gProtein: 4g
HOW MUCH DID YOU LOVE THIS RECIPE?
Please leave a comment on the blog or share a photo on Pinterest