
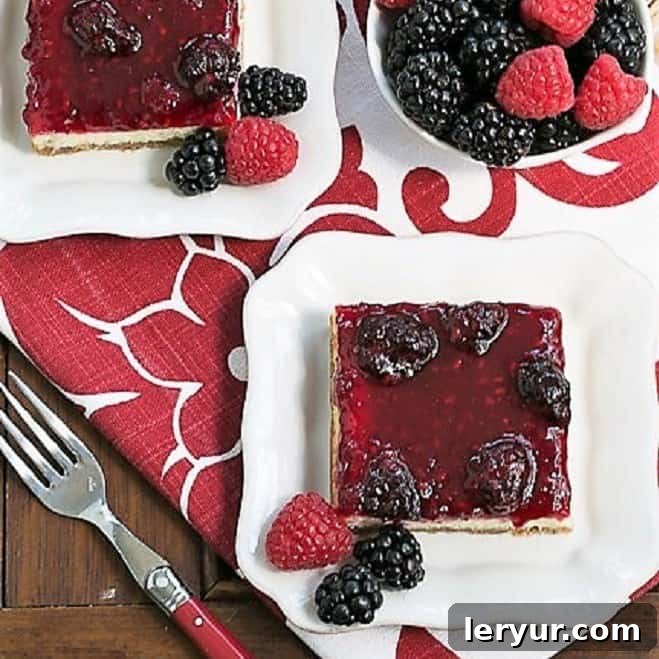
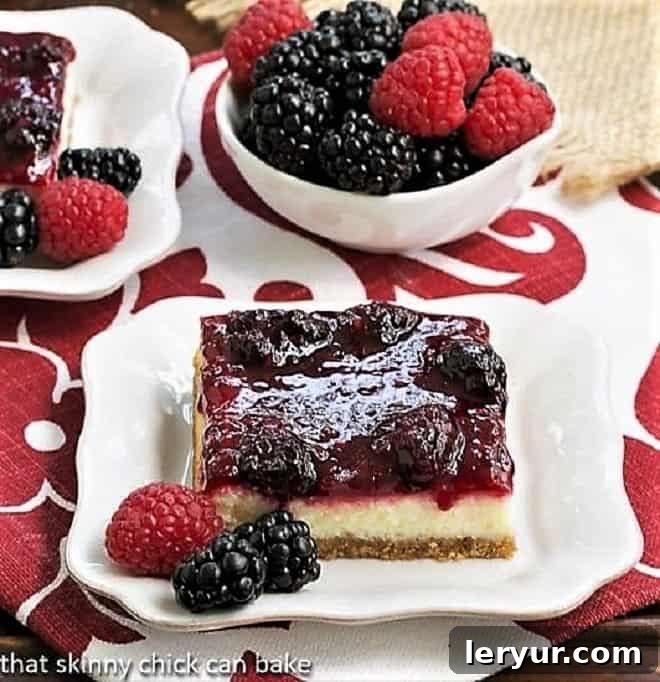
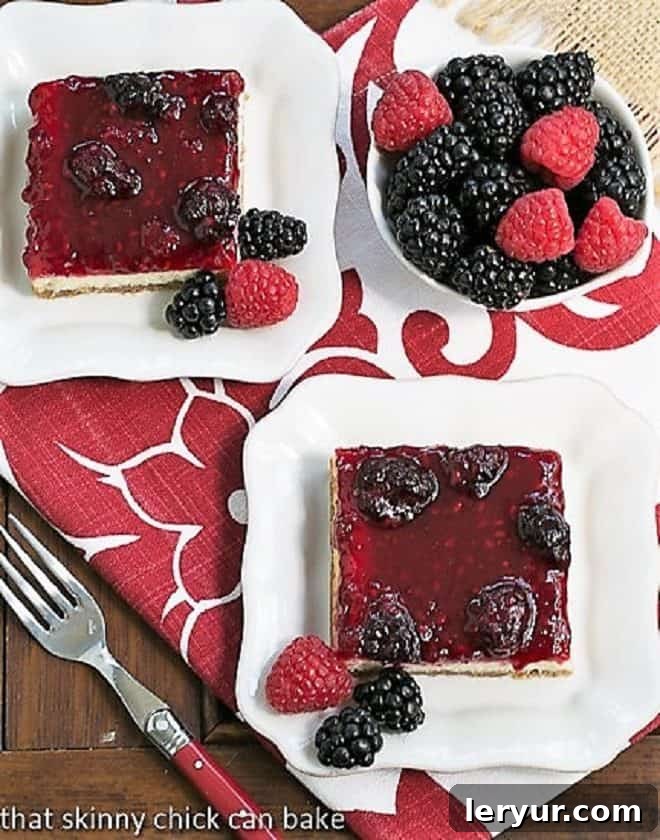
Discover the irresistible charm of these delightful Berry Topped Cheesecake Bars. Far less intimidating than a traditional full-sized cheesecake, these bars deliver all the creamy, dreamy indulgence you crave in a perfectly portioned dessert. With a luscious berry topping crowning a rich, velvety cheesecake, these homemade bars are an absolute sensation for any occasion. Prepare to impress your taste buds and your guests with this phenomenal treat!
Irresistible Berry Topped Cheesecake Bars: Your New Favorite Dessert
There’s something uniquely satisfying about cheesecake, a dessert that effortlessly combines rich creaminess with a delicate sweetness. However, baking a whole cheesecake can often feel like a culinary challenge, requiring precise timing and careful handling. That’s where the magic of cheesecake bars comes in. Offering all the luxurious flavor and texture of a classic cheesecake in a more approachable, easy-to-manage format, these Berry Topped Cheesecake Bars are a game-changer for home bakers and dessert enthusiasts alike. They are not only simpler to prepare but also perfect for sharing, making them an ideal choice for potlucks, parties, or simply a delightful weekend treat.
My journey to creating these exquisite cheesecake bars with berries began with a routine perusal of inspiring recipes. Each month, I eagerly anticipate discovering new, sugar-laden delights, and it’s always a delightful dilemma to choose just one to recreate and share. With a smaller household, a full cheesecake often feels like too much, but cheesecake bars are always a safe, perfectly portioned bet. So, when I stumbled upon a tempting blackberry version, my mouth instantly watered, and I knew I had found a winner. Inspired by that initial discovery, I decided to elevate the recipe by combining the vibrant flavors of both blackberries and raspberries for my topping. The result? These spectacular Berry Topped Cheesecake Bars, a harmonious blend of sweet, tangy, and utterly creamy bliss. The contrast of the tart berries against the rich cheesecake base is simply divine, creating a dessert that truly sings with flavor and freshness.
Crafting the Perfect Berry Topped Cheesecake Bars: A Step-by-Step Guide
Creating these sensational cheesecake bars is a rewarding experience, and with a few key steps and tips, you’ll achieve a dessert that looks as good as it tastes. From the buttery crust to the velvety filling and the vibrant berry topping, each layer contributes to the overall exquisite flavor profile. Let’s dive into the details of making these homemade cheesecake bars truly special.
The Foundation: A Flawless Vanilla Wafer Crust
Every great cheesecake starts with an equally great crust. For these berry-topped bars, we opt for a classic vanilla wafer crust, enhanced with the subtle nutty crunch of pecans. This combination creates a sturdy yet tender base that perfectly complements the creamy filling. The process is straightforward: simply pulse vanilla wafers and pecans in a food processor until fine crumbs form. Then, incorporate melted butter and a hint of vanilla extract to bind everything together. Press this mixture firmly into a nonstick foil-lined baking pan, ensuring an even layer. The nonstick foil is a secret weapon here, making it incredibly easy to lift the baked bars out of the pan for clean, effortless slicing later.
The Heart: A Velvety Smooth Cheesecake Filling
The cheesecake filling is where the magic truly happens, transforming simple ingredients into a rich, creamy indulgence. The key to a smooth, crack-free cheesecake lies in a few crucial techniques. Begin with room temperature cream cheese and eggs; this ensures they incorporate seamlessly without lumps or overmixing. Using a paddle attachment on your electric mixer is preferable, as it minimizes air incorporation, which can lead to cracks. Beat the cream cheese and sugar until wonderfully smooth, then add the eggs one at a time, mixing just until combined after each addition. Finally, fold in the sour cream for an added touch of tanginess and moisture. Pour this silky filling over your prepared crust, smooth the top with an offset spatula for an even layer, and it’s ready for the oven.
The Crown: A Burst of Fresh Berry Topping
What truly sets these cheesecake bars apart is their vibrant, juicy berry topping. I love the combination of blackberries and raspberries for their complementary sweet-tart profiles and stunning colors, but feel free to use your favorite fresh berries. To create the topping, simmer the berries with sugar and a little water until they begin to break down and release their juices. A cornstarch slurry is then added to gently thicken the sauce, transforming it into a glossy, spoonable topping that clings beautifully to the cheesecake. This warm, fruity concoction cools to a perfect consistency, ready to be spread generously over the chilled cheesecake. The freshness of the berries cuts through the richness of the cheesecake, creating a perfectly balanced dessert.
Baking and Cooling for Perfection
Baking cheesecake requires patience and a gentle touch. These bars bake for approximately 50 minutes in a moderately heated oven. The crucial step after baking is to allow the cheesecake to cool slowly. Once the baking time is complete, turn off the oven, open the door slightly, and let the pan rest inside for an additional 15 minutes. This gradual cooling prevents drastic temperature changes that can cause cracks. After this period, remove the pan and let it cool completely on a wire rack before transferring it to the refrigerator. Chilling for at least two hours (or ideally overnight) is essential for the cheesecake to firm up and set properly, ensuring perfect slices every time.
Essential Tips for Making Delicious Cheesecake Bars
Achieving consistently delicious and creamy cheesecake bars isn’t just about following the recipe; it’s also about understanding the nuances of baking. These expert tips, applicable to both full cheesecakes and their bar counterparts, will help you master the art of this beloved dessert and ensure a perfectly smooth, dense, and flavorful result every time.
- PRO-Tip: Start with Room Temperature Ingredients. This is perhaps the most critical tip for any cheesecake. Ensuring your cream cheese and eggs are at room temperature allows them to blend seamlessly, creating a smooth, lump-free batter. Cold ingredients will resist mixing, leading to an overmixed batter with incorporated air, which can cause cracks during baking.
- Mind Your Mixing Technique. When combining your cheesecake filling ingredients, use a paddle attachment on your stand mixer or mix gently with a hand mixer. The goal is to combine thoroughly without incorporating too much air. Excess air can make your cheesecake light and fluffy, rather than dense and creamy, and also contribute to cracking. Mix just until ingredients are incorporated and smooth.
- Line Your Baking Pan with Non-Stick Foil. This simple step makes a world of difference. Lining your 8×8-inch baking pan with non-stick foil (leaving an overhang on the sides) allows you to easily lift the cooled cheesecake slab out of the pan. This means you can transfer it to a cutting board for neat, precise slicing, and it significantly simplifies cleanup.
- Utilize an Offset Spatula for Spreading. An offset spatula is an invaluable tool for smoothing out the cheesecake batter evenly over the crust. Its angled blade makes it easy to spread the thick batter without disturbing the crust, ensuring a level top for your bars. A uniform layer is key for even baking and a beautiful presentation.
- Achieve Clean Slices with a Hot, Dry Knife. For those perfectly cut bars, heat a sharp knife under hot water, wipe it completely dry, and then make each cut. Clean the knife after every slice to prevent dragging crumbs or filling through the next piece. This method results in beautifully defined edges that elevate the presentation of your dessert.
- Consider Freezing for Ultra-Clean Cuts. If you’re aiming for absolute perfection in your slices, a clever trick is to briefly freeze the entire pan of chilled cheesecake bars before cutting. Just 30-60 minutes in the freezer will firm them up enough to allow for incredibly precise, clean cuts. Remember to defrost the cut bars to room temperature before serving for the best texture.
Rave Reviews for These Berry Topped Cheesecake Bars
It’s always a triumph when a new recipe receives widespread approval, especially from discerning palates. I’m delighted to share that these Berry Topped Cheesecake Bars garnered an enthusiastic round of praise. My husband, a self-proclaimed chocoholic, is usually quite particular about non-chocolate desserts. So, his unprompted compliments for these bars were a true testament to their deliciousness. He absolutely adored them, as did I!
But the true test came from my sweet neighbor and her husband, who is a genuine cheesecake connoisseur. Their confirmation of our stellar reviews solidified my belief that these are truly terrific bars. Their expert endorsement means a great deal! Whether you choose to use only blackberries, only raspberries, or a delightful mix as I did, the result will be a dessert that everyone raves about. The versatility of the berry topping allows you to customize it to your preference, ensuring you’ll love these berry topped cheesecake bars no matter how you shake it. A huge thanks to Danielle for the initial inspiration that led to this magnificent creation!
Customizing Your Cheesecake Bars: Endless Possibilities
While the blackberry and raspberry combination for these cheesecake bars is undeniably perfect, don’t hesitate to get creative with your topping. Consider a medley of blueberries and strawberries for a different flavor profile, or even a single-berry topping if you have a favorite. You could also experiment with adding a hint of lemon zest to the cheesecake filling for a brighter, more citrusy note, or a touch of almond extract for a delicate aroma. For those who love a bit of texture, a sprinkle of toasted shredded coconut or finely chopped nuts could be added to the crust. These bars are wonderfully adaptable, allowing you to tailor them to your personal taste and whatever fresh produce is in season.
Serving and Storage Suggestions
These homemade cheesecake bars are best served chilled, allowing their creamy texture to shine. Garnish individual slices with a few extra fresh berries or a sprig of mint for an elegant touch. They pair beautifully with a cup of coffee or a glass of dessert wine, making them suitable for both casual gatherings and more formal occasions. Leftover cheesecake bars should be stored in an airtight container in the refrigerator for up to 3-4 days. For longer storage, you can freeze them individually wrapped for up to a month. Simply thaw them in the refrigerator overnight before serving, and they’ll taste as fresh as the day they were made.
More Cheesecake Inspired Recipes You’ll Love:
- The Best No Bake Cheesecake Recipe from Crazy for Crust
- Cheesecake Truffle Brownies from Two Peas and Their Pod
- Almost No Bake Drumstick Cheesecake from Melanie Makes
- Ganache Topped Cheesecake Bars
- Caramel Cheesecake
- Strawberry Cheesecake Trifle
- Plus my 900 Best Dessert Recipes in my Recipe Index
Berry Topped Cheesecake Bars Recipe
30 minutes
1 hour
1 hour 30 minutes
9 servings
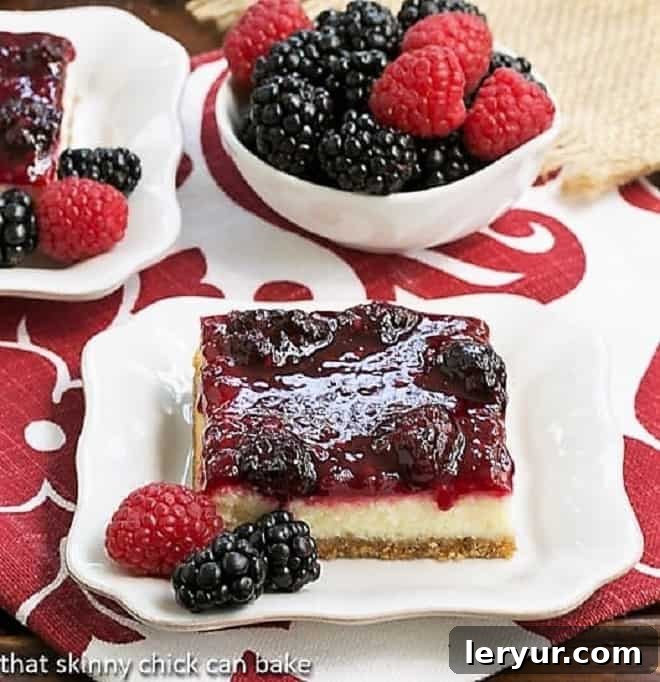
A lovely cheesecake bar topped with berries!
Ingredients
Crust:
- 5 ½ ounces vanilla wafers (half an 11-ounce box)
- ¼ cup pecans
- ¼ cup butter, melted
- 1 teaspoon vanilla
Filling:
- 12 ounces cream cheese, at room temperature
- ¾ cups sugar
- 2 eggs, at room temperature
- ¼ cup sour cream
Topping:
- 2 cups fresh berries (I used raspberries and blackberries)
- ½ cup sugar
- 2 teaspoons cornstarch
Instructions
- Preheat the oven to 350ºF (175ºC).
- For the crust: Line an 8-by-8-inch (20×20 cm) rectangular baking pan with nonstick foil, leaving an overhang on two sides for easy removal.
- In your food processor, pulse the vanilla wafers and pecans into fine crumbs. Add the melted butter and vanilla extract and pulse again until the mixture is well combined and moist. Pour the crumb mixture into the prepared pan and press it firmly and evenly into the bottom of the pan to form the crust.
- For the filling: In the bowl of an electric mixer fitted with a paddle attachment, beat the softened cream cheese and sugar together on medium speed until smooth and creamy, scraping down the sides of the bowl as needed. Add the eggs one at a time, beating just until incorporated after each addition. Be careful not to overmix. Stir in the sour cream until just combined.
- Pour the cheesecake filling onto the prepared crust, spreading the top evenly with an offset spatula. Bake for 50 minutes. After baking, turn off the oven, open the oven door slightly, and allow the pan to sit in the open oven for 15 minutes to cool gradually. Remove from the oven and set aside on a wire rack to cool completely at room temperature. Once cool, refrigerate for at least 2 hours, or ideally overnight, until thoroughly chilled and set.
- For the topping: In a medium saucepan, combine the fresh berries, ½ cup sugar, and 2 tablespoons of water. Bring the mixture to a boil over medium-high heat, stirring occasionally, and cook until the berries begin to break down and their juices thicken slightly, about 4 to 5 minutes.
- In a small separate bowl, make a slurry by stirring together the 2 teaspoons of cornstarch and 1 tablespoon of cold water until smooth. Pour the cornstarch slurry into the simmering berries, return to a boil, and cook for another 1 to 2 minutes, stirring constantly, until the topping has thickened to your desired consistency. Turn off the heat and allow the berry mixture to cool completely before using.
- Once the cheesecake is thoroughly chilled and the berry topping is cool, carefully spoon the berry topping over the cheesecake. Spread it evenly across the top. Place the pan back into the fridge to cool and set for at least another 30 minutes to allow the topping to firm up slightly.
- When ready to serve, use the foil overhang to carefully lift the entire cheesecake slab from the pan. Transfer it to a cutting board. Heat a sharp knife under hot water, wipe it dry, and then slice the cheesecake into 9 even bars. Wipe the knife clean between each cut for neat, precise slices. Serve immediately and enjoy!
Notes
Bring the cream cheese and eggs out of the refrigerator at least an hour before you plan to start mixing. This will help them incorporate more easily into the batter, ensuring a smooth and lump-free filling.
Recipe adapted from Pioneer Woman via Hugs & Cookies XOXO.
Nutrition Information:
Yield:
9
Serving Size:
1 bar
Amount Per Serving:
Calories: 432Total Fat: 26gSaturated Fat: 13gTrans Fat: 0gUnsaturated Fat: 10gCholesterol: 97mgSodium: 247mgCarbohydrates: 47gFiber: 2gSugar: 37gProtein: 5g
HOW MUCH DID YOU LOVE THIS RECIPE?
Please leave a comment on the blog or share a photo on Pinterest
Skinny Tip: Smart Choices for a Balanced Lifestyle
As part of my ongoing series of “Skinny Tips,” I often get asked about my approach to maintaining a healthy lifestyle without sacrificing flavor. These tips are designed to help you make mindful choices that support your well-being while still enjoying delicious food.
Tip #12: Eat Nutrient-Dense Food (Part 2). This tip emphasizes making smart caloric choices. It’s about maximizing the nutritional value of what you consume rather than just counting calories. Avoid “empty calories” found in sugary sodas, refined white bread, or an excessive amount of highly processed sweets. These items often offer little to no nutritional benefit and can leave you feeling unsatisfied despite their caloric content. Instead, prioritize foods that are rich in vitamins, minerals, and fiber. Whole grains, lean proteins, fruits, and vegetables are excellent examples. Foods high in fiber, in particular, will help you feel fuller for longer, naturally reducing your overall calorie intake and supporting healthy digestion. By choosing nutrient-dense options, you nourish your body more effectively and feel more satisfied, making healthy eating a sustainable and enjoyable part of your daily routine. It’s about quality over quantity, ensuring every bite contributes positively to your health.