
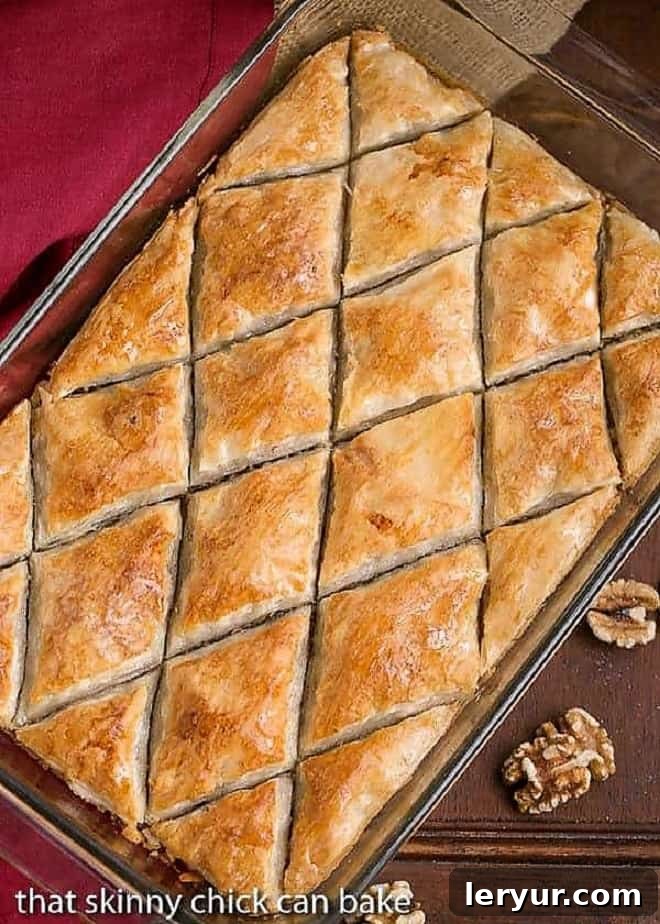
Indulge in a truly unforgettable dessert experience with this **Classic Greek Baklava** recipe. Each delicate bite offers a symphony of flavors and textures, featuring crisp layers of filo pastry, a rich, nutty filling, and a fragrant syrup infused with the enchanting aroma of orange flower water. This isn’t just any baklava; it’s a testament to the cherished recipes passed down through generations, like the one my mother meticulously crafted, creating delicious and memorable treats that gathered our family around the table.
For those new to working with filo, fillo, or phyllo dough – those incredibly thin sheets of pastry – fear not! I’ve included comprehensive tips below to guide you through the process. Once you master the art of handling filo, this **Baklava Recipe** will undoubtedly become a treasured addition to your dessert repertoire, proving that creating this intricate-looking delicacy is far more approachable than you might imagine.
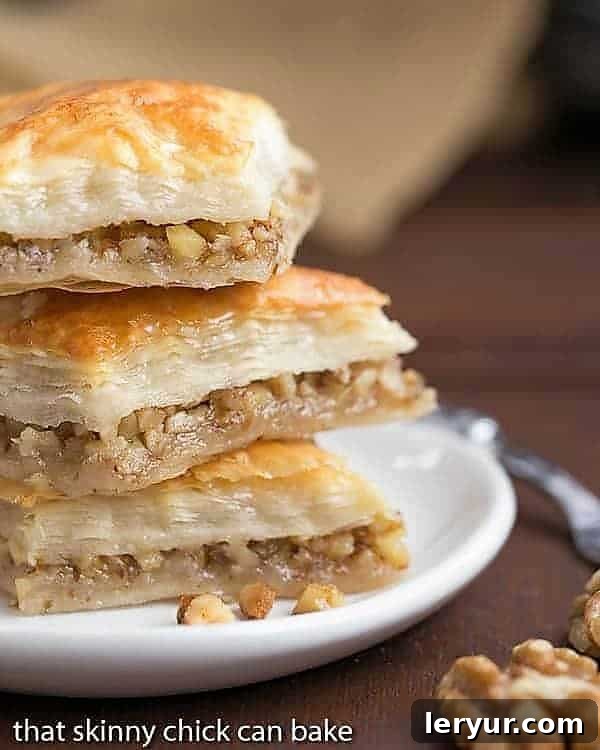
Why Every Home Baker Should Experience Making This Greek Baklava
Creating homemade baklava is a culinary journey that rewards you with an exquisite dessert and a profound sense of accomplishment. Here’s why this **Classic Greek Baklava recipe** is an absolute must-try:
- **Impress Your Loved Ones:** Imagine the sheer delight and admiration from your friends and family when you present them with a tray of beautiful, homemade baklava. This dessert, often perceived as complex and reserved for professional pastry chefs, will truly make you shine as a skilled baker.
- **Easier Than It Appears:** Don’t let the delicate layers of filo intimidate you. While working with filo dough requires a gentle touch and some specific techniques, this recipe breaks down each step, making the process straightforward and manageable. My detailed tips will equip you with the confidence needed to succeed, even if you’re a first-timer.
- **A Nut Lover’s Dream:** If you appreciate the rich, earthy flavors and satisfying crunch of nuts, this baklava is your ultimate indulgence. Packed with finely chopped walnuts (or your preferred alternative), each piece offers a delightful texture contrast against the crisp filo and sweet syrup, creating a truly harmonious flavor profile.
- **A Taste of Tradition:** Baklava carries centuries of history and cultural significance. By making it yourself, you connect with a rich culinary tradition that spans across the Middle East and Mediterranean, bringing an authentic taste of heritage into your home.
- **Unforgettable Flavor Profile:** Beyond the visual appeal, the taste of freshly baked baklava is simply divine. The combination of buttery filo, sweet nuts, and an aromatic syrup creates a dessert that is both rich and refreshing, thanks to the subtle notes of orange blossom water. It’s a sensory experience that stays with you long after the last bite.
My own journey with international cuisine began in a rather unexpected place: a small Midwest university town. Ames, Iowa, while geographically isolated, became a vibrant hub of diverse cultures thanks to its college. This unique environment exposed my family to a myriad of traditions, including culinary delights from around the globe. It was this early exposure that sparked a lifelong appreciation for authentic, global flavors, and baklava quickly became a beloved staple in our home, often shared during gatherings that celebrated our newfound friendships and diverse backgrounds.
Essential Ingredient Notes for Perfect Baklava
Crafting the perfect baklava begins with understanding and selecting the right ingredients. Each component plays a vital role in achieving that signature flaky texture and exquisite taste.
- Filo (Fillo or Phyllo) Dough: This is the cornerstone of baklava. Filo is an incredibly thin, unleavened dough, almost transparent, that bakes into wonderfully crisp and flaky layers when brushed with butter or oil. It’s what gives baklava its distinctive airy crunch. You’ll typically find it in the frozen section of your grocery store, usually near puff pastry or other specialty frozen doughs. Always follow the package instructions for proper defrosting to ensure it remains pliable and easy to work with.
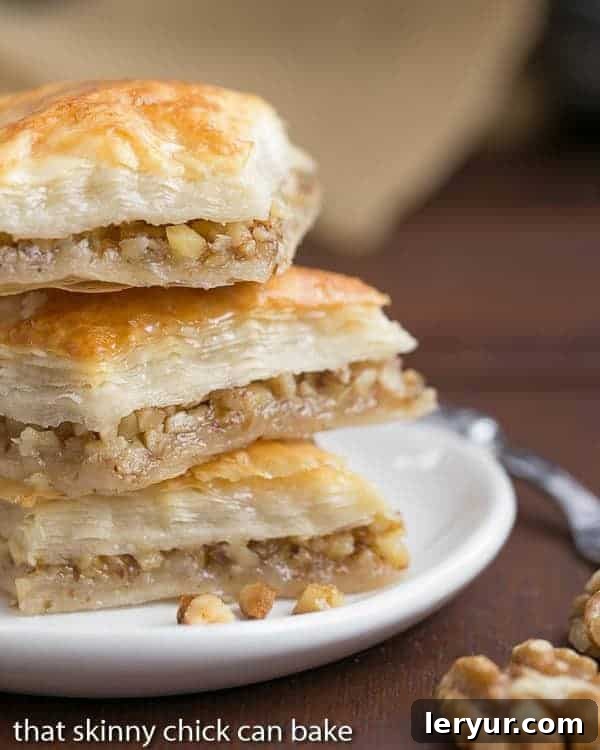
- Nuts: While not optional, the choice of nuts offers delightful flexibility. My classic recipe features walnuts, which provide a robust, earthy flavor and satisfying texture. However, feel free to experiment with other varieties like pistachios for a vibrant green hue and delicate flavor, or almonds and hazelnuts for their distinct sweetness and aroma. A combination of nuts can also create a wonderfully complex filling. Ensure your nuts are coarsely chopped, as this creates a substantial layer that contrasts beautifully with the thin filo.
- Aromatic Sugar Syrup: This sweet, sticky syrup is essential for binding the layers and infusing the baklava with moisture and flavor. While many traditional recipes incorporate honey, the Turkish versions often omit it for a cleaner, brighter sweetness, a preference I share. My recipe elevates the syrup with **orange flower water** (also known as orange blossom water). This subtle yet distinctive floral essence adds a layer of sophisticated fragrance that makes the baklava truly unforgettable and sets it apart from more common versions. The syrup must be cold when poured over the hot baklava to achieve the perfect crisp texture.
- Butter (or Olive Oil): Melted butter is crucial for brushing between each delicate filo layer. It not only prevents the layers from sticking but also contributes significantly to the rich flavor and incredibly flaky texture. For a dairy-free or slightly different flavor profile, some recipes use olive oil, which also works beautifully to create crisp layers. Using good quality unsalted butter will yield the best results, allowing its creamy flavor to complement the nuts and syrup without adding excess salt.
Mastering Filo Dough: Pro Tips for Perfect Baklava
Working with filo dough can seem intimidating due to its delicate nature, but with a few expert tips, you’ll be layering like a pro. These techniques are crucial for achieving that characteristic crispness and avoiding common pitfalls.
- **Proper Defrosting is Key:** Filo dough is almost always sold frozen. The most critical first step is proper defrosting. Remove the box from the freezer and place it in the refrigerator overnight (at least 8-10 hours) for a slow, gentle thaw. Never attempt to rush defrosting at room temperature or in the microwave, as this can make the dough gummy or brittle.
- **Keep It Covered, Always:** Once defrosted, do not remove the filo from its plastic packaging until all your other ingredients (melted butter, chopped nuts, prepared baking pan) are prepped and ready to go. Exposure to air is filo’s worst enemy, causing it to dry out rapidly.
- **PRO-Tip: The Damp Towel Method:** When you’re ready to start assembling, carefully remove the filo from its packaging, unroll it, and lay it flat on a clean, dry work surface. Immediately cover the stack of filo sheets with a sheet of plastic wrap, then top that with a lightly damp, clean kitchen towel. This creates a humid environment that prevents the delicate sheets from becoming brittle and cracking as you work.
- **Work Swiftly and Methodically:** Only uncover the filo stack long enough to gently pull out one sheet at a time. As soon as you’ve taken a sheet, immediately recover the remaining stack. Speed is your friend here. If the filo sheets dry out, they will shatter into many unmanageable pieces when you try to lift or move them.
- **Butter Generously and Evenly:** Use a soft pastry brush to apply melted butter (or oil) between each layer of filo, as directed in your recipe. Pay special attention to the edges, as these are most prone to drying out first. A gentle brushing motion will minimize tearing. Don’t be shy with the butter; it’s what creates the incredible flakiness.
- **PRO-Tip: Don’t Fear the Tear:** It’s almost inevitable that a filo sheet will tear, especially when you’re starting out. Don’t panic! Simply use these torn sheets in the middle layers of your baklava. They will be completely hidden by the intact layers above and below, and the final result will be just as delicious and beautiful.
- **Cutting Before Baking:** For the best results and traditional presentation, cut the baklava into diamond or square shapes *before* baking. This allows the butter to penetrate deeper into the layers and ensures the syrup can evenly drench every piece after baking.
- **Storage of Leftover Filo:** If you have any unused filo dough, wrap it tightly in plastic wrap, pressing out as much air as possible, then place it back in its original box or an airtight freezer bag. It can be stored in the freezer for up to 3 months. Defrost it in the refrigerator overnight before its next use.
Step-by-Step Guide: How to Make Authentic Greek Baklava
Making baklava is a rewarding experience, and with proper preparation and these detailed instructions, you’ll find it surprisingly straightforward. The key to success lies in having all your ingredients ready before you begin the layering process. Ensure your nuts are finely chopped, your filo dough is defrosted in the refrigerator, and your damp tea towel is at hand. Critically, the sugar syrup should be made ahead of time and thoroughly chilled. Here’s a comprehensive guide on **how to make baklava**:
- **Prepare Your Pan and Butter:** Begin by melting your unsalted butter. Use a pastry brush to generously grease your chosen baking pan (a 9×13 inch pan is ideal) with some of the melted butter. This prevents sticking and contributes to the golden crust.
- **Combine Nut Filling:** In a medium bowl, mix together your coarsely chopped nuts with the specified amount of sugar. Stir well to ensure the sugar is evenly distributed, then set this mixture aside.
- **PRO-Tip: Keep Filo Covered:** Before you even unroll your filo, prepare your workstation. Open the filo package, but immediately cover the entire stack of dough sheets with the plastic or parchment paper it came with, followed by a lightly damp, clean kitchen towel. This crucial step prevents the delicate pastry from drying out and becoming brittle, which makes it impossible to work with.
- **Layer the First Half of Filo:** Carefully peel off one sheet of filo dough at a time. Lay the first sheet into your prepared baking pan. Using your pastry brush, lightly butter the entire surface of the filo sheet. Repeat this process, layering and buttering each individual sheet, until you have used exactly half of your filo dough. Ensure each layer is buttered evenly for maximum flakiness.
- **Add the Nut Filling:** Once the first half of the filo layers are in place and buttered, evenly spread the entire nut and sugar mixture over the top surface. Gently pat it down so it forms a consistent layer.
- **Continue Layering the Remaining Filo:** Now, resume the layering process with the remaining filo dough. Take one sheet at a time, lay it over the nut mixture, and brush it generously with melted butter. Continue until all the remaining filo sheets have been used, ensuring the top layer is also well-buttered.
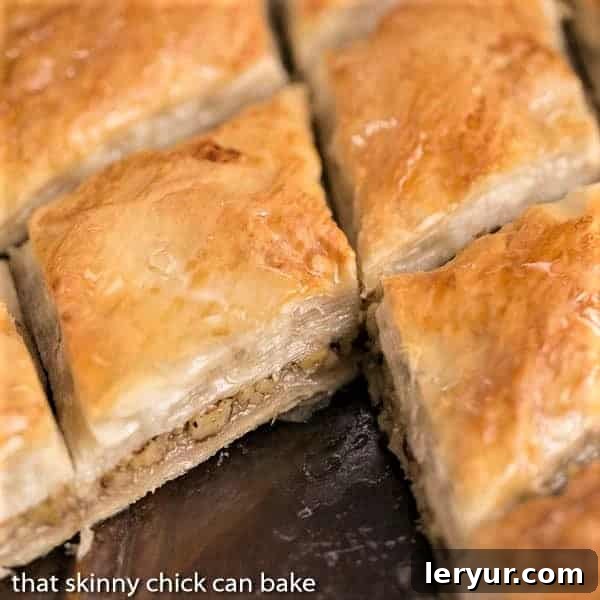
- **Cut Before Baking:** This is a vital step for both presentation and even baking. Using a sharp knife, carefully cut the baklava on the diagonal in one direction, then the other, to create traditional lozenge (diamond) shapes. Alternatively, you can cut it into squares. Cut all the way through the layers to the bottom of the pan. This allows the heat to penetrate and the butter to crisp up all the layers.
- **Bake to Golden Perfection:** Place your baklava in a preheated oven and bake according to the recipe’s temperature and time. You’re looking for a beautiful puffed, golden-brown crust. Keep an eye on it to prevent over-browning.
- **Syrup Immersion is Critical:** Immediately upon removing the baklava from the hot oven, evenly pour the prepared, *chilled* sugar syrup over the entire surface. The sizzling sound indicates the hot pastry is eagerly absorbing the cold syrup, which is essential for creating that perfect balance of crispness and moist sweetness.
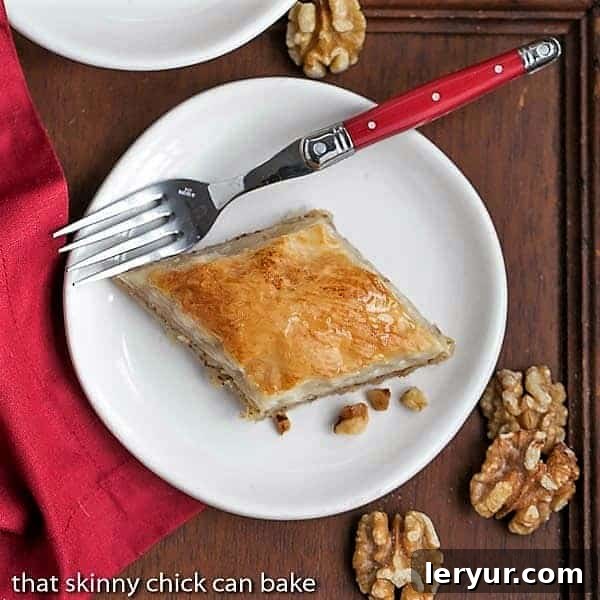
- **Cool and Serve:** Allow the baklava to cool completely to room temperature before serving. This cooling period is crucial as it allows the syrup to fully absorb and set, ensuring each piece is moist, sweet, and perfectly structured. Once cooled, dig in and savor your homemade masterpiece!
Frequently Asked Questions About Baklava
Baklava is a rich, sweet dessert pastry crafted from multiple layers of thin filo dough, generously filled with chopped nuts, and held together by a sweet, often aromatic, syrup or honey. The specific nuts, syrup ingredients, and flavorings can vary widely depending on regional culinary traditions and individual baker preferences, making each baklava recipe a unique expression of flavor.
Baklava boasts a fascinating and extensive history, with its origins debated among various cultures. It is widely recognized as hailing from the Middle East and the Mediterranean regions, encompassing the Levant, South Caucasus, Southeast Europe (including Greece), the Maghreb, and Central Asia. However, the prevailing historical consensus attributes the development and popularization of baklava to the kitchens of the Ottoman Empire, where it evolved into the intricate and celebrated dessert we know today.
Filo, also spelled phyllo or fillo, is a paper-thin, unleavened pastry dough integral to Mediterranean and Middle Eastern cuisine. Its extreme thinness is what allows it to bake into incredibly light and crispy layers. The downside to this delicacy is its rapid drying when exposed to air, which causes it to become brittle and prone to shattering. This fragility necessitates extra care, requiring bakers to keep it meticulously covered with a damp towel while working, as demonstrated in this **classic baklava recipe**, as well as other filo-based delights like börek, spanakopita, strudel, and tiropita. Once you understand its nature, you’ll discover this truly is an **easy baklava recipe** to master!
Absolutely! While walnuts are traditional for Greek baklava and provide a rich flavor, you can certainly experiment with other nuts. Pistachios are popular in many Middle Eastern versions, offering a distinct flavor and beautiful green color. Almonds and hazelnuts also work wonderfully, each adding its own unique aroma and texture. You can even create a blend of different nuts for a more complex profile.
Orange blossom water (or orange flower water) is a fragrant, clear distillate made from the blossoms of bitter orange trees. It’s a staple in Middle Eastern and Mediterranean cooking and baking, prized for its delicate floral and citrusy aroma. It adds a subtle, elegant perfume to desserts like baklava, custards, and drinks. You can typically find it in the international foods aisle of larger supermarkets, specialty Middle Eastern or Mediterranean grocery stores, or easily online.
Baklava keeps remarkably well due to its syrup content. It can be stored at room temperature, in an airtight container, for up to 2 weeks, provided your kitchen isn’t excessively warm. During hotter months, or for extended freshness, it’s best kept in the refrigerator for up to 2 weeks. Always ensure it’s in a tightly sealed container to prevent it from drying out or absorbing other odors.
For longer storage, baklava freezes beautifully. Once completely cooled, arrange pieces in an airtight freezer-safe container, separating layers with wax or parchment paper to prevent sticking. It can be frozen for up to 4 months. To serve, simply defrost overnight in the refrigerator, then bring to room temperature before enjoying.
The most common mistakes are related to filo dough handling: not defrosting properly, letting it dry out, or not buttering layers sufficiently. Another frequent error is pouring hot syrup over hot baklava, which can make it soggy. Always ensure the syrup is cold when it meets the hot pastry for that perfect crisp texture. Finally, resist the urge to cut baklava after it’s fully baked and cooled; cutting before baking creates cleaner lines and better syrup absorption.
Explore More Delicious Dessert Recipes:
If you’ve enjoyed making and tasting this classic baklava, you might love these other delightful recipes:
- Double Chocolate Nutella Toffee Skillet Brownie from Country Cleaver
- Pecan Tassies
- Old Fashioned Pecan Pie
- Toffee Cookies with Walnuts
- White Chocolate Macadamia Nut Cookies
- Plus, don’t miss my extensive collections of Dessert Recipes and Bar Cookie Recipes for more sweet inspiration!
Stay connected and share your culinary creations with me on social media! Find me @ Instagram, Facebook, and Pinterest. Don’t forget to tag me when you try one of my recipes! If you love the results, please consider giving it a 5-star rating in the recipe card below.
Classic Baklava Recipe
20 minutes
30 minutes
50 minutes
24 servings
A traditional Greek dessert that you can now make at home!
Ingredients
Syrup:
- 1 cup sugar
- ½ cup water
- 1 tablespoon lemon juice
- 1 tablespoon orange blossom water
- 1 pound filo dough
Baklava:
- 1 cup unsalted butter, melted
- 6-8 ounces chopped walnuts, coarsely chopped
- 2 tablespoons sugar
Instructions
- Make syrup by dissolving sugar in water and simmer till thick enough to coat a spoon, then add lemon and orange blossom water and simmer for 2 more minutes. Cool to room temperature in the refrigerator.
- Brush a 9 x 13 pan with butter. Place half of the filo in the pan, one sheet at a time, brushing each layer with butter.
- Keep the filo covered with a damp towel while brushing the layers to prevent it from drying out. Don’t worry if it tears, though, it will still look and taste fine.
- Mix nuts and sugar and spread over the filo layers. Cover with remaining filo, brushing each layer with butter as before.
- Cut diagonally into lozenge shapes. Bake at 350º for 30 minutes, then increase the temperature to 450º for 15 minutes or less till puffed and golden.
- Remove from oven and quickly pour cold syrup over baklava.
- Cool to room temperature to serve.
Notes
Pistachios, hazelnuts or almonds can be used instead of walnuts.
Recommended Products
As an Amazon Associate and member of other affiliate programs, I earn from qualifying purchases.
- Orange Blossom Water
- Silicone Pastry Brush
- 9 x 13 Revol Ceramic Baking Dish
Nutrition Information:
Yield:
24
Serving Size:
1
Amount Per Serving:
Calories: 559Total Fat: 49gSaturated Fat: 10gTrans Fat: 0gUnsaturated Fat: 37gCholesterol: 20mgSodium: 80mgCarbohydrates: 27gFiber: 4gSugar: 11gProtein: 9g
HOW MUCH DID YOU LOVE THIS RECIPE?
Please leave a comment on the blog or share a photo on Pinterest