
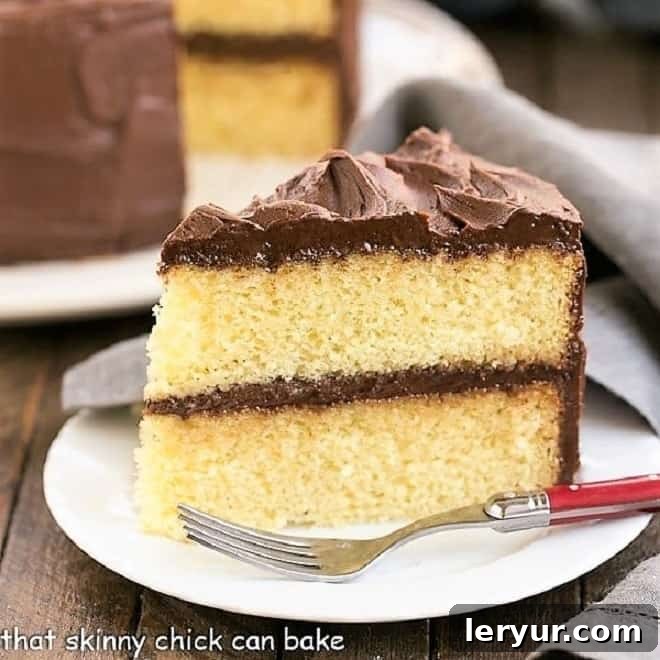
When celebrations call for a touch of homemade magic, one recipe consistently steals the show: our incredibly tender and moist Best Yellow Cake Recipe, flawlessly paired with a rich, dreamy Chocolate Buttercream Frosting. This classic combination isn’t just a dessert; it’s a cherished memory in the making, guaranteed to delight everyone from the youngest guest to the most discerning chocoholic.
There’s an undeniable charm to a Homemade Yellow Cake. Forget the dry, bland experience of a box mix; this recipe yields a cake that’s profoundly tender, wonderfully moist, and boasts an exquisite fine crumb that simply melts in your mouth. It’s truly a versatile masterpiece, perfectly suited for any occasion, whether it’s a grand birthday celebration, a festive holiday gathering, or simply a comforting treat on a lazy weekend afternoon.
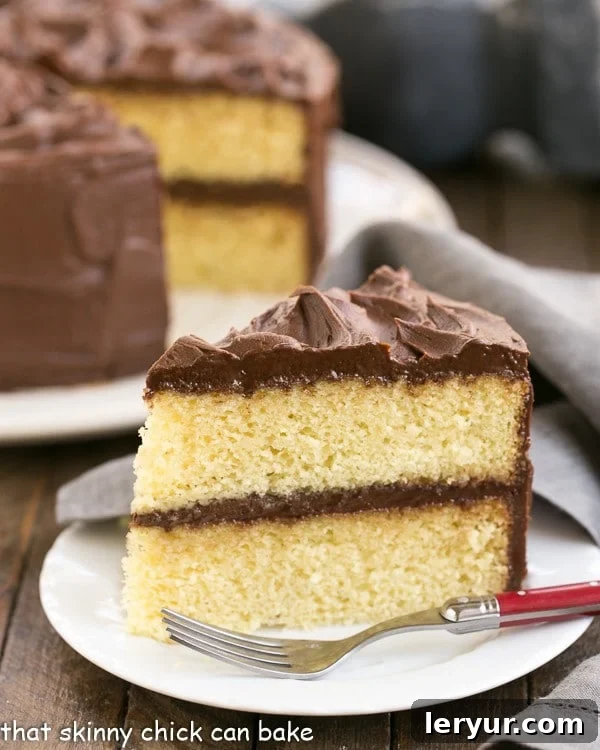
Why This Perfect Yellow Cake Recipe is a Must-Try
Every year, as my husband’s birthday approaches, there’s only one cake request on his mind: this Perfect Yellow Cake Recipe with Chocolate Buttercream. It might seem surprising for someone who identifies as a chocoholic, but his choice is often influenced by what he knows our daughter, “Miss Katie,” would adore. With a whimsical sign above her bed declaring it “The Queen’s Bed” in elegant calligraphy, it’s clear her preferences hold court!
This recipe isn’t just a family favorite; it’s a culinary triumph rooted in a reliable foundation. We initially adapted this moist yellow cake recipe from the renowned Smitten Kitchen, a source celebrated for its nearly foolproof and consistently delicious creations. What makes this particular yellow cake stand out?
- Unmatched Tenderness: Crafted with rich buttermilk, the cake achieves an unparalleled softness and a delicate fine crumb that is utterly irresistible.
- Subtle Sweetness: The flavor profile is perfectly balanced – sweet without being cloying, allowing the pure vanilla essence to shine through.
- Chocoholic Approved: Pairing this golden cake with a decadent chocolate frosting satisfies even the most intense chocolate cravings, offering the best of both worlds without needing to bake a full chocolate cake.
- Universal Acclaim: Without fail, this cake consistently receives rave reviews from our entire family and everyone who tries a slice. Its classic appeal and comforting flavors make it a guaranteed crowd-pleaser for any gathering.
Crafting the Best Chocolate Buttercream Frosting
A yellow cake, in my humble opinion, is simply incomplete without the luxurious embrace of a rich, velvety chocolate buttercream frosting. For the majority of our family, chocolate reigns supreme, and the truth is, this specific combination is nothing short of magical. The light, airy texture and classic vanilla notes of the yellow cake provide the perfect canvas for the deep, fudgy intensity of the chocolate frosting.
Imagine a symphony of flavors and textures: the delicate crumb of the cake yielding to the smooth, melt-in-your-mouth richness of the buttercream. It’s a harmonious pairing that elevates a simple dessert into an extraordinary experience. So, if you have a birthday celebration, anniversary, or any special occasion on your horizon, I wholeheartedly recommend this terrific combination. This perfect yellow cake recipe crowned with its fudgy, irresistible frosting is a surefire way to create lasting sweet memories.
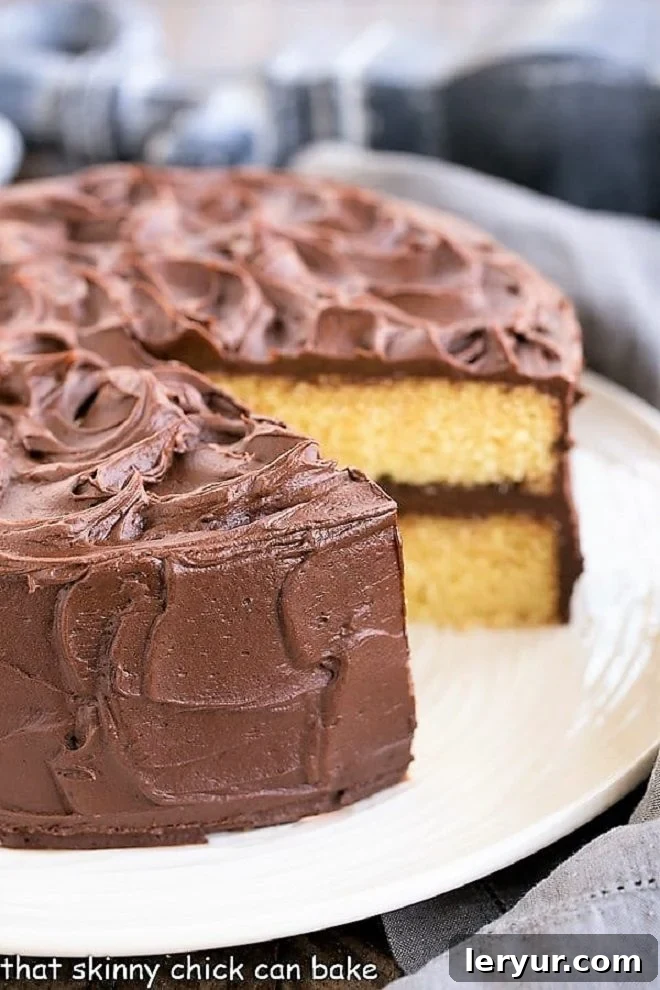
Frequently Asked Questions About Yellow Cake
The primary distinction lies in the eggs. A yellow cake incorporates whole eggs, meaning both the yolks and whites are used. The egg yolks are responsible for giving the cake its characteristic rich yellow hue and contributing significant richness and moisture to the batter. In contrast, a white cake typically uses only egg whites, resulting in a lighter, purer white color and a slightly different texture. Both types of cakes are traditionally flavored with vanilla, making vanilla a common element in their taste profile.
Achieving a super moist yellow cake is a result of several key ingredients and techniques. Butter is crucial; beyond its flavor, it slows down gluten formation, which helps keep the cake tender, and adds essential fat for moisture. Sugar plays a dual role by breaking up gluten strands and absorbing liquids, preventing a dry crumb. Eggs, particularly the yolks in a yellow cake, contribute fat and emulsification, further enhancing moisture. Additionally, using buttermilk and cake flour (or a homemade equivalent) can dramatically improve the cake’s tenderness and overall moistness, as discussed in our tips section below.
Proper storage is essential to maintain your yellow cake’s freshness and moisture. Once the cake has been cut, expose sections should be meticulously covered with plastic wrap. This barrier prevents air exposure, which is the main culprit behind a dry cake. For an uncut cake, a cake dome or an airtight container works wonders. This cake can typically be kept at room temperature for 3-4 days, remaining delightfully fresh and ready to enjoy.
Yes, you can freeze cake, but with certain considerations. Leftover cake slices, especially those already frosted, can be individually wrapped exceptionally well in plastic wrap, then foil, or placed in an airtight container to prevent freezer burn. They can be frozen for a month or two without significant loss of quality. However, freezing an entire frosted cake is generally not advised. The frosting, especially delicate buttercreams, may not fare well with the repeated handling, freezing, and thawing process, potentially compromising its texture and appearance.
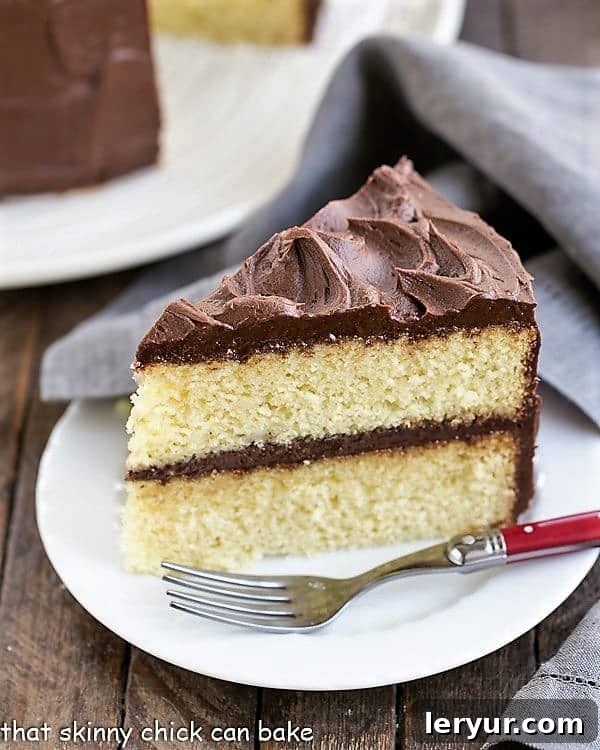
Expert Tips for Making a Flawless Layer Cake
The thought of baking and assembling a multi-layered cake can often feel a bit daunting. From ensuring perfectly even layers to achieving that professional, bakery-quality finish, there are several steps where things can go awry. But fear not! With a few simple yet effective tips, you can transform your layer cake anxieties into baking triumphs. Here’s how to master the art of the layer cake, ensuring beautiful results every time:
- Achieve Even Layers with Precision:
- PRO-Tip: For perfectly uniform cake layers, I highly recommend using a kitchen scale to divide your batter. This ensures each pan receives an identical amount of batter, leading to layers that bake up evenly in size and thickness. Eyeballing it can often result in one layer being noticeably thicker than the other.
- If your cake layers emerge from the oven with slightly rounded tops, don’t despair! Allow them to cool completely, then use a serrated knife or a cake leveler to gently trim the domes off. This creates a flat surface, which is crucial for stable stacking and easy frosting.
- Once trimmed, place the bottom side of each cake layer facing upwards when you begin frosting. The bottom surface of a baked cake is typically flatter and less crumbly than the top, giving you a smoother canvas to work with and minimizing stray crumbs in your frosting.
- Mastering the Crumb Coat for a Smooth Finish:
- A “crumb coat” is your secret weapon for a professional-looking cake. Apply a very thin, almost translucent layer of frosting over the top and sides of each cooled cake layer. This thin layer acts as a net, catching any loose crumbs.
- After applying the crumb coat, chill the cake (either in the refrigerator or freezer for a short period) until the frosting hardens slightly. This sets the crumbs in place, creating a perfectly smooth, crumb-free surface for your final, thicker layer of frosting.
- Temperature is Key: Ensure your cake layers are completely cooled to room temperature before you even think about applying frosting. Attempting to frost a warm cake will result in a melted, sliding mess. Patience here pays off immensely.
- The Power of the Right Ingredients: Both cake flour and buttermilk are instrumental in achieving this cake’s signature tender texture.
- PRO-Tip: Homemade Buttermilk Substitute: If you don’t have buttermilk on hand, it’s incredibly easy to make your own. Add one tablespoon of lemon juice or white/cider vinegar to a liquid measuring cup. Then, fill the cup to the one-cup mark with whole or 2% milk. Stir it gently and let it rest for about 5-10 minutes. The milk will curdle slightly, and you can then use this mixture as an equal substitute for store-bought buttermilk in any recipe.
- PRO-Tip: DIY Cake Flour: No cake flour? No problem! For every cup of cake flour required, measure out a cup of all-purpose flour. Remove two tablespoons of this flour. Then, add two tablespoons of cornstarch to the remaining all-purpose flour. Sift this mixture together at least three times. This process lightens the flour and evenly distributes the cornstarch, mimicking the low-protein structure of commercial cake flour, resulting in a lighter, more tender cake.
- Keep Your Serving Plate Clean: When assembling and frosting, I like to tuck small strips of parchment or wax paper around the perimeter of the cake on the serving plate. This ingenious trick catches any frosting drips or stray crumbs, keeping your final presentation pristine. Once you’re done frosting, simply slide the paper strips out, revealing a perfectly clean cake plate.
More Delicious Recipes for Birthday Cakes You’ll Love
While our Perfect Yellow Cake with Chocolate Buttercream is a reigning champion for celebrations, there are many other delightful options to explore. Whether you’re seeking something innovative, bite-sized, or a different classic, these recipes offer fantastic alternatives:
- Birthday Cake Roll from Crazy for Crust: A fun and festive dessert that rolls up all the birthday joy into one impressive treat.
- Birthday Cake Brownies from Back for Seconds: Combine the richness of brownies with the playful sprinkles and flavors of a birthday cake.
- Birthday Cake Mix Cookies Recipe from Crunchy Creamy Sweet: An incredibly easy and delightful cookie recipe that captures the essence of birthday cake in every bite.
- White Birthday Cake: For those who prefer the elegant simplicity and delicate crumb of a classic white cake.
- Chocolate Fudge Layer Cake: A decadent option for serious chocolate lovers, promising deep, rich flavors.
- Angel Food Cake Recipe: A light, airy, and fluffy cake, perfect for a less indulgent but equally delicious celebration.
Stay connected with us for more delicious recipes and baking inspiration! Find us on Instagram, Facebook, and Pinterest. Don’t forget to tag us when you bake one of our recipes! And if you love the results, please consider leaving a 5-star rating in the recipe card below – your feedback means the world to us.
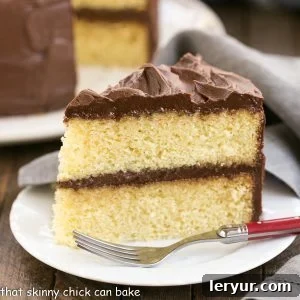
Perfect Yellow Cake with Chocolate Buttercream
1 hour
40 minutes
1 hour 40 minutes
16 servings
A classic and beloved combination featuring a fine-crumb yellow cake and irresistible, dreamy chocolate frosting! This recipe is absolutely perfect for any celebration or just because.
Ingredients
For the Yellow Cake:
- 4 cups plus 2 tablespoons cake flour
- 2 teaspoons baking powder
- 1 ½ teaspoons baking soda
- 1 teaspoon salt
- 1 cup (2 sticks) unsalted butter, softened to room temperature
- 2 cups granulated sugar
- 2 teaspoons pure vanilla extract
- 4 large eggs, at room temperature
- 2 cups buttermilk
For the Best Chocolate Buttercream Frosting:
- 1 ½ cups (3 sticks) unsalted butter, softened to room temperature
- 1 cup unsweetened cocoa powder
- 5 cups powdered sugar, sifted
- ½ cup milk (whole or 2%)
- 2 teaspoons pure vanilla extract
Instructions
- Preheat your oven to 350°F (175°C).
- Prepare two 9-inch round cake pans by buttering them generously. Line the bottoms with circles of parchment paper, then butter the parchment as well (a baking spray with flour, like Baker’s Joy, also works wonderfully).
- In a medium bowl, whisk together the cake flour, baking powder, baking soda, and salt until well combined. Set aside.
- In the bowl of your stand mixer fitted with the paddle attachment, beat the softened butter and sugar together on medium speed until the mixture is light, pale, and fluffy (about 3-5 minutes). Beat in the vanilla extract.
- Add the eggs one at a time, beating well after each addition and scraping down the sides of the bowl to ensure everything is incorporated.
- Gradually mix in the buttermilk until just combined. The mixture may look slightly curdled, but this is normal. Do not over-mix.
- With the mixer on low speed, add the dry flour mixture in three batches, mixing until just combined after each addition. Be very careful not to over-mix, as this can develop too much gluten and result in a tough cake with large air pockets.
- Divide the batter evenly between the prepared cake pans. To release any large air bubbles, gently drop the cake pans onto the counter from a few inches up, 2 or 3 times.
- Bake for 35 to 40 minutes, or until a wooden toothpick inserted into the center of the cakes comes out clean.
- Allow the cakes to cool in their pans on a wire rack for about 10 minutes. Then, carefully invert them onto the wire rack, remove the pans, peel off the parchment paper, and let the cakes cool completely before frosting.
- To make the chocolate buttercream frosting: In the bowl of your stand mixer, place the cocoa powder. Mix briefly with a whisk attachment to remove any lumps. Add the softened butter and cream until the mixture is smooth and light.
- Begin adding the sifted powdered sugar and milk alternately. Start with about a cup of powdered sugar, mix, then add a tablespoon of milk, mix, and repeat until all the powdered sugar and milk are incorporated and the frosting is smooth and creamy.
- Stir in the vanilla extract until combined. If you prefer a thicker frosting, add a little more powdered sugar; for a thinner consistency, add a small amount more milk, adjusting to your desired texture.
Recipe Notes
Always check the expiration date on your baking powder and baking soda. These leavening agents lose potency over time, and expired products can lead to a flat cake.
This exquisite yellow cake recipe is adapted from Smitten Kitchen, a source for consistently excellent baking. The decadent chocolate buttercream frosting is adapted from Add a Pinch, known for their perfect frosting recipes.
Recommended Baking Essentials
As an Amazon Associate and member of other affiliate programs, I earn from qualifying purchases, helping to support this blog at no extra cost to you.
- 9-inch Parchment Rounds
- 9-inch USA Pan Bakeware Round Cake Pan
- KitchenAid KSM150PSER Artisan Tilt-Head Stand Mixer with Pouring Shield, 5-Quart, Empire Red
Nutrition Information:
Yield: 16
Serving Size: 1 slice
Amount Per Serving (Estimated):
Calories: 547
Total Fat: 31g
Saturated Fat: 19g
Trans Fat: 1g
Unsaturated Fat: 9g
Cholesterol: 125mg
Sodium: 620mg
Carbohydrates: 65g
Fiber: 1g
Sugar: 60g
Protein: 4g
Please Note: Nutritional information for recipes is provided as a courtesy and is an estimate only. This information typically comes from online calculators and can vary based on specific product types or brands used. While efforts are made to provide accurate nutritional data, these figures are only estimates. Factors such as “to taste” measurements (e.g., salt) or optional toppings may not be included in calculations. For the most precise nutritional information, it is recommended to calculate with the exact ingredients you use. You are solely responsible for verifying the accuracy of any nutritional information obtained.
HOW MUCH DID YOU LOVE THIS RECIPE?
Please leave a comment on the blog or share a photo on Pinterest – we love to see your creations!