
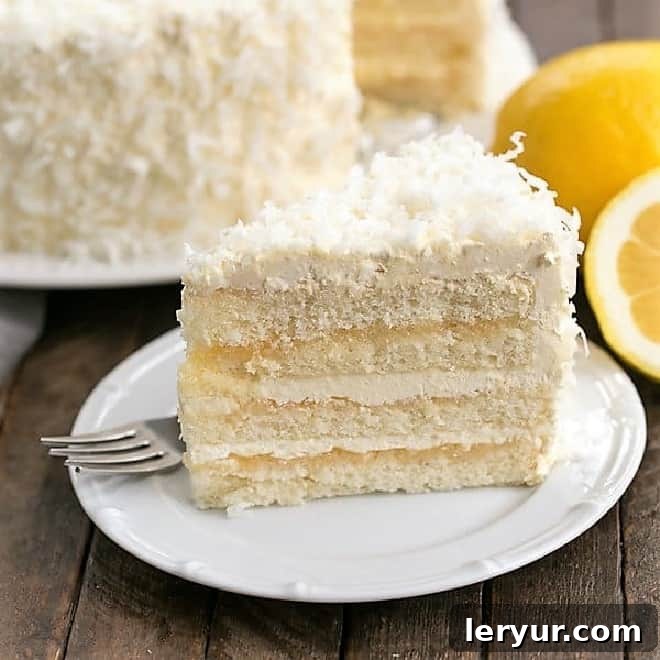
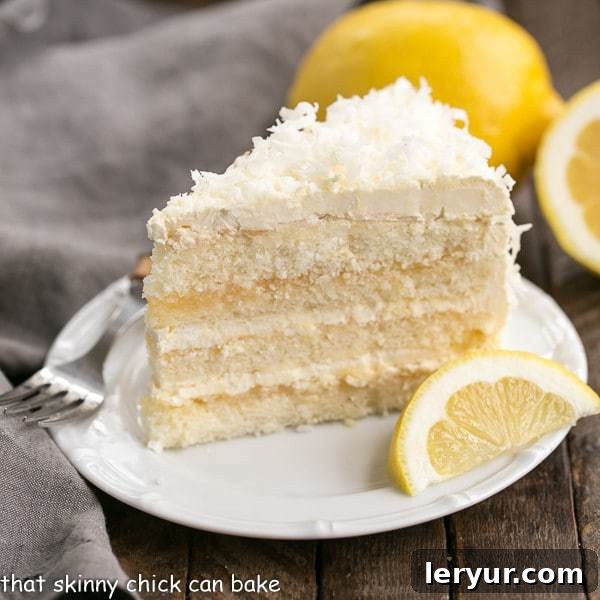
Prepare to be enchanted by the ultimate Lemon Layer Cake with Lemon Curd Filling – a truly spectacular dessert that promises to brighten any special occasion. With its vibrant citrus notes and luxurious textures, this cake is more than just a treat; it’s an experience. Perfect for welcoming the warmth of springtime, celebrating Easter, or simply elevating any gathering, this cake evokes feelings of sunshine and joy with every single bite.
This exquisite Lemon Curd Cake is meticulously crafted for true lemon enthusiasts. While it demands a little effort and attention to detail, the final result is undeniably worth every minute spent in the kitchen. The symphony of zesty lemon cake, tangy lemon curd, and a cloud-like frosting creates an unforgettable dessert. If you’ve never had the pleasure of tasting or making a Swiss Meringue Buttercream Frosting, this recipe is guaranteed to make you a convert. Its unparalleled satiny smoothness and delicate sweetness perfectly complement the bright lemon layers, resulting in a dessert that is simply divine and remarkably sophisticated.
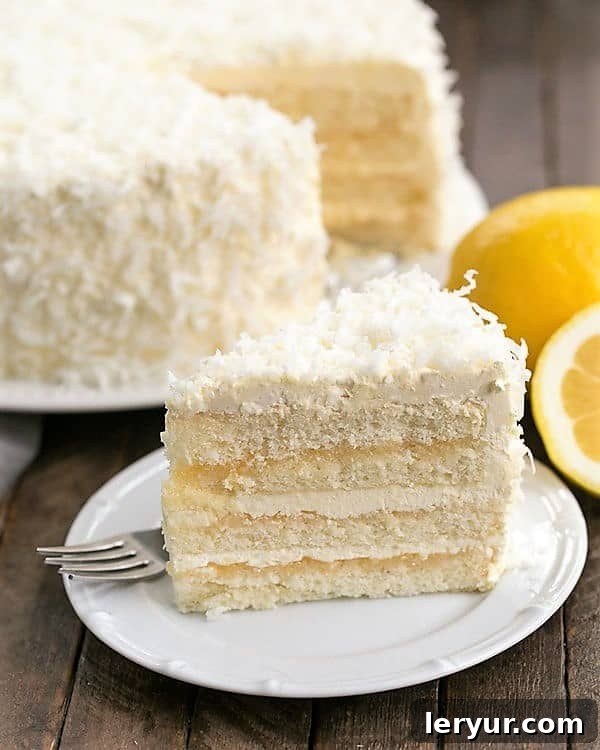
Why This Lemon Layer Cake is a Must-Bake Masterpiece
There are countless reasons why this Lemon Layer Cake deserves a coveted spot in your baking repertoire. It transcends the ordinary, transforming simple ingredients into an extraordinary culinary delight that will earn you accolades.
- The Epitome of a Special Occasion Cake: This isn’t just any cake; it’s a showstopper designed for moments that matter. Whether it’s a birthday, anniversary, holiday gathering, or any milestone worth celebrating, its stunning appearance and unforgettable flavor profile make it the perfect centerpiece. Its elegance suits formal dinners, yet its comforting taste makes it ideal for intimate family celebrations.
- A Dream Come True for Lemon Lovers: For those who truly adore the bright, zesty flavor of lemon, this cake is a revelation. Every component—from the moist cake layers deeply infused with fresh lemon zest and juice to the vibrant, luscious lemon curd filling—sings with intense citrus goodness. It’s a perfectly balanced symphony of tangy and sweet that will delight even the most discerning palate, leaving a refreshing aftertaste.
- Experience the Luxury of Swiss Meringue Buttercream: Often hailed as the “queen of frostings,” Swiss Meringue Buttercream is renowned for its silken texture and light, less-sweet profile. Unlike traditional American buttercream, which can sometimes be overly sweet and heavy, SMB is airy, incredibly stable, and exceptionally smooth. It spreads like a dream, cuts cleanly without tearing, and allows the natural flavors of the cake and curd to shine through without overpowering them. It’s a truly sophisticated finish that elevates the entire dessert to professional patisserie standards.
- A Rewarding Baking Journey: While the recipe involves a few distinct steps, each one is manageable, and the process is incredibly rewarding. The sense of accomplishment you’ll feel after presenting this beautiful, homemade cake is immense, and the rave reviews from your guests will be the sweetest reward, making every moment spent worthwhile.
Essential Baking Tips for a Flawless Lemon Cake
Achieving baking perfection often comes down to a few critical details and smart preparation. Here are some indispensable tips to ensure your Lemon Layer Cake with Lemon Curd Filling turns out beautifully, boasting perfect texture and flavor every single time.
- This particular lemon curd cake recipe is a delightful adaptation of Dorie Greenspan’s beloved Perfect Party Cake. We’ve significantly enhanced the lemon profile by replacing Dorie’s traditional raspberry preserves with a generous layer of vibrant lemon curd, ensuring an even more pronounced and exhilarating citrus burst throughout the cake. This substitution truly makes it a celebration of lemon.
- PRO-Tip: Ensure Your Baking Powder is Fresh: This is a crucial, yet often overlooked step that directly impacts your cake’s rise and texture. Baking powder is not used as frequently as baking soda in many home kitchens, and it can unfortunately lose its potency over time while sitting in your cupboard. A fresh, active leavening agent is absolutely vital for achieving the desired light, airy, and fluffy cake texture.
- PRO-Tip: How to Test Baking Powder Freshness: To quickly and easily check if your baking powder is still active, place ½ teaspoon into a heat-safe bowl and pour in ¼ cup of boiling water. If you observe a vigorous fizzing and bubbling reaction, your baking powder is fresh and ready to perform. If it remains flat or shows only minimal bubbles, it’s a clear sign that it’s expired and needs to be replaced for optimal baking results.
- You will be elegantly slicing each baked cake layer in half horizontally to create four thinner layers. This technique might sound a little intimidating at first glance, but with the right guidance and a steady hand, it’s surprisingly straightforward. This step adds a professional touch and allows for more generous distribution of the luscious lemon curd filling. Check our detailed tips below; it’s genuinely not as daunting as it sounds!
- PRO-Tip: Storing and Preparing Swiss Meringue Buttercream: If you decide to prepare your Swiss Meringue Buttercream ahead of time, be aware that it will firm up considerably when chilled in the refrigerator. It will not be spreadable directly from the fridge. Therefore, plan accordingly: either prepare the buttercream just before you intend to assemble and frost the cake, or allow ample time (several hours, depending on quantity) for it to come back to room temperature before attempting to use it. Once at room temperature, re-whip it briefly on medium speed to restore its luscious, smooth, and spreadable consistency.
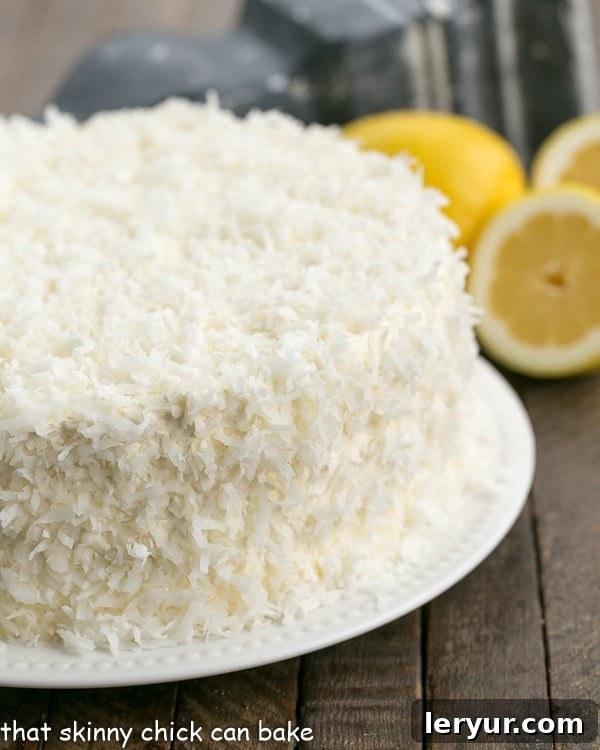
How to Master Slicing Cake Layers Horizontally for a Multi-Layer Masterpiece
Creating a cake with multiple, thinner layers not only enhances its visual appeal but also allows for a more generous and delightful distribution of delicious fillings. While the idea of slicing cake layers horizontally might seem like a task best left to professional bakers, it’s entirely achievable at home with a simple, reassuring technique and a bit of patience. This method will transform your two baked cake rounds into four delicate layers, ready for assembly into a truly impressive dessert.
- My PRO-Tip: Use Toothpicks as Your Guide: This trick is an absolute game-changer for achieving remarkably even and straight cuts. Once your cakes are completely cooled, gently insert toothpicks or bamboo skewers around the perimeter of each baked layer, positioning them just below the mid-line. These strategically placed markers will serve as invaluable visual guides, helping you maintain a perfectly straight, level cut as you work your way around the cake. Aim for consistency in placement for the most accurate and beautiful results.
- The Gentle Serrated Knife Technique: I find that a long serrated knife (often referred to as a bread knife) is the absolute best tool for this precise job. Begin by making shallow, gentle cuts all the way around the edge of the cake, slowly and carefully rotating the cake as you go. Once you’ve established a complete, guiding groove around the entire circumference, slowly work your way deeper into the center of the cake with steady, delicate sawing motions, always ensuring your knife remains level with your toothpick guides. This gradual approach minimizes tearing and ensures a smooth cut.
- Aim for Uniformity (But Don’t Stress Perfection!): The ultimate goal here is to create four cake slices of approximately the same thickness, which contributes significantly to the cake’s elegant presentation. Take your time with both the toothpick placement and with each individual slice. Remember, even if your slices aren’t absolutely flawless or perfectly symmetrical, the luscious lemon curd and velvety Swiss meringue buttercream will generously mask any minor imperfections in the layers, and the cake will still be wonderfully delicious and beautiful to behold!
- An Ingenious Alternative for More Layers: A clever reader once shared an innovative alternative to the slicing technique: baking the batter in four separate, thinner cake pans instead of two thicker ones. This method could potentially save you the step of horizontal slicing, appealing to those who prefer to avoid it. If you opt for this approach, you would likely need to decrease the baking time significantly (as thinner cakes bake faster) and possibly reduce the oven temperature by about 25 degrees Fahrenheit (around 14°C) to prevent the thinner layers from drying out or over-browning. If you decide to try this creative alternative, please do let me know about your experience and how it turned out!
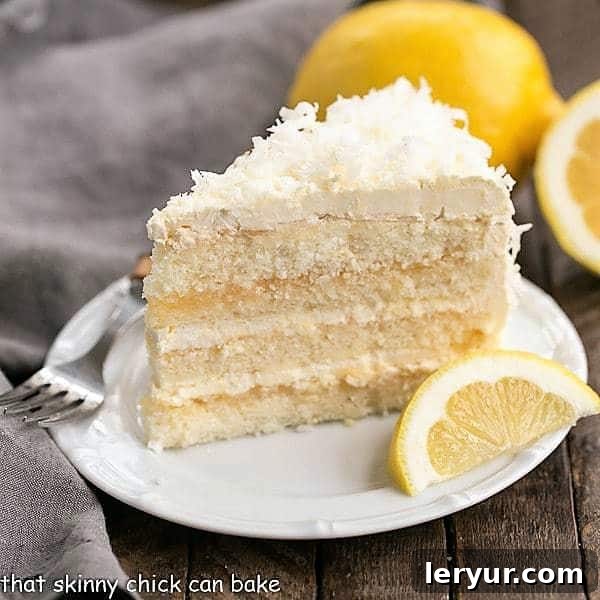
Mastering Swiss Meringue Buttercream: Your Guide to Silky-Smooth Frosting
Swiss Meringue Buttercream (SMB) may initially appear more complex than its American counterpart, but I assure you, its luxurious texture and sublime, balanced flavor are absolutely worth the extra effort. Once you master this technique and taste its velvety richness and light sweetness, you’ll understand why it’s my absolute favorite frosting to work with for special occasion cakes.
- Understanding Buttercream Varieties: Beyond the common American buttercream (typically butter and powdered sugar), there are several sophisticated European varieties like Swiss, French, and Italian buttercreams. Each of these uses eggs as a base, distinguishing them from American versions and contributing to their unique textures and flavors. For a frosting that’s significantly less sweet, incredibly smooth, wonderfully stable, and cuts cleanly, Swiss Meringue Buttercream is undoubtedly my go-to choice.
- Less Sugar, More Flavor: One of the key advantages of opting for Swiss Meringue Buttercream is its significantly reduced sugar content compared to American buttercream. This allows the natural, nuanced flavors of the cake and any added essences (such as bright lemon extract or fresh lemon juice) to truly shine through, resulting in a more balanced, refined, and palatable dessert experience that isn’t cloyingly sweet.
- Safe to Eat Egg Whites: Don’t be concerned about using raw egg whites; in the making of Swiss Meringue Buttercream, they are gently but thoroughly heated. The egg whites and granulated sugar are whisked together over a pot of simmering water (creating a double boiler setup) for approximately 3 minutes. This controlled heating process brings the mixture to a safe temperature (ideally 160ºF or 71°C, which you can easily verify with an instant-read thermometer), effectively neutralizing any potential salmonella bacteria. This ensures your frosting is not only exceptionally delicious but also perfectly safe for everyone to enjoy.
- Constant Whisking is Key During Heating: During the crucial heating process, it is paramount to whisk the sugar and egg white mixture constantly and vigorously. This continuous motion prevents the egg whites from scrambling or cooking solid at the bottom of the bowl. Instead, it ensures they remain liquid, evenly heated, and that all the sugar crystals completely dissolve, forming the smooth, glossy base for your meringue.
- Patience During Cooling: After the heating step, the warm meringue mixture is transferred to a stand mixer and whipped on high speed until it cools completely. This step is absolutely crucial and can take 10 minutes or even longer, depending on the power of your mixer and the ambient temperature of your kitchen. It is vital to periodically touch the sides of the mixing bowl; it must be cool to the touch before you even contemplate adding the butter. Adding butter to a warm meringue will inevitably result in a soupy, unstable, and failed frosting.
- Adding the Butter, One Tablespoon at a Time: Once your meringue is perfectly cool and holds stiff, glossy peaks, switch to the paddle attachment on your stand mixer. Begin incorporating the room-temperature unsalted butter, one tablespoon at a time, allowing each addition to be mostly absorbed before adding the next. Don’t be alarmed if the mixture appears curdled, lumpy, or even separated during this stage – this is a completely normal and often-seen “ugly phase” in the transformation process. Trust the process!
- The Magical Transformation: After all the butter has been incorporated, increase the mixer speed to high and continue beating the entire mixture for another 6-10 minutes. During this extended whipping period, the frosting will miraculously transform from that initially curdled appearance into a magnificently fluffy, flawlessly smooth, and incredibly stable buttercream. Keep whipping until it achieves that desired satiny, airy consistency, and you’ll be amazed at the result!
- Flavoring Your Buttercream: Once the buttercream has reached its fluffy, smooth state, reduce the mixer speed to medium-low. Gradually beat in the fresh lemon juice, allowing each addition to be fully absorbed before incorporating more to maintain the buttercream’s beautiful texture. Finally, mix in the vanilla extract until just combined, ensuring the flavors are perfectly blended.
The reception for this Lemon Layer Cake, whether served as a birthday cake or for any other special occasion, has been overwhelmingly positive. One guest even declared it the best thing I’d ever baked! I had a captivated audience as I proudly shared my horizontal cutting technique for creating those beautiful thin layers and elaborated on the rewarding process of making such a velvety Swiss Meringue Buttercream. This frosting, by the way, spreads and cuts like an absolute dream, providing a professional finish that truly impresses. If you have a cherished lemon lover in your life, be sure to save this incredible Lemon Layer Cake recipe for their next special occasion – it’s guaranteed to impress and become a treasured favorite!
Frequently Asked Questions About Lemon Cake & Buttercream
Lemon is incredibly versatile and pairs beautifully with a wide array of complementary flavors, making it a fantastic base for diverse desserts. Coconut is a particularly popular and delightful pairing, especially in springtime or for Easter desserts, as its tropical sweetness and texture beautifully complement lemon’s bright tang. For flavorings, pure vanilla extract adds warmth and depth without overpowering the citrus, while almond extract provides a sophisticated, subtle nuttiness that enhances the lemon’s complexity. Berries such as fresh strawberries, sweet raspberries, and tart cherries are fantastic additions to lemon desserts, either incorporated directly into the recipe, used as elegant garnishes, or served alongside as a vibrant sauce. Other excellent pairings include ginger (for a spicy kick), fresh mint (for a refreshing note), lavender (for a floral aroma), and even certain cheeses like mascarpone or cream cheese for a rich and creamy contrast in cheesecakes or tarts.
Infusing a cake with bright, authentic lemon flavor is easy with a few key techniques that maximize its citrus impact. One of my absolute favorite tips is to rub fresh lemon zest directly into the granulated sugar called for in your recipe. This simple yet effective action helps to release the essential oils from the zest, allowing the sugar to absorb and carry that intense lemony aroma and flavor throughout the entire batter, ensuring every bite is permeated with citrus. Beyond zest, incorporating a good quality lemon extract can significantly boost the citrus notes without adding excess liquid. Fresh lemon juice is also a fantastic addition to the batter, providing acidity and a natural tang that brightens the overall flavor profile. For an even more profound flavor and moistness, consider adding a thin layer of luscious lemon curd between cake layers or mixing a bit of lemon juice directly into your frosting.
Swiss Meringue Buttercream (SMB) is one of the most revered types of buttercream frosting in the culinary world, highly regarded for its ultra-smooth, silky texture and a delightful richness that is significantly less sweet than traditional American buttercream. It’s crafted through a specific process: first, egg whites and granulated sugar are gently heated together over a double boiler (a bowl set over simmering water) until the sugar fully dissolves and the mixture reaches a safe temperature. This warm meringue is then transferred to a stand mixer and whipped extensively until it becomes voluminous, glossy, and cools completely, holding stiff peaks. Finally, soft, room-temperature unsalted butter is gradually added and beaten until the frosting transforms into a light, airy, and incredibly stable emulsion. Its elegant finish, stability, and balanced sweetness make it a preferred choice for decorating and filling delicate cakes, such as this Lemon Layer Cake, providing a luxurious experience.
Serving and Storage Suggestions for Your Lemon Layer Cake
To fully enjoy the delightful flavors and exquisite textures of your homemade Lemon Layer Cake with Lemon Curd Filling, consider these serving and storage tips for maximum enjoyment and freshness:
- Optimal Serving Temperature: For the absolute best flavor and texture experience, allow your cake to sit at room temperature for about 30-60 minutes before slicing and serving. This resting period softens the buttercream slightly to its ideal creamy consistency and allows the full intensity of the bright lemon flavors in both the cake and curd to truly shine.
- Garnish for Enhanced Elegance: Enhance the already stunning presentation of your cake with simple yet effective garnishes. Fresh lemon slices, delicate candied lemon peel, vibrant fresh berries (especially raspberries or blueberries), or a light sprinkle of toasted shredded coconut can add both visual appeal and additional layers of flavor and texture that complement the lemon beautifully.
- Storage at Room Temperature: If your kitchen environment is cool and stable (ideally below 70°F or 21°C), this cake can be safely stored in an airtight cake dome or container at room temperature for up to two days. The stability of the Swiss Meringue Buttercream ensures it holds up well during this period.
- Refrigeration for Longer Storage: For extended preservation, refrigerate the cake in an airtight container for up to 5-7 days. It’s crucial to protect it from absorbing odors from other foods. Always remember to bring individual slices or the entire cake to room temperature for about 20-30 minutes before serving to ensure optimal enjoyment of its delicate flavors and textures.
- Freezing for Future Indulgence: Both individual slices and the entire frosted cake can be frozen successfully. To do so, first freeze the cake uncovered until the buttercream is firm. Then, wrap it thoroughly in several layers of plastic wrap, followed by a layer of aluminum foil, ensuring it’s completely airtight. Freeze for up to 2-3 months. To thaw, transfer the wrapped cake to the refrigerator overnight, then bring it to room temperature before serving for the best possible experience.
More Irresistible Dessert Recipes You May Also Love
If you’re a devoted fan of delightful desserts, especially those with a bright citrus twist or a touch of elegance, be sure to explore these other fantastic recipes that promise to tantalize your taste buds and impress your guests:
- Outrageous Lemon Lover’s Trifle from Melissa’s Southern Style Kitchen – A truly layered dessert packed with an abundance of creamy, zesty lemon goodness.
- The Best Lemon Bars Recipe – A classic, irresistible combination of a buttery shortbread crust and a perfectly tangy, sweet lemon filling.
- Lemon Meringue Pie – A timeless favorite featuring a tart lemon custard beneath a towering, light, and perfectly toasted meringue cloud.
- Strawberry Lemon Tart – A beautiful and refreshing dessert combining the sweetness of fresh strawberries with the vibrant zest of lemon in a delicate, crisp tart shell.
- Discover more of the Best Dessert Recipes for every occasion and craving, from comforting classics to elegant showstoppers.
Stay connected and share your culinary creations with us! Follow along for more delicious recipes and inspiration on social media: Instagram, Facebook, and Pinterest. Don’t forget to tag me when you try one of my recipes! If you love the results and want to help other bakers discover this wonderful recipe, please consider leaving a 5-star rating in the recipe card below.
Lemon Layer Cake with Lemon Curd Filling Recipe
45 minutes
40 minutes
1 hour 25 minutes
16 servings
A scrumptious lemon and coconut layer cake adapted from Perfect Party Cake from Dorie Greenspan’s Baking: From My Home to Yours, enhanced with luscious lemon curd and silky Swiss Meringue Buttercream.
Ingredients
For Lemon Cake:
- 2 ¼ cups cake flour
- 1 tablespoon baking powder
- ½ teaspoon table salt
- 1 ¼ cups buttermilk
- 4 egg whites, at room temperature
- 1 ½ cups sugar
- 2 teaspoons finely grated lemon zest
- 1 stick (4 ounces) unsalted butter, at room temperature
- ½ teaspoon pure lemon extract, I use Penzey’s brand
For the Buttercream:
- 1 cup sugar
- 4 egg whites
- 3 sticks (12 ounces) unsalted butter, at room temperature
- ⅛ teaspoon table salt
- ¼ cup fresh lemon juice
- 1 teaspoon vanilla extract
For assembly:
- 1 11-ounce jar of good-quality lemon curd
- 2 cups sweetened shredded coconut
Instructions
- Preheat the oven to 350 degrees F (175 C). Grease two 9-inch cake pans with non-stick flour and oil baking spray (like Baker’s Joy) and line the bottom of each pan with parchment paper. Spray the top of the parchment as well.
- To prepare the cake batter, first, in a medium bowl, whisk together the cake flour, baking powder, and salt. In a separate small bowl, whisk together the buttermilk and egg whites.
- In your stand mixer bowl (or a large mixing bowl with a hand mixer), combine the sugar and finely grated lemon zest. Use your fingers to rub the zest into the sugar for a few minutes until the sugar becomes moist and intensely fragrant. This technique releases the essential oils from the zest, infusing the sugar with deep lemon flavor.
- Add the room-temperature unsalted butter to the lemon-sugar mixture. Beat at medium speed for about 3 minutes until the butter and sugar are very light and fluffy. Mix in the pure lemon extract. Now, gradually add the dry and wet ingredients in alternating steps: add one-third of the flour mixture and mix until just combined, then half of the buttermilk-egg mixture until incorporated. Repeat with another third of the flour mixture, followed by the rest of the milk-egg mixture, and finally, the last of the flour.
- Scrape down the sides and bottom of the bowl as needed throughout the mixing process to ensure all ingredients are thoroughly incorporated. Continue beating for another 2 minutes on medium speed to create a smooth, airy batter.
- Divide the prepared batter evenly between the two greased and lined 9-inch cake pans. Use an offset spatula to gently smooth the tops. Bake for 30-35 minutes, or until a wooden skewer inserted into the center comes out clean and the middle of the cake springs back lightly when touched.
- Remove the baked cakes from the oven and transfer them to wire cooling racks. Allow them to cool in their pans for 5 minutes before carefully inverting them onto the racks. Remove the parchment paper from the bottoms of the cakes, then let them finish cooling completely, top sides up, on the racks before proceeding to assembly.
- To make the Swiss Meringue Buttercream, combine the sugar and egg whites in a large, heat-safe mixer bowl. Place this bowl over a pot of simmering water (ensure the bottom of the bowl does not touch the water).
- Whisk the mixture continuously with a balloon whisk until it becomes hot to the touch (about 160°F or 71°C if using a thermometer) and all the sugar crystals have dissolved, which typically takes about 3 full minutes. The mixture should feel smooth when rubbed between your fingers.
- Carefully remove the bowl from the heat and attach it to your stand mixer (using a stand mixer is highly recommended for this step). Beat the meringue on high speed for about 5 minutes, or until the meringue has cooled completely, become very thick, glossy, and holds stiff peaks. The outside of the bowl should feel cool to the touch.
- Switch to the paddle attachment. With the mixer on medium-low speed, begin adding the room-temperature unsalted butter, one stick (4 ounces) at a time, cutting each stick into smaller pieces. Beat until each addition is fully incorporated and the mixture starts to smooth out. Don’t worry if it looks curdled or separated; it will come together.
- Once all the butter has been added, increase the mixer speed to high and continue beating for 6-10 minutes. During this time, the buttercream will transform from what might look like a curdled mess into a thick, incredibly smooth, and fluffy frosting. Keep beating until it’s perfectly emulsified and light.
- Decrease the mixer speed to medium-low. Gradually beat in the fresh lemon juice, waiting until each addition is fully absorbed before incorporating more. Finally, mix in the vanilla extract until just combined, ensuring the flavors are perfectly blended. Set the finished buttercream aside while you prepare the cake layers for assembly.
- To assemble the cake, carefully slice each cooled cake layer horizontally in half, creating a total of four layers. My recommended technique is to place toothpicks around the perimeter of each cake, slightly below where you intend to slice. These will act as a guide for your long serrated knife as you gently saw through the layers.
- Place one cake layer, cut side up, onto your chosen serving dish or cake stand. Spread it evenly with one-third of the good-quality lemon curd (approximately ⅓ cup).
- Next, spread about ¼ of the prepared Swiss Meringue Buttercream over the lemon curd. Place the next cake layer on top and repeat the layers of lemon curd and buttercream two more times. Finally, top with the fourth and final cake layer, with its baked side facing up.
- Use the remaining buttercream to generously frost the top and sides of the entire cake, creating a smooth, elegant finish. If desired, gently press sweetened shredded coconut onto the frosted surfaces for an additional layer of texture and flavor, particularly around the sides. Your stunning Lemon Layer Cake is now ready to be served and enjoyed!
Notes
Make sure you use baking powder, not baking soda, for this recipe. It’s also important to check if your baking powder is fresh before using, as it often loses potency sitting in your pantry. Refer to the ‘Essential Baking Tips’ section in the post for guidance on how to easily test its freshness.
Nutrition Information:
Yield:
16
Serving Size:
1
Amount Per Serving:
Calories: 343Total Fat: 9gSaturated Fat: 6gTrans Fat: 0gUnsaturated Fat: 2gCholesterol: 34mgSodium: 326mgCarbohydrates: 62gFiber: 1gSugar: 44gProtein: 5g
HOW MUCH DID YOU LOVE THIS RECIPE?
Please leave a comment on the blog or share a photo on Pinterest