
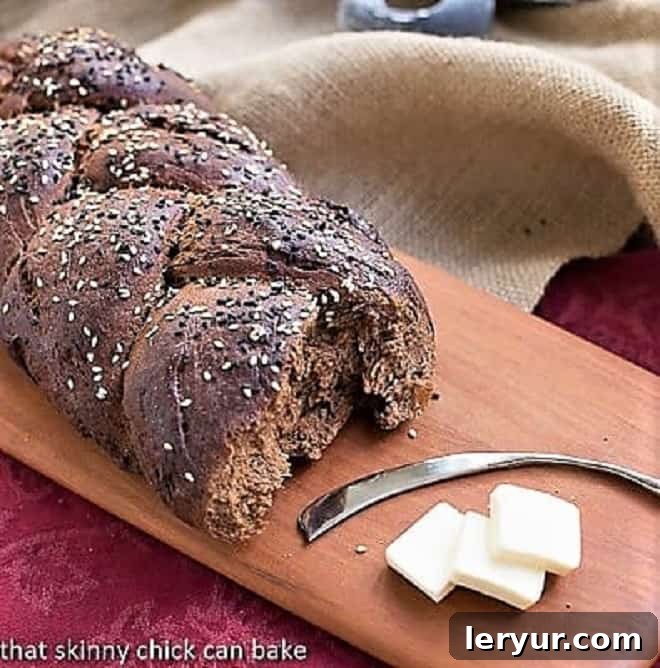
Unleash the rich, dark, and wonderfully chewy magic of Homemade Pumpernickel Loaves. This exceptional bread offers a unique flavor profile and a satisfying texture that will elevate any meal or snack. Forget store-bought; once you experience the deep, malty notes and tender crumb of freshly baked Pumpernickel, you’ll understand why it’s a treasured classic.
For those who revel in the satisfying craft of yeast bread making, this recipe for beautiful, handcrafted Pumpernickel Bread is an absolute must-add to your baking repertoire. Prepare to embark on a culinary adventure that yields truly extraordinary results.
The Mystery Behind Pumpernickel’s Distinctive Flavor & Color
Diving into the ingredient list for authentic Pumpernickel loaves can be an intriguing experience for any baker. Prune butter, espresso, molasses, and unsweetened chocolate – at first glance, this combination might seem unusual, even perplexing. Yet, each component plays a crucial role in crafting the signature characteristics of this beloved German bread. The prunes, beyond their subtle sweetness, act as a natural preservative, contributing to the bread’s moistness and longevity. Meanwhile, the dark trio of espresso, molasses, and unsweetened chocolate are the master architects behind Pumpernickel’s deep, alluring color and its distinctive, complex flavor profile.
As noted by celebrated bakers like Lauren Groveman, whose method inspires this recipe, these ingredients don’t just add color; they introduce a profound dimension of flavor that is both earthy and slightly sweet, with a hint of bitterness that perfectly balances the rich rye. And then there’s the truly unique technique of hanging the loaves in a sling for their final rise – an unconventional method that piqued my curiosity and promised an interesting baking journey. This wasn’t just bread making; it was an exploration into the fascinating world of traditional artisan techniques.
Mastering the Art of Pumpernickel: Unique Techniques Unveiled
Baking authentic Pumpernickel bread involves a few distinct techniques that set it apart from other yeast breads. These methods are essential for achieving the dense, moist crumb and the rich flavor that Pumpernickel is famous for. Understanding them will transform your baking experience and ensure a truly successful loaf.
The Role of Rye Flour and Kneading
- Unlike wheat-based doughs, rye flour, especially the coarse variety used here, produces a stickier, less elastic dough. My professional KitchenAid mixer handled the kneading beautifully, making the process much more manageable. However, it’s crucial to understand that rye dough won’t develop gluten in the same way as white flour dough. It will feel “pasty” at first, but with persistent kneading and the help of a pastry scraper to keep it clean from your work surface, it will become smooth and elastic enough.
- For those sensitive to strong flavors or baking for a diverse palate, consider adjusting or omitting certain spices. I chose to leave out the caraway seeds initially, hoping my husband would be more inclined to try a larger piece. Caraway offers a distinct, aromatic touch that many associate with Pumpernickel, so including it is a matter of personal preference.
Proofing for Perfection: The Sling Method
- Pumpernickel requires multiple proofing periods, contributing to its complex flavor development. During the first of these proofs, I found invaluable guidance by watching the PBS episode featuring Lauren Groveman demonstrating her precise method to Julia Child. Visualizing the steps made a significant difference in my confidence and execution.
- One of the most intriguing aspects of this recipe is the “sling” technique for the final rise. This involves supporting the loaves within a towel sling, often secured in a drawer, allowing them to hang undisturbed. This method helps the dense rye dough maintain its shape and encourages a slower, more even rise, resulting in a beautifully structured loaf. If you’re curious to see this unique technique in action, the original video on how to shape and bake these loaves can be a fantastic resource.
Essential Ingredients for Authentic Flavor
- Gathering the unique ingredients is key to an authentic Pumpernickel experience. Make sure to source prune butter (also known as prune lekvar), a readily available product in most well-stocked supermarkets, typically found near jams and preserves. Alongside this, have molasses, instant espresso powder, and unsweetened chocolate on hand. And, of course, include caraway seeds (both ground and whole, if desired) to achieve the classic aroma. Each ingredient contributes significantly to the bread’s deep color, rich flavor, and moist texture.
- To truly appreciate the bread’s distinct character, consider making one loaf using the traditional shaping method as directed in the recipe, and perhaps experiment with a second loaf by braiding it, adding an artistic touch to your homemade bread.
The Unforgettable Taste: A Baker’s Honest Review
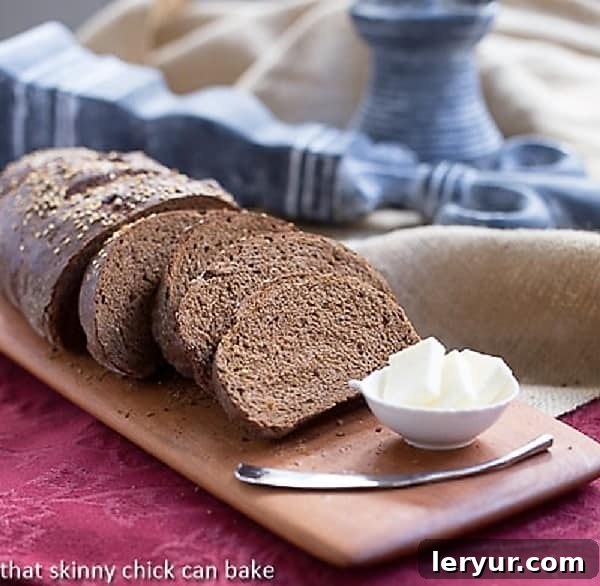
After all the anticipation, the rich, dark Pumpernickel bread emerged from the oven, filling the kitchen with its distinctive aroma. The true test, of course, was in the tasting. Smeared with a creamy pat of butter, each chewy slice was an absolute delight. There’s a profound satisfaction that comes from baking a complex bread like this from scratch, and the flavor delivered exactly what Pumpernickel should: a deep, earthy, slightly sweet and malty profile that is uniquely its own.
Truth be told, before joining the wonderful “Tuesdays with Dorie” baking group, I don’t think I would have ever ventured into baking this particular variety of bread. It pushed me out of my comfort zone and introduced me to fascinating ingredients and techniques. While it was undeniably good and authentic, Pumpernickel isn’t a bread I personally crave on a regular basis. As for the most discerning critic in my household, my husband Bill, he simply observed the beautiful loaves from a distance and, alas, didn’t succumb to their allure.
Nevertheless, the experience was incredibly rewarding, and the resulting loaves were a testament to the magic of combining unusual ingredients with thoughtful techniques. If you’re looking to broaden your baking horizons and create something truly unique, Pumpernickel is a journey worth taking.
Should you wish to explore more delightful baking projects, be sure to check out my collection of other Homemade Bread Recipes.
Pumpernickel Loaves
45 minutes
40 minutes
1 hour 25 minutes
2 loaves
Rich, delicious Pumpernickel Loaves make a tasty breakfast, sandwich or dinner side!
Ingredients
- 3 to 4 tablespoons melted butter, for greasing
- 2 cups plain yogurt, at room temperature or, as a substitute, use tepid water (warm to the touch)
- 1 stick unsalted butter, softened and cut into small cubes
- 1/4 cup solid vegetable shortening, at room temperature
- 1/2 cup prune lekvar (also called prune butter: available in most well-stocked supermarkets with jams and preserves)
- 1/4 cup molasses
- 1 tablespoon instant espresso powder
- 1 cup boiling water
- 2 1/2 squares (2 1/2 ounces) unsweetened chocolate, broken
- 2 tablespoons ground caraway seeds
- 1 1/2 tablespoon whole caraway seeds
- 1 tablespoon fine table salt
- 2 1/2 packages active dry yeast
- 1/2 cup warm water
- Pinch of sugar
- 3 1/2 cups coarse rye meal (if unavailable, substitute medium rye flour)
- Up to 6 cups high gluten bread flour, including flour for dusting and shaping
- Glaze: 1 egg white beaten with 1 teaspoon water
- Topping: sesame seeds and/or caraway seeds (optional)
- Cornmeal (medium ground), for bakers peel
Instructions
- Brush an 8-quart bowl with melted butter, ensuring all inner surfaces are lightly coated. Set this aside, as it will be used for the dough to rise. Gather your pastry scraper, another large mixing bowl, and a sturdy wooden spoon.
- In the large mixing bowl, combine the room-temperature yogurt (or tepid water), the softened cubed butter, vegetable shortening, prune lekvar, and molasses. In a separate small, heavy-bottomed saucepan, dissolve the instant espresso powder into 1 cup of boiling water.
- To the saucepan with the espresso, add the broken unsweetened chocolate. Melt the chocolate over very low heat, stirring frequently, until the mixture is completely smooth and uniform. Pour this chocolate-espresso mixture into the large mixing bowl with the other ingredients. Add both the ground and whole caraway seeds (if using), and the table salt. In a separate small bowl, dissolve the active dry yeast in 1/2 cup of warm water with a pinch of sugar; let it sit until creamy (about 5-10 minutes). Pour the activated yeast mixture into the large mixing bowl along with the coarse rye meal. Stir thoroughly with the wooden spoon to combine all ingredients well.
- Using the wooden spoon, briskly stir in the high gluten bread flour, adding it 1/2 to 1 cup at a time. Continue mixing until the dough forms a cohesive mass that is difficult to stir, but not dry. Turn the dough out onto a lightly floured wooden board. Knead the dough until it becomes smooth and elastic, adding only as much additional flour as necessary to prevent it from sticking to your work surface and hands.
- Due to the nature of rye flour, the dough will initially feel quite “pasty” or sticky during the early stages of kneading. This is normal. Continuously use a pastry scraper to clean the dough off the board and your hands, allowing you to incorporate sufficient flour and develop the dough’s structure effectively.
- Once the dough achieves a smooth and elastic consistency, transfer it to the buttered 8-quart rising bowl. Cover the bowl securely with buttered plastic wrap, then drape a clean kitchen towel over it. Place the covered bowl in a warm, draft-free location and allow the dough to rise until it has doubled significantly in bulk, which typically takes about 2 1/2 hours.
- After the first rise, gently but firmly punch down the dough with several swift swats from the back of your hand. This will completely deflate the dough. Turn the dough over in the bowl, cover it again, and let it rise for a second time for approximately 1 1/2 hours.
- Once the dough has fully risen a second time, turn it out onto a lightly floured board. Use the sharp blade of your pastry scraper to carefully divide the dough into two equal halves. Work with one half of the dough at a time, keeping the other half covered to prevent it from drying out.
- Prepare your workspace by laying two clean kitchen towels on your counter and sprinkling them generously with bread flour. Take one half of the dough and roll it out into a rectangle measuring approximately 7×10 inches. Starting from the short end farthest from you, tightly roll the dough towards you, pinching the seam closed as you go to ensure a tight cylinder.
- Pinch the ends of the rolled loaf securely and tuck them underneath to attach them to the bottom seam. Gently rotate and plump the dough to refine its shape. Place the shaped loaf, seam side up, diagonally onto one of the prepared, floured towels.
- To create the essential “sling” for the final rise, join the two corners of the towel that are furthest from the loaf. Secure these joined towel points within a closed drawer or another stable, quiet area. Ensure the loaves hang undisturbed in their slings for approximately 45 minutes, allowing them to proof vertically.
- While the bread is undergoing its final rise, prepare your oven. Position an oven rack in the second or third lowest shelf. If you are using quarry tiles or a pizza stone, place it on this rack now. On the rack directly below this, place a heavy-bottomed, oven-proof pan. This pan will preheat along with the tiles. Lightly sprinkle a baker’s peel or a flat cookie sheet with cornmeal. Thirty minutes before the final rise is complete, preheat your oven to 450 degrees Fahrenheit (230 degrees Celsius).
- If you are not using baking tiles or a pizza stone, brush or spray one or two large, shallow baking sheets (preferably dark steel for better crust development) with vegetable oil and sprinkle their interiors with cornmeal. Prepare the glaze by beating one egg white with one teaspoon of water. For a smoother glaze, pour the mixture through a small medium-mesh sieve into another bowl to remove any excess coagulation or bubbles. Place the prepared glaze near your work surface, ready for use.
- Working with one loaf at a time, carefully release it from its sling. Gently turn the loaf out from the towel (smooth side up) onto the prepared baker’s peel or baking sheet, ensuring loaves are placed at least 3 inches apart. Use your hands to gently plump and reshape the loaf into a neat, uniform appearance.
- Using a very sharp serrated knife or a razor blade, make three horizontal slashes across the top of each loaf. These slashes should be approximately 1/3 inch deep into the dough. Using a pastry brush, generously paint the tops and sides of the loaves with the prepared glaze, being careful to avoid filling the slashes. If desired, sprinkle with sesame seeds and/or caraway seeds for topping.
- Just before inserting the dough into the hot oven, carefully pour ¾ cup of warm water into the heavy-bottomed pan positioned beneath the baking rack. Quickly shut the oven door to trap the steam while you retrieve the loaves. If baking with tiles or a stone, smoothly slide the peel all the way to the back of the oven and, with one swift jerk, pull the peel out, leaving the loaves directly on the hot tiles (maintain at least three inches between them). If not using tiles, carefully place the baking sheets with the loaves into the hot oven as directed.
- Bake the loaves at 450 degrees Fahrenheit (230 degrees Celsius) for the initial 10 minutes. After 10 minutes, reduce the oven temperature to 350 degrees Fahrenheit (175 degrees Celsius) and continue baking for an additional 30 minutes. Once baked, remove the loaves from the oven and transfer them to wire racks to cool thoroughly. It is crucial to allow the Pumpernickel loaves to cool for 2 to 3 hours before attempting to slice them, as this allows the crumb to set and flavors to fully develop.
Notes
Recipe adapted from “Baking with Julia” by Dorie Greenspan, featuring Lauren Groveman’s Pumpernickel bread.
The total time listed does not include the extensive proofing periods required for this bread.
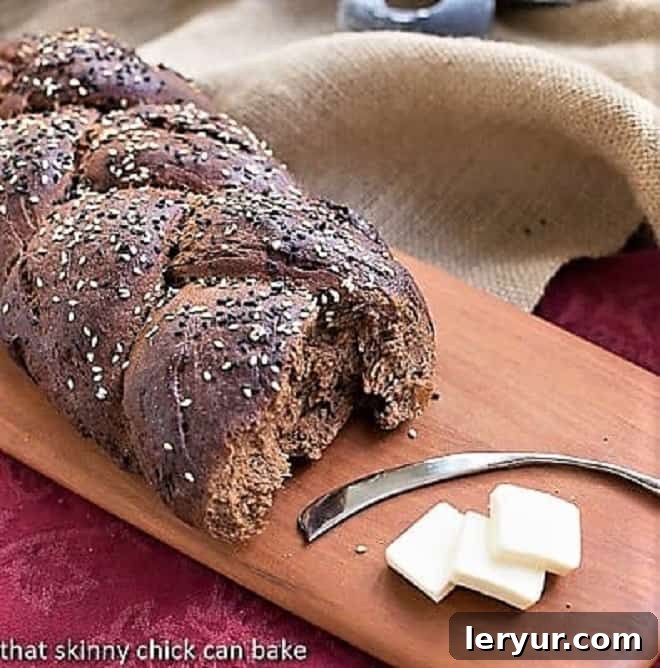
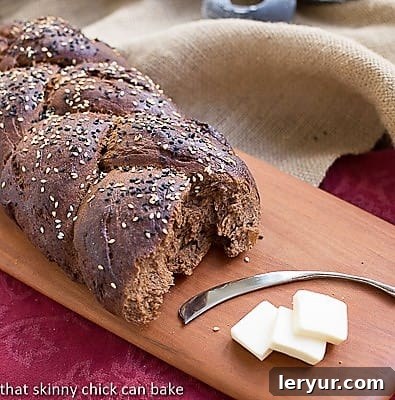
For the shaping, I followed the recipe’s instructions for one loaf. For the second loaf, I divided that half of the dough into three equal ropes and braided them, similar to a challah, for a different visual presentation.
Nutrition Information:
Yield:
36 servings (1 slice each)
Serving Size:
1 slice
Amount Per Serving:
Calories: 195Total Fat: 7gSaturated Fat: 3gTrans Fat: 0gUnsaturated Fat: 3gCholesterol: 12mgSodium: 225mgCarbohydrates: 29gFiber: 2gSugar: 4gProtein: 5g
This nutritional information is provided as a courtesy and is an estimate only. It is derived from online calculators and may vary based on specific product brands, ingredient substitutions, and optional toppings used. While efforts are made to ensure accuracy, these figures are not guaranteed. For the most precise nutritional data, it is recommended to calculate the information with the actual ingredients used in your recipe.
HOW MUCH DID YOU LOVE THIS RECIPE?
Please leave a comment on the blog or share a photo on Pinterest