
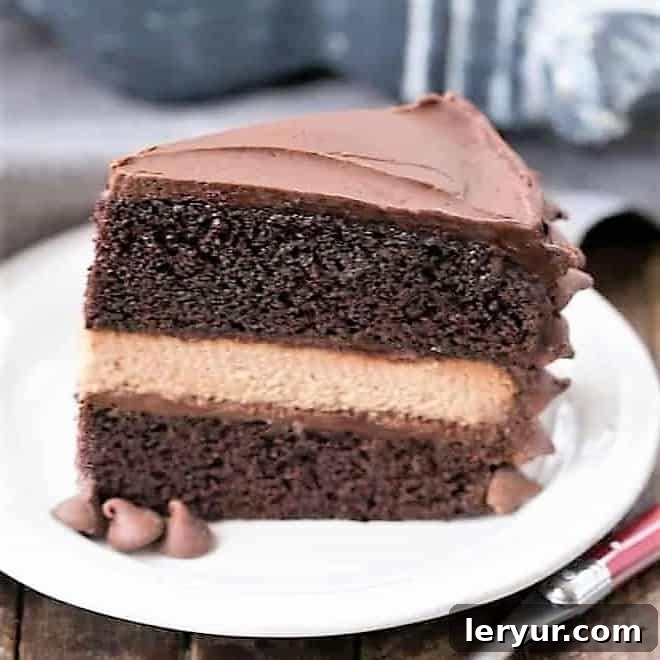
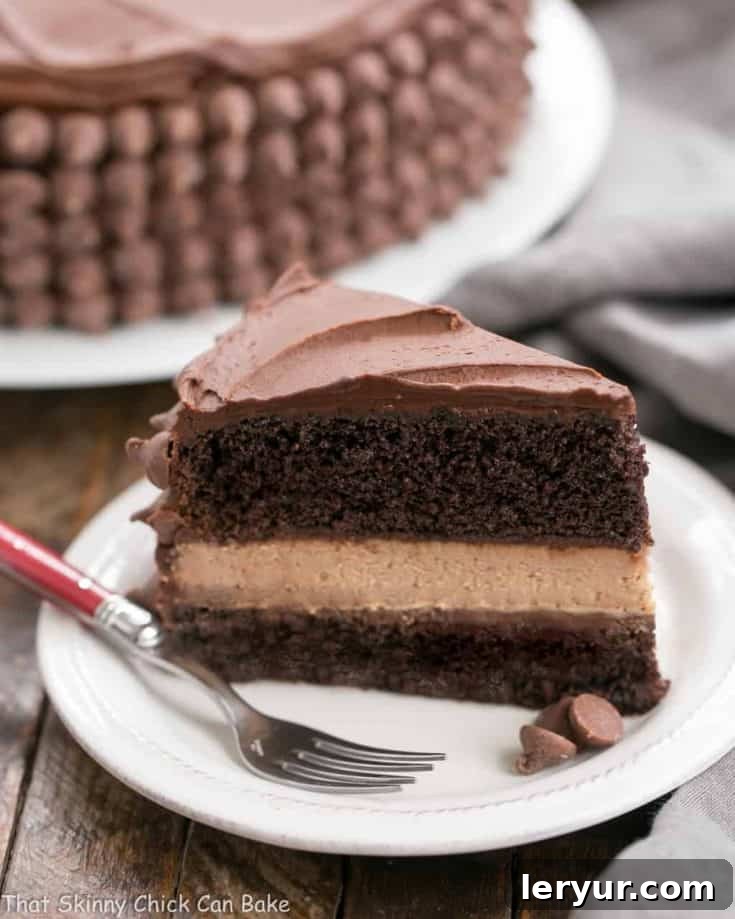
Welcome to the magnificent world of dessert mashups, where two beloved classics unite to create an unforgettable culinary masterpiece: the **Candy Bar Cheesecake**! This isn’t just any dessert; it’s a sublime marriage of a rich, fudgy chocolate layer cake and a creamy, dreamy milk chocolate cheesecake. If you’ve ever found yourself torn between the indulgent decadence of chocolate cake and the smooth, tangy delight of cheesecake, then this **chocolate cheesecake-filled layer cake recipe** is your ultimate solution. Prepare to embark on a sweet journey that promises to satisfy every chocolate lover’s craving and leave an indelible impression on anyone lucky enough to taste it.
Our inspiration for this extraordinary creation, often referred to as a **Hershey Bar Cheesecake**, comes from the renowned Cheesecake Factory, known for its iconic and often generously portioned desserts. This particular recipe captures the essence of their famous “candy bar” cheesecake by infusing the cheesecake filling with the classic, comforting flavor of milk chocolate, reminiscent of a beloved Hershey bar. It’s a copycat recipe that brings gourmet indulgence right into your home kitchen, allowing you to recreate a show-stopping dessert that tastes even better when made with love.
Why You Must Make This Unforgettable Candy Bar Cheesecake
There are countless reasons why this **chocolate cheesecake-filled layer cake** isn’t just another recipe, but a baking adventure you simply must undertake. It promises to elevate your dessert repertoire and become a cherished favorite.
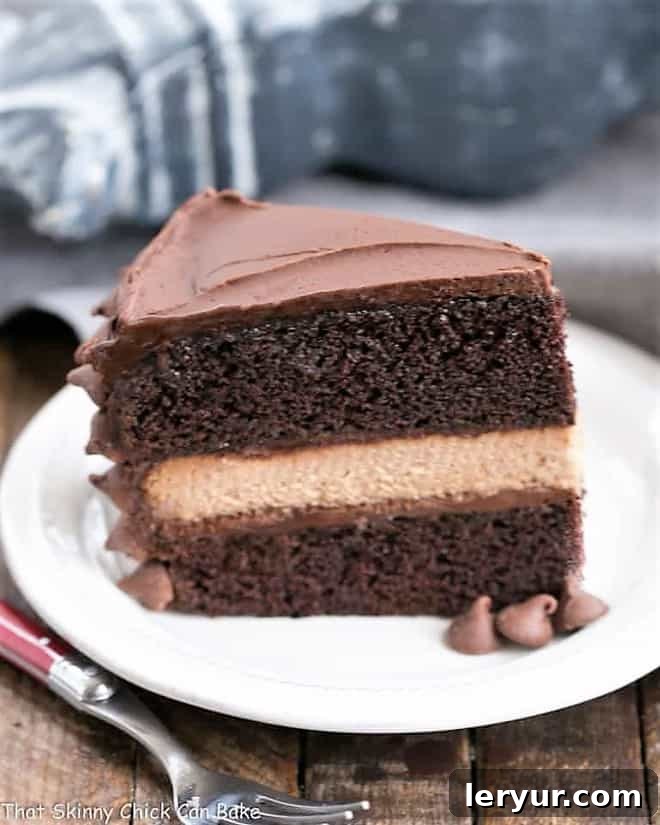
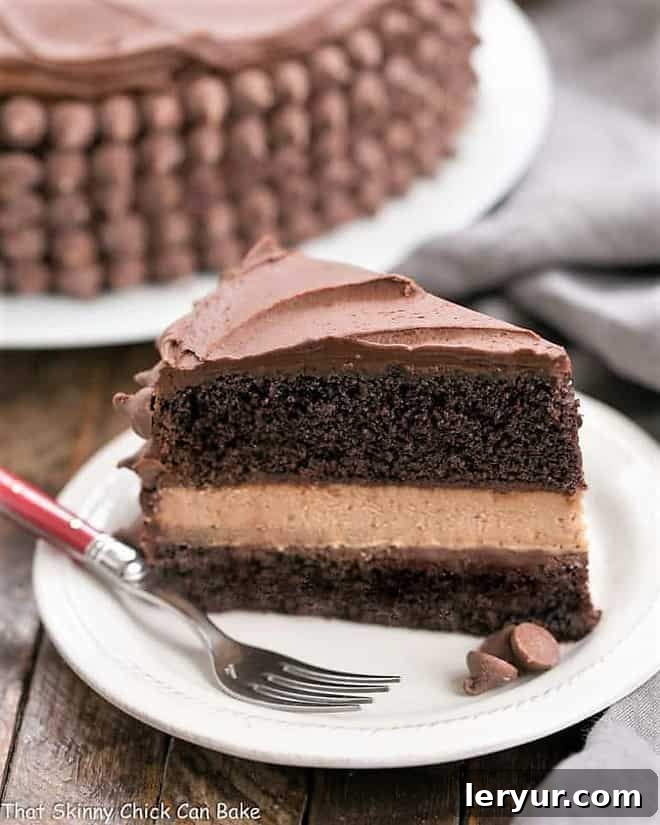
- A Legacy of Deliciousness: This rich, unforgettable candy bar cheesecake recipe has graced my kitchen for years. Its “candy bar” moniker, originating from its Cheesecake Factory counterpart, stems from the delightful inclusion of milk chocolate in the creamy cheesecake layer. The sheer thought of combining a moist, classic chocolate cake, generously coated with velvety frosting, and a decadent chocolate cheesecake filling is enough to make any dessert enthusiast’s mouth water.
- The Ultimate Crowd-Pleaser: While a dessert of this grand scale might seem daunting, it’s surprisingly perfect for any gathering, big or small. Small slices are incredibly satisfying, ensuring everyone can indulge without feeling overwhelmed. I recently had the pleasure of remaking it for a dinner party with dear friends, and it was, as expected, an absolute sensation. Guests were captivated by its impressive appearance and blown away by its exquisite taste.
- A True Dessert Mashup Experience: This recipe offers the best of both worlds. You no longer have to choose between a rich chocolate cake and a creamy cheesecake. Here, they coexist in perfect harmony, creating a complex flavor profile and an exciting textural contrast that will keep you coming back for more. It’s a culinary innovation that transcends expectations and delivers pure dessert bliss.
- Impressive & Rewarding: Crafting this cake is a labor of love, but the outcome is immensely rewarding. The sheer beauty of a perfectly assembled, frosted layer cake with a surprise cheesecake center is a showstopper. It’s the kind of dessert that elicits gasps of delight and earns you endless compliments, making every minute spent in the kitchen utterly worthwhile.
Essential Ingredient Notes for Your Chocolate Cheesecake Layer Cake
Success in baking often begins with understanding your ingredients. Here’s a closer look at the key components for your **Candy Bar Cheesecake** and tips for optimal results:
- Kitchen Staples: You’ll need sugar, all-purpose flour, baking soda, salt, vegetable oil, butter, and milk. Ensure your eggs are at room temperature for both the cake and cheesecake layers; this promotes better emulsification and a smoother batter.
- Cream Cheese: Crucial for the cheesecake, it *must* be at room temperature. Cold cream cheese will result in a lumpy batter, no matter how long you beat it. Plan ahead and take it out of the fridge at least 1-2 hours before you start.
- Sour Cream: Also at room temperature. Sour cream adds a delightful tang and contributes to the cheesecake’s creamy texture. Its acidity also helps activate the baking soda in the chocolate cake.
- Vanilla Extract: Opt for real vanilla extract over artificial flavoring. High-quality vanilla, like Nielsen-Massey, makes a noticeable difference in the overall flavor of your desserts.
- Milk Chocolate: This is the “candy bar” element! Use good quality milk chocolate bars (like Ghirardelli) that you can chop and gently melt. Avoid chocolate chips for the melting step, as they contain stabilizers that prevent them from melting as smoothly.
- Cocoa Powder: Stick to regular unsweetened cocoa powder, not Dutch-processed. Regular cocoa reacts with baking soda to give the cake its lift and characteristic chocolate flavor.
- Baking Powder: Always check the expiration date. Baking powder loses its potency over time. To test its freshness, drop a spoonful into a bowl of hot water; it should fizz vigorously if still active.
- Powdered Sugar: Essential for a smooth, lump-free frosting. Sifting it before mixing is highly recommended to achieve that silky texture.
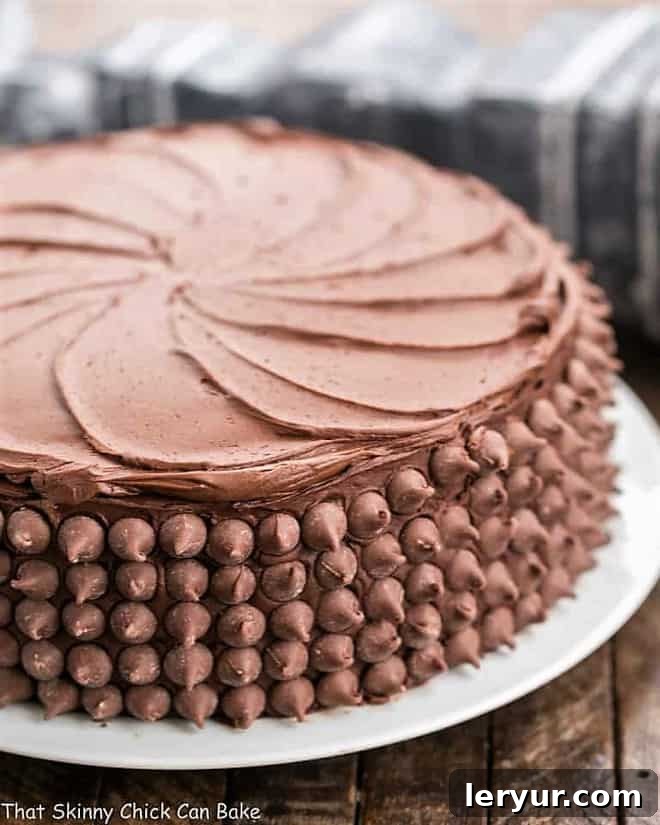
- Milk Chocolate Chips: These are an optional, but highly recommended, garnish to decorate the sides of your finished cake, adding both visual appeal and an extra burst of chocolate flavor.
The Perfect Marriage of Two Chocolate Desserts: A Tale of Sweet Success
As a passionate food blogger, my friends are well-acquainted with the delightful “shenanigans” that come with being my taste-testers, often involving experimental dishes and, yes, slices artfully cut out for photos before being reinserted. Thankfully, they are always enthusiastic guinea pigs, offering honest and invaluable feedback on my latest creations.
This **Candy Bar Cheesecake** truly stood out. Our host, known for his sweet tooth, discreetly squirreled away an extra slice, much to his wife’s amused discovery the following day! One friend, after declaring he couldn’t possibly eat another bite, soon found his plate mysteriously empty after an hour of lively conversation around a roaring fire. Another friend, who typically shies away from indulgent desserts, savored a full slice, initially mistaking the rich filling for a luscious ganache until her cheesecake-loving husband proudly corrected her. These genuine reactions are the highest praise a baker can receive.
I even managed to bring a couple of slices home, which my husband, Bill, relished, savoring every last bite. These anecdotes underscore the universal appeal and irresistible charm of this dessert. So, if you’re seeking a showstopper that will leave your guests utterly captivated and talking about your baking prowess for weeks, look no further than this exquisite **Hershey’s Candy Bar Cheesecake**. It’s more than a dessert; it’s an experience.
Mastering Your Chocolate Cheesecake Layer Cake: Expert Recipe Tips
Achieving perfection with this indulgent **Candy Bar Cheesecake** is made easier with a few insider tips and tricks:
- PRO-Tip: Room Temperature Ingredients for Cheesecake: This is non-negotiable for a silky-smooth cheesecake. Before you even think about mixing, ensure your cream cheese, eggs, and sour cream are at room temperature. This allows them to combine seamlessly, preventing lumps and ensuring a consistently creamy texture that melts in your mouth. Cold ingredients will result in a denser, less appealing cheesecake.
- PRO-Tip: Make-Ahead Magic: Planning for a dinner party can be hectic, but this recipe offers incredible flexibility. All three layers of this spectacular dessert—the chocolate cakes and the cheesecake—can be made ahead of time. Store the cooled cake layers, tightly wrapped in plastic wrap then foil, in the refrigerator for a day or two, or in the freezer for up to two weeks. The cheesecake, once cooled, can be wrapped in foil and frozen in its pan. Simply defrost them in the refrigerator overnight when you’re ready to assemble, then prepare the frosting fresh. This strategy significantly reduces last-minute stress.
- Serving Temperature: For the most delightful experience, serve this cake at room temperature. The chocolate cake layers will be incredibly moist and tender, the chocolate frosting wonderfully creamy and fudgy, and the milk chocolate cheesecake filling will achieve its optimal lusciousness. The balance of textures and flavors truly shines when the cake is allowed to come to room temperature. The rave reviews I’ve received consistently confirm this is a universally beloved dessert.
- Freezing for Future Indulgence: If you’re not planning to serve the entire cake at once, or if you simply want to prepare components in advance, freezing is an excellent option. Once the cake layers are completely cooled, remove them from their pans, wrap each layer tightly in plastic wrap, then in aluminum foil. For the cheesecake, let it cool completely, then wrap the entire pan (or just the cheesecake layer if removed from the springform) securely in foil. Thaw all components slowly in the refrigerator overnight before assembling.
- Assembling with Ease: When the time comes to assemble, ensure all components are chilled (cheesecake) or at room temperature (cake layers). This makes handling much easier. If your cheesecake becomes too soft during assembly, a quick 20-30 minute stint in the freezer can firm it up, making it easier to transfer and layer perfectly.
- Perfect Frosting Consistency: When making the chocolate frosting, add milk gradually until you reach a smooth, spreadable consistency. If it’s too thick, add a tiny bit more milk; if too thin, a spoonful of sifted powdered sugar can help.
Frequently Asked Questions About Candy Bar Cheesecake
Several factors contribute to an exceptional cheesecake. Firstly, all ingredients, especially cream cheese and eggs, should be at room temperature for a lump-free, creamy batter. Baking in a springform pan is essential for easy removal and presentation. Most importantly, avoid over-baking; the cheesecake should still have a slight jiggle in the very center (about the size of a quarter) when you gently tap the pan. It will continue to set as it cools. While a water bath is often recommended for traditional cheesecakes to ensure slow, even cooking and prevent cracks, it’s not strictly necessary for this particular recipe since the cheesecake layer will be nestled between two cake layers, concealing any minor imperfections.
For professional-looking frosting, an offset spatula is your best friend. I recommend having both a small and a large offset spatula. The larger one is great for applying frosting to the top and sides, while the smaller one allows for more precise smoothing and detailing. For this **Candy Bar Cheesecake**, the chocolate chip garnish artfully conceals any minor frosting imperfections on the sides, so you can focus primarily on achieving a smooth finish on the top exposed surface.
Absolutely! While this recipe specifically calls for milk chocolate to evoke the “candy bar” experience and the classic Hershey flavor, you can experiment. For a richer, darker flavor, consider using semi-sweet chocolate. White chocolate could also be an interesting twist for a different flavor profile, though it would change the “candy bar” theme. Just ensure you use baking chocolate bars that melt smoothly.
The secret to a moist chocolate cake lies in several key areas. First, do not overmix the batter after adding the dry ingredients; overmixing develops gluten, leading to a tough cake. Second, accurate oven temperature is vital; use an oven thermometer to ensure your oven isn’t running too hot. Most importantly, do not overbake. Start checking for doneness at the lower end of the baking time. A wooden pick inserted into the center should come out with moist crumbs, but not wet batter. The boiling water in this recipe also contributes significantly to the cake’s moist texture.
Due to the cheesecake layer, this dessert should always be stored in the refrigerator. Cover it tightly with plastic wrap or place it in an airtight cake container to prevent it from drying out or absorbing other odors from the fridge. It will stay fresh for 3-4 days. For optimal flavor and texture, allow slices to come to room temperature for about 15-20 minutes before serving.
You May Also Like: More Irresistible Dessert Recipes
- Cheesecake Factory Red Velvet Cheesecake from Copycat Recipes
- Homemade Caramel Cheesecake
- Chocolate Caramel Twix Cheesecake
- Deluxe Caramel Cheesecake with Caramel Toffee Topping
- Discover more of the Best Cheesecake Recipes
Stay connected for more delightful recipes and baking inspiration! Follow me on social media: Instagram, Facebook, and Pinterest. When you try one of my recipes, don’t forget to tag me! Your feedback is invaluable, so if you love the results, please consider giving it a 5-star rating in the recipe card below.
Candy Bar Cheesecake
1 hour
1 hour 20 minutes
2 hours 20 minutes
16 servings
Candy Bar Cheesecake is the ultimate dessert mashup! For a marriage of two chocolate desserts, make this chocolate cheesecake filled layer cake recipe!
Adapted from Recipe Secrets
Ingredients
Cheesecake Layer:
- 2 (8-ounce) packages cream cheese, at room temperature
- ½ cup granulated sugar
- 3 large eggs, at room temperature
- ¼ cup sour cream, at room temperature
- 1 teaspoon pure vanilla extract
- 4 ounces quality milk chocolate, chopped and gently melted
Rich Chocolate Cake Layers:
- 2 cups granulated sugar
- 1 ¾ cups all-purpose flour
- ¾ cup unsweetened cocoa powder
- 1 ½ teaspoons baking powder
- 1 ½ teaspoons baking soda
- 1 teaspoon salt
- 2 large eggs
- 1 cup milk
- ½ cup vegetable oil
- 2 teaspoons pure vanilla extract
- 1 cup boiling water
Velvety Chocolate Frosting:
- ½ cup (1 stick) unsalted butter, softened
- ⅔ cup unsweetened cocoa powder
- 3 cups powdered sugar, sifted
- ⅓ cup milk (add more if needed for consistency)
- 1 teaspoon pure vanilla extract
- 2 cups Milk Chocolate Chips (for garnish, optional)
Instructions
To Prepare the Decadent Cheesecake Layer:
- Preheat your oven to 325ºF (160ºC).
- Prepare a 10-inch round baking pan or springform pan. Line the bottom and sides with non-stick aluminum foil, ensuring the foil extends over the sides to create handles. If using regular foil, spray it thoroughly with non-stick cooking spray.
- In the bowl of your stand mixer fitted with the paddle attachment, beat the softened cream cheese, granulated sugar, and vanilla extract on medium speed until the mixture is beautifully creamy and perfectly smooth, with no lumps remaining. Scrape down the sides of the bowl as needed.
- Add the eggs, one at a time, beating on low speed just until each egg is incorporated into the batter. Be careful not to overmix at this stage, as too much air can cause cracking.
- Gently stir in the room temperature sour cream and the melted milk chocolate until just combined.
- Pour the smooth cheesecake batter into your prepared pan. Bake for approximately 45 minutes, or until the edges are set and the very center of the cheesecake barely jiggles (about the size of a quarter) when you gently tap the pan.
- Allow the cheesecake to cool completely in its pan on a wire rack at room temperature. Once cooled, cover it tightly and chill in the refrigerator for at least 4 hours, or preferably overnight, to allow it to firm up properly.
To Bake the Moist Chocolate Cake Layers:
- Preheat your oven to 350°F (175°C).
- Prepare two 10-inch round baking pans by greasing and flouring them thoroughly. For easy removal, line the bottoms with parchment paper rounds and grease the parchment as well.
- In a large mixing bowl, whisk together the sugar, all-purpose flour, cocoa powder, baking powder, baking soda, and salt until well combined.
- Add the eggs, milk, vegetable oil, and vanilla extract to the dry ingredients. Beat on medium speed with an electric mixer for 2 minutes, ensuring all ingredients are well incorporated and the batter is smooth.
- Carefully stir in the boiling water. The batter will be thin, but this is perfectly normal and contributes to the cake’s moistness.
- Divide the thin batter evenly between your two prepared baking pans.
- Bake for 30 to 35 minutes, or until a wooden pick inserted into the center of the cakes comes out clean or with a few moist crumbs.
- Let the cakes cool in their pans for 10 minutes before carefully inverting them onto wire racks to cool completely. Ensure they are fully cooled before frosting.
To Prepare the Velvety Chocolate Frosting:
- In a medium bowl, melt the butter. Stir in the cocoa powder until smooth.
- Gradually add the sifted powdered sugar and milk alternately to the butter-cocoa mixture, beating until you achieve a smooth, spreadable frosting consistency. If needed, add a small amount of additional milk (a teaspoon at a time) to reach the desired texture.
- Finally, stir in the vanilla extract until well combined.
To Assemble Your Show-Stopping Candy Bar Cheesecake:
- Place one of the cooled chocolate cake layers on your serving platter or cake stand. Spread a generous, even layer of the prepared chocolate frosting on top of this cake layer.
- Using the foil edges as convenient handles, carefully remove the chilled cheesecake from its pan and gently peel away the foil.
- Carefully center and layer the cheesecake directly on top of the frosted chocolate cake layer. If your cheesecake becomes too soft to handle, you can place it in the freezer for 20-30 minutes to firm it up before layering.
- Spread another layer of chocolate frosting evenly over the top of the cheesecake layer.
- Place the second chocolate cake layer on top of the frosted cheesecake. Now, generously frost the top and all sides of the entire cake with the remaining chocolate frosting, striving for a smooth finish.
- For an extra touch of elegance and flavor, gently press milk chocolate chips onto the sides of the cake.
- Slice, serve, and prepare for an unforgettable dessert experience!
Notes
For the creamiest cheesecake and best cake texture, ensure all dairy ingredients and eggs are at room temperature before you begin mixing. This detail significantly impacts the final result.
Recommended Products
As an Amazon Associate and member of other affiliate programs, I earn from qualifying purchases.
- KitchenAid KSM150PSER Artisan Tilt-Head Stand Mixer with Pouring Shield, 5-Quart, Empire Red
- 10-inch Cake Pan
- 10-inch Springform Pan
Nutrition Information:
Yield:
16
Serving Size:
1
Amount Per Serving:
Calories: 831Total Fat: 20gSaturated Fat: 7gTrans Fat: 0gUnsaturated Fat: 10gCholesterol: 70mgSodium: 414mgCarbohydrates: 146gFiber: 5gSugar: 67gProtein: 16g
Thatskinnychickcanbake.com occasionally offers nutritional information for recipes contained on this site. This information is provided as a courtesy and is an estimate only. This information comes from online calculators. Although thatskinnychickcanbake.com attempts to provide accurate nutritional information, these figures are only estimates. Varying factors such as product types or brands purchased can change the nutritional information in any given recipe. Also, many recipes on thatskinnychickcanbake.com recommend toppings, which may or may not be listed as optional and nutritional information for these added toppings is not listed. Other factors may change the nutritional information such as when the salt amount is listed “to taste,” it is not calculated into the recipe as the amount will vary. Also, different online calculators can provide different results. To obtain the most accurate representation of the nutritional information in any given recipe, you should calculate the nutritional information with the actual ingredients used in your recipe. You are solely responsible for ensuring that any nutritional information obtained is accurate.
HOW MUCH DID YOU LOVE THIS RECIPE?
Please leave a comment on the blog or share a photo on Pinterest