
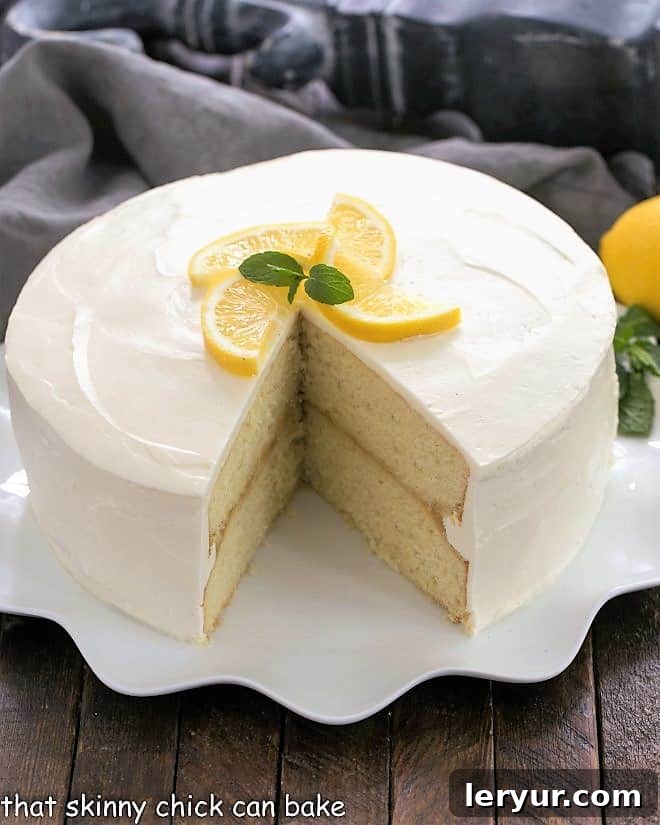
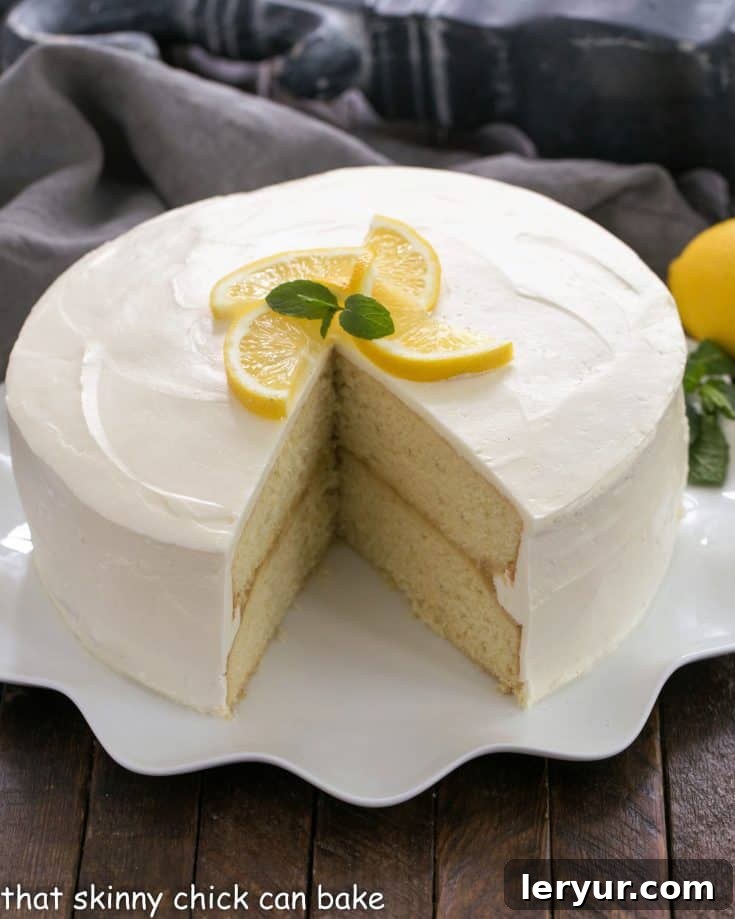
Indulge in the bright and exquisite flavors of this spectacular Lemon Layer Cake, a true masterpiece perfect for any celebration or simply to satisfy your citrus cravings. Featuring two tender vanilla cake layers generously filled with luscious, homemade lemon curd and crowned with a silky, cloud-like Swiss meringue buttercream, this dessert is an absolute dream for any lemon enthusiast. It’s not just a cake; it’s an experience, promising a delightful balance of sweetness and vibrant tartness in every single bite.
The inspiration for this magnificent creation came from a heartwarming request by a dear friend, Gini, who was planning a very special celebration: her mother’s 90th birthday. This monumental occasion called for an extraordinary dessert. Knowing that the family matriarch wasn’t particularly fond of chocolate, the quest began for the perfect alternative. The consensus was unanimous: a dazzling Lemon Cake Recipe would be the ideal centerpiece for such a joyous milestone. This decision set the stage for a dessert that would not only be delicious but also a memorable tribute to a life well-lived.
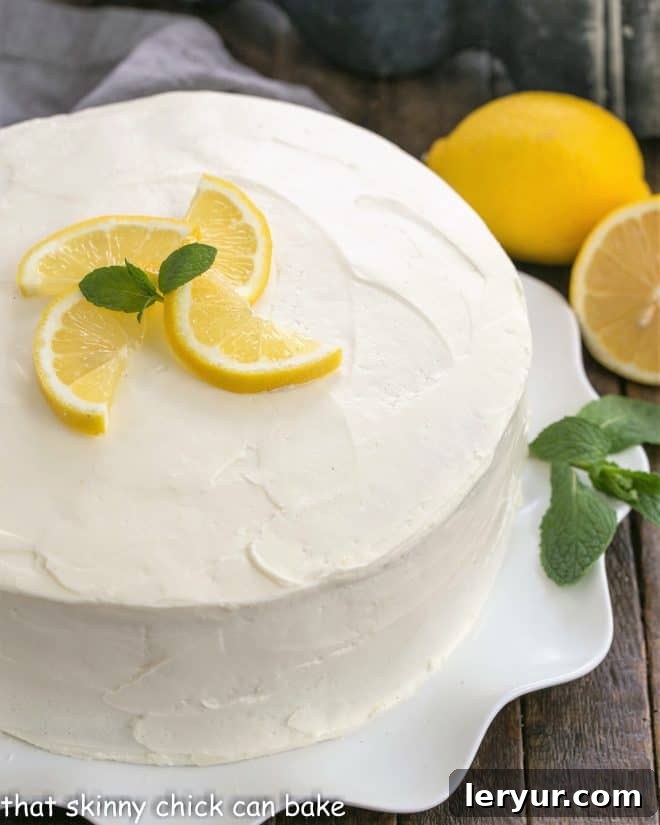
Why This Lemon Layer Cake is an Absolute Must-Bake
There are countless reasons why this particular Lemon Layer Cake stands out as a superior choice for your next baking adventure, especially if you’re seeking a dessert that truly impresses:
- A Lemon Lover’s Paradise: If the bright, tangy zest of lemon makes your heart sing, then prepare to be utterly enchanted. This cake embodies everything wonderful about lemon, from its aromatic essence in the curd to the subtle citrus notes in the frosting, creating a symphony of flavor that’s truly unparalleled.
- Harmonious Flavor Balance: What sets this cake apart is the exquisite interplay between its components. The zesty, tart lemon curd acts as a perfect counterpoint to the sweet, delicate vanilla cake and the rich, buttery Swiss meringue buttercream. This thoughtful balance ensures each forkful is exciting, preventing the cake from being overly sweet and leaving you craving more.
- Experience Luxurious Swiss Meringue Buttercream: For those who have yet to discover the sheer delight of Swiss meringue buttercream, this cake offers the perfect introduction. Known for its incredibly smooth, light, and less-sweet profile compared to traditional American buttercreams, it’s often hailed as the most luxurious frosting available. Its velvety texture and elegant finish will win you over with the very first taste, elevating the entire cake experience.
- Impressive Presentation for Any Occasion: With its beautifully structured layers and elegant frosting, this cake is visually stunning. It makes a grand statement at any gathering, from intimate family dinners to significant milestones like birthdays and anniversaries, ensuring your dessert is as memorable as the event itself.
- A Baking Project That Rewards: While some elements like the Swiss meringue buttercream might seem daunting at first, the detailed instructions and tips provided will guide you through each step. The satisfaction of creating such a magnificent dessert from scratch is incredibly rewarding, proving that a little effort yields extraordinary results.
The gathering for Gini’s mother was truly special, with eleven children traveling from all corners of the country to celebrate their beloved matriarch’s 90th year. It was a testament to a life filled with love and family, and such an occasion undeniably deserved a celebratory feast. Gini, an accomplished cook and baker herself, was already immersed in planning a magnificent dinner. With so much on her plate, ensuring a perfect lemon dessert was one less worry she had to bear, and I was honored to step in and create something truly spectacular.
Crafting Your Masterpiece: A Step-by-Step Guide to Lemon Layer Cake with Lemon Curd
I was absolutely thrilled to contribute to such a momentous birthday celebration by baking this incredible cake. The process, while involving a few steps, is incredibly rewarding and results in a dessert that truly shines:
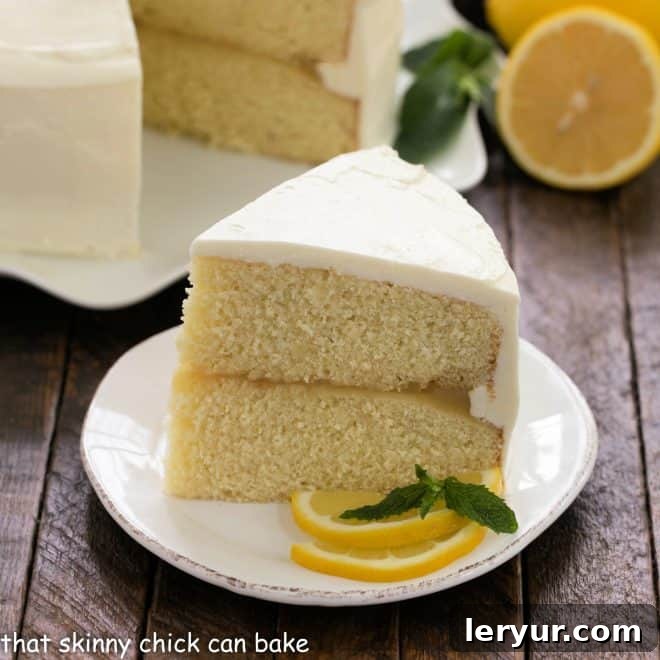
- Building the Vanilla Foundation: The journey begins with baking two moist and flavorful vanilla cake layers. For an even grander presentation and more opportunities for that delicious lemon curd, I carefully sliced each cooled cake layer horizontally, yielding four impressive, uniform layers. This technique creates a taller, more dramatic cake with multiple thin layers of cake and filling.
- The Heart of the Cake: Luscious Lemon Curd: Next, I prepared a generous batch of vibrant lemon curd. Made with freshly squeezed lemon juice, its intense tartness provides a delightful contrast to the sweet vanilla cake and the rich frosting. This tangy filling is generously spread between three of the four cake layers, ensuring a burst of citrus in every bite. The bright, sunny flavor of homemade lemon curd is truly incomparable and makes all the difference.
- Simplification for Convenience (Optional): While the four-layer method with homemade curd yields an undeniably show-stopping cake, I understand that time constraints can sometimes be a factor. The second time I made this cake, I opted for a simpler approach: I didn’t split the layers, resulting in a more traditional two-layer cake, and used a premium store-bought lemon curd. This still produced a delicious and beautiful cake! Whichever route you choose, rest assured, the results will be delightful. The detailed directions below include instructions for making the homemade lemon curd and the two-layer cake base, offering flexibility to suit your baking style.
- The Crown Jewel: Swiss Meringue Buttercream: To complete this culinary creation, a light, buttery Swiss meringue buttercream was whipped to perfection. Infused with a touch of pure vanilla extract, it provides an exquisite, smooth finish. For an extra citrus kick, a hint of lemon extract can also be added, intensifying the cake’s lemony essence. This lemon curd layer cake, with its elegant height and harmonious flavors, was indeed a true beauty, ready to dazzle any gathering.
Expert Tips for Layering Your Cake with Lemon Curd
Achieving perfectly neat layers with a soft filling like lemon curd can be a little tricky, but with a simple technique, you can ensure a beautiful presentation and prevent any messy mishaps. When spreading the lemon curd onto your cake layers, the key is to create a “dam” around the perimeter. If you spread the lemon curd right to the very edge of your bottom cake layer, the weight of the subsequent layers will inevitably cause it to ooze out the sides, leading to a less-than-perfect finish.
Therefore, it’s crucial to leave a clean half-inch gap (or even a full inch, depending on the consistency of your curd) between the side of the cake and the lemon curd filling. This generous border provides the curd with ample room to spread slightly under the pressure of the next cake layer without escaping. Once you place the top layer, any minuscule amount of curd that might still try to sneak out can be easily tidied up with the delicate sweep of an offset spatula, ensuring your cake remains pristine and elegantly structured.
Mastering the Art of Stacking a Layer Cake for Professional Results
Stacking a layer cake might seem intimidating, but with a few professional tricks, you can achieve a stable, beautiful, and perfectly level dessert. Here’s how to ensure your multi-layered creation stands tall and proud:
- Prepare Your Base: Begin by carefully placing your first cake layer, top side down, onto your chosen cake plate or serving stand. This ensures a flat, stable base for your entire cake structure.
- Keep it Clean: To maintain a clean cake stand throughout the frosting process, gently tuck several strips of wax paper or parchment paper around the perimeter of the cake. These strips will catch any errant frosting drips and can be easily removed once your cake is fully frosted, revealing a spotless presentation.
- First Frosting Layer: Depending on the total amount of frosting you have prepared, spread a generous and even layer of about 1/2 to 3/4 cup of Swiss meringue buttercream on top of the bottom cake layer. Ensure it reaches the edges, creating a level surface for the next layer.
- Adding the Second Layer: Carefully place the second cake layer on top, this time with the top side facing up. This strategic placement ensures that the two flattest, most even sides of your baked cakes (which are typically the bottoms) meet in the middle, contributing to a more stable and level cake.
- Repeat for Additional Layers: If you’re building a taller cake with more layers, continue this process, adding a layer of frosting and then a cake layer, always ensuring the flattest sides are facing each other or outwards to maintain stability.
- Crumb Coat Perfection: Once all your layers are stacked, apply a very thin layer of frosting all over the cake – this is known as a “crumb coat.” Its purpose is to trap any loose cake crumbs, preventing them from mixing into your final decorative frosting layer. Chill the cake in the refrigerator for about 15-20 minutes until the crumb coat is firm.
- Final Frosting Flourish: After the crumb coat has set, apply your remaining frosting in a thicker, smooth, and even layer. Use an offset spatula or a bench scraper to achieve a beautifully polished finish on the sides and top.
- Decorate and Serve: With your cake expertly stacked and frosted, you’re ready for any final decorations or simply to serve this magnificent creation.
By following these steps, you’ll not only create a stunning multi-layered cake but also gain confidence in your cake-stacking abilities, leading to perfectly structured and delicious results every time.
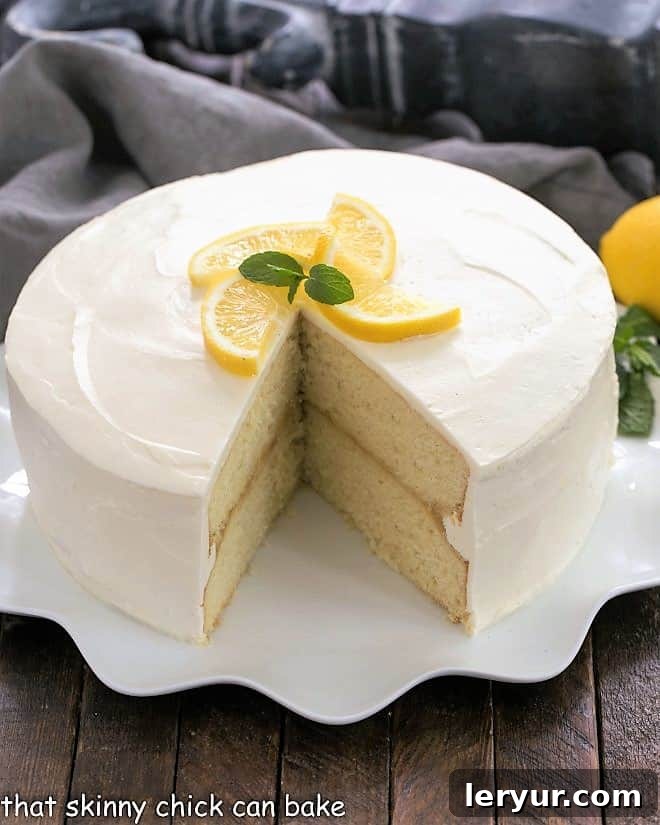
Unlocking the Secrets to Silky Swiss Meringue Buttercream Frosting
Swiss Meringue Buttercream (SMBC) is truly a revelation in the world of frostings. It’s renowned for its incredibly light, smooth, and less-sweet profile, making it a favorite among professional bakers and discerning dessert lovers. While it might have a reputation for being a bit “tricky,” don’t let that deter you! The resulting luxurious texture and stable finish are absolutely worth the effort. Of course, if you’re short on time or feeling less adventurous, a classic American buttercream or a tangy cream cheese frosting can also make a delicious substitute. But for those ready to elevate their baking, I encourage you to give SMBC a try. Here are all my tried-and-true tips and tricks to help you create this outrageously delicious frosting with confidence:
- The Golden Rule: Grease-Free Environment is Paramount: This is arguably the most critical tip for successful meringue. Any trace of grease – whether from residual butter in your mixing bowl, oil on your beaters, or even a tiny speck of egg yolk (which contains fat) – will prevent your egg whites from whipping up into stiff, voluminous peaks. Ensure all your equipment is impeccably clean, often by wiping with a paper towel dampened with lemon juice or vinegar.
- Precision Egg Separation: While eggs separate best when they are cold (the yolks are firmer and less likely to break), egg whites whip best when they are at room temperature. To achieve both, separate your eggs immediately after taking them from the fridge. Use a three-bowl method for ultimate safety: crack each egg into a small, separate bowl, carefully transfer the yolk to a “yolk bowl,” then pour the clean egg white into your main “whites bowl.” This way, if a yolk breaks, it only contaminates one egg white, not the entire batch. Once separated, let the whites come to room temperature for about 20-30 minutes before starting.
- The Indispensable Instant-Read Thermometer: Success with Swiss meringue hinges on precise temperature control. You absolutely must have an instant-read thermometer. The egg white and sugar mixture needs to be heated over a double boiler to exactly 160ºF (71ºC). This temperature is crucial for two reasons: it ensures the sugar is completely dissolved, creating a smooth meringue, and it safely pasteurizes the egg whites, eliminating any potential pathogens and making the frosting safe to consume.
- Mastering the Double Boiler Technique: This heating process is best done using a double boiler setup. If you don’t have a dedicated double boiler, you can easily create one using the bowl of your stand mixer (if it’s heatproof, typically stainless steel or glass) placed over a saucepan filled with about 1-2 inches of simmering water. The most important detail here is that the bottom of your mixing bowl should NOT touch the simmering water. The steam from the water will gently and evenly heat the egg white mixture without scrambling it.
- Heating the Egg White and Sugar Mixture: Cook the egg whites and sugar over the simmering water, whisking continuously to prevent the eggs from cooking and to help the sugar dissolve evenly. This process typically takes about 4-6 minutes until the mixture reaches 160ºF. To confirm the sugar is fully dissolved, carefully rub a small amount of the mixture between your thumb and forefinger – you should feel absolutely no grittiness or sugar crystals. If you do, continue heating and whisking for another minute or two.
- Whipping the Meringue to Perfection: Once the mixture reaches 160ºF and the sugar is dissolved, carefully remove the bowl from the heat. If you used a separate heatproof bowl, transfer the mixture to the clean bowl of your stand mixer. Attach the whisk attachment and begin beating on medium-high speed. Continue beating for approximately 10 minutes, or until the meringue is glossy, forms stiff peaks, and the bottom of the mixing bowl is no longer warm to the touch (it should feel cool). This cooling step is vital before adding butter.
- Incorporating the Butter (The “Magic” Moment): Switch from the whisk attachment to the paddle attachment. This is where the magic happens! Begin adding the room temperature butter, one tablespoon at a time. It’s critical that the butter is at room temperature – too cold and it won’t incorporate smoothly; too warm and it could melt the meringue. Add each tablespoon only after the previous one has been fully incorporated into the meringue. Don’t panic if the mixture looks curdled or broken at first; this is normal! Continue mixing, and it will eventually come together into a smooth, luxurious buttercream.
- Flavoring and Finishing: Once all the butter is mixed in and the buttercream is smooth, turn the mixer down to low speed and mix in your desired flavorings, such as vanilla extract or lemon extract for an extra citrus boost. Give it a final taste test, perhaps swoon a little over its perfection, and then proudly frost your magnificent cake!
With these comprehensive tips, you are well-equipped to conquer Swiss Meringue Buttercream and create a truly unforgettable Lemon Layer Cake.
More Zesty Delights: If You Adore Lemon Desserts, Explore These Favorites!
If the bright, refreshing taste of lemon has captured your heart, then you’re in for a treat! Beyond this magnificent Lemon Layer Cake, there’s a whole world of delightful citrus-infused desserts waiting to be discovered. Here are some of our other cherished lemon recipes that promise to bring sunshine to your table:
- Strawberry Lemon Blondies from The View from Great Island – A fruity and zesty twist on a classic.
- Lemon Layer Cake with Lemon Curd Filling – For those who can’t get enough of layered lemon goodness.
- Butter and Rum Crepes with Lemon Curd Filling – An elegant and light dessert perfect for brunch or a special occasion.
- Strawberry Lemon Tart – A beautiful and vibrant tart showcasing fresh fruit and bright lemon.
- Lemon on a Cloud – A whimsical and airy dessert with a delightful lemon essence.
- More of the Best Dessert Recipes – Explore our full collection of delectable treats.
This beloved recipe was initially shared in September 2015. To ensure it continues to meet the highest standards, the photos, text, and the recipe itself underwent a comprehensive update in 2020, offering even more clarity and deliciousness to our readers.
Lemon Layer Cake
30 minutes
40 minutes
1 hour 10 minutes
16 servings
A luscious four-layer cake generously filled with zesty lemon curd and gracefully topped with a light, silky Swiss meringue buttercream.
Ingredients
For the Homemade Lemon Curd (or use a premium store-bought lemon curd):
- 1 cup fresh lemon juice
- 1 teaspoon unflavored gelatin (such as Knox brand)
- 1 1⁄2 cups granulated sugar
- 1⁄8 teaspoon salt
- 4 large eggs
- 6 large egg yolks (reserve the egg whites for the cake batter)
- 8 tablespoons (1 stick) unsalted butter, cut into small cubes and frozen
For the Vanilla Cake Layers:
- 2 1⁄4 cups cake flour
- 1 cup whole milk, brought to room temperature
- 6 large egg whites, brought to room temperature
- 2 teaspoons pure vanilla extract
- 1 3⁄4 cups granulated sugar
- 4 teaspoons baking powder
- 1 teaspoon salt
- 12 tablespoons (1 1/2 sticks) unsalted butter, softened but still cool
For the Swiss Meringue Buttercream Frosting:
- 3 large egg whites
- 1 cup granulated sugar
- 3/4 cup (1 1/2 sticks) unsalted butter, at room temperature
- 1/2 teaspoon lemon extract or 1 teaspoon vanilla extract (or a combination)
Instructions
Homemade Lemon Curd Filling:
- In a small, heatproof bowl, measure out 1 tablespoon of the fresh lemon juice. Sprinkle the unflavored gelatin evenly over the top of the juice and set aside to bloom for 5 minutes.
- In a medium saucepan, combine the remaining lemon juice, 1 1/2 cups sugar, and 1/8 teaspoon salt. Heat over medium-high heat, stirring occasionally, until the sugar completely dissolves and the mixture is hot, but not yet boiling.
- In a large, non-reactive bowl (such as glass or stainless steel), vigorously whisk together the 4 whole eggs and 6 egg yolks until thoroughly combined and slightly lightened in color.
- While whisking the egg mixture constantly, slowly pour a thin stream of the hot lemon-sugar mixture into the eggs. This tempering step prevents the eggs from scrambling. Once combined, immediately return the entire mixture to the saucepan.
- Cook the mixture over medium-low heat, stirring constantly with a whisk or rubber spatula, until it thickens to a custard-like consistency and reaches 170°F (77°C) on an instant-read thermometer. This typically takes about 4-6 minutes.
- Immediately remove the saucepan from the heat. Stir in the bloomed gelatin mixture until it is completely dissolved. Then, add the frozen butter cubes, stirring until they are fully incorporated and melted into the curd, making it smooth and glossy.
- For an extra silky-smooth curd, pour the filling through a fine-meshed strainer into a clean bowl. This removes any potential cooked egg bits or gelatin clumps.
- Press a piece of plastic wrap directly onto the surface of the lemon curd to prevent a skin from forming. Refrigerate for at least 4 hours, or preferably overnight, until the curd is firm enough to spread easily.
Vanilla Cake Layers:
- Preheat your oven to 350°F (175°C).
- Lightly grease and flour two 9-inch round cake pans. Line the bottoms with parchment paper rounds for easy release.
- In a medium bowl, whisk together the 6 room-temperature egg whites and 2 teaspoons vanilla extract until just combined. Set aside.
- In the bowl of a stand mixer fitted with the paddle attachment, combine the cake flour, 1 3/4 cups sugar, baking powder, and 1 teaspoon salt. Mix on slow speed for about 30 seconds to combine the dry ingredients.
- Add the softened, cool unsalted butter (12 tablespoons) one piece at a time to the dry ingredients in the mixer bowl. Continue to beat on medium-low speed until the mixture resembles moist crumbs, ensuring there are no visible chunks of butter remaining. The mixture should be uniform.
- Pour all but 1 cup of the milk mixture (which includes the egg whites and vanilla) into the crumb mixture. Beat on medium speed for about 1 1/2 minutes until the batter is pale, light, and fluffy, scraping down the sides of the bowl as needed.
- With the mixer still running on medium speed, gradually add the remaining 1/2 cup of the milk mixture. Continue to beat for exactly 1 minute more, ensuring the batter is smooth and well-aerated.
- Divide the cake batter evenly between the two prepared 9-inch cake pans. Smooth the tops with an offset spatula.
- Bake for 23-25 minutes, or until a wooden toothpick inserted into the center of the cakes comes out clean. The cakes should be lightly golden and spring back when gently pressed.
- Allow the cakes to cool in their pans for 10 minutes. Then, carefully invert them onto a greased wire rack, remove the parchment paper from the bottoms, and invert them again so they are right side up. Let them cool completely to room temperature before assembling.
Swiss Meringue Buttercream:
- Combine the 3 egg whites and 1 cup sugar in a clean, heatproof mixer bowl (or a separate heatproof bowl). Place this bowl over a medium saucepan filled with about 2 inches of simmering water, ensuring the bottom of the bowl does not touch the water.
- Whisk the egg white and sugar mixture constantly over the simmering water until the sugar is fully dissolved and the mixture reaches 160°F (71°C) on an instant-read thermometer. This should take approximately 5-10 minutes. Rub a small amount between your fingers to ensure no sugar crystals remain.
- Carefully remove the bowl from the saucepan. If using a separate bowl, transfer the hot mixture to your stand mixer bowl. Attach the whisk attachment and beat on medium-high speed for about 10 minutes, or until the meringue is glossy, forms stiff peaks, and the bottom of the bowl is no longer warm to the touch but cool.
- Switch to the paddle attachment. With the mixer on medium-low speed, slowly add the room temperature butter (3/4 cup), one tablespoon at a time. Add the next tablespoon only after the previous one has been fully incorporated. The mixture may look curdled at first, but keep mixing; it will come together into a smooth buttercream.
- Once all the butter is incorporated and the buttercream is smooth and fluffy, add 1/2 teaspoon lemon extract or 1 teaspoon vanilla extract (or a combination) and mix on low speed until just combined.
Assembly of the Lemon Layer Cake:
- Once the cake layers are completely cool, place the first cake layer, top side down, onto your serving plate or cake stand. If desired, tuck strips of wax paper or parchment paper around the perimeter to keep the stand clean.
- Spread 1 cup of the chilled lemon curd evenly over the top of the first cake layer, leaving a 1/2-inch border around the perimeter to prevent oozing.
- Carefully place the second cake layer on top of the lemon curd, with its top side facing up. Gently press down to secure the layers.
- If you wish to create a four-layer cake from two cakes: carefully slice each cooled cake horizontally with a serrated knife to create four thinner layers. Repeat the lemon curd spreading step between the first, second, and third layers.
- Apply a thin layer of Swiss Meringue Buttercream (a crumb coat) over the entire cake (top and sides) to trap any loose crumbs. Chill in the refrigerator for 15-20 minutes until firm.
- Once the crumb coat is set, spread the remaining Swiss Meringue Buttercream evenly over the top and sides of the cake, smoothing it out with an offset spatula or bench scraper for a polished finish.
- Serve immediately or refrigerate until ready to serve. Bring to room temperature for about 30 minutes before slicing for the best flavor and texture.
Notes
Adapted from a cherished Southern Living recipe, this Lemon Layer Cake has been refined to bring you the ultimate balance of flavor and texture. For optimal freshness, the cake can be stored in an airtight container in the refrigerator for up to 3-4 days. Allow it to come to room temperature for about 30-60 minutes before serving to ensure the cake layers are soft and the buttercream is perfectly creamy.
Nutrition Information:
Yield:
16
Serving Size:
1 slice
Amount Per Serving:
Calories: 469Total Fat: 18gSaturated Fat: 10gTrans Fat: 0gUnsaturated Fat: 7gCholesterol: 155mgSodium: 329mgCarbohydrates: 72gFiber: 0gSugar: 56gProtein: 7g
HOW MUCH DID YOU LOVE THIS RECIPE?
Please leave a comment on the blog or share a photo on Pinterest