
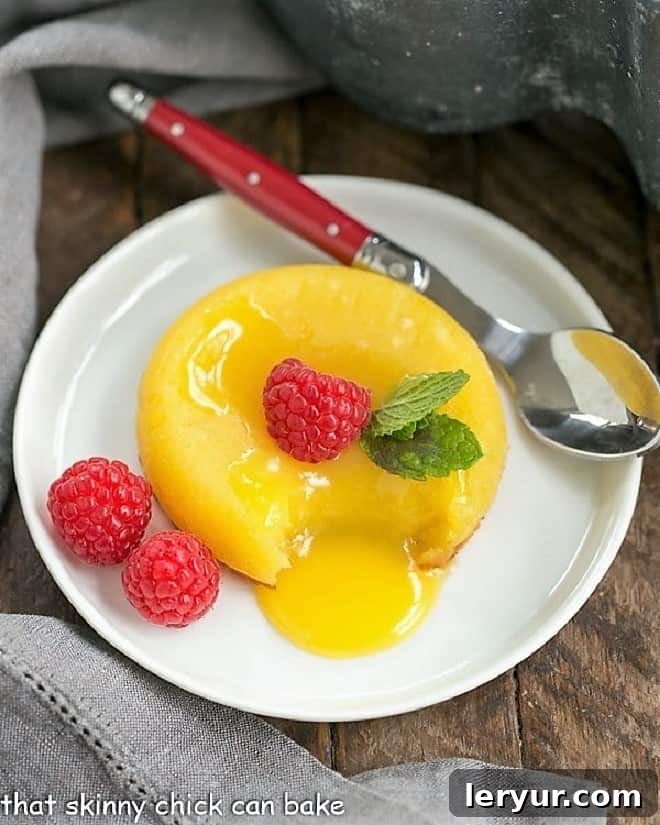
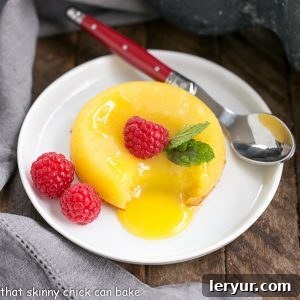
Indulge in a truly exquisite dessert that promises to captivate your senses: White Chocolate Molten Lava Cakes. Much like their dark chocolate counterparts, these individual cakes offer a blissful, restaurant-worthy experience right in your own home. Imagine sinking your spoon into a delicate cake exterior, only to discover a warm, luxuriously fudgy, oozing white chocolate center. This impressive yet surprisingly easy recipe is guaranteed to make you fall in love with its irresistible charm, perfect for any special occasion or a delightful treat.
For years, classic dark chocolate lava cakes have been a family favorite, consistently earning rave reviews. However, it was time to introduce a delightful twist, reimagining this beloved dessert with the creamy, sweet richness of white chocolate. This recipe delivers all the dramatic molten goodness you expect, elevated by the unique flavor profile of premium white chocolate, creating a truly unforgettable experience.
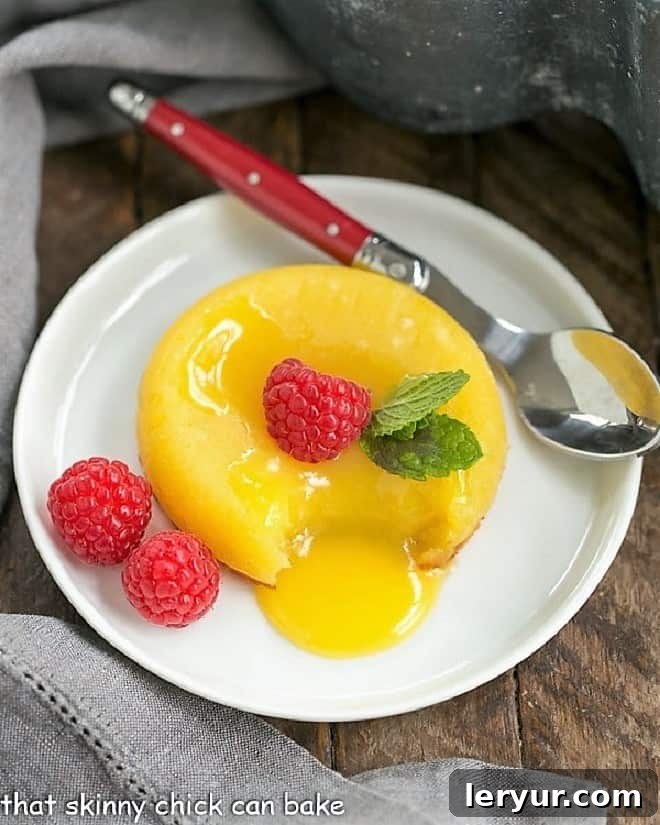
Why These White Chocolate Molten Lava Cakes Are a Must-Try
These individual white chocolate delights are more than just a dessert; they’re an experience waiting to happen. Here’s why this recipe deserves a prime spot in your culinary repertoire:
- Effortless Preparation: Forget the hassle of complicated baking. This recipe requires no electric mixer, streamlining your preparation process and making it accessible for even novice bakers.
- Simple Yet Stunning: Despite its sophisticated appearance and incredible taste, the recipe itself is incredibly straightforward. It’s the perfect way to impress guests or treat yourself without spending hours in the kitchen.
- Minimal Ingredients: You won’t need a pantry full of obscure items. This recipe relies on a few core ingredients, making it easy to gather everything you need.
- Perfect for Any Occasion: Whether it’s a romantic dinner, a celebratory gathering, or simply a craving for something extraordinary, these lava cakes add a touch of elegance and surprise.
- Customizable Garnishes: The delicate flavor of white chocolate serves as a perfect canvas for a variety of garnishes, allowing you to personalize each serving to perfection.
I’ve experimented with countless classic dark chocolate lava cake recipes over the years. Some unmolded flawlessly, others clung stubbornly to their ramekins. Some delivered the perfect molten flow, while others had moist, but not quite liquid, centers. While the Jean-Georges classic lava cakes recipe consistently performed well, I was eager to see how the molten magic would translate with white chocolate. This quest became particularly personal when my mother requested a white chocolate dessert for Mother’s Day. The challenge was eagerly accepted!
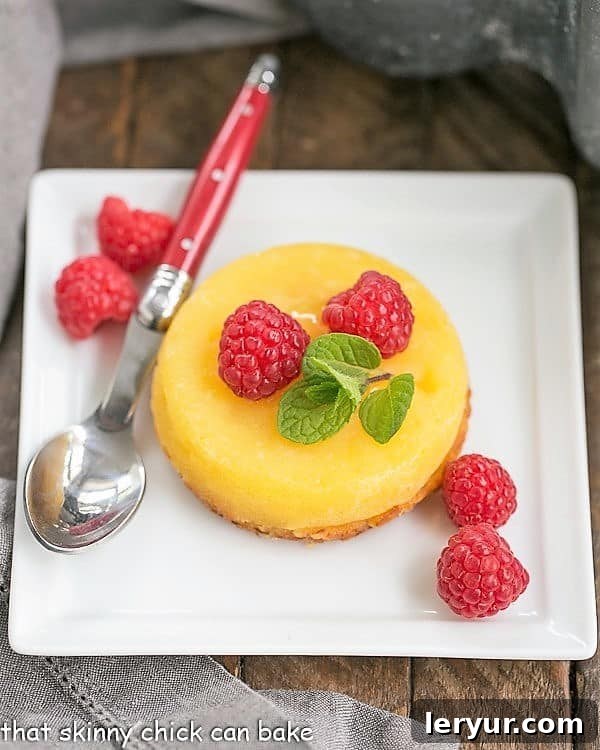
Step-by-Step Guide to Baking Perfect White Chocolate Molten Lava Cakes
Creating these dreamy white chocolate molten lava cakes is a rewarding process, resulting in a dessert that looks as good as it tastes. Follow these steps for flawless results:
- Preheat Your Oven Accurately: Begin by preheating your oven to a precise 450ºF (232ºC). The high initial temperature is crucial for creating the cake’s set exterior while keeping the interior gloriously molten.
- Prepare Your Ramekins for Easy Release: This is a critical step for perfect unmolding. Generously butter four 4-ounce ramekins, then line the bottom of each with a round of parchment paper. Butter the top of the parchment as well, then dust the entire interior lightly with flour. This meticulous preparation prevents sticking and ensures your cakes slide out beautifully.
- Gently Melt Butter and White Chocolate: In a microwave-safe bowl, combine the butter and chopped white chocolate. Melt them gently, using short intervals (e.g., 30 seconds) and stirring frequently to ensure a smooth, uniform mixture without scorching the chocolate. Set this mixture aside to cool slightly.
- Combine Wet Ingredients: In a separate bowl, whisk together the eggs, egg yolks, and granulated sugar until the mixture becomes light, thick, and pale yellow. A hand whisk works perfectly here, eliminating the need for an electric mixer.
- Fold in Chocolate and Flour: Carefully fold the cooled melted white chocolate mixture into the egg mixture until just combined. Then, gently incorporate the all-purpose flour, mixing only until no dry streaks remain. Overmixing can lead to a tough cake.
- Divide and Bake to Perfection: Evenly divide the prepared batter among your ramekins. Place the ramekins on a baking sheet to catch any potential overflow and for easier handling. Bake for approximately 6-10 minutes. The key is to bake until the edges are set and firm, but the very center still appears soft and jiggly—this is where the “lava” magic happens.
- The Art of Unmolding and Serving: Once baked, remove the cakes from the oven. Immediately run a thin knife or metal spatula carefully around the perimeter of each cake to loosen it from the ramekin. Let them rest for just a minute or two. Then, carefully invert each ramekin onto a serving plate. If a cake doesn’t release immediately, a gentle shake usually helps.
- Garnish and Serve Immediately: The molten center is best enjoyed warm. Garnish your lava cakes with fresh raspberries, a sprig of mint, a dollop of whipped cream, or a scoop of vanilla ice cream for an ultimate dessert experience. Serve them without delay to savor that delightful oozing center.
It’s always a treat to see my husband, Bill, discover my latest culinary creations in the fridge. His grin broadens when I tell him they’ve been photographed, signaling they’re fair game. These white chocolate lava cakes received his enthusiastic approval, and he was even more delighted when I mentioned I’d need to update my photos of the classic semisweet version – a sure sign of success!
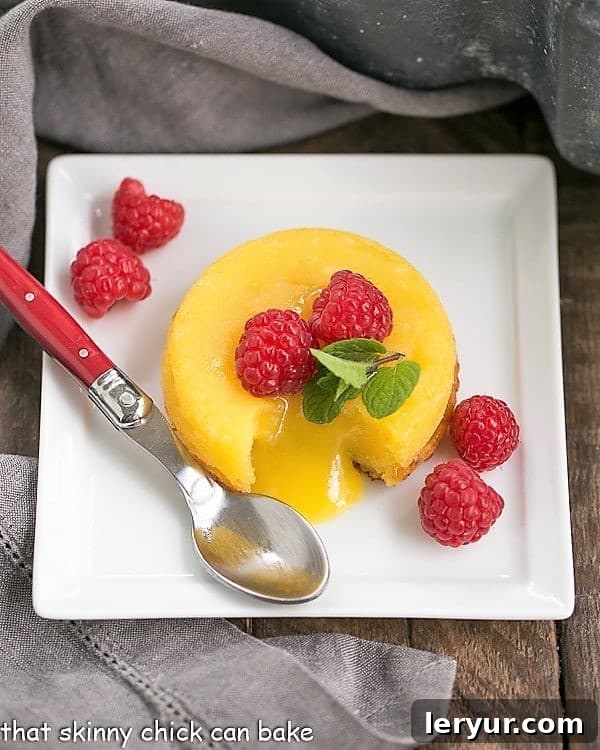
Expert Tips for Flawless White Chocolate Lava Cakes
Achieving that perfect molten center and beautiful presentation requires a few insider tricks. Here are some expert tips to ensure your white chocolate lava cakes are a resounding success:
- Egg Safety First: Since the center of these cakes remains deliciously undercooked, it may not reach the 160°F temperature needed to kill potential salmonella bacteria. To ensure safety, especially for the very young, elderly, or immuno-compromised, consider using pasteurized eggs for this recipe. Alternatively, you can learn how to pasteurize your eggs at home.
- Mastering the Unmolding: While the original recipe might suggest just buttering and flouring ramekins, my experience shows that adding parchment paper rounds to the bottom of your ramekins is a game-changer. This extra step significantly enhances the ease of release, preventing your beautiful cakes from sticking.
- The Perfect Bake Time – A Balancing Act: The exact baking time for molten lava cakes can vary greatly depending on your specific oven and even the initial temperature of your batter. The goal is to have the perimeter of the cake fully set and firm, with only about a quarter-sized area in the very center appearing unset and jiggly. Resist the urge to overbake, as this will solidify the molten core. Some recipes suggest baking until the internal temperature reaches 160°F, but I’ve found that at this point, the entire interior can be jiggly, losing the desired contrast between the set edges and gooey center. Trust your eyes and the jiggle test!
- Pro-Tip: Practice Makes Perfect: If you’re planning to serve these elegant desserts for company, I highly recommend a practice run. This allows you to fine-tune the baking time for your specific oven and setup, ensuring a perfect result when it truly counts. Remember, all ovens have their unique quirks.
- Transforming to Classic Dark Chocolate: To make the traditional dark chocolate molten lava cakes, simply substitute the white chocolate with an equal amount of high-quality semisweet or bittersweet chocolate. Adjust for sweetness if necessary.
- Preparation Ahead of Time: These cakes can be prepared in advance up to the point of pouring the batter into the prepared ramekins. Cover the filled ramekins tightly with plastic wrap and refrigerate them. When you’re ready to bake, remove them from the refrigerator about an hour beforehand to allow them to come closer to room temperature. Bake as directed, but be aware that you might need to add an extra minute or two to the baking time due to the chilled batter.
Ingredient Notes for Optimal Flavor and Texture
The quality of your ingredients significantly impacts the final taste and texture of your White Chocolate Molten Lava Cakes. Here’s a closer look at what to choose:
- Butter: Salted butter is generally fine for this recipe as a little salt enhances flavor, even in desserts. If you opt for unsalted butter, be sure to add a generous pinch of fine sea salt (about ¼ teaspoon) to the batter. Salt is a crucial flavor enhancer, bringing out the sweetness and complexity of the white chocolate.
- White Chocolate: This is the star ingredient, so choose wisely. I highly recommend using high-quality white chocolate bars, such as Ghirardelli. Avoid standard white chocolate chips often found in baking aisles, as they typically contain stabilizers like wax to help them hold their shape during baking. This can result in a less smooth and flavorful molten center. Look for white chocolate that lists cocoa butter as a primary ingredient.
- Eggs: Use large eggs. Their size contributes to the correct batter consistency and richness. As noted in the expert tips, consider pasteurized eggs for added safety due to the undercooked center.
- Sugar: Regular granulated sugar is all you need. Its fine crystals dissolve easily and provide the perfect amount of sweetness.
- Flour: All-purpose flour works perfectly here. You only need a small amount, just enough to give the cake structure without making it dense. Remember, less is more for that molten core.
- Garnishes (Optional but Recommended): Elevate your presentation and flavor with fresh raspberries for a tart counterpoint, fresh mint for a refreshing aroma, a dollop of homemade whipped cream for extra richness, or a scoop of premium vanilla ice cream for a delightful temperature contrast.
Frequently Asked Questions About Molten Lava Cakes
Curious about molten lava cakes? Here are answers to some common questions:
These two culinary terms are used interchangeably, referring to the same decadent dessert. They both describe individual cakes characterized by an intentionally undercooked, flowing center that resembles molten lava when the cake is broken into. Soufflés, while also baked in ramekins, are distinct in that they are fully baked, light, and airy throughout, without a liquid center.
Due to their signature undercooked centers, lava cakes are only guaranteed safe to eat if they are made with pasteurized eggs. Pasteurized eggs have been treated to eliminate harmful bacteria like salmonella. If you are using unpasteurized eggs, it’s generally advised not to serve these cakes to individuals who are very young, elderly, pregnant, or anyone with a compromised immune system, as they are more susceptible to foodborne illnesses.
Absolutely! Lava cakes are fantastic for entertaining because you can prepare them in advance. Simply mix the batter, fill your prepared ramekins, and then cover them tightly with plastic wrap. Store the filled ramekins in the refrigerator for up to 24 hours. When you’re ready to bake, take them out of the fridge about an hour before baking to allow them to lose some of their chill. While they will bake similarly, they might require an additional minute or two of baking time compared to room-temperature batter. Just keep an eye on them and bake until the sides are set and only the very center appears unset.
Leftover lava cakes can be stored, covered, in the refrigerator for 3-4 days. However, it’s important to note that reheating them often causes the centers to cook completely, which eliminates the signature “lava” effect. If you wish to gently warm them, try microwaving them at 50% power, covered with a damp paper towel, for very short intervals (e.g., 15-20 seconds). Stop and check the center after each interval. Your goal is to warm the cake without fully cooking the middle. If you notice the center starting to set, stop immediately to preserve as much of the molten quality as possible for the next cake.
Explore More White Chocolate & Dessert Recipes
If you’ve fallen for the irresistible charm of these White Chocolate Molten Lava Cakes, you’re sure to enjoy these other delightful treats:
- White Chocolate Blondies from Crazy for Crust
- White Chocolate Raspberry Bars
- Classic White Layer Cake with White Chocolate Buttercream
- White Chocolate Macadamia Nut Cookies
- White Chocolate Ice Cream with Raspberry Sauce
- Red Velvet White Chocolate Chunk Cookies
- More Irresistible Dessert Recipes
Stay in touch and share your creations! Find me on Instagram, Facebook, and Pinterest. Don’t forget to tag me when you try one of my recipes! If you loved the results, please consider leaving a 5-star rating in the recipe card below.
The Recipe:
White Chocolate Molten Lava Cakes Recipe
15 minutes
10 minutes
25 minutes
4 servings
A blissful, white chocolate version of the classic molten lava cake, offering a warm, oozing center and elegant presentation.
Rating: 5 out of 5 stars (based on 44 reviews)
Ingredients
- 1 stick (8 tablespoons) butter, plus extra for preparing ramekins
- 4 ounces quality white chocolate, finely chopped (avoid chocolate chips for best molten results)
- 2 large eggs
- 2 large egg yolks
- ¼ cup granulated sugar
- 2 teaspoons all-purpose flour, plus more to dust the ramekins
- Fresh raspberries, fresh mint, whipped cream, or vanilla ice cream, for optional garnishing
Instructions
- Preheat Oven: Preheat your oven to 450ºF (232ºC).
- Prepare Ramekins: Cut four parchment paper rounds to fit the bottom of four 4-ounce ramekins. Generously butter each ramekin, then place a parchment round at the bottom. Butter the top of the parchment paper. Dust the entire interior of the ramekins with flour, tapping out any excess. (Alternatively, use an oil/flour baking spray like Baker’s Joy.) Set prepared ramekins aside.
- Melt Chocolate & Butter: In a microwave-safe bowl, gently melt the butter and chopped white chocolate. Heat in 30-second intervals, stirring thoroughly after each, until smooth and fully melted. Do not overheat. Set aside to cool slightly.
- Prepare Batter: In a medium bowl, whisk (or use an electric mixer with a paddle attachment if preferred) the eggs, egg yolks, and sugar until the mixture is light in color and thick. Gradually add the cooled melted chocolate mixture and mix until just combined. Gently fold in the flour until no dry streaks remain; avoid overmixing.
- Fill & Bake: Divide the batter evenly among the four prepared ramekins. Place the ramekins on a baking sheet. Bake for 6-10 minutes. Baking time is crucial and varies by oven; the cakes are ready when the sides are set and firm, but the very center still jiggles noticeably (it will look unset). My oven typically takes about 9 minutes.
- Unmold: Carefully remove the baking sheet from the oven. Immediately run a thin knife or metal spatula around the perimeter of each cake to loosen it from the ramekin. Let the cakes rest for 1-2 minutes. Then, invert each ramekin onto a serving plate. If a cake doesn’t release, gently shake the ramekin.
- Garnish & Serve: Garnish your White Chocolate Molten Lava Cakes as desired with fresh raspberries, mint, whipped cream, or a scoop of vanilla ice cream. Serve immediately to enjoy the warm, flowing white chocolate center.
Notes
Recipe adapted from a classic Jean-Georges recipe, reimagined with white chocolate.
Nutrition Information:
Yield:
4 servings
Serving Size:
1 cake
Amount Per Serving (estimated):
Calories: 545
Total Fat: 41g
Saturated Fat: 24g
Trans Fat: 1g
Unsaturated Fat: 14g
Cholesterol: 268mg
Sodium: 274mg
Carbohydrates: 39g
Fiber: 1g
Sugar: 37g
Protein: 8g