
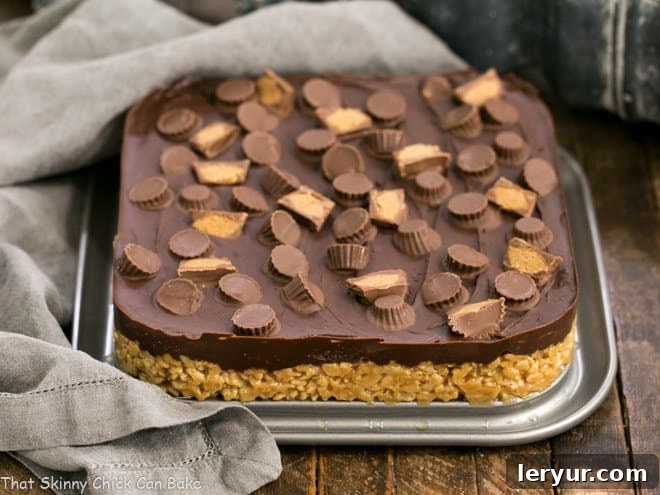
Welcome to a journey back to childhood, where some treats were so incredibly delicious, they became legendary. For many, few desserts evoke such fond memories as the classic combination of peanut butter and chocolate. Today, we’re diving into an irresistible, no-bake delight: **Reese’s Peanut Butter Rice Krispie Treats**. These aren’t your average marshmallow-based treats; they offer a unique twist, delivering a richer, denser, and utterly decadent experience that’s stood the test of time.
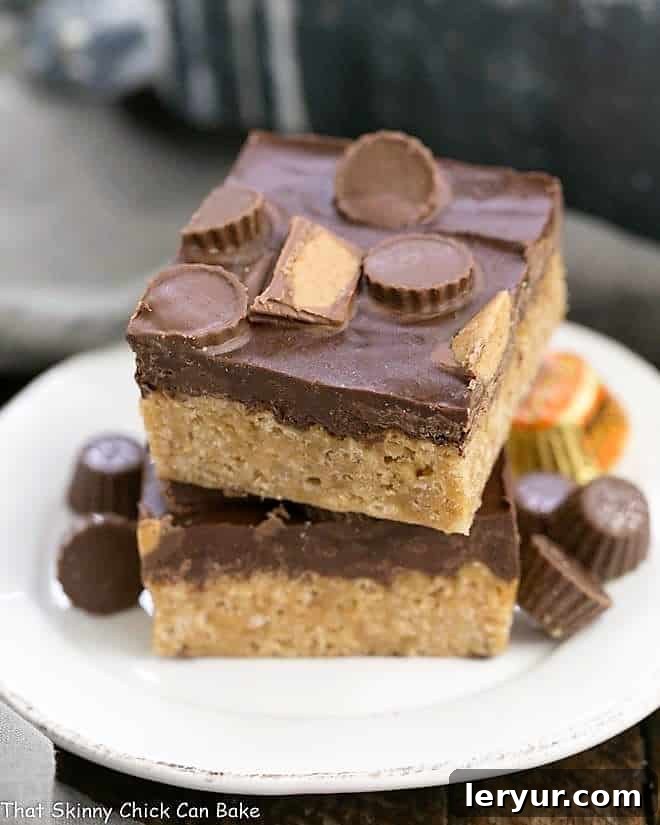
While the traditional Rice Krispie treat often relies on melted marshmallows, this beloved recipe takes a different approach. It masterfully blends creamy peanut butter with a mixture of sugars and light corn syrup, creating a gooey, irresistible base that perfectly complements the crispy cereal. We know some might hesitate at the mention of corn syrup, but for a truly exceptional, occasional indulgence, its role in achieving that perfect texture and sweetness is undeniable. Consider it a nostalgic nod to simpler times, where pure joy in a bite trumped strict dietary rules.
Why These No-Bake Peanut Butter Treats Are a Must-Make
If you’re searching for an easy-to-make dessert that promises to disappear fast, look no further. Our Reese’s Rice Krispie Treats are not just delicious; they’re incredibly practical for a multitude of reasons:
- **Effortless & Oven-Free Baking:** The greatest appeal of these treats is that absolutely no baking is involved! This makes them an absolute savior during hot summer months when turning on the oven is the last thing you want to do. They’re perfect for impromptu gatherings, picnics, barbecues, or simply satisfying a sweet craving without heating up your kitchen.
- **Instant Gratification for Cravings:** When that intense craving for chocolate and peanut butter strikes, these Krispie Treats are your fastest route to satisfaction. They come together in minutes, offering a delightful crunch and a symphony of flavors that hits all the right notes for any fan of this iconic duo.
- **A Marshmallow-Free Solution:** For those who might not have marshmallows on hand, or perhaps prefer a different texture, this recipe is a brilliant alternative. The peanut butter, sugar, and corn syrup base creates a rich, chewy consistency that sets these bars apart from their marshmallow counterparts, offering a distinctly indulgent experience.
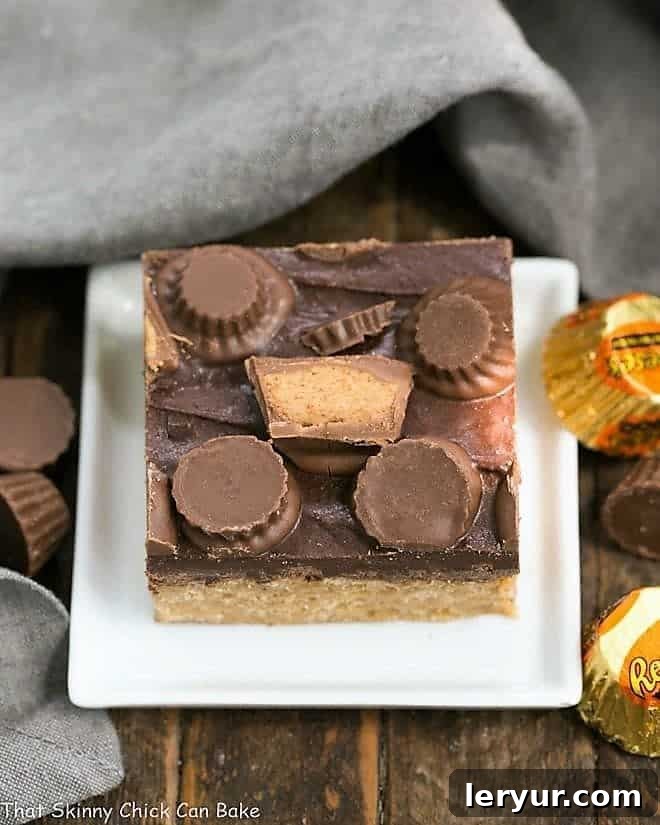
- **Irresistibly Garnished with Reese’s:** To truly elevate these treats, we crown them with miniature Reese’s Peanut Butter Cups. This simple garnish not only adds an extra layer of peanut butter and chocolate goodness but also makes them visually stunning and utterly impossible to resist. The burst of familiar Reese’s flavor makes these a true showstopper.
- **Kid-Friendly Fun:** These treats are not only loved by kids but also incredibly fun to make with them. The no-bake process, simple steps, and exciting final assembly make it a fantastic activity for budding young chefs.
- **Perfect for Any Occasion:** From school lunchboxes and after-school snacks to birthday parties, potlucks, and holiday dessert tables, these bars are universally loved. Their easy transportability and crowd-pleasing flavor make them a go-to dessert for any event.
Essential Ingredients for Perfect Peanut Butter Krispie Treats
Crafting these delectable no-bake bars requires a few key ingredients. While the list is simple, understanding the role of each component can make all the difference in achieving that perfect taste and texture:
- **Sweeteners (Sugar, Brown Sugar, Light Corn Syrup):** This trio forms the sweet, gooey base. Granulated sugar provides crispness, brown sugar adds a deep, molasses-rich flavor and chewiness, while light corn syrup is crucial for binding and preventing crystallization, ensuring a smooth, pliable texture without making the bars too hard. Don’t confuse it with high-fructose corn syrup; light corn syrup is a simple, readily available ingredient in most grocery stores.
- **Creamy Peanut Butter:** The star of the show! For the best results, opt for a standard creamy peanut butter like Jif or Skippy. Natural peanut butter, while delicious in its own right, tends to be runnier due to oil separation, which can affect the final consistency of your bars, potentially making them too soft or greasy. The emulsifiers in conventional creamy peanut butter provide the ideal structure.
- **Neutral Vegetable Oil (e.g., Canola Oil):** Used in the chocolate glaze, a neutral oil helps create a smooth, pourable topping that sets beautifully without becoming brittle. Canola oil is a great choice as it doesn’t impart any additional flavor.
- **Rice Krispies Cereal:** The “crispie” in Krispie Treat! Ensure your cereal is fresh for maximum crunch. You can also experiment with other puffed rice cereals if Rice Krispies aren’t available, but the classic variety yields the most authentic texture.
- **Semisweet Chocolate Chips:** These form the rich, glossy topping. Semisweet chocolate offers a balanced sweetness that pairs wonderfully with the peanut butter. If you prefer a darker, more intense chocolate flavor, bittersweet chocolate chips are an excellent alternative. You could even combine them for a custom blend.
- **Mini Peanut Butter Cups (for Garnish):** The ultimate finishing touch! Miniature Reese’s Peanut Butter Cups add an extra layer of iconic flavor and a festive visual appeal. If you only have full-sized cups, simply quarter them for a similar effect. While optional, they truly elevate these treats to “Reese’s” status.
Expert Tips for Crafting Flawless Peanut Butter Rice Krispie Treats
While these no-bake bars are undeniably simple, a few expert tips can ensure your treats turn out perfectly every single time, yielding bars that are chewy, not hard, and incredibly easy to handle:
- **Proper Pan Preparation is Key:** Whether you’re making the classic marshmallow version or these peanut butter delights, thorough pan prep is crucial for easy removal. Lining your 9×9-inch baking pan with non-stick foil is highly recommended, as it creates a convenient “sling” that allows you to lift the entire batch out of the pan for clean cutting. Another excellent option is to use a non-stick springform pan of the same size. Its removable sides prevent the sticky peanut butter mixture from adhering, ensuring a smooth release.
- **Choose the Right Peanut Butter:** This is a critical distinction. Always use regular, creamy peanut butter (such as Jif or Skippy) for this recipe. Natural peanut butter, which often separates and has a runnier consistency, will not bind the ingredients as effectively and can lead to greasy, crumbly bars. The stabilizers in conventional peanut butter are essential for the desired texture.
- **Avoid Overcooking the Peanut Butter Mixture:** This is the most common pitfall leading to hard, brittle Rice Krispie treats. Once the corn syrup and sugar mixture reaches a full boil, immediately remove it from the heat and stir in the peanut butter. Overheating the mixture will cause the sugars to caramelize too much and stiffen, resulting in rock-hard bars once cooled.
- **Gentle Mixing and Pressing:** When incorporating the Rice Krispies cereal into the peanut butter base, mix gently and quickly. Aggressive stirring can crush the delicate cereal pieces, leading to a less satisfying texture. Similarly, when pressing the mixture into your prepared pan, use a light, even hand. Avoid compacting the mixture too densely, as this can also contribute to a harder bar. You want them just firm enough to hold their shape.
- **Prevent Sticking While Pressing:** The peanut butter mixture can be quite sticky. To make pressing it into the pan easier, lightly grease your hands with a tiny bit of butter, neutral oil, or cooking spray. Alternatively, you can use the buttered side of a butter wrapper or a piece of parchment paper to press the mixture down evenly without it sticking to you.
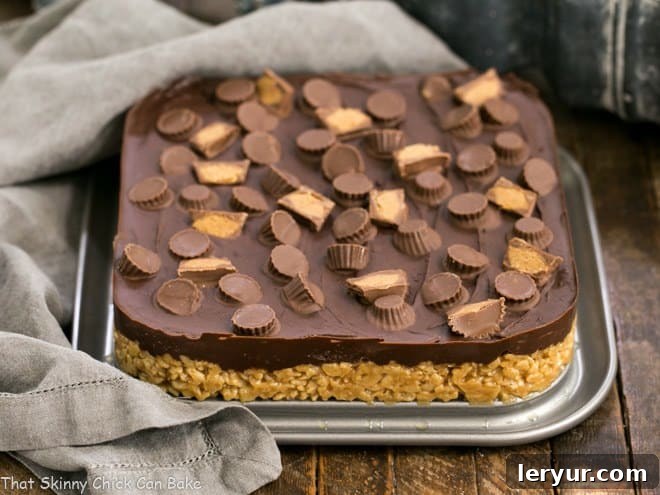
- **Strategic Garnish Application:** Timing is everything when adding your Reese’s Peanut Butter Cups. To prevent them from melting and losing their shape, allow the chocolate topping to cool slightly but still be soft enough to create adhesion. If your kitchen is warm, or you’re making these in the summer heat, a pro tip is to briefly freeze the mini peanut butter cups for about 15 minutes before placing them on the still-soft chocolate glaze. (Learn from my mistake – if the chocolate is too hot, they will melt!)
- **Cereal Alternatives and Nostalgia:** While Rice Krispies are traditional, feel free to use other puffed rice cereals if that’s your preference. Interestingly, some families grew up making marshmallow treats with Rice Krispies and peanut butter treats with Special K cereal. Both yield delightful cereal bars, so don’t hesitate to experiment if you have a different favorite.
- **Cooling Patience is a Virtue:** Allow your finished bars ample time to cool completely and set before cutting. Rushing this step can result in messy cuts and crumbly bars. Chilling them in the refrigerator for about 30-60 minutes can speed up the setting process.
- **Batch Doubling and Scaling:** This recipe is easily doubled or halved. If doubling, use a larger saucepan and a 9×13-inch pan. Remember to maintain the ingredient ratios for optimal results.
Frequently Asked Questions About Peanut Butter Krispie Treats
The most common reason for hard Rice Krispie treats is overcooking the peanut butter mixture. Once the corn syrup and sugar mixture comes to a boil, it needs to be immediately removed from the heat before stirring in the peanut butter. Continuing to boil or simmer it for too long will cause the sugars to harden excessively when cooled. Another contributing factor can be over-packing the mixture too tightly into the pan. Press it in gently, just enough to form an even layer.
Absolutely! These Peanut Butter Rice Krispie Treats freeze beautifully. For best results, allow them to cool completely, then cut them into individual bars. Place them in an airtight freezer-safe container, separating layers with parchment paper to prevent sticking. They can be frozen for up to 2 months. To enjoy, simply thaw them at room temperature for an hour or so, or pop them in the refrigerator overnight.
While both are delicious no-bake cereal bars featuring peanut butter and Rice Krispies, there’s a key difference! Scotcheroos typically feature a topping made with a combination of both chocolate chips and butterscotch chips, giving them a distinct butterscotch flavor alongside the chocolate. Our Reese’s Rice Krispie Treats, on the other hand, focus purely on the classic chocolate and peanut butter pairing, with a simple chocolate glaze, often enhanced by Reese’s peanut butter cups.
These treats are best stored at room temperature in an airtight container, where they will remain fresh and chewy for up to a week. If your kitchen is particularly warm, or during hot summer months, you may choose to store them in the refrigerator to prevent them from becoming too soft. Just be aware that when chilled, they will become very firm, so it’s often easier to cut them into bars before refrigerating.
Yes, you absolutely can! Simply ensure that you use a certified gluten-free puffed rice cereal, as some conventional Rice Krispies contain malt flavoring which may not be gluten-free. All other ingredients (peanut butter, sugars, corn syrup, chocolate chips, and Reese’s cups) are typically gluten-free, but always double-check product labels to be certain.
The beauty of this recipe lies in its versatility! Beyond the classic Reese’s cups, you can experiment with adding mini chocolate chips into the cereal mixture, a sprinkle of sea salt on top of the chocolate glaze to enhance the flavors, or even a drizzle of caramel. For a holiday twist, add sprinkles! The possibilities are endless for customizing these delicious bars.
More Irresistible Chocolate & Peanut Butter Desserts
If you’re a devoted fan of the chocolate and peanut butter combination, here are some other fantastic recipes to satisfy your cravings:
- **Chocolate Peanut Butter Caramel Bars**: These bars take indulgence to the next level with a gooey caramel layer.
- **Tiger Bark**: An incredibly simple yet satisfying treat for when you need a quick chocolate-peanut butter fix.
- **Tagalong Cookie Bars**: Recreate the beloved flavors of the classic Girl Scout Cookies in an easy-to-make bar form.
- **Peanut Butter Cheesecake Bars**: A creamy, dreamy dessert for cheesecake lovers with a peanut butter twist.
- Plus, explore more of our Easy Bar Cookie Recipes for every occasion!
More Delightful Krispie Treat Inspirations
Beyond the classic, there’s a whole world of Rice Krispie Treat variations to explore:
- **Peanut Butter Coconut Balls** – A creative twist from Creative Culinary.
- **Cookie Dough Rice Krispie Treats**: Combining two favorite treats into one epic bar.
- **Caramel Rolo Rice Krispie Treats**: Indulgent bars featuring the delightful combination of caramel and chocolate.
- **Candy Corn Rice Krispie Treats**: A festive and colorful option perfect for Halloween or fall celebrations.
- Discover more of my Best Dessert Recipes for all your sweet cravings!
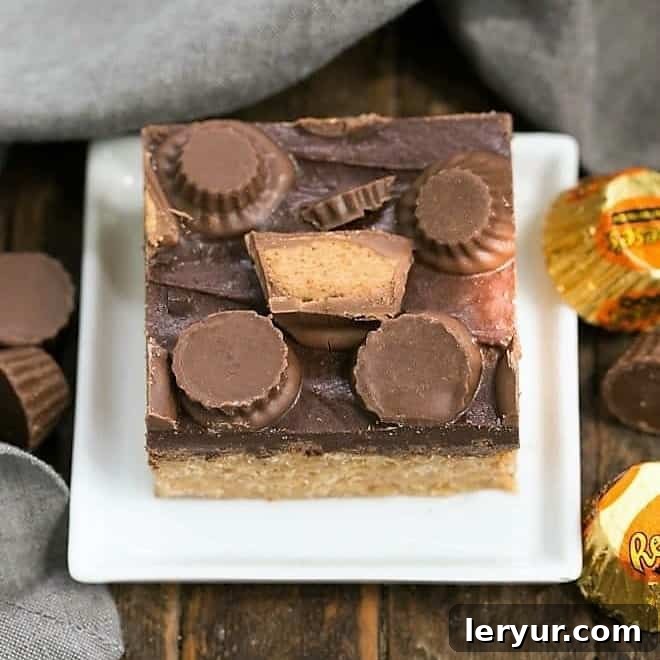
Reese’s Peanut Butter Rice Krispie Treats
20 minutes
5 minutes
25 minutes
25 bars
A cherished childhood favorite that has truly stood the test of time, these no-bake bars combine crispy rice cereal with a rich peanut butter base and a decadent chocolate topping, garnished with miniature Reese’s Peanut Butter Cups for an unforgettable treat!
Ingredients
For the Peanut Butter Bars:
- 1 cup light corn syrup
- 1/2 cup granulated sugar
- 1/2 cup brown sugar (packed)
- 1 cup creamy peanut butter (such as Jif or Skippy, *not* natural peanut butter)
- 5 cups Rice Krispies or other puffed rice cereal
For the Chocolate Glaze & Garnish:
- 3 cups semisweet chocolate chips (or bittersweet for a deeper flavor)
- 2 tablespoons creamy peanut butter
- 1 tablespoon neutral-flavored oil (like canola or vegetable oil)
- Small peanut butter cups, to garnish (optional, but highly recommended!)
Instructions
- **Prepare Your Pan:** Line a 9 x 9-inch baking pan with non-stick foil, leaving an overhang on two sides to create a “sling” for easy removal. Alternatively, use a 9 x 9-inch non-stick springform pan. Set aside.
- **Start the Base Mixture:** In a large, heavy-bottomed saucepan, combine the light corn syrup, granulated sugar, and brown sugar. Place the saucepan over medium-low heat and stir constantly until the sugars are fully dissolved and the mixture is well combined.
- **Boil and Remove from Heat:** Bring the mixture to a gentle boil, continuing to stir to prevent scorching. As soon as it reaches a rolling boil, immediately remove the saucepan from the heat. Promptly stir in the 1 cup of creamy peanut butter until it’s completely melted and smoothly incorporated into the syrup mixture.
- **Add Cereal and Press:** Working quickly, add the 5 cups of Rice Krispies cereal to the peanut butter mixture. Gently fold and mix until the cereal is evenly coated. Transfer the mixture to your prepared baking pan. To press it down, lightly grease your hands with a bit of butter or cooking spray, or use a piece of parchment paper, and gently press the mixture into an even, flat layer. Avoid compressing too firmly.
- **Prepare the Chocolate Glaze:** In a small saucepan over very low heat, combine the 3 cups of chocolate chips, 2 tablespoons of creamy peanut butter, and 1 tablespoon of neutral oil.
- **Melt and Spread:** Cook the glaze mixture, stirring frequently, until the chocolate chips are completely melted and the mixture is smooth and glossy. Remove from heat and immediately spread the warm chocolate glaze evenly over the peanut butter Rice Krispie bars.
- **Add Garnish (Optional but recommended):** If you are topping the bars with small peanut butter cups, allow the chocolate glaze to cool slightly – it should still be soft and pliable but not hot enough to melt the candies. Arrange the peanut butter cups over the chocolate. For best results and to prevent melting, consider freezing the peanut butter cups for 15 minutes beforehand.
- **Cool and Cut:** Allow the bars to cool completely at room temperature, or chill them in the refrigerator for about 30-60 minutes to speed up setting. Once fully set, use the foil sling to lift the entire slab out of the pan. Place it on a cutting board and cut into 25 squares or bars using a sharp, warm knife for clean edges. Enjoy!
Notes
For pristine Reese’s cups on top, briefly freeze them for about 15 minutes before placing them on the chocolate glaze. This helps them hold their shape better, especially if your kitchen is warm. Alternatively, make sure the chocolate topping has cooled down enough to be warm but not hot, so the candies don’t melt upon contact. You want the chocolate soft enough for adhesion, but cool enough to maintain the cup’s form.
Recommended Products for This Recipe
As an Amazon Associate and member of other affiliate programs, I earn from qualifying purchases. This means if you click on a link and make a purchase, I may receive a small commission at no extra cost to you.
- 4 Quart All Clad Sauce Pan
- Silicone Spatulas
- 9 x 9-inch Baking Pan
Nutrition Information:
Yield:
25
Serving Size:
1 bar
Amount Per Serving:
Calories: 273Total Fat: 13gSaturated Fat: 5gTrans Fat: 0gUnsaturated Fat: 7gCholesterol: 0mgSodium: 104mgCarbohydrates: 41gFiber: 2gSugar: 31gProtein: 4g
Thatskinnychickcanbake.com occasionally offers nutritional information for recipes contained on this site. This information is provided as a courtesy and is an estimate only. This information comes from online calculators. Although thatskinnychickcanbake.com attempts to provide accurate nutritional information, these figures are only estimates. Varying factors such as product types or brands purchased can change the nutritional information in any given recipe. Also, many recipes on thatskinnychickcanbake.com recommend toppings, which may or may not be listed as optional and nutritional information for these added toppings is not listed. Other factors may change the nutritional information such as when the salt amount is listed “to taste,” it is not calculated into the recipe as the amount will vary. Also, different online calculators can provide different results. To obtain the most accurate representation of the nutritional information in any given recipe, you should calculate the nutritional information with the actual ingredients used in your recipe. You are solely responsible for ensuring that any nutritional information obtained is accurate.
HOW MUCH DID YOU LOVE THIS RECIPE?
Please leave a comment on the blog or share a photo on Pinterest
I must confess, while I’ve never been a fan of peanut butter sandwiches – a single childhood nibble was enough for me – my love for peanut butter desserts knows no bounds. These Reese’s Peanut Butter Rice Krispie Treats are a testament to that devotion. They represent the perfect marriage of flavors, delivering a nostalgic, comforting, and utterly delightful experience with every single bite.
There’s something magical about the combination of crispy cereal, rich peanut butter, and smooth chocolate, especially when crowned with those iconic miniature peanut butter cups. These aren’t just a dessert; they’re a memory in the making, a guaranteed crowd-pleaser, and a treat that will test the willpower of even the most disciplined dessert lover. So go ahead, whip up a batch, and let these incredible no-bake bars bring a little extra joy to your day!