
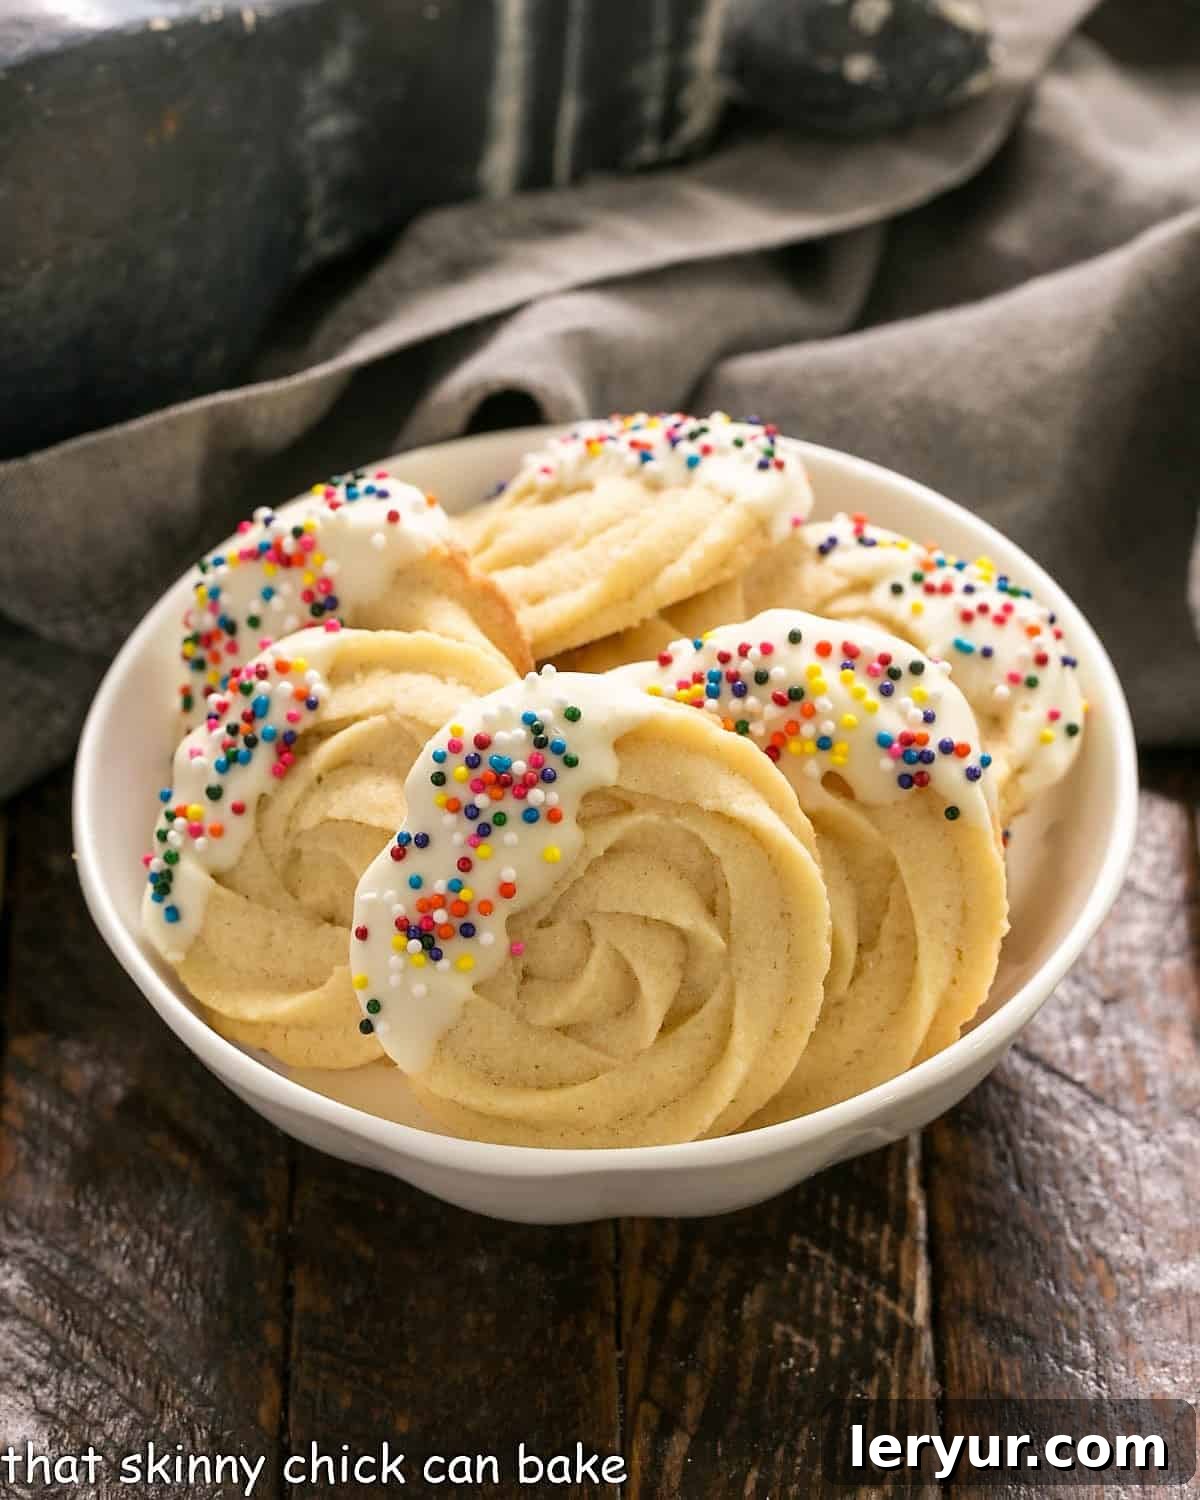
Classic Danish Butter Cookies: A Beloved Recipe for Every Occasion
There’s an undeniable charm to a crisp, buttery cookie that simply melts in your mouth. For many, that nostalgic feeling is inextricably linked to the iconic blue tin of Royal Dansk cookies, a staple in countless homes during the holidays and beyond. This exquisite recipe for Danish Butter Cookies isn’t just a tribute; it’s a perfected rendition designed to replicate that beloved experience, offering a delightful twist on a Traditional Shortbread Recipe. Prepare to bake a batch of buttery bliss that will transport you straight back to your fondest memories, all from your own kitchen.
My journey to perfecting these Homemade Danish Butter Cookies was one filled with delicious experimentation. Batch after batch emerged from the oven – some too flat, resembling pancakes, others stubbornly resisting the piping bag, challenging my patience. My husband, bless his sweet tooth, happily devoured every imperfect swirl, assuring me that even a “failed” cookie was still a treat. But perseverance paid off, and after extensive testing, I am thrilled to share what I confidently call the winning recipe. These aren’t just cookies; they’re edible works of art, promising the signature light, crisp texture and rich, buttery flavor you adore.
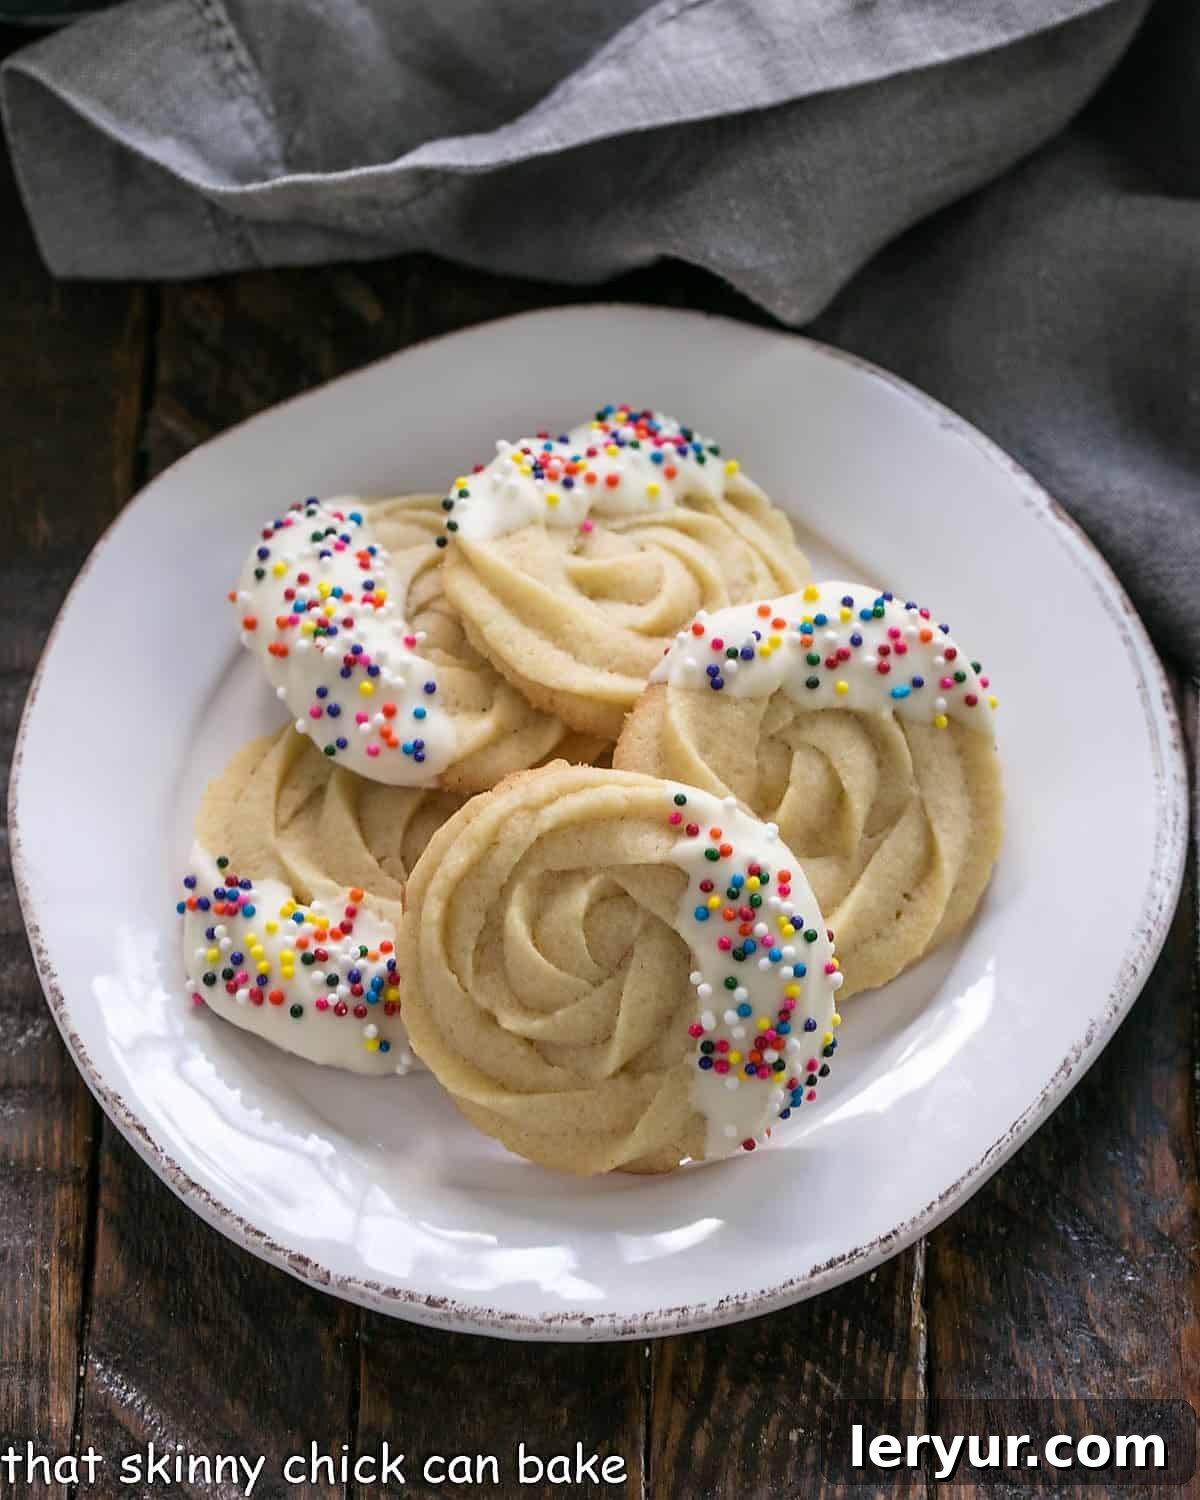
Why These Danish Butter Cookies Are a Must-Bake
While the market is flooded with various cookie options, these Classic Danish Butter Cookies stand out for several compelling reasons. They’re more than just a sweet treat; they’re an experience, a delightful addition to any event, and a perfect homemade gift. Here’s why you’ll want to bake them again and again:
- Irresistibly Simple and Pure Flavor: The flavor profile is elegantly straightforward – a symphony of sweet and buttery notes that truly shines. Made with minimal, high-quality ingredients, these cookies deliver a clean taste that satisfies without being overly rich, making them a perfect accompaniment to a cup of coffee or tea.
- Universally Appealing for All Palates: Their mild, comforting taste makes them ideal for even the pickiest eaters. Unlike some heavily spiced or intensely flavored cookies, Danish Butter Cookies offer a gentle sweetness and delicate texture that appeals to everyone, from children to adults.
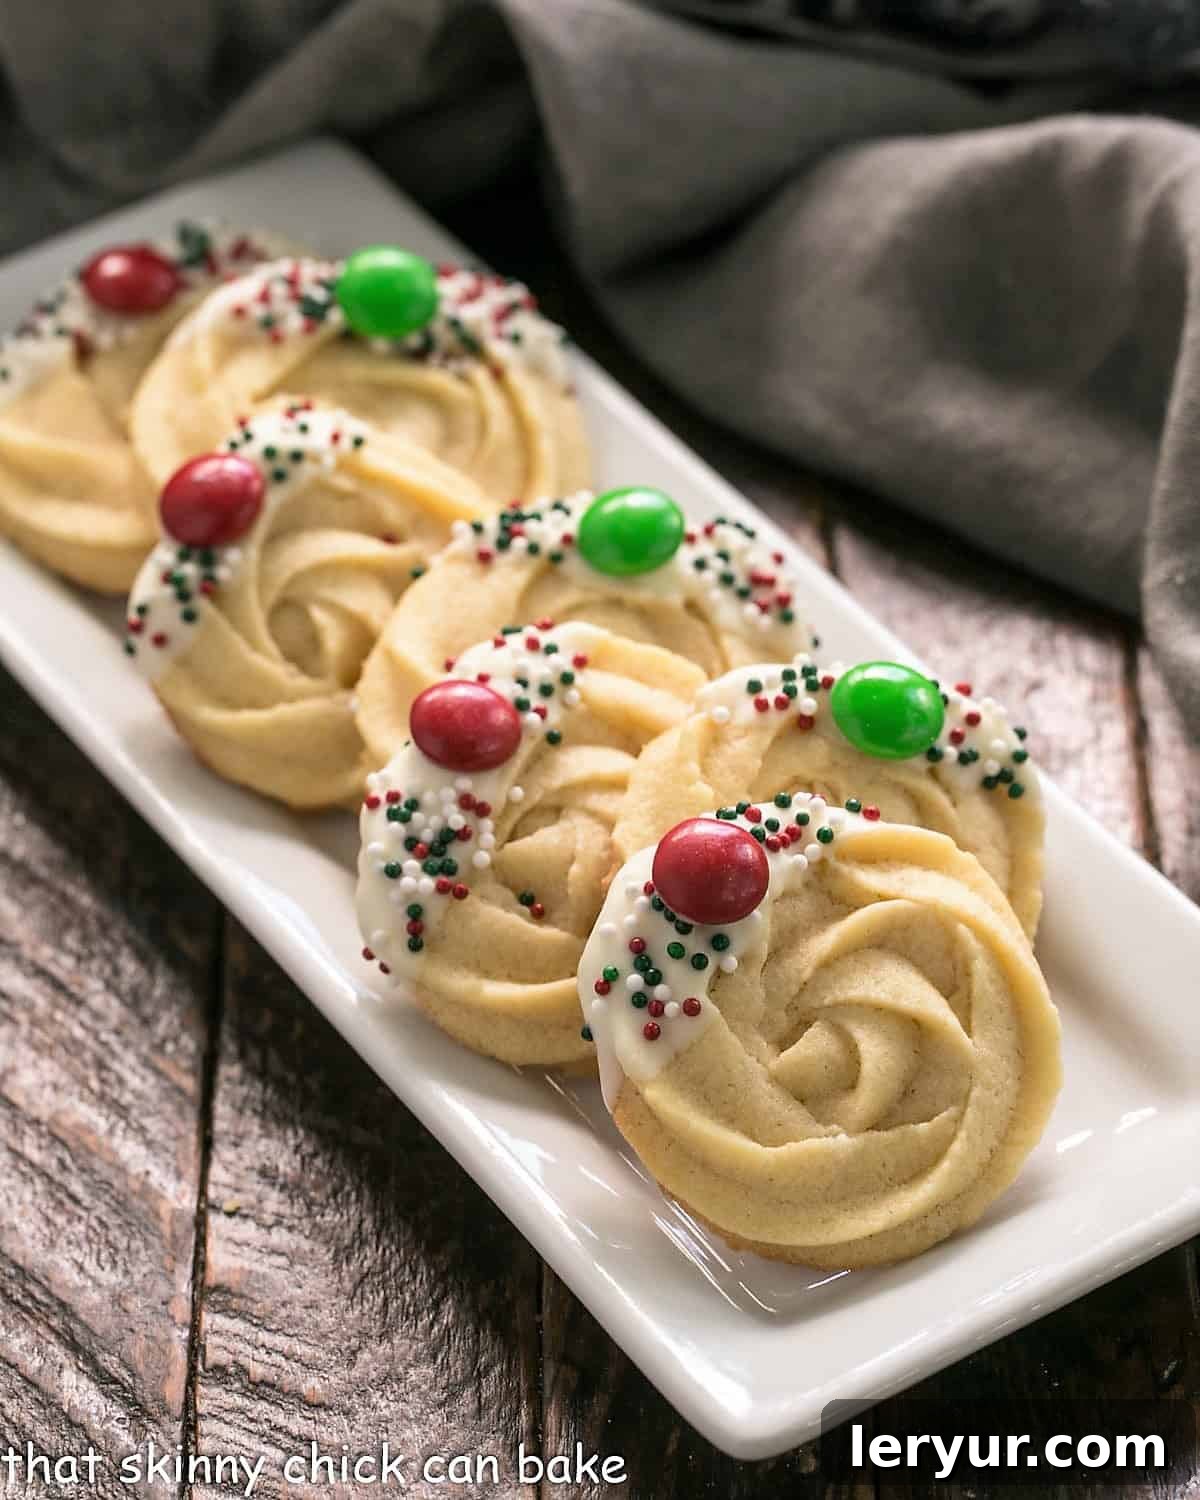
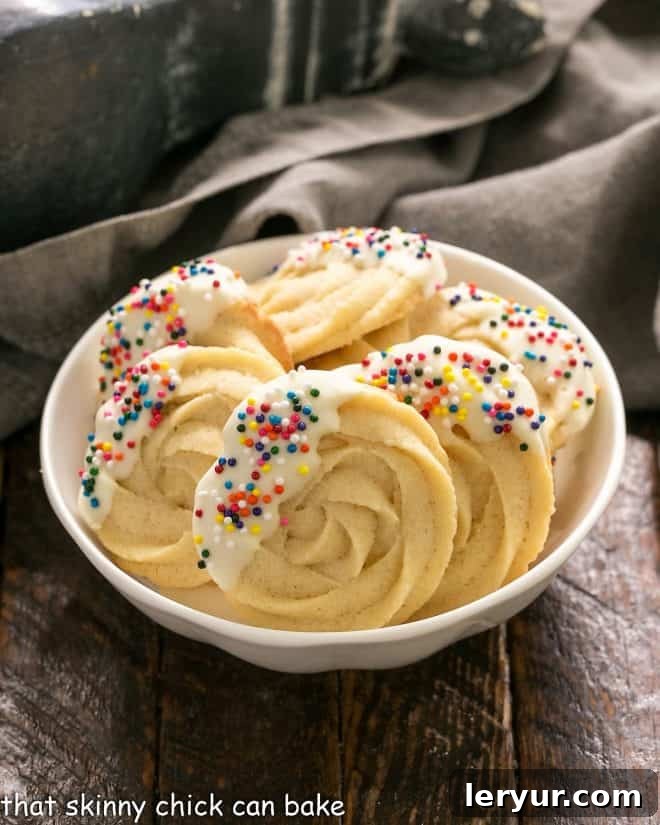
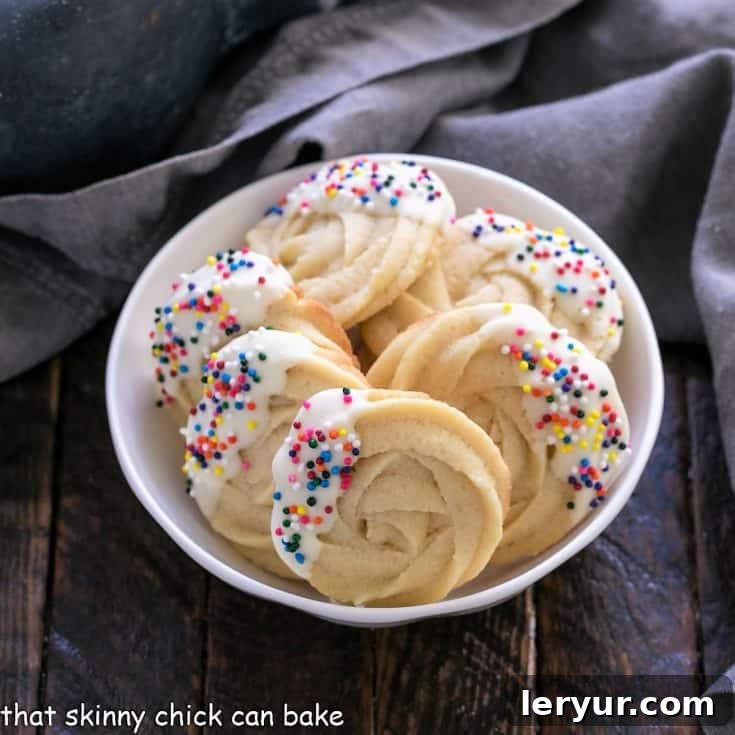
- Endless Decorative Possibilities: These cookies serve as a beautiful canvas for creativity. Whether you’re celebrating a birthday, a holiday, or simply brightening an ordinary day, you can easily customize their appearance. Change up the sprinkles, drizzle them with different chocolates, or add a touch of edible glitter to match any theme or season. They transform effortlessly from a simple teatime biscuit to a festive holiday showstopper.
- Exceptional Shelf Life for Gifting and Planning: One of the greatest advantages of these Buttery Shortbread Cookies is their impressive staying power. They remain fresh and delicious for much longer than many other cookie varieties. This characteristic makes them absolutely perfect for packaging in decorative tins as thoughtful gifts for the holidays, hostess presents, or as a welcome addition to a cookie exchange. You can even bake them ahead of time, reducing stress during busy periods.
- A Touch of European Elegance: This recipe captures the essence of traditional Danish baking, bringing a taste of European charm directly to your home. The simple yet sophisticated nature of these cookies makes them feel special and luxurious without requiring complicated techniques.
Essential Ingredient Notes for Perfect Results
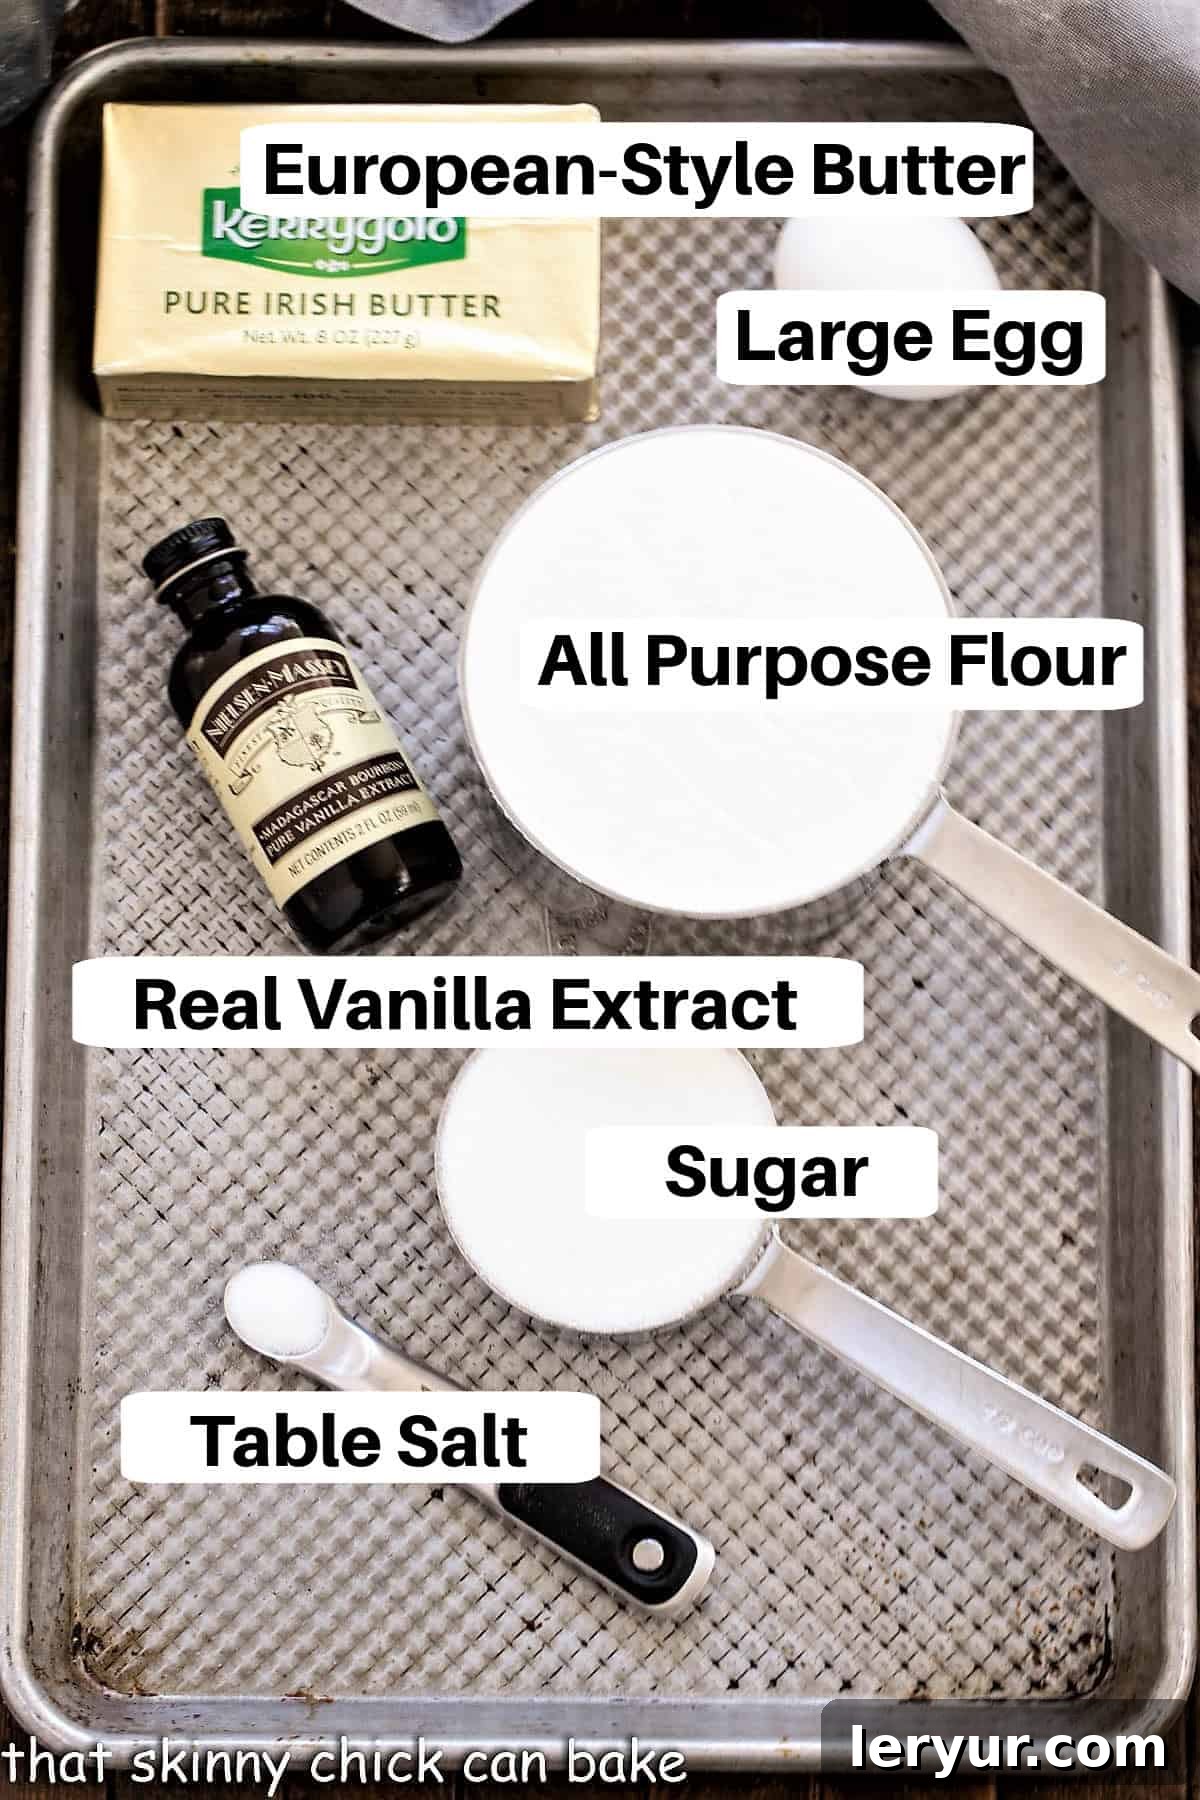
Achieving that signature light, crisp, and buttery texture in your Homemade Danish Butter Cookies largely depends on the quality and preparation of your ingredients. Here’s what you need to know to ensure success:
- Butter – The Star Ingredient: Use good quality, salted butter, and ensure it’s at room temperature. This is crucial for achieving a smooth, well-emulsified dough. PRO-Tip: European-style butters, such as Kerrygold, are highly recommended. They have a higher butterfat content and significantly less water than most American brands. This lower water content helps minimize spreading during baking, resulting in cookies that hold their intricate piped shapes beautifully.
- Sugar – Simple Sweetness: Regular granulated white sugar is all you need. Its fine crystals dissolve easily and contribute to the cookie’s delicate crispness without overpowering the butter flavor.
- Salt – Flavor Enhancer: A pinch of salt is vital for balancing the sweetness and enhancing the rich butter flavor. I prefer using fine table salt for baking, as its smaller grains disperse more evenly throughout the dough, ensuring every bite is perfectly seasoned.
- Real Vanilla Extract – For Aromatic Depth: Always opt for pure vanilla extract over imitation. The genuine article provides a complex, warm, and aromatic depth that truly elevates the overall flavor profile of these classic cookies. Imitation vanilla can leave an artificial aftertaste that detracts from the cookie’s delicate nature.
- Egg – Binder and Texture: Use a large egg, also at room temperature. A room-temperature egg incorporates more easily into the butter and sugar mixture, creating a smoother, more uniform dough. The egg acts as a binder, helping the cookies hold their shape, and contributes to their tender crumb.
- Flour – The Structural Foundation: Standard all-purpose flour works perfectly for this recipe. Measure it correctly (preferably by weight, or by spooning it lightly into a measuring cup and leveling) to avoid a dense or dry cookie.
- Optional Garnishes – Personalize Your Cookies: White chocolate, dark chocolate, M&M’s, and various sprinkles are wonderful for decorating. These additions are entirely optional but offer a fantastic way to customize your Danish Butter Cookies for different seasons, holidays, or personal preferences. Melted chocolate provides a luxurious coating, while sprinkles add a fun pop of color and texture.
Crafting Your Own Danish Butter Cookies: A Step-by-Step Guide
Baking these elegant cookies is a rewarding process. Follow these detailed steps to create beautiful and delicious Danish Butter Cookies that will impress everyone:
- Prepare Your Baking Environment: Begin by preheating your oven to 350°F (175°C). Line several baking sheets with parchment paper. Parchment paper is essential for preventing sticking and ensuring easy removal of the delicate cookies.
- Cream the Butter and Sugar: In a stand mixer fitted with the paddle attachment, beat the softened butter, granulated sugar, and salt together. Cream until the mixture is light, fluffy, and pale in color. This process incorporates air, which is key to the cookies’ tender texture. Scrape down the sides of the bowl as needed to ensure everything is well combined.
- Incorporate Wet Ingredients: Add the room-temperature vanilla extract and the egg to the creamed mixture. Mix on low speed until just combined. Be careful not to overmix at this stage; overmixing can introduce too much air, which can cause cookies to spread excessively. Again, use a rubber spatula to scrape down the sides and bottom of the bowl to ensure all ingredients are fully incorporated.
- Gently Add the Flour: With the mixer on its lowest setting, slowly add the all-purpose flour, mixing only until it is just incorporated. It’s crucial not to overmix the flour. Excessive mixing develops the gluten in the flour, which can lead to tough, chewy cookies instead of the desired tender, melt-in-your-mouth texture. Stop mixing as soon as no dry streaks of flour remain. The dough will be quite thick.
- Pipe the Cookie Shapes: Transfer the thick, buttery dough into a sturdy piping bag fitted with a large star tip. A Wilton 1M tip is a popular choice, but Ateco 844 or 827 will also work beautifully, creating slightly different swirl patterns. Alternatively, if you don’t have piping tools, a cookie press can be used (note that baking times might vary slightly with a cookie press). Pipe elegant rings, rosettes, or S-shapes onto the parchment-lined baking sheets, leaving a little space between each cookie.
- Chill the Piped Dough: This step is critical for minimizing spread and preserving the intricate piped details. Place the baking sheets with the piped cookies into the refrigerator for at least 30 minutes, or even up to an hour. The colder the dough, the better the cookies will hold their shape during baking.
- Bake to Golden Perfection: Bake the chilled cookies in the preheated oven for 12-15 minutes, or until their edges are lightly golden brown. The centers should remain pale, indicating their delicate texture. Keep a close eye on them, as ovens can vary.
- Cool Completely: Remove the baking sheets from the oven and let the cookies cool on the sheets for a few minutes before carefully transferring them to a wire rack to cool completely. This helps them firm up and prevents breakage.
- Garnish (Optional): Once the cookies are entirely cool, you may garnish them as desired. Melt white or dark chocolate and dip one side of the cookies, then immediately add sprinkles or M&M’s before the chocolate sets. Allow the chocolate to fully harden before storing.
- Store for Freshness: Once completely cool and any garnishes have set, store your delicious Danish Butter Cookies in an airtight container at room temperature. They will remain fresh and delightful for up to a week.
Expert Tips for Baking Flawless Danish Butter Cookies
Achieving bakery-quality Danish Butter Cookies is within your reach with these expert insights and techniques:
- Choose the Right Piping Tip: This cookie dough is notably thick. To avoid hand strain and ensure beautifully defined shapes, always use a piping tip with a large, open star-shaped mouth. As mentioned, a Wilton 1M piping tip (affiliate link) is an excellent choice, but Ateco 844 or 827 also work wonderfully, each yielding a slightly different swirl aesthetic.
- Keep the Dough Cold: Temperature is your best friend when piping and baking these cookies. If you find the dough warming up and becoming too soft to pipe cleanly, or if your piped cookies start to lose their definition, simply pop your baking sheet (with the piped cookies on it) into the refrigerator for 10-15 minutes. Chilling the dough firm it up, significantly minimizing spreading in the oven and ensuring those crisp edges and defined swirls.
- Handle Flour with Care: For that coveted tender, melt-in-your-mouth texture, incorporate the flour just until it disappears into the dough. Do NOT use a mixer to vigorously beat the flour into the mixture. Mechanical beating introduces excess air and activates the gluten in the flour, which can result in tough, chewy cookies – the opposite of what we want for delicate butter cookies. A gentle fold or mixing on the lowest speed until just combined is all that’s needed.
- Flavor Variations: While classic vanilla extract provides a timeless flavor, feel free to experiment. A ¼ teaspoon of almond extract can be added alongside (or in place of, for a distinct flavor) vanilla for an extra boost of nutty aroma that complements the buttery base beautifully. Citrus zests, like lemon or orange, can also be incorporated for a brighter profile.
- Perfecting Piped Shapes: If you notice any small dough spikes or minor malformations after piping, you can gently tap them into place with the tip of a damp finger before baking. This simple trick ensures a smoother, more aesthetically pleasing cookie.
- Elegant Dipping Technique: When garnishing with chocolate, try dipping only one side of the cookie, specifically where the swirl ends. This technique leaves the most intricate and beautiful part of the cookie’s swirl unadorned, showcasing its craftsmanship while still adding a touch of decadent chocolate.
- Cooling Is Key: Ensure cookies are completely cool before storing or decorating. Warm cookies are fragile and can break easily. They also don’t hold chocolate or icing well until fully set.
Frequently Asked Questions About Danish Butter Cookies
Here are some common questions and helpful answers regarding these delightful Homemade Danish Butter Cookies:
While both are deliciously buttery, there are a few subtle differences. Danish Butter Cookies typically contain more sugar and often include an egg (or sometimes just an egg yolk) which gives them a slightly firmer texture that holds intricate piped shapes better. They also have a lower ratio of butter to flour compared to traditional shortbread, which is famously made with a 1:2:3 ratio of sugar, butter, and flour with no eggs. Butter cookies are generally baked at a slightly higher temperature, which can result in a hint of browning around the edges, whereas classic shortbread aims for a very pale, almost uncolored bake.
These butter cookies boast an excellent shelf life. When stored properly in an airtight container at room temperature, they will maintain their freshness and crispness for up to a week. For longer storage, they freeze beautifully (especially if ungarnished) for up to 3 months. Just be sure they are completely cooled before freezing in an airtight container or freezer bag to prevent freezer burn.
European-style butter, like Kerrygold, is highly recommended because it has a higher butterfat content (typically 82-84%) and a significantly lower water content (around 14-16%) compared to standard American butter (which is usually 80% butterfat and 18% water). This reduced water content is crucial for these cookies as it minimizes spreading during baking, helping your piped cookie shapes remain crisp and defined, yielding a more tender and rich final product.
The ideal texture for these Buttery Cookies is wonderfully delicate: light, exquisitely buttery, and truly melt-in-your-mouth. They offer a satisfying crispness with each bite, dissolving gently on the palate. They are not overly sweet, which makes them perfect for enjoying on their own or for embellishing with various toppings like melted chocolate and colorful sprinkles, adding both visual appeal and textural contrast.
Absolutely! The cookie dough can be made a day or two in advance. Store it wrapped tightly in plastic wrap in the refrigerator. When you’re ready to bake, let the dough soften slightly at room temperature for about 15-20 minutes to make it easier to pipe. You can also pipe the cookies and then chill them on the baking sheet for up to 24 hours before baking.
Excessive spreading can be caused by several factors: butter that is too soft, dough that isn’t chilled enough, or an oven that isn’t at the correct temperature. Ensure your butter is at room temperature but not greasy. Always chill your piped cookies thoroughly before baking. Also, verify your oven temperature with an oven thermometer, as many ovens can run hot or cold.
The Beloved Recipe: Danish Butter Cookies
These Danish Butter Cookies are not just a treat; they’re a celebration of simple, pure flavors and timeless baking traditions. Perfect for any occasion, from quiet afternoons with a cup of tea to grand holiday gatherings, they embody comfort and elegance. With their delicate crispness and rich, buttery taste, these cookies are destined to become a cherished recipe in your baking repertoire. Prepare to fill your home with an irresistible aroma and your cookie tins with delectable homemade delights!
The Recipe:
Danish Butter Cookies Recipe
30 minutes
15 minutes
1 hour
1 hour 45 minutes
30 cookies
Buttery shortbread cookies that can be dressed up for any occasion!
Ingredients
- 1 cup butter, at room temperature (European style butter like Kerrygold work best)
- ½ cup sugar
- ⅛ teaspoon salt
- 1 tablespoon vanilla extract
- 1 egg, at room temperature
- 2 cups all-purpose flour
- White chocolate, M&M’s and/or sprinkles to garnish, optional
Instructions
- Preheat the oven to 350°F (175°C). Line baking sheets with parchment paper.
- Beat the butter, sugar, and salt in a stand mixer fitted with the paddle attachment until light and fluffy. Scrape down the sides of the bowl as needed.
- Add the vanilla extract and the egg, and mix until just combined, scraping the bottom of the bowl with a rubber spatula as needed.
- Slowly add the flour and mix on low speed just until incorporated. Do not overmix.
- Place the dough into a piping bag fitted with a large star tip (such as Wilton 1M, Ateco 844, or 827). Pipe desired shapes onto the prepared baking sheets.
- Place the baking sheets with the piped cookies in the refrigerator to chill for at least 30 minutes. This helps prevent spreading.
- Bake for 12-15 minutes, or until the edges are light golden brown.
- Let cookies cool on the baking sheets for a few minutes before transferring to a wire rack to cool completely.
- May garnish with melted white chocolate, sprinkles, and/or M&M’s if desired, after cookies have cooled completely. See notes for detailed garnishing instructions.
- Store in an airtight container at room temperature once completely cool.
Notes
Use European-style butter for the best results. It contains less water than American brands, which helps minimize spreading and ensures a crisp, buttery cookie.
To garnish, melt chopped white chocolate in the microwave or over a double boiler. Dip one side of the cooled cookie into the melted chocolate, letting any excess drip off, then place it on a parchment-lined baking sheet. Immediately add sprinkles before the chocolate hardens. Allow chocolate to fully set before storing.
This recipe is adapted from Gemma’s Bigger Bolder Baking.
Recommended Products
As an Amazon Associate and member of other affiliate programs, I earn from qualifying purchases.
- 1M Piping Tip
- Reynolds Kitchens Non-Stick Baking Parchment Paper Sheets – 12×16 Inch, 22 Count
- USA Pan Bakeware Half Sheet Pan, Warp Resistant Nonstick Baking Pan, Made in the USA from Aluminized Steel – 1050HS
Nutrition Information:
Yield:
15
Serving Size:
2 cookies
Amount Per Serving:
Calories: 250Total Fat: 15gSaturated Fat: 9gTrans Fat: 1gUnsaturated Fat: 5gCholesterol: 47mgSodium: 127mgCarbohydrates: 25gFiber: 1gSugar: 12gProtein: 3g
This nutritional information is an estimate only and may vary based on specific ingredients and brands used. It is provided as a courtesy and should not be considered professional dietary advice. For the most accurate information, please calculate with your exact ingredients.
You May Also Love These Delicious Cookie Recipes:
- Pecan Shortbread Cookies from Crazy for Crust
- Cranberry White Chocolate Pistachio Shortbread
- Old-Fashioned Amish Sugar Cookies
- Festive Christmas Sugar Cookies
- Decadent Chocolate Caramel Shortbread (Twix Cookies)
- Explore more of the Best Cookie Recipes
- Discover more of the Best Holiday Recipes
Stay in touch through social media @ Instagram, Facebook, and Pinterest. Don’t forget to tag me when you try one of my recipes! And if you love the results, please consider giving it a 5-star rating in the recipe card.