
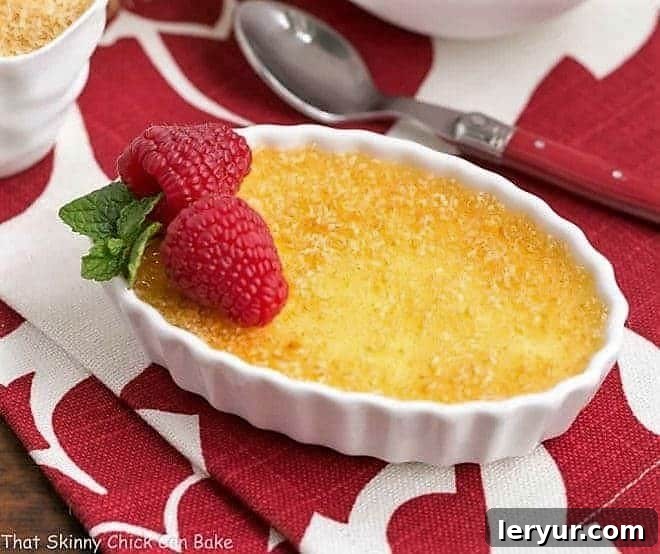
Embark on a culinary journey with this unparalleled Classic Crème Brûlée recipe, a timeless dessert that has graced dinner tables and fine dining establishments for centuries. This particular rendition, inspired by the legendary Le Cirque restaurant in New York City and famously featured by Martha Stewart nearly two decades ago, stands as the gold standard in my kitchen. It was the first crème brûlée I ever attempted, and its exquisite balance of creamy vanilla custard and a perfectly crisp caramelized sugar topping has ensured no other version has ever come close to surpassing it. What began as a simple experiment has blossomed into a cherished family favorite, bringing a touch of gourmet elegance to any occasion.
The magic truly happens when coarse sugar meets intense heat, transforming into a brittle, golden crust. Whether achieved with a kitchen torch or under the broiler, the satisfying crack of a spoon breaking through this hardened sugar layer to reveal the silky-smooth, rich vanilla custard beneath is an experience that defines this easy crème brûlée recipe. It’s this captivating interplay of contrasting textures and delicate flavors that makes crème brûlée not just a dessert, but a celebrated culinary masterpiece.
Why This Le Cirque Crème Brûlée Recipe is a Must-Try
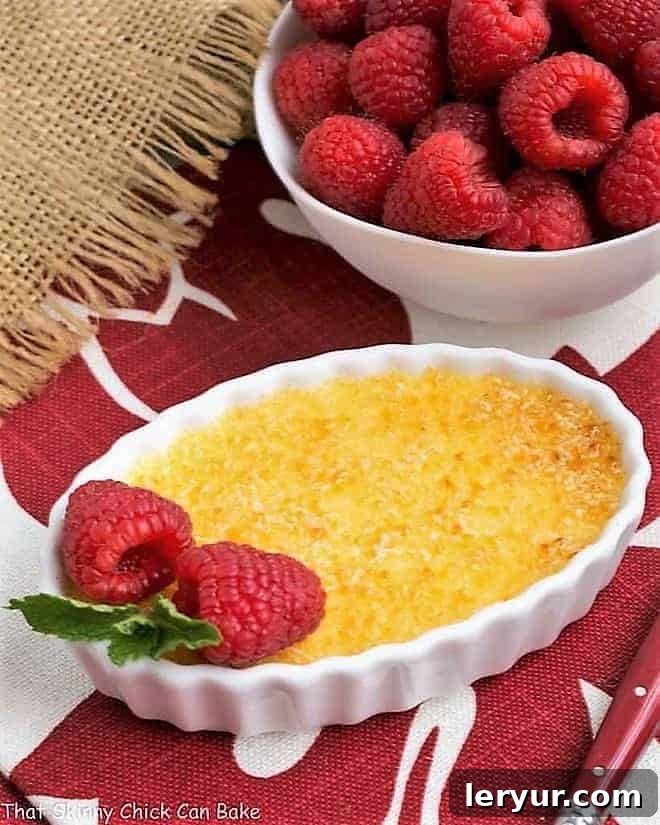
Crème brûlée, also elegantly known as Burnt Cream or Trinity Cream, is more than just a dessert; it’s a testament to simple ingredients coming together to create extraordinary flavor. It features a lush, creamy vanilla custard base, crowned with a thin, glistening layer of crunchy, caramelized sugar. This particular recipe, hailing from the iconic Le Cirque restaurant in New York City, holds a special place in my culinary repertoire for several compelling reasons:
- Unrivaled Quality: Since perfecting this Classic Crème Brûlée at home, my family, especially Bill, refuses to order it at restaurants. They insist that restaurant versions invariably “fall short” in comparison to the homemade perfection achieved with this recipe. It’s a testament to its authentic and superior taste.
- A Culinary Legacy: This recipe is a direct offering from Le Cirque, a legendary New York City establishment renowned for its exquisite French cuisine and commitment to culinary excellence. By making this recipe, you’re not just creating a dessert; you’re bringing a piece of gourmet history into your home.
- The Quintessential Experience: This isn’t just a crème brûlée recipe; it’s the quintessential crème brûlée recipe. It embodies everything this classic dessert should be: rich, smooth, profoundly vanilla-flavored, and topped with that irresistible, brittle sugar crust. It promises an authentic and unforgettable dessert experience every time.
- Impressive Yet Achievable: Despite its sophisticated presentation and gourmet origins, this recipe is surprisingly approachable for home cooks. With clear instructions and a little patience, you can recreate a restaurant-quality dessert that will undoubtedly impress your guests and delight your family.
Prepare to elevate your dessert game and discover why this specific crème brûlée recipe has captivated palates for decades. Its perfect balance of textures and flavors will make it a regular feature in your culinary repertoire.
Essential Ingredient Notes for Perfect Crème Brûlée
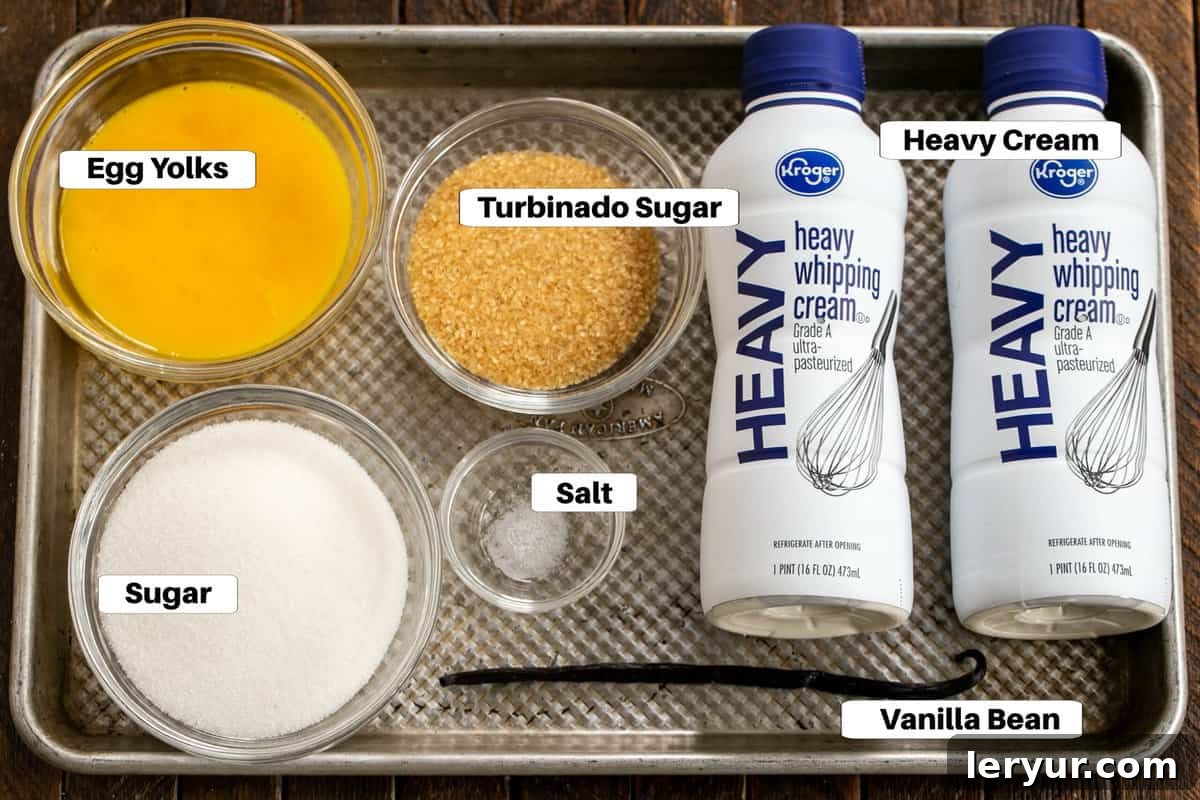
Crafting the perfect crème brûlée begins with understanding and selecting the right ingredients. Each component plays a vital role in achieving that coveted silky texture and rich flavor. Here’s a detailed look at what you’ll need and why:
- Granulated Sugar (Regular White Sugar): A kitchen staple, granulated sugar is essential for both sweetening the custard and creating the delightful caramelized topping. While other sugars can be used for the topping (like turbinado), granulated sugar is perfect for the custard itself.
- Heavy Cream (36% Butterfat): The foundation of a truly luxurious crème brûlée is high-quality heavy cream. Opt for cream with at least 36% butterfat content, as this ensures maximum richness and a velvety smooth texture. Lower fat creams may result in a thinner, less satisfying custard.
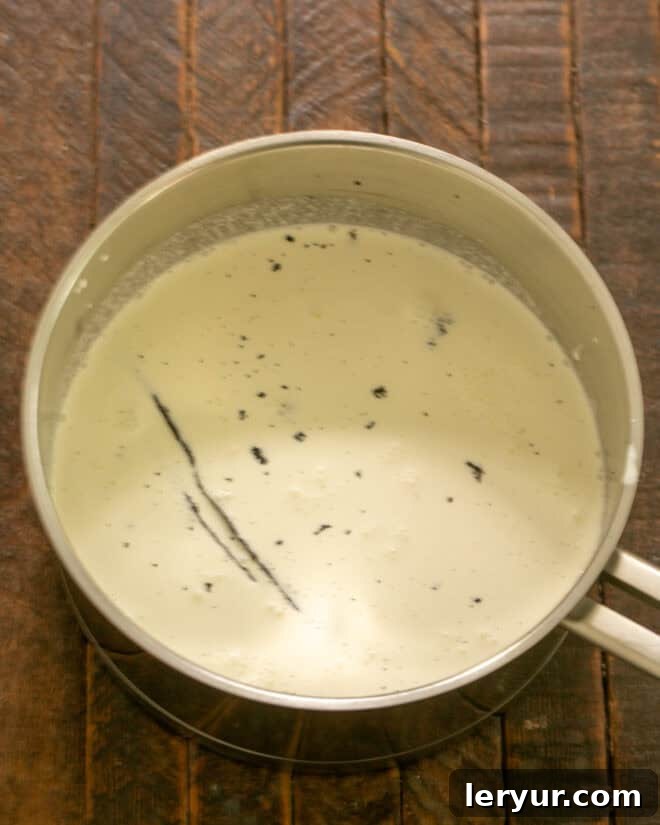
- Vanilla Bean: For the most authentic and aromatic vanilla flavor, a fresh vanilla bean is indispensable. Slit the bean in half lengthwise, then carefully scrape out the tiny, fragrant seeds. Both the scraped seeds and the vanilla pod itself should be steeped in the hot cream. The pod infuses the cream with a deeper, more complex vanilla essence, which you’ll remove before straining.
- Egg Yolks: Egg yolks are the primary thickening agent for the custard, giving it its signature rich and creamy consistency. It’s crucial to use large egg yolks for consistency. For easier separation, crack your eggs when they are cold, as the yolks are less likely to break. Don’t discard the leftover egg whites; see our suggestions below for recipes to use them up!
- Salt: A small pinch of salt in desserts might seem counterintuitive, but it’s a game-changer. Just like in savory dishes, salt enhances the other flavors, preventing the dessert from tasting flat or overly sweet. Use fine table salt, not coarse kosher salt, as it dissolves more easily and evenly into the mixture.
- Turbinado Sugar (Sugar in the Raw): This coarse, blonde-colored sugar, also known as sugar in the raw, is ideal for the caramelized topping. Its larger crystals and delicate molasses flavor create a robust, brittle crust when melted.
- Caramelizing Tip: To achieve the perfect “brulee,” you’ll need either a handheld kitchen torch or your oven’s broiler. If using a broiler, position the ramekins about 4-6 inches from the heat source and keep the oven door slightly ajar. This allows you to closely monitor the sugar as it melts and turns a beautiful golden brown. The goal is a deeply caramelized, crispy layer, not a burnt one. Speed and attentiveness are key!
By paying close attention to these ingredients, you’ll lay the groundwork for a crème brûlée that rivals any you’d find in a high-end restaurant.
Mastering Crème Brûlée: A Step-by-Step Guide
Creating this exquisite Le Cirque Crème Brûlée is a delightful process that, once mastered, will become a cherished culinary skill. Follow these detailed steps for a perfect, silky custard with a shatteringly crisp topping:
Expert Tips for Crème Brûlée Perfection
Once you’ve mastered the art of making crème brûlée, it’s bound to become a go-to dessert for any occasion – whether it’s a sophisticated dinner party, a festive holiday gathering, or simply a desire to treat your loved ones to something truly special. Here are some essential tips to ensure your crème brûlée turns out perfectly every time:
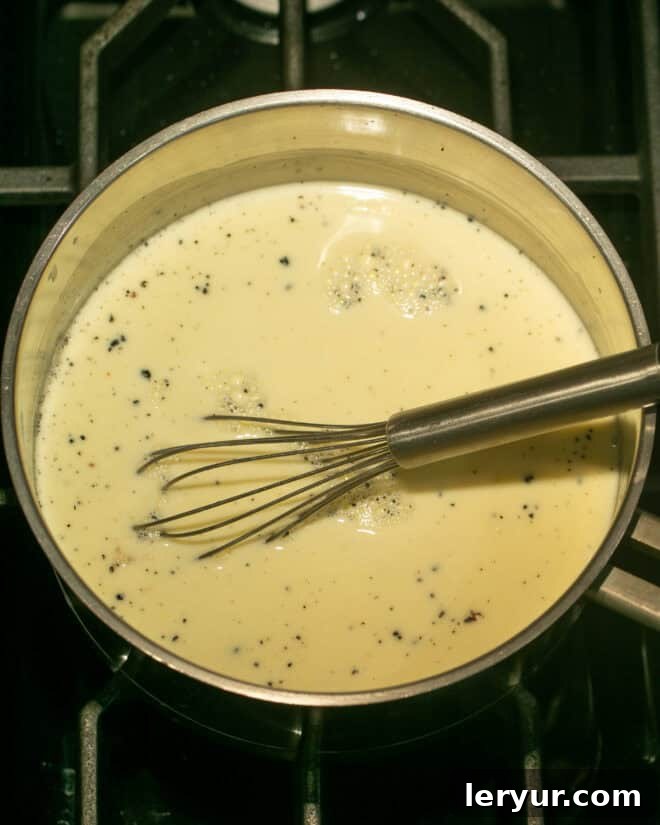
- Tempering the Egg Yolks is Crucial: When incorporating the hot cream into the whisked egg yolks, pour very slowly in a thin stream while whisking the yolks constantly and vigorously. This gradual introduction of heat prevents the yolks from scrambling and minimizes the formation of cooked egg bits in your custard batter. Patience here is paramount for a smooth result.
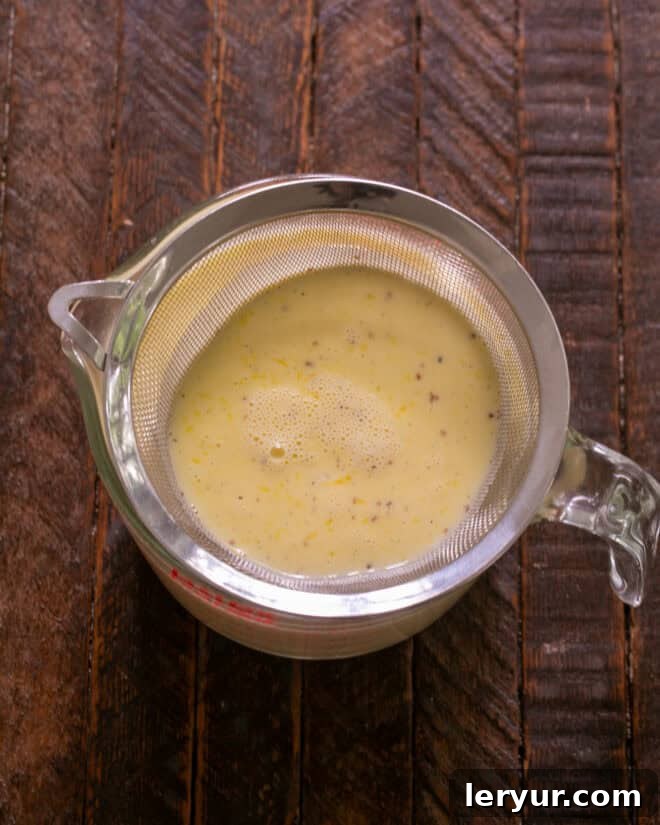
- Strain for Ultimate Smoothness: For the silkiest, most luxurious custard texture, always pour the entire batter through a fine-mesh sieve before filling your ramekins. Even with careful tempering, tiny bits of egg can sometimes coagulate when mixed with the hot cream. Straining ensures these imperfections are removed, leaving you with a flawlessly smooth custard.
- The Perils of Rushing Tempering: If you don’t pour the hot cream slowly enough or fail to whisk constantly during the tempering process, you risk cooking a significant amount of the egg yolks. If too many egg bits form and are strained out, your custard might not have enough egg protein to set properly, resulting in a runny dessert. Avoid rushing this step to prevent having to start over.
- Chill Thoroughly: After baking, allow the custards to cool to room temperature, then chill them in the refrigerator for at least 2 hours, and preferably longer. Proper chilling is essential for the custard to fully set and achieve its firm yet creamy consistency.
- Select the Right Sugar for Topping: Always purchase turbinado sugar, also known as sugar in the raw, for the caramelized topping. Its larger crystal size and subtle molasses flavor create a superior, brittle crust compared to regular granulated sugar.
- Master the Caramelization: You have two main options for caramelizing the sugar: a mini kitchen torch or your broiler.
- Using a Kitchen Torch: This is generally the preferred method as it offers precise control, allowing you to melt and brown the sugar evenly without overheating the custard. Move the flame steadily over the sugar until it bubbles and turns a rich golden-brown.
- Using the Broiler: If you don’t have a torch, the broiler works. Place the ramekins on a baking sheet directly under the broiler element (about 4-6 inches away). Watch them extremely carefully, as the sugar can go from perfectly caramelized to burnt in a matter of seconds. The goal is a golden, bubbling crust, not black smoke.
- Don’t Skip the Salt: As previously mentioned, adding a tiny pinch of salt to the custard mixture isn’t just about making it salty; it’s about accentuating all the other flavors, especially the vanilla, and preventing the dessert from tasting bland or one-dimensional. Trust the process; it makes a world of difference.

Essential Crème Brûlée Equipment
Having the right tools can make all the difference in achieving crème brûlée perfection. Here’s a breakdown of the key equipment you’ll need:
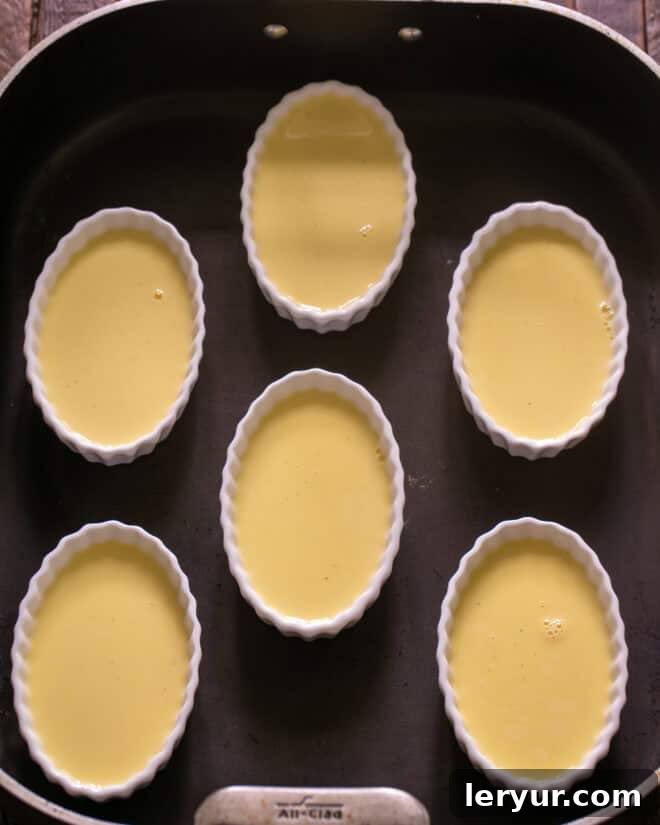
- Ramekins: These small, individual ceramic dishes are crucial for baking crème brûlée. While round, deeper ramekins work well, I personally love flat oval ramekins as they allow the custard to set more quickly and provide a larger surface area for the caramelized sugar. If using deeper ramekins, you may need to add a bit more baking time to ensure the custard is fully set. The custard is perfectly baked when the edges are firm, but there’s still a slight, gentle jiggle in the center when gently shaken.
- Bain Marie (Water Bath): Crème brûlée is traditionally baked in a bain marie, which is the French term for a water bath. This method is vital for several reasons:
- It helps to stabilize the baking temperature, ensuring the custards cook gently and evenly.
- It prevents the edges from overcooking or curdling while the center sets.
- The steam from the hot water creates a moist environment, which contributes to the incredibly creamy and smooth texture of the custard.
To set up your water bath, place your filled ramekins into a larger baking dish, such as a roasting pan. Carefully pour enough hot or boiling water into the roasting pan to come about halfway up the sides of your ramekins. Be very cautious not to splash any water into the custard itself.
- Culinary Torch or Broiler: This is the tool for creating that iconic crackly sugar crust. While a culinary torch offers precision and control, allowing you to caramelize the sugar evenly without heating the custard too much, your oven’s broiler can also do the job in a pinch. Refer to the “Caramelizing the Sugar Topping” section for detailed instructions on both methods.
The Importance of Straining the Custard
Achieving a silky-smooth crème brûlée hinges on one often-overlooked but absolutely critical step: straining the custard. This process is non-negotiable for a truly professional result.
- The custard mixture, even if you’ve been meticulously careful in tempering the egg yolks, will almost inevitably contain a few small, cooked bits of egg. These tiny coagulated pieces, if left in, would create an undesirable texture in your final dessert. Using a fine-mesh strainer to filter the custard before pouring it into the ramekins is essential to remove any imperfections, ensuring a custard that is uniformly smooth and utterly luxurious.
- A Word of Caution: If you find a substantial amount of cooked egg bits after straining, it’s a clear indication that you likely added the hot cream too quickly to the egg yolks and/or did not whisk continuously and vigorously enough during the tempering process. In such a scenario, if too much egg protein has coagulated and been removed, your custard might not have sufficient binding power to set properly, resulting in a runny, disappointing dessert. Learn from experience – this step is not one to rush!
- Pro Tip for Easy Pouring: To make filling the ramekins a breeze, I highly recommend straining the custard directly into a 4-cup Pyrex measuring cup or a similar pitcher with a spout. This makes pouring the smooth mixture neatly and efficiently into your individual ramekins, minimizing spills and mess.
Caramelizing the Sugar Topping: Your Options
The signature crack of crème brûlée comes from its caramelized sugar topping, and there are a few ways to achieve this perfect crust. While I prefer turbinado sugar, you have some flexibility:
- Sugar Choices: My go-to is turbinado sugar (sugar in the raw) because its larger crystals create a thicker, more robust, and brittle crust with a lovely subtle molasses flavor. However, you can also use fine granulated sugar for a thinner, crispier layer, or even brown sugar for a slightly different flavor profile. Some chefs even apply a thin layer, torch it, and then repeat the process for extra thickness, but a single generous layer usually suffices.
- Caramelization Methods:
- The Broiler Method: This used to be my preferred technique. To use your broiler, place the chilled crème brûlée ramekins on a baking sheet and position them directly under the broiler element, typically about 4-6 inches away. Heat the sugar until it starts bubbling and turns a deep golden brown. This method requires constant, vigilant watching, as sugar can burn very quickly under intense heat. Remove them the moment they reach your desired color to prevent burning.
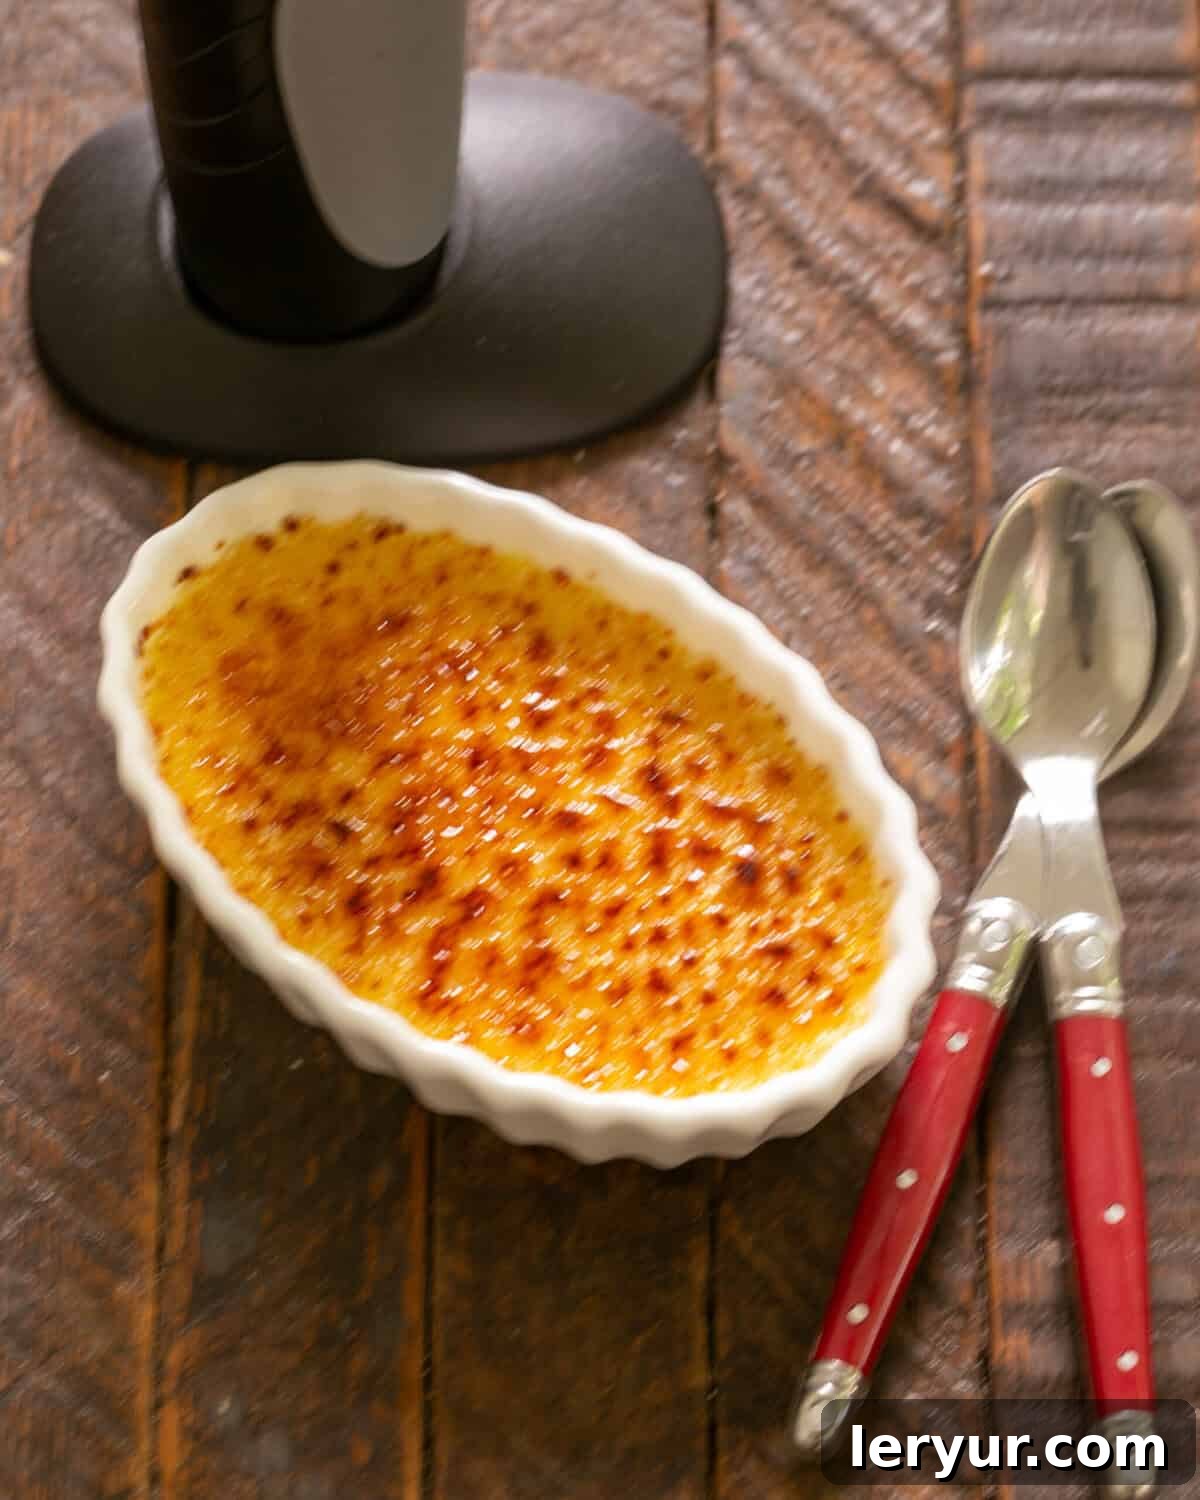
- The Culinary Torch Method: A culinary mini-torch designed for the kitchen is arguably the best tool for this job. It offers precise control, allowing you to melt and caramelize the sugar evenly without significantly warming the underlying custard. Move the flame in a steady, circular motion over the sugar until it forms a uniform, bubbly, golden-amber crust. If you’re comfortable and have one, a larger welding torch can also be used, but extreme caution is advised due to its more powerful flame.
Serving Your Perfect Crème Brûlée
Once your exquisite crème brûlée is made and caramelized, a few final touches ensure a truly memorable dessert experience.
- Chill Before Torching: It’s absolutely essential that your custards are thoroughly chilled before you apply the sugar topping and torch them. This keeps the creamy custard underneath cool and firm, preventing it from liquefying from the heat of the torch or broiler. Even if it occasionally warms up a bit, it’s still delicious, but a perfectly cold custard contrasting with a warm, crisp top is ideal.
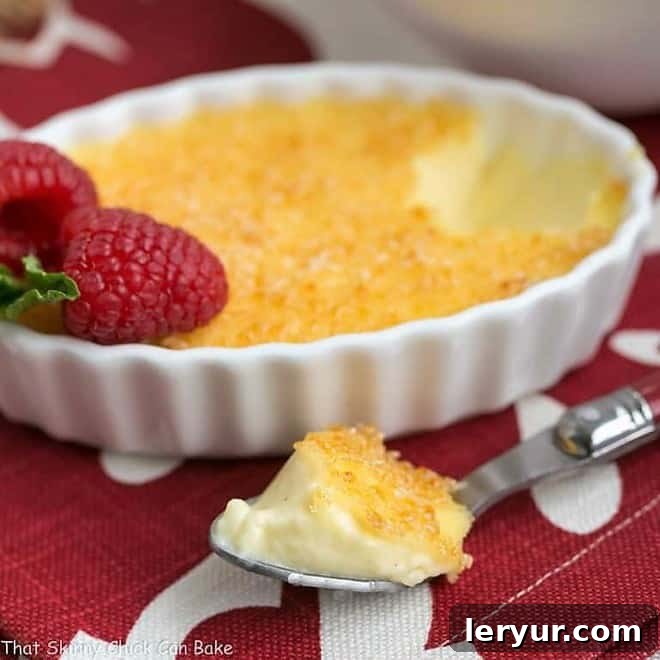
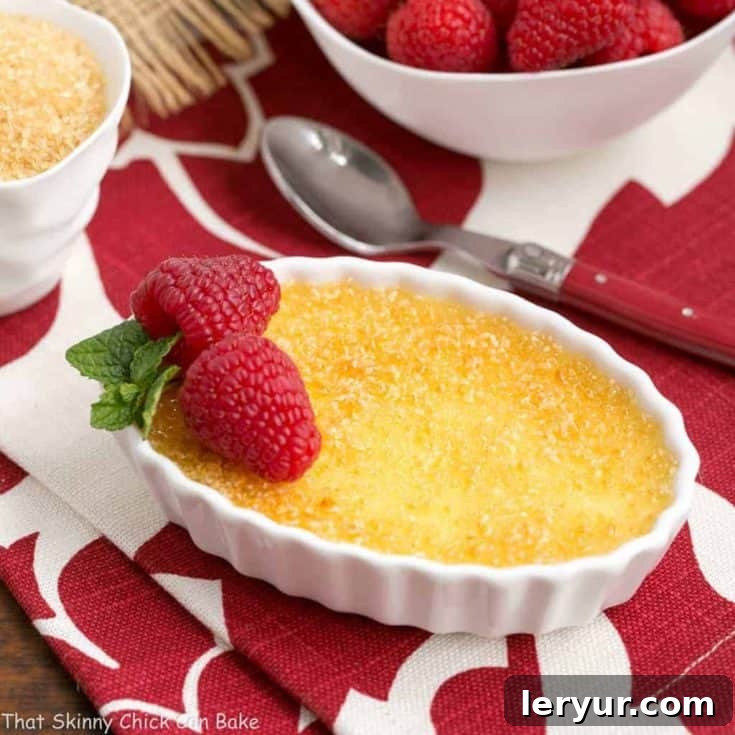
- Elegant Presentation: While this classic crème brûlée is stunning served unadorned, a thoughtful garnish can elevate its presentation for guests. For company, I often add a few fresh raspberries or thinly sliced strawberries. A delicate sprig of fresh mint or a few vanilla bean specks sprinkled on the plate can add a professional, sophisticated touch, highlighting the dessert’s main flavors.
- The Pinch of Salt Philosophy: This recipe was updated after a wonderful insight from Jenni Field, an accomplished pastry chef, on the power of salting desserts. Just a small pinch of salt in the custard truly makes a world of difference. It doesn’t make the dessert salty, but rather enhances and amplifies the rich vanilla flavor, preventing it from tasting merely sweet and lending it a more complex, balanced profile.
- Make Ahead Magic: One of the many beauties of crème brûlée is its make-ahead potential. You can prepare and bake the custards up to 3 days in advance and store them, covered, in the refrigerator. This makes it an ideal dessert for entertaining, as you only need to perform the quick caramelization step right before serving. This ensures the sugar crust is at its absolute crispiest, providing that delightful “crack” when your spoon breaks through.
- A Romantic Treat: If you’ve never ventured into making crème brûlée before, consider this easy crème brûlée recipe for a special occasion like Valentine’s Day. It’s a dessert that speaks volumes of love and effort, perfect for the ones you cherish.
Creative Recipes to Use Up Extra Egg Whites
After crafting this delicious crème brûlée, you’ll find yourself with a surplus of 7 egg whites. Don’t let them go to waste! Egg whites are incredibly versatile and can be used in a variety of delightful recipes. Here are some fantastic ideas to put those leftover egg whites to good use:
- 2 Egg Whites: Simple Meringue Cookies – Light, airy, and delicately sweet, these cookies are perfect for a subtle treat or garnish.
- 3 Egg Whites: Chocolate Velvet Pie with Meringue Crust – A rich and decadent chocolate pie often benefits from a fluffy meringue topping.
- 4 Egg Whites: Fresh Strawberry Souffles – Elevate your dessert with elegant, airy soufflés, bursting with fresh fruit flavor.
- 6 Egg Whites: Chocolate Raspberry Pavlova – A stunning dessert featuring a crisp meringue shell, creamy filling, and fresh berries.
- 7 Egg Whites: Fresh Strawberry Meringue Cake – A show-stopping cake where meringue layers provide a wonderful texture contrast to fresh fruit and cream.
Frequently Asked Questions About Crème Brûlée
Crème Brûlée is a French phrase that translates literally to “burnt cream.” Its pronunciation can sometimes be tricky due to the accent marks, but it’s pronounced as krehm-broo-LAY. Mastering the pronunciation is almost as satisfying as mastering the recipe itself!
Absolutely! This is one of the fantastic features that makes crème brûlée an ideal dessert for entertaining and meal prepping. The custards can be prepared and baked up to 3 days in advance. Simply cover them tightly with plastic wrap and store them in the refrigerator. The key is to sprinkle the turbinado sugar on top and caramelize it with a kitchen torch or under the broiler just before you plan to serve, ensuring that perfect, crisp crust.
While a culinary torch is the preferred method for melting the sugar topping on your custards due to its superior control, the broiler can certainly be used in a pinch. If you opt for the broiler, place the dishes of chilled crème brûlée on a sturdy baking sheet and position them about 4 inches from the heating element. You must watch them continuously and very carefully, as the sugar can go from perfectly golden to burnt in a matter of seconds. You may need to arrange your ramekins strategically so they are directly beneath the heat source for even caramelization.
No, while Le Cirque certainly popularized crème brûlée in the United States, especially when it featured it prominently on their menu in the 1980s, the dessert itself has a much longer history. Versions of “burnt cream” can be traced back to 15th-century England and a Spanish version, known as “crema catalana,” dates back even further to Medieval times. Le Cirque played a significant role in its modern resurgence and widespread appeal.
Crème brûlée offers a truly unique and captivating flavor and texture experience. The base is a smooth, incredibly silky, and rich vanilla-infused custard that melts in your mouth. This creamy indulgence is beautifully contrasted by a thin, brittle layer of caramelized sugar on top. The combination of the warm, slightly bitter caramel and the cool, sweet vanilla custard, along with the contrasting textures, is what makes this dessert so memorable and exquisitely delicious.
You May Also Enjoy These Crème Brûlée Inspired Recipes:
If you love the classic crème brûlée, you’ll be delighted by these creative twists and variations:
- Creme Brulee Cookie Bars from Crazy for Crust
- No-churn Creme Brulee Ice Cream from Big Bear’s Wife
- Creme Brulee French Toast
- Creme Brulee Cheesecake
- White Chocolate Creme Brulee
- Creme Brulee with Raspberries
- Discover more of the Best Dessert Recipes
Stay connected for more delicious recipes! Follow on Instagram, Facebook, and Pinterest. Don’t forget to tag me when you try one of my recipes! If you love the results, please consider leaving a 5-star rating in the recipe card below.
Classic Crème Brûlée Recipe
15 minutes
50 minutes
1 hour 5 minutes
9 servings
A creamy vanilla custard topped with a crisp “burnt” sugar topping, inspired by Le Cirque.
Ingredients
- 4 cups heavy cream (36% butterfat)
- 1 vanilla bean, slit in half lengthwise and seeds scraped
- ¾ cup granulated sugar
- Pinch of fine table salt
- 7 large egg yolks
- Turbinado sugar (sugar in the raw), for topping
Instructions
- Preheat your oven to 300ºF (150ºC). Prepare a water bath by placing nine 8-ounce ramekins into a larger roasting pan.
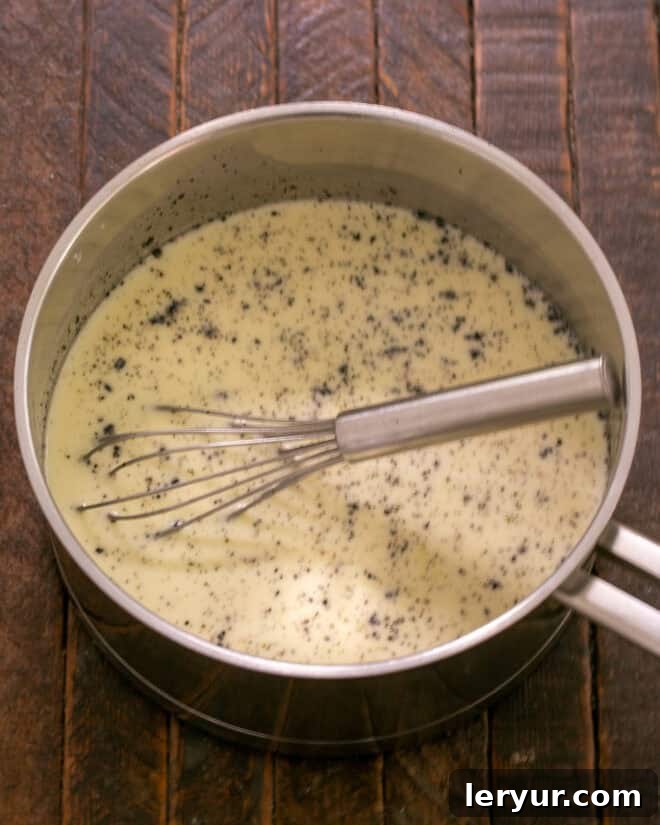
- In a medium saucepan, combine the heavy cream, vanilla bean pod and scraped seeds, ¾ cup granulated sugar, and the pinch of salt. Heat over medium heat, stirring occasionally, until small bubbles just begin to form around the perimeter of the pan. Do not bring the mixture to a full boil. Remove from heat immediately and let the vanilla bean steep for about 10-15 minutes to infuse flavor.
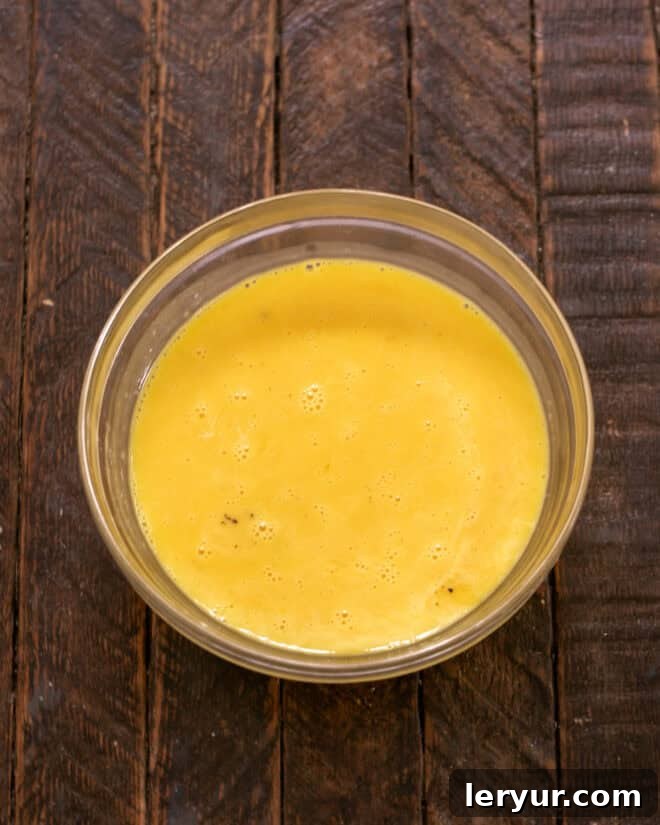
- While the cream mixture steeps, whisk the 7 large egg yolks in a separate large glass measuring cup or bowl until well combined and slightly pale. To temper the yolks, slowly ladle a small amount of the hot cream mixture into the whisked yolks, whisking constantly and vigorously. Repeat this process a few more times, adding the hot cream very gradually while continuously whisking the yolks, to gently raise their temperature without cooking them.
- Pour the tempered egg yolks back into the saucepan with the remaining cream mixture and whisk until smooth and fully combined. Remove the vanilla bean pod. For an exceptionally silky custard, strain the entire mixture through a fine-mesh sieve into a clean large measuring cup with a spout. This step removes any cooked egg bits or vanilla bean fragments.
- Carefully fill each ramekin to the top with the strained custard mixture. Place the roasting pan containing the filled ramekins into the preheated oven. Then, pour enough hot or boiling water into the roasting pan to come about halfway up the sides of the ramekins, creating a bain marie.
- Bake for approximately 40-50 minutes, or until the custards are set around the perimeter but still have a slight, gentle jiggle in the very center when the pan is carefully shaken. Baking time may vary depending on the depth of your ramekins (shallow ramekins may take closer to 40 minutes).
- Carefully remove the roasting pan from the oven and then lift the ramekins out of the water bath. Let them cool on a wire rack for at least 30 minutes to an hour. Once cooled, cover each ramekin tightly with plastic wrap and chill in the refrigerator for a minimum of 2 hours, or up to 3 days, to allow the custard to fully firm up.
- Just before serving, uncover the chilled custards. Sprinkle a generous, even layer of turbinado sugar over the top of each crème brûlée. Use a kitchen torch to caramelize the sugar until it melts, bubbles, and turns a rich golden-amber color, forming a crisp crust. Alternatively, you can place them under a preheated broiler (about 4 inches from the element) and broil very carefully until the sugar is melted and caramelized. Watch constantly to prevent burning.
- Serve immediately on small plates to highlight their elegant presentation. Enjoy the contrast of the crisp sugar and creamy custard!
Notes
Separate your eggs when they’re cold as the yolk is less likely to break. For an even more intense vanilla flavor, you can let the vanilla bean steep in the warm cream mixture for up to an hour before straining.
Recommended Products
As an Amazon Associate, I earn from qualifying purchases.
- Turbinado Sugar
- Roasting Pan
- Shallow Ramekins
- Culinary Torch
Nutrition Information:
Yield:
9
Serving Size:
1 creme brulee
Amount Per Serving:
Calories: 488Total Fat: 42gSaturated Fat: 26gTrans Fat: 1gUnsaturated Fat: 14gCholesterol: 285mgSodium: 100mgCarbohydrates: 20gFiber: 0gSugar: 20gProtein: 8g