
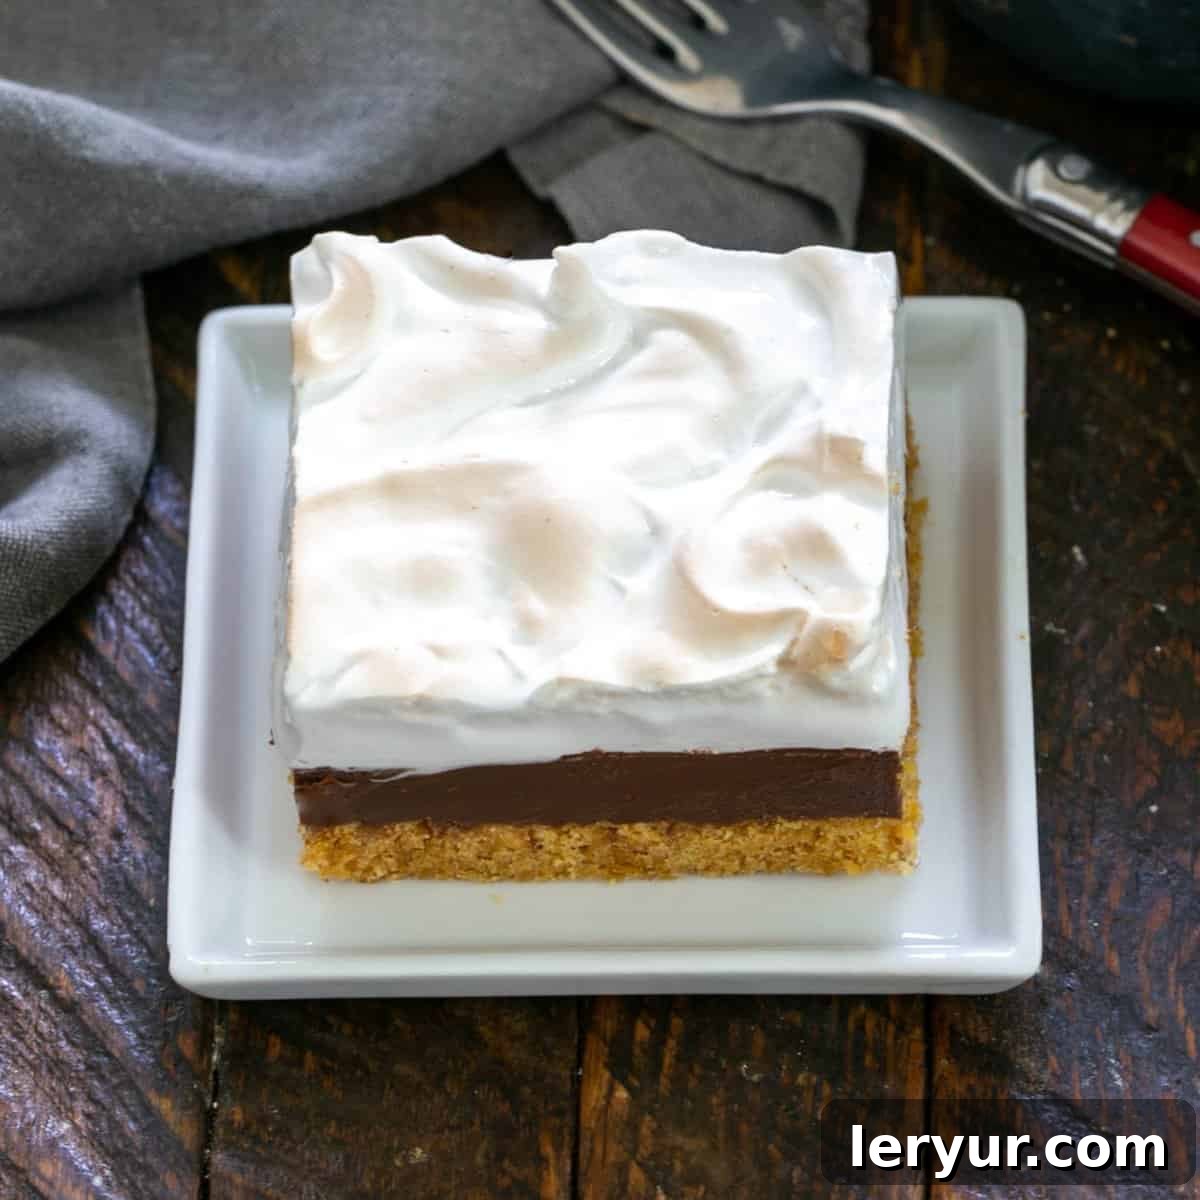
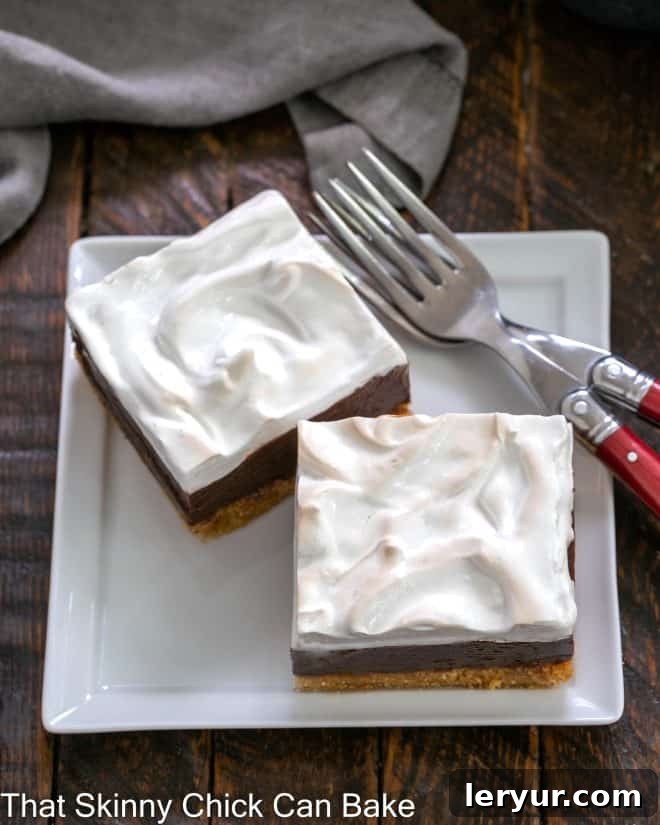
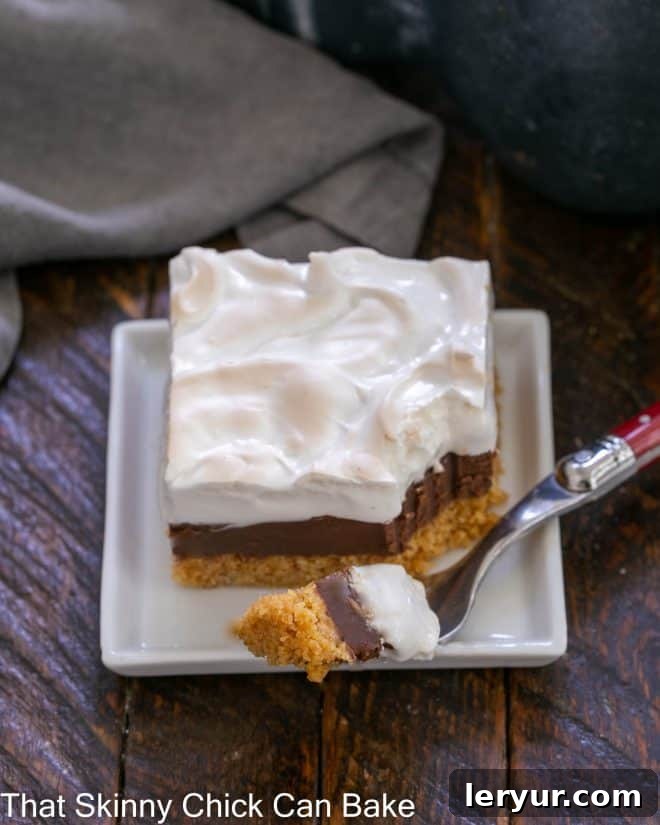
Experience pure dessert bliss with these exquisite S’mores Fudge Bars. Far surpassing the beloved campfire classic, this recipe brings together three irresistible layers: a perfectly crisp graham cracker crust, a rich, velvety chocolate fudge center, and a cloud-like, toasted marshmallow meringue topping. Get ready to elevate your s’mores game and impress everyone with a treat that’s both nostalgic and incredibly gourmet.
While the traditional campfire s’more holds a special place in our hearts, these homemade S’mores Fudge Bars take the iconic flavors to an entirely new level of sophistication and convenience. Forget the smoky clothes and sticky fingers; this bar recipe delivers all the gooey, chocolatey, marshmallowy goodness in a perfectly portioned, easy-to-serve format that’s ideal for any occasion, from backyard BBQs to elegant dinner parties. If you’re looking for an easy s’mores recipe that delivers big on flavor and presentation, you’ve found your new favorite!
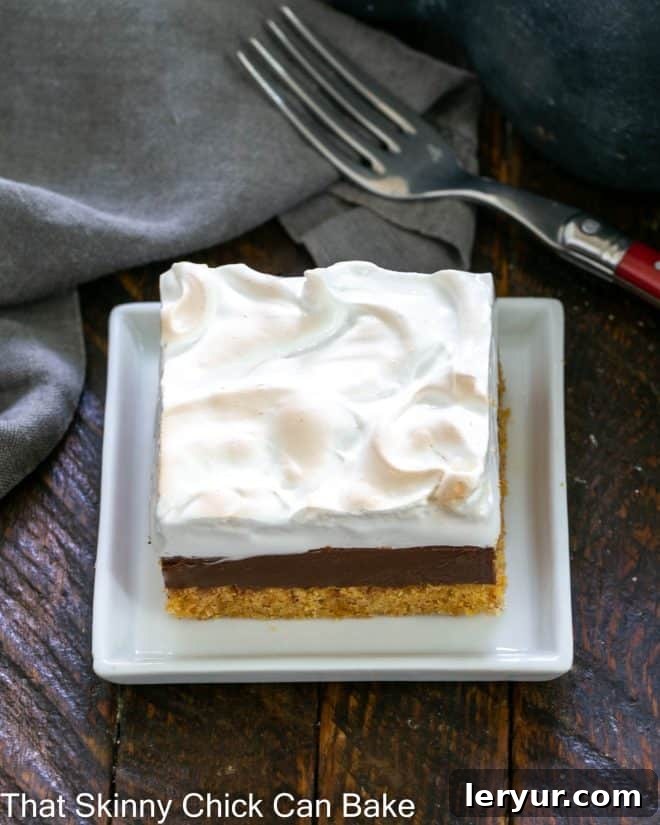
Why These S’mores Fudge Bars Are an Absolute Must-Make
Prepare to fall in love with a dessert that captures the essence of summer campfires with an elegant twist. These S’mores Fudge Bars aren’t just a treat; they’re an experience. Here’s why they deserve a top spot on your baking list:
- All the Classic S’mores Elements, Elevated: Every bite delivers the quintessential trio of graham crackers, rich chocolate, and fluffy marshmallow. We’ve taken these beloved components and refined them into a truly decadent bar, ensuring a harmonious balance of textures and flavors.
- The Unforgettable Homemade Marshmallow Meringue: Say goodbye to store-bought marshmallows! Our recipe features a light, airy, and utterly delicious homemade marshmallow meringue topping. It’s infinitely superior to anything from a bag, offering a delicate sweetness and an incredibly smooth texture that browns beautifully for that authentic toasted s’mores finish. This gourmet touch truly sets these bars apart.
- Perfect for Any Occasion, No Campfire Required: Imagine enjoying the cozy flavors of s’mores without the hassle of building a fire. These indoor s’mores bars are ideal for summer gatherings, holiday parties, potlucks, or simply a comforting treat at home. When the weather is too hot for a bonfire, or you just prefer a more convenient dessert, these bars are your go-to solution. They bring the joy of s’mores to your kitchen, anytime, anywhere.
- Effortless Crowd-Pleaser: Looking for a dessert that everyone will adore? These S’mores Fudge Bars are guaranteed to be a hit with both kids and adults. Their familiar yet refined taste makes them incredibly appealing, and their bar format makes them easy to serve and enjoy at any get-together.
- Make-Ahead Convenience: Unlike traditional s’mores that require immediate assembly and consumption, these bars can be prepared in advance, allowing you to enjoy your event without last-minute stress. They chill beautifully, making them a fantastic option for meal prepping your desserts.
- A Unique Gourmet Twist: Move beyond the ordinary with a dessert that feels special. The fudge layer adds a rich depth of flavor that complements the crisp crust and fluffy meringue, creating a multi-dimensional taste experience that is truly unforgettable.
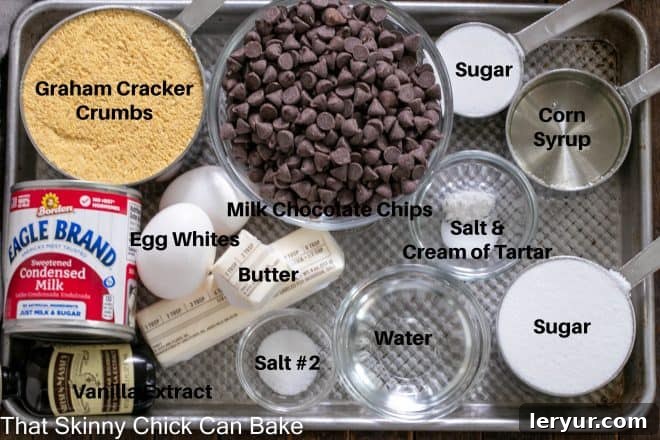
Ingredient Notes and Selection for Perfect S’mores Fudge Bars
Crafting the perfect S’mores Fudge Bars begins with understanding your ingredients. While the recipe is straightforward, paying attention to these details can make a significant difference in the final taste and texture of your homemade s’mores bars.
- Graham Cracker Crumbs: The foundation of our delicious crust! You have two excellent options here:
- Pre-Ground Crumbs: For ultimate convenience, purchase a box of pre-ground graham cracker crumbs. This saves time and ensures a consistent texture.
- Grind Your Own: For a fresher taste and potentially better value, buy whole graham cracker sheets and process them yourself in a food processor until fine crumbs form. A standard 9×9 inch pan usually requires about 1 1/2 sleeves of graham crackers to yield 2 cups of crumbs.
Ensure your crumbs are fine and uniform for a sturdy, cohesive crust.
- Milk Chocolate Chips: The heart of the rich fudge layer. Milk chocolate offers that classic, sweet s’mores flavor.
- Substitution: If you prefer a less sweet or slightly darker chocolate profile, semisweet chocolate chips are a fantastic alternative. You could even use a blend of milk and semisweet for a balanced flavor. High-quality chocolate chips will melt more smoothly and provide a richer taste.
- Sweetened Condensed Milk: This magical ingredient is crucial for creating the incredibly smooth and luscious fudge layer. It provides sweetness and helps achieve that creamy, decadent texture when combined with chocolate. Do not confuse it with evaporated milk.
- Cream of Tartar: A baker’s secret weapon for meringue! This acidic powder acts as a stabilizer for the egg whites, helping them whip up into tall, voluminous, and stable peaks. It also prevents the meringue from collapsing and contributes to its overall silky texture. Don’t skip it for the best marshmallow topping!
- Egg Whites: The star of your fluffy marshmallow meringue. Success here hinges on absolute cleanliness:
- Purity is Key: Ensure your egg whites, mixing bowl (preferably glass or metal), and beaters are scrupulously clean and completely free from any traces of grease, oil, or even a tiny speck of egg yolk. Any contamination will prevent the egg whites from whipping correctly, resulting in a flat meringue.
- Temperature: Room temperature egg whites generally whip up faster and achieve more volume than cold ones. Separate your eggs when cold (they separate more easily), then let the whites sit out for 20-30 minutes before whipping.
- Light Corn Syrup: This ingredient plays a vital role in the marshmallow meringue, preventing sugar crystallization and contributing to its smooth, chewy texture.
- Brand Recommendation: Karo brand is a widely trusted choice.
- Measuring Tip: To easily measure and release sticky corn syrup from your measuring cup, spray the cup lightly with non-stick cooking spray (like Pam) before pouring. This simple trick makes cleanup a breeze!
- Sugar & Water: Essential for creating the hot sugar syrup that transforms egg whites into meringue. The precise ratio is important for achieving the correct consistency and stability.
- Vanilla Extract: A touch of vanilla enhances all the other flavors, adding a warm, aromatic note to the marshmallow meringue. Use good quality pure vanilla extract for the best results.
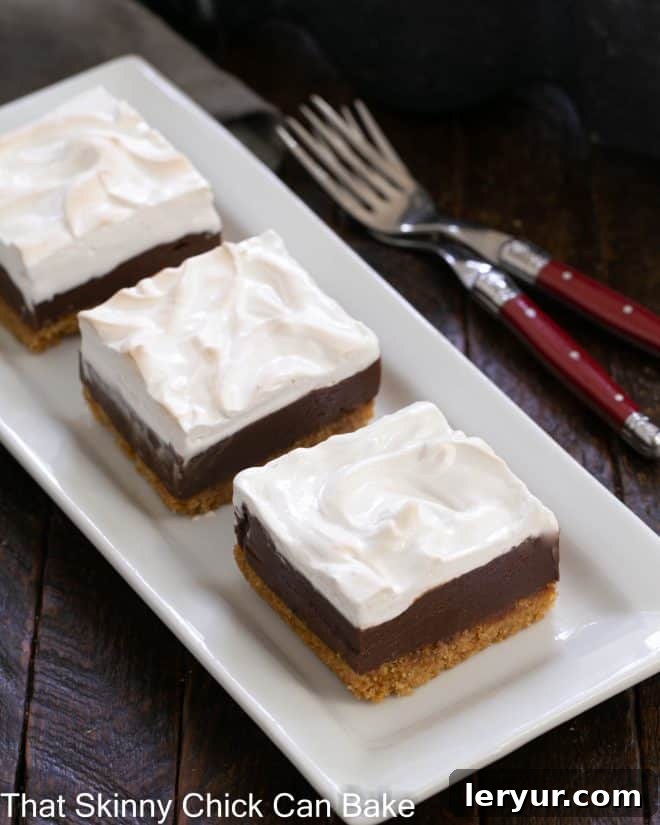
Expert Tips for S’mores Fudge Bar Perfection
Achieving bakery-quality S’mores Fudge Bars is easier than you think with these professional insights. Follow these tips to ensure your homemade s’mores bars turn out perfectly every time, from the fluffy meringue to perfectly cut slices.
- Mastering the Meringue: Cleanliness is Crucial: The homemade marshmallow topping is a highlight of these bars, and its success hinges on one golden rule: immaculate cleanliness.
- PRO-Tip: When whipping egg whites for your meringue, your mixing bowl and beaters MUST be scrupulously clean. Even the slightest trace of grease, oil, or egg yolk can prevent the egg whites from whipping up to their full potential, resulting in a flat, dense meringue instead of a light, fluffy cloud. Use a glass or metal bowl, as plastic can sometimes retain oily residues. Wipe everything down with a paper towel dampened with a little vinegar if you’re concerned.
- Gradual Sugar Syrup Addition: Once your egg whites reach soft peaks, slowly and steadily drizzle the hot sugar syrup in a thin stream into the whipped egg whites while the mixer is running on low. Be careful not to pour the syrup directly onto the whisk. This gradual addition ensures the syrup is evenly incorporated, creating a stable, glossy meringue.
- Don’t Rush the Whipping: After adding the syrup, continue beating the meringue on medium-high speed for the full 8 minutes. This cooling period is crucial for the meringue to become thick, stable, and glossy. It also helps it hold its shape and prevents it from weeping.
- The Secret to Perfect Slices: The Hot Knife Method: Cutting through the sticky marshmallow meringue and fudge layers can be tricky, but this simple trick ensures clean, beautiful bars.
- PRO-Tip: Use a hot, dry knife to cut these bars. The heat helps the knife glide through the sticky marshmallow and rich fudge, preventing tearing and messy edges.
- How to Heat Your Knife: The easiest way to heat your knife is to run it under very hot tap water (or use a hot water dispenser if you have one). Immediately wipe it completely dry with a clean towel. Moisture can make the marshmallow stick more.
- Reheat as Needed: The knife will cool and start to stick again after a few cuts. Don’t hesitate to reheat and wipe dry after every few slices to maintain those pristine edges.
- Homemade Graham Cracker Crumbs: A Smart Choice: While pre-packaged crumbs are convenient, making your own offers several advantages.
- Economical and Fresh: Buying whole graham crackers and grinding them in a food processor is often more cost-effective. Plus, freshly ground crumbs can have a more pronounced flavor and a pleasant coarse texture compared to some pre-packaged varieties.
- Quick & Easy: Simply break graham cracker squares into pieces and pulse them in a food processor until fine. It takes less than a minute!
- Chilling is Your Friend: Allow ample time for the fudge layer to chill and firm up before adding the marshmallow topping, and for the finished bars to cool completely before cutting. This ensures clean layers and a much better eating experience. Rushing the chilling process will lead to a gooey mess.
- Broiler Watch: When toasting the marshmallow topping, keep a very close eye on the bars under the broiler. Meringue can go from perfectly golden to burnt in a matter of seconds. Stay right by the oven and pull them out as soon as they reach your desired level of golden brown. A kitchen torch can offer even more control if you have one.
Frequently Asked Questions About S’mores Fudge Bars
Got questions about these delicious S’mores Fudge Bars? We’ve got answers to help you confidently create and enjoy this exceptional dessert.
What Exactly Are S’mores?
S’mores are an iconic American campfire treat, with roots tracing back to a Girl Scout cookbook in 1927, where they were originally called “Some More.” The name itself is a delightful contraction, perfectly describing the irresistible urge to ask for “some more” after just one bite. Traditionally, a s’more is a simple sandwich crafted from two graham crackers, a square of milk chocolate candy bar, and a gooey, fire-toasted marshmallow. The marshmallow is typically roasted over an open flame on a stick, giving it a beautifully caramelized exterior and a molten interior that melts the chocolate upon assembly. It’s a nostalgic symbol of outdoor adventures and cozy evenings by the fire.
How Do You Make S’mores Bars?
S’mores bars are a versatile and popular adaptation of the classic campfire treat, bringing all the beloved flavors indoors. While countless variations exist, most S’mores bar recipes, including ours, typically feature three distinct layers:
- Graham Cracker Crust: A buttery, crumbly base made from crushed graham crackers.
- Chocolate Filling: This can range from a simple chocolate ganache, a rich fudge layer (as in this recipe), or even a layer of melted chocolate bars.
- Marshmallow Topping: This is often the star! It can be made using store-bought marshmallows (cut in half or melted) or, for a superior texture and flavor, a homemade marshmallow meringue (like the one in this recipe).
After assembling the layers, the marshmallow topping is typically browned to mimic that campfire toast. This can be achieved by carefully placing the bars under a hot broiler for a minute, baking them in a very hot oven for a short period, or using a small kitchen torch for precise caramelization. Each method provides that delightful golden, slightly charred marshmallow finish.
How Do You Store S’mores Fudge Bars?
Proper storage ensures your S’mores Fudge Bars remain delicious and maintain their delightful texture. Due to the homemade marshmallow meringue and rich fudge layer in this particular recipe, storage recommendations are specific:
- Refrigeration for Optimal Freshness: For bars made with a homemade gooey topping, it’s best to store them in a single layer in an airtight container in the refrigerator. They will maintain their best quality for 3-4 days. Storing them in a single layer prevents the sticky topping from adhering to other bars or the container lid.
- Room Temperature (for bagged marshmallow versions): If you’ve made a S’mores bar recipe using bagged marshmallows (which are generally more stable at room temperature), they can typically be stored covered at room temperature for 1-2 days, or in the refrigerator for longer freshness.
- Freezing for Long-Term Enjoyment: Our S’mores Fudge Bars, especially those with the homemade meringue, can be frozen! Ensure they are well-chilled and firm before wrapping individual bars tightly in plastic wrap, then placing them in an airtight freezer-safe container or bag. They should keep beautifully in the freezer for 2-3 months.
- Defrosting: When you’re ready to enjoy a frozen bar, simply transfer it to the refrigerator overnight to defrost slowly. You can then let it come to room temperature for a few minutes before serving, or even gently warm it slightly if you prefer a softer fudge layer.
Can I Make These S’mores Fudge Bars Ahead of Time?
Absolutely! These S’mores Fudge Bars are an excellent make-ahead dessert, which makes them perfect for parties and gatherings. You can prepare them a day or two in advance and store them in the refrigerator as described above. If you plan to serve them for a special event, assembling them the day before ensures they have ample time to chill and set, making them easier to cut and handle, and allowing the flavors to meld beautifully. Just give them about 30 minutes at room temperature before serving for the best texture.
What are Some Serving Suggestions for S’mores Fudge Bars?
These bars are delightful on their own, but here are a few ideas to elevate your serving experience:
- A La Mode: Serve them slightly warmed with a scoop of vanilla bean ice cream for an extra indulgence. The contrast of warm bar and cold ice cream is heavenly.
- Coffee or Hot Cocoa Pairing: A rich cup of coffee or a comforting mug of hot cocoa makes a perfect companion for these sweet treats.
- Fruit Garnish: A few fresh berries like raspberries or strawberries can add a touch of freshness and a vibrant color contrast.
- Holiday Treat: Cut them into smaller squares for a dessert platter during the holidays. Their festive look and comforting flavors are always welcome.
- Picnic Perfection: Pack them individually for a picnic or outdoor event. They travel well once chilled and cut.
Discover More S’mores-Inspired Treats
If you’ve fallen in love with these S’mores Fudge Bars, you’ll be thrilled to explore other creative ways to enjoy the iconic flavors of graham cracker, chocolate, and marshmallow. Here are some of our favorite S’mores-inspired recipes:
- S’mores Cookies (S’mookies): A delightful fusion of cookie and s’more!
- Easy S’mores Dip: The ultimate warm, gooey dip perfect for sharing.
- S’mores Brownies: Fudgy brownies topped with toasted marshmallow.
- S’mores Pie: A show-stopping pie with all the s’mores goodness.
- Explore more Easy Bar Cookie Recipes for every occasion!
Note: This post may contain affiliate links; view my Disclosure Policy for details. I earn a small percentage from any purchase you make by clicking on these links at no extra cost to you. Your support helps keep this blog running and allows me to share more delicious recipes!
We love hearing from you! Stay in touch through social media @ Instagram, Facebook, and Pinterest. Don’t forget to tag us when you try one of our recipes! And if you absolutely love the results, please consider leaving a 5-star rating and a comment in the recipe section below. Your feedback means the world to us!
The Ultimate Recipe:
S’mores Fudge Bars
20 minutes
20 minutes
40 minutes
16 bars
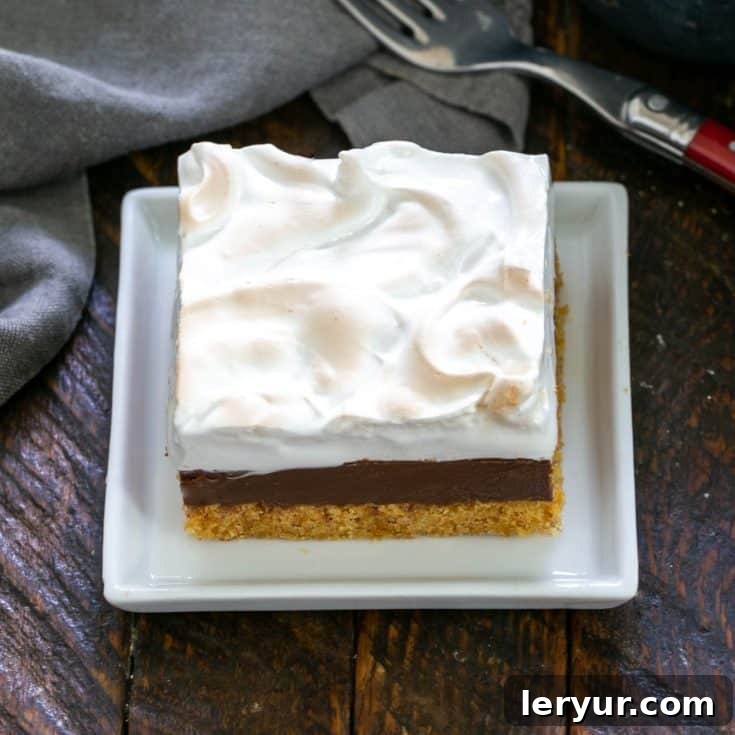
Indulge in these irresistible layered s’mores bars featuring a crunchy graham cracker crust, a rich and creamy fudge center, and a perfectly toasted homemade marshmallow meringue topping.
Rating: 4.9 out of 5 stars based on 37 reviews.
Ingredients You’ll Need
For the Graham Cracker Crust:
- 2 cups graham cracker crumbs
- 10 tablespoons unsalted butter, melted
- ¼ cup granulated sugar
- ½ teaspoon fine sea salt
For the Decadent Fudge Layer:
- 2 cups milk chocolate chips (or semisweet, if preferred)
- 14-ounce can sweetened condensed milk
For the Fluffy Marshmallow Meringue Layer:
- ¾ cup granulated sugar
- ½ cup light corn syrup
- ¼ cup water
- ¼ teaspoon fine sea salt
- 2 large egg whites, at room temperature
- ¼ teaspoon cream of tartar
- 1½ teaspoons pure vanilla extract
Step-by-Step Instructions
- Prepare for Baking: Preheat your oven to 350°F (175°C). Line a 9 x 9-inch baking pan with nonstick foil, ensuring there’s an overhang on the sides to easily lift the bars out later. Set aside.
- Craft the Crust: In a medium bowl, combine the graham cracker crumbs, melted butter, ¼ cup sugar, and ½ teaspoon salt. Mix until the crumbs are thoroughly moistened. Press this mixture firmly and evenly into the bottom of your prepared baking pan.
- Bake the Crust: Bake the crust in the preheated oven for 10 minutes. This helps to set it and give it a lovely crisp texture. Remove from oven and let it cool completely on a wire rack.
- Make the Fudge Filling: In a microwave-safe bowl, combine the milk chocolate chips and the entire can of sweetened condensed milk. Microwave in 30-second intervals, stirring well after each, until the chocolate is fully melted and the mixture is smooth and glossy. This usually takes 1-2 minutes.
- Assemble Fudge Layer: Pour the warm fudge filling evenly over the cooled graham cracker crust. Spread with an offset spatula to create a smooth layer. Place the pan in the refrigerator for at least 30 minutes, or until the fudge layer is firm.
- Begin the Meringue: In the bowl of a stand mixer fitted with a whisk attachment (or a large, very clean mixing bowl with an electric hand mixer), beat the 2 room-temperature egg whites and ¼ teaspoon cream of tartar together on medium-high speed until soft peaks form. Do not overbeat at this stage. Set this aside while you prepare the sugar syrup.
- Prepare the Sugar Syrup: In a small, heavy-bottomed saucepan, combine the ¾ cup sugar, light corn syrup, ¼ cup water, and ¼ teaspoon salt. Cook over medium-high heat, stirring occasionally, until the sugar dissolves and the mixture comes to a boil. Continue to boil without stirring until a candy thermometer registers 240°F (115°C). This mixture will be extremely HOT, so exercise extreme caution.
- Incorporate Syrup into Meringue: With the mixer running on low speed, slowly and very carefully drizzle the hot sugar syrup in a thin stream into the whipped egg whites. Be careful not to pour the syrup directly onto the whisk.
- Whip to Stiff Peaks: Once all the syrup has been added, increase the mixer speed to medium-high and continue to beat for approximately 8 minutes, or until the meringue is very thick, glossy, and holds stiff peaks. During the last few seconds of beating, add the 1½ teaspoons of vanilla extract.
- Top the Bars: Carefully spread the fluffy marshmallow meringue evenly over the chilled chocolate fudge layer. You can create decorative swirls or peaks with an offset spatula or the back of a spoon if desired.
- Toast the Meringue: For that classic s’mores look, place the pan under a preheated broiler for about 1 minute, or until the top of the marshmallow meringue layer is lightly golden and toasted. Watch it EXTREMELY carefully, as it can burn very quickly. Alternatively, use a kitchen torch for more precise browning.
- Cool, Chill, and Serve: Allow the bars to cool completely at room temperature, then place the pan back into the refrigerator to chill thoroughly for at least 2-3 hours (or even better, overnight). Once thoroughly chilled and firm, lift the bars out of the pan using the foil overhang. Use a hot, dry knife (refer to expert tips) to cut them into 16 squares or desired bar sizes. Serve and enjoy!
Chef’s Notes & Important Tips
This recipe has been carefully adapted from a wonderful source (Cookies & Cups via Hugs & Cookies) to bring you the best possible S’mores Fudge Bars. Here are a few final reminders for success:
- Meringue Purity: Reiterate the importance of absolutely no oil or egg yolk contamination in your egg whites. This is the single most critical factor for a successful, voluminous meringue.
- Hot Syrup Caution: The sugar syrup reaches a very high temperature. Handle with extreme care to avoid burns when pouring it into the egg whites.
- Broiler Vigilance: Never walk away from the broiler when browning the marshmallow topping. It can toast and burn in a flash! Stay focused until you achieve the perfect golden hue.
- Proper Chilling: Don’t underestimate the power of chilling. Adequate chilling time ensures all layers set properly, making the bars easier to cut and providing a much more enjoyable texture.
- Vanilla Quality: Use pure vanilla extract for the best flavor in your meringue.
Recommended Baking Tools & Products
As an Amazon Associate and member of other affiliate programs, I earn a small commission from qualifying purchases made through these links, at no extra cost to you. These are products I personally recommend for best results.
- Nonstick Foil
- Thermapen Instant Read Thermometer
- 9 x 9-inch Baking Pan
Nutrition Information:
Yield: 16
Serving Size: 1 bar
Amount Per Serving (Estimated):
- Calories: 410
- Total Fat: 17g
- Saturated Fat: 10g
- Trans Fat: 0g
- Unsaturated Fat: 6g
- Cholesterol: 35mg
- Sodium: 277mg
- Carbohydrates: 60g
- Fiber: 1g
- Sugar: 52g
- Protein: 5g
*Please note that nutritional information is an estimate and may vary based on specific ingredients and preparation methods.
Loved This Recipe? Share Your Thoughts!
We’d be thrilled if you shared your experience with these S’mores Fudge Bars! Leave a comment directly on the blog, or share a photo of your beautiful creation on Pinterest or Instagram, tagging us so we can see your amazing work!