
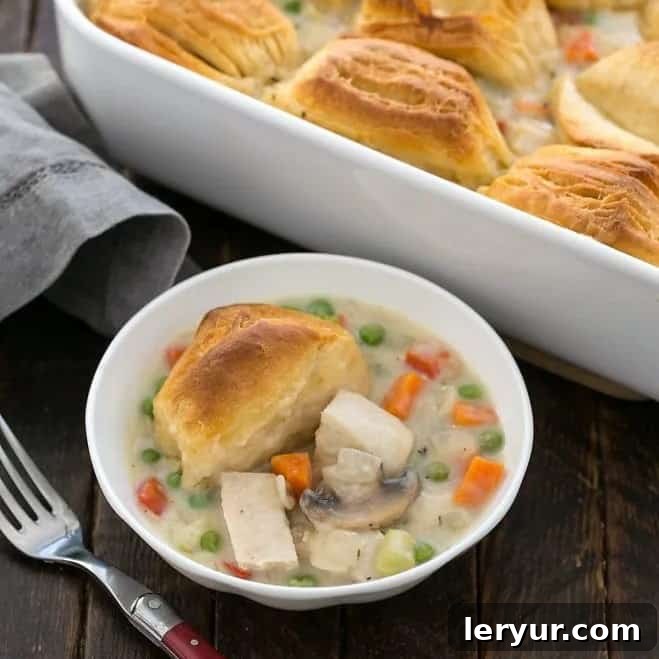
Welcome to the ultimate guide for creating the most satisfying and delicious Homemade Chicken Pot Pie you’ll ever taste! This isn’t just a meal; it’s a warm embrace on a chilly evening, a dish that truly embodies the spirit of comfort food. Imagine succulent pieces of chicken and tender vegetables, all swimming in a rich, creamy sauce, crowned with the most exquisite, flaky, and golden goat cheese biscuits. It’s a classic reinvented, offering a gourmet twist that elevates this humble casserole to a culinary masterpiece.
When the temperatures drop and your soul yearns for something deeply satisfying and hearty, look no further than this incredible Chicken Pot Pie Casserole. Prepare yourself for rave reviews and requests for seconds! The timeless pairing of Chicken and Biscuits reaches new heights in this recipe, promising a dining experience that is both familiar and exciting. While our signature goat cheese biscuits provide an unparalleled experience, we also offer a convenient shortcut using canned buttermilk flaky layer biscuits for those busy nights without compromising on flavor or comfort.
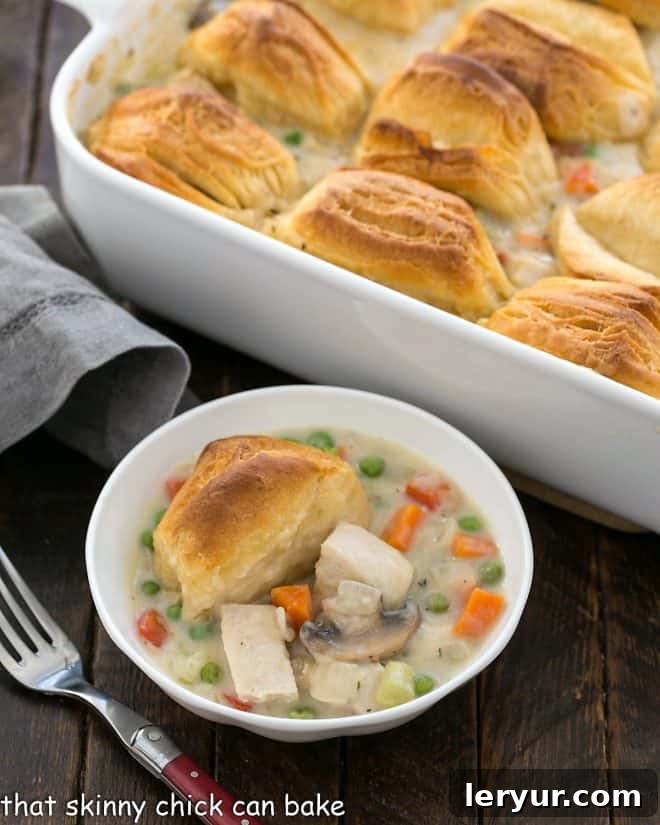
Why This Chicken Pot Pie Recipe is a Must-Try
This Homemade Chicken Pot Pie stands out from the rest, offering a symphony of flavors and textures that will make it an instant family favorite. Here’s why you absolutely need to make it:
- The Epitome of Comfort Food: Chicken Pot Pie has long been revered as the ultimate comfort food, and this recipe delivers on that promise. Each spoonful is a harmonious blend of creamy, savory goodness and flaky biscuit perfection, providing warmth and contentment with every bite.
- A Complete Meal in One Dish: Forget about juggling multiple side dishes. This Chicken Pot Pie Casserole is a wholesome, balanced meal on its own. It features tender protein from the chicken, essential vitamins and fiber from a medley of vegetables, and satisfying carbohydrates from the rich sauce and fluffy biscuits. It’s convenience and nutrition wrapped up in one delicious package.
- Easily Adaptable to Your Taste: While our recipe is meticulously crafted for optimal flavor, it’s also incredibly versatile. You can effortlessly adapt it to suit your preferences. Not a fan of mushrooms? Simply omit them! Have extra carrots or peas on hand? Feel free to add more. The beauty of homemade food lies in its flexibility, allowing you to customize the vegetable medley to your heart’s content.
- The Signature Goat Cheese Biscuits: What truly sets this recipe apart is the optional, yet highly recommended, topping of exquisite goat cheese biscuits. The subtle tang and herby notes of the goat cheese infuse the flaky biscuits with an irresistible depth of flavor, creating a topping that’s both tender and incredibly aromatic. This unique twist elevates the entire dish from a simple pot pie to a gourmet experience. For those seeking a quicker route, canned buttermilk flaky layers biscuits provide a delightful, buttery alternative.
My decision to incorporate a log of herb and garlic goat cheese into my favorite Goat Cheese Biscuits for the topping was a game-changer. The resulting Homemade Chicken Pot Pie was nothing short of amazing, transforming a beloved classic into something truly extraordinary.
Mastering Your Homemade Chicken Pot Pie: A Step-by-Step Guide
Crafting a delicious pot pie, while rewarding, involves a few distinct steps. Don’t be intimidated by the process; it’s straightforward and well worth the effort. Let’s break down how to create this incredible comfort meal:
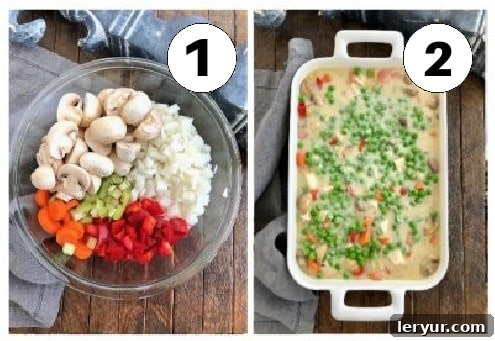
- Prepare Your Ingredients: Begin by gathering and chopping all your filling components. This includes your cooked chicken, onions, carrots, celery, bell pepper, and mushrooms. Once prepped, sauté the aromatics (onions, celery, carrots) and other vegetables as directed in the recipe until they are tender-crisp, setting aside the peas for later.
- Assemble the Flavorful Filling: In a large bowl, combine the sautéed vegetables and your chopped cooked chicken. Next, create a rich and velvety white sauce by melting butter, whisking in flour to form a roux, and then gradually incorporating chicken broth and milk. This forms the luscious base of your pot pie. Once thickened, combine the sauce with the chicken and vegetables, ensuring everything is evenly coated. Pour this magnificent mixture into your prepared casserole dish.
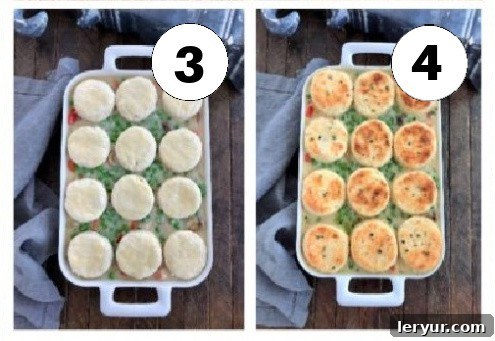
- Top with Biscuits: Once your creamy filling is nestled in the casserole dish, it’s time for the crowning glory. Carefully arrange your choice of biscuits—either your homemade goat cheese buttermilk biscuits or the convenient canned variety—over the warm filling.
- Bake to Golden Perfection: Place your assembled casserole in a preheated oven and bake according to the recipe instructions. Watch as the biscuits puff up and turn a beautiful golden brown, signaling that your comforting Chicken Pot Pie is ready to be enjoyed. The aroma filling your kitchen will be irresistible!
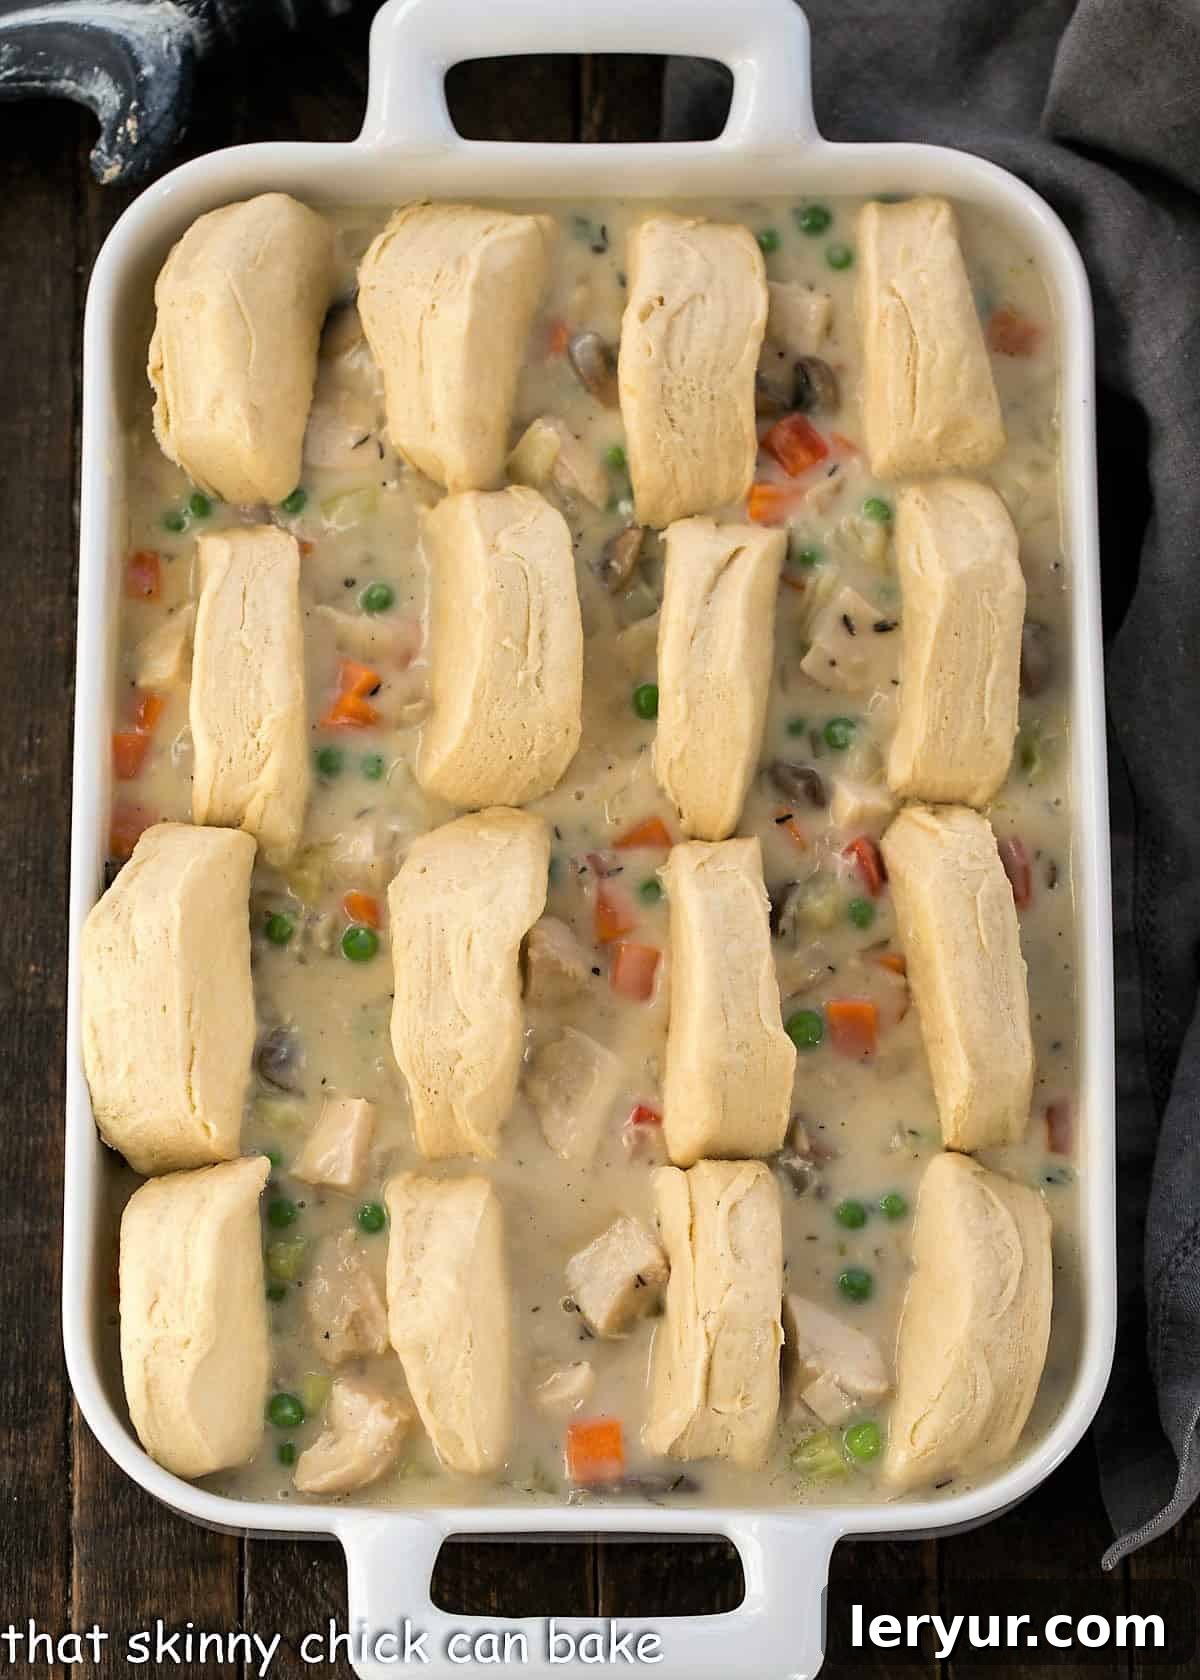
Expert Tips for the Best Chicken Pot Pie
Creating a truly outstanding Chicken Pot Pie involves a few key techniques. Follow these expert tips to ensure your casserole is a resounding success every time:
- Prepare Your Chicken in Advance: Efficiency is key! Before you even begin sautéing vegetables, ensure your chicken is fully cooked and cut into bite-sized cubes. This can be done by using a convenient rotisserie chicken, leftover roasted chicken, or by poaching boneless, skinless chicken breasts. I often prepare the chicken the day before, making assembly on cooking day a breeze.
- Pre-Cook Vegetables to Perfection: Next, chop and lightly cook all the hardy vegetables (onions, carrots, celery, bell pepper, mushrooms) until they are tender-crisp. Remember, they won’t be in the oven long enough to cook thoroughly once combined with the sauce and chicken. However, be sure to reserve the frozen peas until the very end; adding them too early will cause them to overcook and turn an unappetizing grayish color in the oven.
- Crafting the Silky Sauce: The heart of any great pot pie is its sauce. This recipe uses a classic white sauce, elevated with the subtle depth of sherry and fragrant fresh thyme. To make it, melt the butter in a pan, then whisk in the flour and cook for about a minute to eliminate any raw flour taste. Gradually whisk in the milk and chicken broth, continuing to whisk until the sauce thickens beautifully. Stir in the sherry and fresh thyme, then taste and adjust seasoning with salt and pepper as needed.
- PRO-Tip for a Lumpy-Free Sauce: If you’re not accustomed to making sauces or gravies, I highly recommend using Wonder flour. This granular flour by Gold Medal is specifically designed to dissolve smoothly, preventing lumps and ensuring a perfectly velvety sauce every time.
- Enhance Flavor with Sherry: Just like salt, a splash of dry sherry will significantly enhance the overall flavor profile of your sauce, adding a complex note that deepens its richness. If you’re concerned about serving alcohol to children, simply allow the sauce to simmer for a few extra minutes after adding the sherry; the alcohol will evaporate, leaving only the delicious flavor behind. Of course, this addition is optional and can be skipped if preferred.
- Combine and Prepare for Baking: Once your sauce is perfect, gently fold in the cooked chicken, the pre-sautéed vegetables, and the thawed frozen peas. Mix everything thoroughly to ensure every ingredient is coated in the creamy sauce.
- PRO-Tip: Hot Filling, Flaky Biscuits: For the flakiest, perfectly cooked biscuit topping, always add your biscuits to a hot filling. The heat from below will significantly aid in cooking the underside of the biscuits, preventing them from becoming doughy. If your filling has cooled while you prepared the biscuits, simply rewarm it gently on the stovetop or in the microwave before topping.
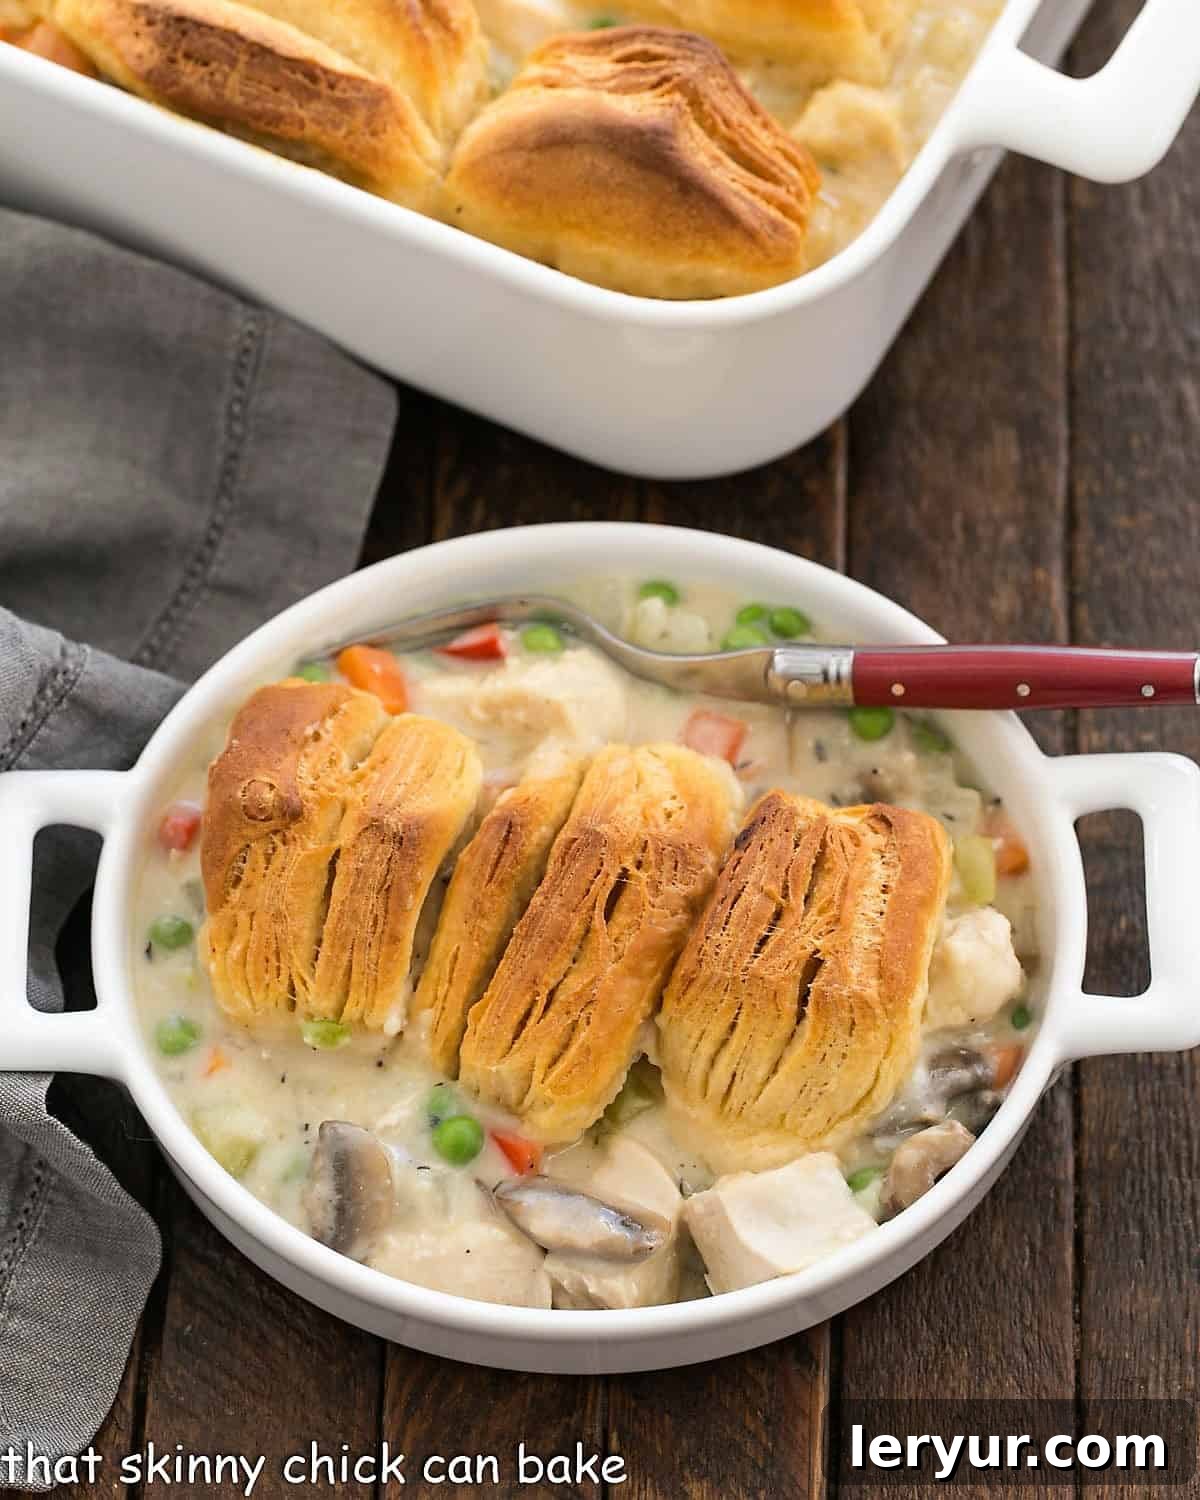
Crafting the Perfect Topping: Buttermilk Biscuits (Homemade or Shortcut)
The topping is arguably as important as the filling in a Chicken Pot Pie. Whether you opt for homemade or a convenient shortcut, a flaky, tender biscuit truly completes this dish. I’ve successfully topped this pot pie with my goat cheese biscuits, my general favorite buttermilk biscuit recipe, and even canned butterflake biscuits. All yield delicious results, so choose the option that best suits your time and preferences.
Secrets to Super Flaky Homemade Buttermilk Biscuits
Making truly flaky biscuits is an art, but one that is easily mastered with a few key principles:
- Embrace the Cold: The most crucial rule for flaky biscuits is to keep your fats (butter, shortening if using) and liquids (buttermilk) very cold. Cold butter creates steam in the oven, which leads to those wonderful layers.
- Work the Fat Quickly: Incorporate the cold fat into the dry ingredients as quickly as possible to prevent it from warming up. I find using my fingertips to “pinch and break apart” the pieces of butter into flat, pea-sized pieces works wonderfully. Alternatively, a pastry blender or two knives can be used to cut the fat into the flour mixture until it resembles coarse cornmeal with some larger, irregular pieces of butter still visible. These larger pieces are what create the flakiness.
- Gentle Mixing for Tender Dough: Once the fat is incorporated, gently mix in the cold buttermilk until just combined. Overmixing will develop the gluten, resulting in tough biscuits. A light touch is all you need to form a shaggy dough.
- Layering for Maximum Fluff: Turn the dough out onto a lightly floured surface. Instead of just rolling it out, I like to gently pat the dough into a rectangle, then fold it over itself a couple of times. This simple technique creates additional layers within the dough, which translates to a more tender and flaky biscuit. A lightly floured rolling pin can help even out the thickness before cutting.
- Precise Cutting for Tall Biscuits: Use a biscuit cutter, dipped in flour to prevent sticking, to cut out your biscuit rounds. PRO-Tip: Press the cutter straight down, do not twist it. Twisting seals the edges of the biscuit dough, preventing it from rising to its full potential. Straight cuts encourage a beautiful, tall rise.
- The Finishing Touch: Arrange your freshly cut biscuits over the hot casserole filling. For an extra golden crust and richer flavor, brush the tops of the biscuits with a little melted butter before baking.
- PRO-Tip: Homemade Buttermilk Substitute: No buttermilk on hand? No problem! You can easily make a substitute at home. Add 1 tablespoon of lemon juice or white/cider vinegar to a 1-cup liquid measuring cup. Fill the rest of the cup with milk (any kind works, but whole milk is best for richness) up to the 1-cup mark. Stir gently and let it sit for 5-10 minutes. The milk will curdle slightly, and it’s then ready to use as a direct substitute for buttermilk.
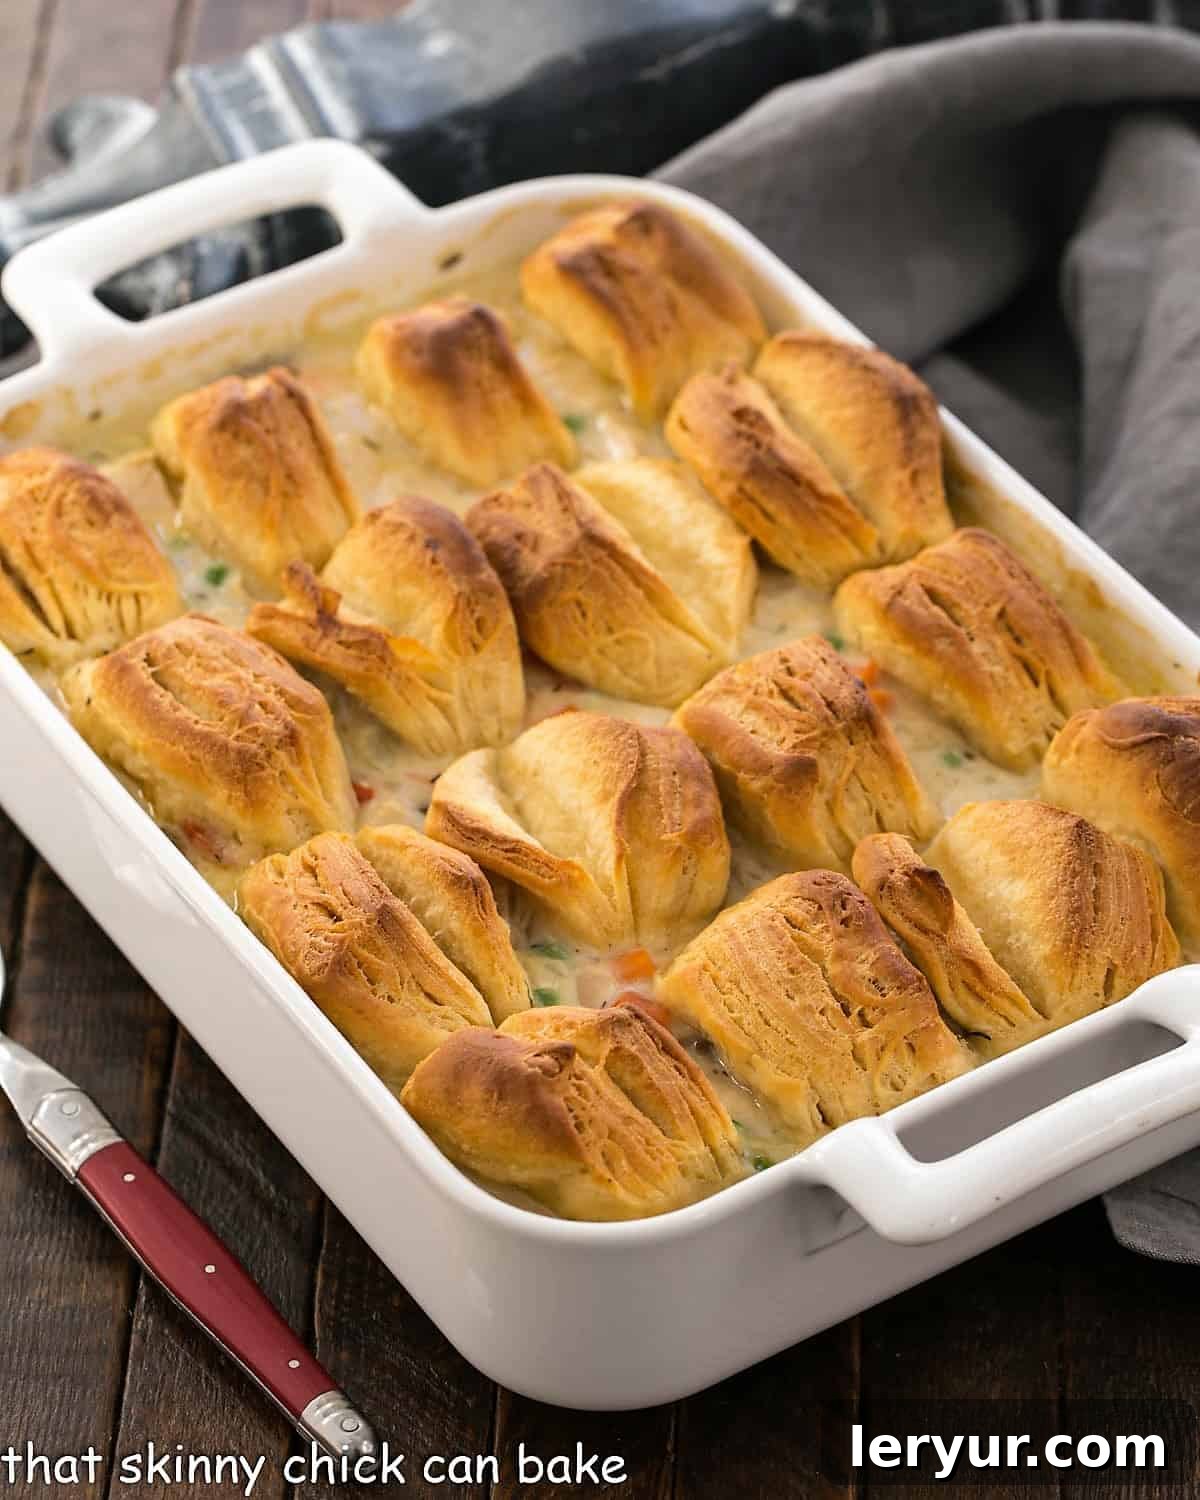
Frequently Asked Questions About Chicken Pot Pie
Got questions about making the perfect Chicken Pot Pie? We’ve got answers!
Since the filling for this easy chicken pot pie is already hot and the chicken is precooked, the baking time is primarily focused on cooking the biscuits to golden perfection. Typically, it takes about 12-18 minutes in a hot oven (usually 400-425°F or 200-220°C). The goal is for the biscuits to rise, become puffed, and turn a beautiful golden brown. As a crucial reminder, always ensure the filling is hot before adding the biscuits and placing the pot pie in the oven. This heat from below is vital for cooking the biscuit bottoms.
Before removing the casserole, gently lift one of the biscuits with a fork to check its underside. If it appears doughy or undercooked, continue baking for another 5 minutes or until the bottom is cooked through and lightly browned. Every oven varies, so keep an eye on it!
While our Homemade Chicken Pot Pie uses milk (not heavy cream) for the sauce and is packed with vegetables and lean protein, the biscuit topping does add a significant amount of calories and fat. It’s best to view a chicken pot pie casserole as a hearty comfort food meal, perfect for an occasional indulgence, rather than an everyday healthy entree if calorie intake is a primary concern. Alternative toppings can reduce the calorie count slightly. Options include canned biscuits (though often high in fat), puff pastry, or a single pie crust. A single pie crust is often the least caloric of these traditional pastry toppings.
To make it a bit lighter, you could focus on maximizing the vegetables, using leaner chicken cuts, and choosing a lighter topping. However, for true comfort, don’t shy away from enjoying this classic as intended!
Reheating chicken pot pie can be done effectively using either a microwave or an oven, depending on your preference for crispness. For a quick reheat, scoop out your desired serving and microwave it for 1-2 minutes, or until heated through. Be aware that the biscuit topping may become soft in the microwave.
For best results, especially if you want to maintain a crispy topping, reheat the pot pie in a preheated oven. Place your serving or the entire casserole (covered loosely with foil if the biscuits are already browned enough) in a 300°F (150°C) oven until it’s heated through, usually around 15-25 minutes for a single serving, longer for a whole casserole. Uncover for the last few minutes if you want the biscuits to crisp up further.
Absolutely! This Homemade Chicken Pot Pie is an excellent meal prep option. You can prepare the entire filling (chicken, vegetables, and sauce) and store it in an airtight container in the refrigerator for up to 3 days. When ready to bake, transfer the filling to your casserole dish, rewarm it slightly if needed, then prepare and add your fresh biscuits before baking as directed. You can also assemble the entire casserole (filling and uncooked biscuits) and refrigerate it for a few hours before baking. For longer storage, see the freezing tips below.
Yes, chicken pot pie freezes beautifully! There are a couple of ways to do this:
- Freeze the Filling: Prepare the filling completely, allow it to cool, then transfer it to freezer-safe containers or bags. It can be frozen for up to 3 months. Thaw overnight in the refrigerator, then rewarm slightly, transfer to a casserole dish, top with fresh biscuits, and bake.
- Freeze Assembled (Unbaked): Assemble the entire pot pie with the uncooked biscuits in a freezer-safe casserole dish. Cover tightly with plastic wrap and then foil. Freeze for up to 2-3 months. When ready to bake, you can bake it from frozen (though it will take significantly longer, around 60-90 minutes, covered for the first half) or thaw it in the refrigerator overnight before baking as usual. The biscuits might not rise quite as much if baked from frozen, but it’s still a convenient option.
Serving Suggestions for Your Perfect Pot Pie
Since this rich and savory Chicken Pot Pie already provides a balanced combination of meat, vegetables, and starch, it truly stands as a complete meal in a single casserole. However, a light side dish can beautifully complement its hearty nature and add a refreshing contrast to its creamy texture. Here are a few ideal companions:
- Best Caesar Salad Recipe: A crisp, zesty Caesar salad offers a delightful counterpoint to the richness of the pot pie.
- Kale Salad with Cranberries: The earthy notes of kale paired with the sweetness of cranberries and a tangy vinaigrette make for a vibrant and healthy accompaniment.
- Strawberry Spinach Salad: A light and fruity salad can provide a refreshing burst of flavor that cleanses the palate.
- Roasted Green Beans: Simple, tender-crisp roasted green beans with garlic and Parmesan are a classic and easy vegetable side.
- Explore more of my Best Chicken Recipes for other delicious meal ideas!
Stay in touch through social media @ Instagram, Facebook, and Pinterest. Don’t forget to tag me when you try one of my recipes! And if you love the results, please give it a 5-star rating in the recipe card below.
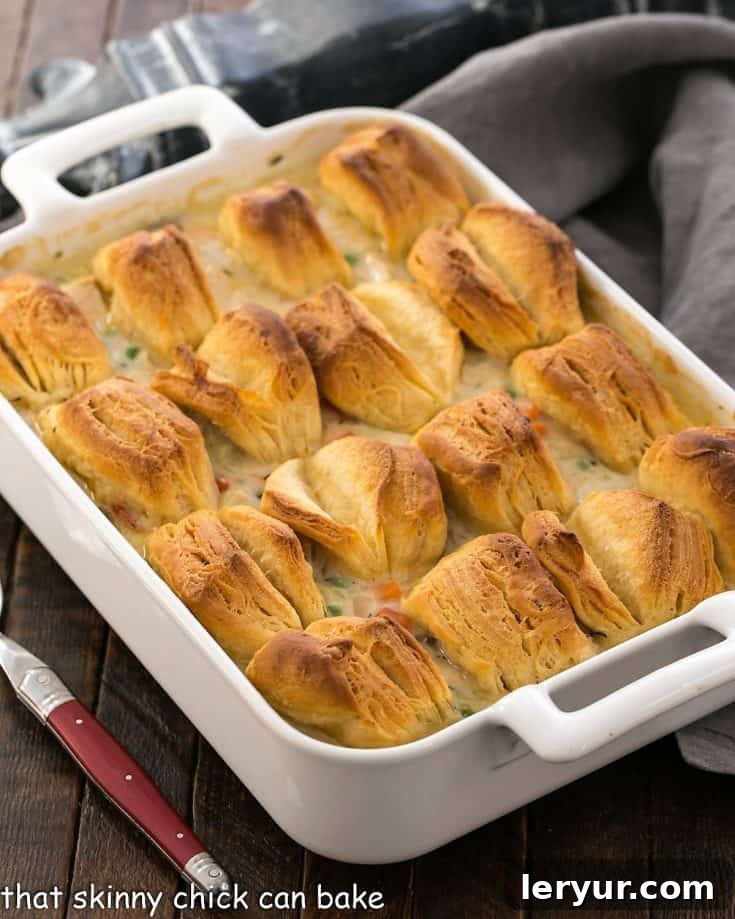
Homemade Chicken Pot Pie with Biscuits
30 minutes
30 minutes
1 hour
8 servings
A rich and delicious Homemade Chicken Pot Pie topped with flaky homemade buttermilk biscuits for the ultimate comfort food experience.
(46 Reviews)
Ingredients
For the Chicken Pot Pie Filling:
- 4 boneless, skinless chicken breasts, poached or roasted and chopped (about 4-5 cups)
- 2 cups chicken broth
- 1-2 tablespoons olive oil
- 1 medium onion, finely chopped
- 4 carrots, peeled and sliced or diced
- 2 stalks of celery, sliced or chopped
- ½ red bell pepper, diced (optional, for color and sweetness)
- 8 ounces button mushrooms, halved or quartered
- Salt and freshly ground black pepper, to taste
- 4 tablespoons unsalted butter
- ½ cup all-purpose flour (Wondra flour is recommended for a smoother sauce)
- 1 ½ cups milk (whole milk for richness)
- 1 teaspoon fresh thyme leaves, finely chopped
- 3 tablespoons dry sherry (optional, for enhanced flavor)
- 1 cup frozen peas, thawed
For the Herbed Goat Cheese Biscuits (adapted from Art Smith, or use canned):
(Alternatively, use one 16.3 oz can of Pillsbury Grands Buttermilk Flaky Biscuits, cut in half and placed cut-side down across the surface of the casserole.)
- 2 cups all-purpose flour
- 2 ½ teaspoons baking powder
- 1 ¼ teaspoon salt
- 4 tablespoons cold unsalted butter, cut into small pieces
- 4 tablespoons (2 ounces) good quality herb and garlic goat cheese, crumbled or cut into small pieces
- 1 cup cold buttermilk
- About 1 tablespoon melted butter to brush on biscuits (for a golden finish)
Instructions
- Prepare Vegetables: Heat 1-2 tablespoons of olive oil in a large Dutch oven or heavy-bottomed pot over medium heat. Add the chopped onions, celery, and carrots. Sauté for about 5-7 minutes until they begin to soften.
- Add Remaining Veggies: Stir in the mushrooms and red bell pepper (if using). Continue to cook for another 5-8 minutes until all the vegetables are tender. Season with a pinch of salt and freshly ground black pepper. Remove the cooked vegetables from the pot and set aside in a bowl.
- Make the Roux: In the same pot, melt the 4 tablespoons of butter over medium heat. Once melted, sprinkle in the ½ cup of flour and whisk continuously for about 1 minute to create a roux, cooking out the raw flour taste.
- Whisk in Liquids: Slowly and gradually whisk in the 1 ½ cups of milk, followed by the 2 cups of chicken broth. Continue whisking constantly to prevent lumps until the sauce begins to thicken and is smooth.
- Season the Sauce: Stir in the fresh thyme leaves. Continue to cook and whisk for another minute or two until the sauce reaches your desired thickness. Add the dry sherry (if using) and stir well. Taste the sauce and adjust seasonings with salt and pepper as needed.
- Combine Filling: Add the chopped cooked chicken, the reserved cooked vegetables, and the thawed frozen peas to the sauce. Stir gently until all ingredients are well combined and coated in the creamy sauce. Pour this hot filling into a 9×13 inch (or similar sized) casserole dish.
- Prepare for Baking & Biscuits: Preheat your oven to 425°F (220°C). While the oven preheats, prepare your biscuits.
- Make Biscuit Dough (if homemade): In a medium bowl, sift together the 2 cups of flour, 2 ½ teaspoons of baking powder, and 1 ¼ teaspoon of salt. Add the cold butter pieces and crumbled goat cheese. Using your fingers or a pastry blender, quickly work the butter and goat cheese into the dry ingredients until the mixture resembles coarse cornmeal with some larger, pea-sized pieces of butter/cheese.
- Form the Dough: Pour in the 1 cup of cold buttermilk. Gently mix with a fork or your hands until just combined and a shaggy dough forms. Be careful not to overmix. If the dough is too dry, add an extra tablespoon of buttermilk, one at a time, until it comes together.
- Cut & Top: Turn the dough out onto a lightly floured surface. Gently pat or roll the dough to about ¾ to 1 inch thickness. For extra flakiness, fold the dough over itself 2-3 times before cutting. Use a floured 2-inch biscuit cutter to cut out rounds (you should get about 10-12). Arrange the biscuits over the hot chicken pot pie filling in the casserole dish. If using canned biscuits, cut them in half and arrange cut-side down. Brush the tops of the biscuits with melted butter. Place the casserole dish on a baking sheet to catch any potential drips.
- Bake: Bake in the preheated oven for 12-18 minutes, or until the biscuits are beautifully golden brown and have puffed up, and the filling is bubbling. Check the underside of a biscuit to ensure it’s cooked through and not doughy.
Notes
- If you don’t have goat cheese on hand, you can use my traditional buttermilk biscuit recipe for a delicious topping. For a quick shortcut, use canned biscuits from the refrigerator section of your grocery store. I recommend cutting canned biscuits in half and placing them cut-side down over the casserole filling for better coverage and texture.
- Instead of poaching or roasting chicken specifically for this recipe, you can save time by using the meat from a pre-cooked rotisserie chicken.
- This Chicken Pot Pie recipe is adapted from a fantastic base by Pam Anderson.
- For the best flaky biscuits, ensure all your dairy and butter are very cold. Work quickly to incorporate the butter into the flour.
- Always add biscuits to a piping hot filling to prevent soggy bottoms.
Recommended Products
As an Amazon Associate and member of other affiliate programs, I earn from qualifying purchases.
- OXO Cutting Board
- OXO Vegetable Peeler
- Wondra Flour
Nutrition Information:
Yield:
8
Serving Size:
1 Serving
Amount Per Serving:
Calories: 688Total Fat: 31gSaturated Fat: 14gTrans Fat: 1gUnsaturated Fat: 15gCholesterol: 123mgSodium: 1457mgCarbohydrates: 61gFiber: 5gSugar: 8gProtein: 40g
HOW MUCH DID YOU LOVE THIS RECIPE?
Please leave a comment on the blog or share a photo on Pinterest