
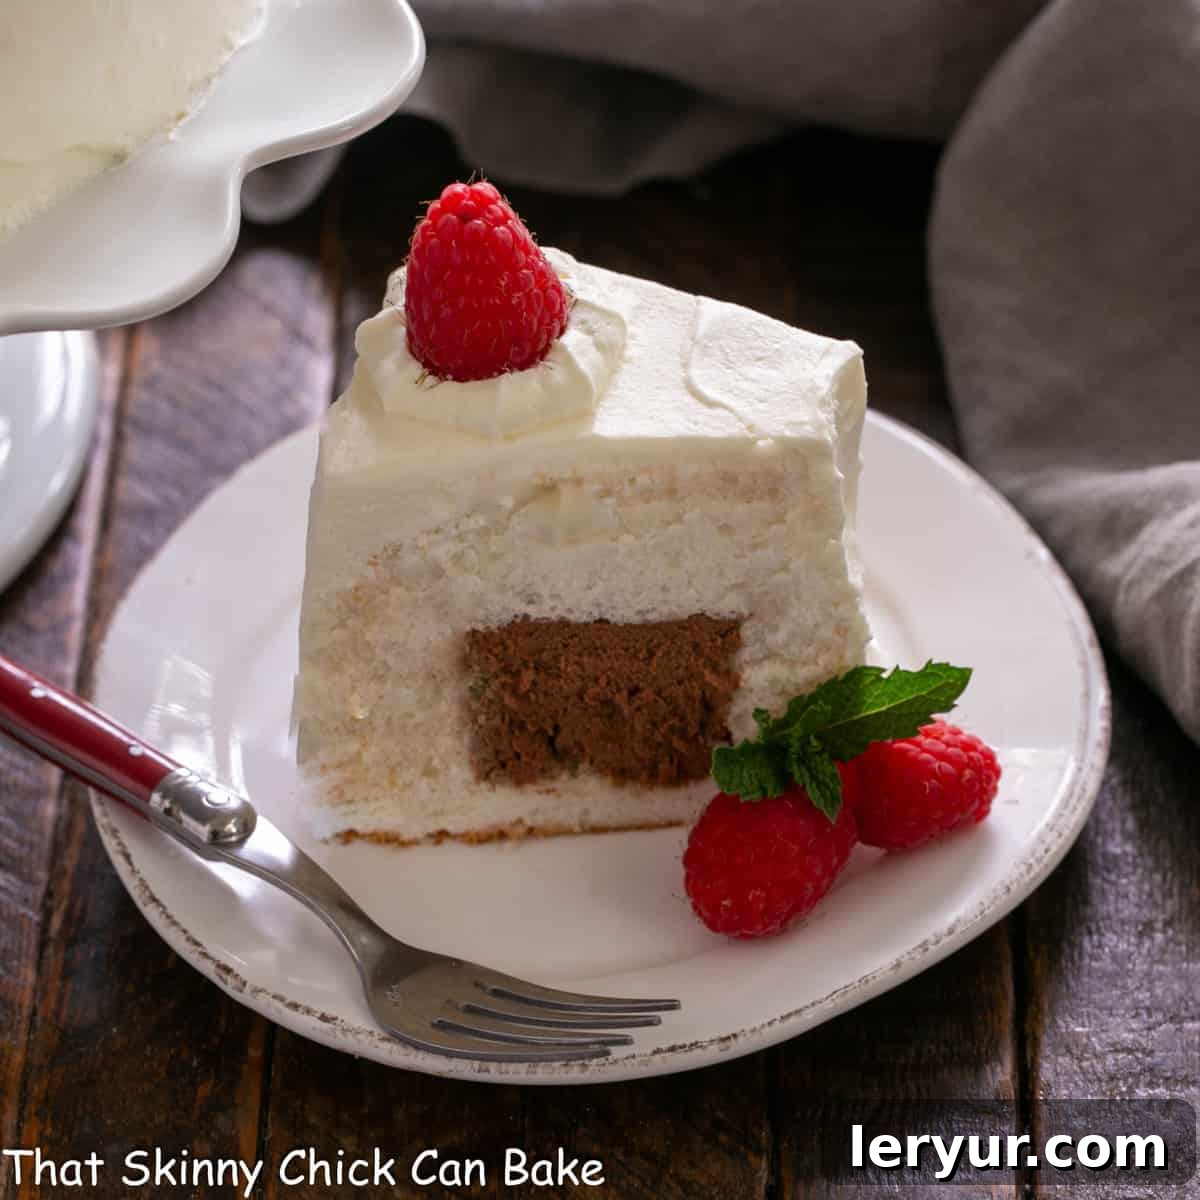
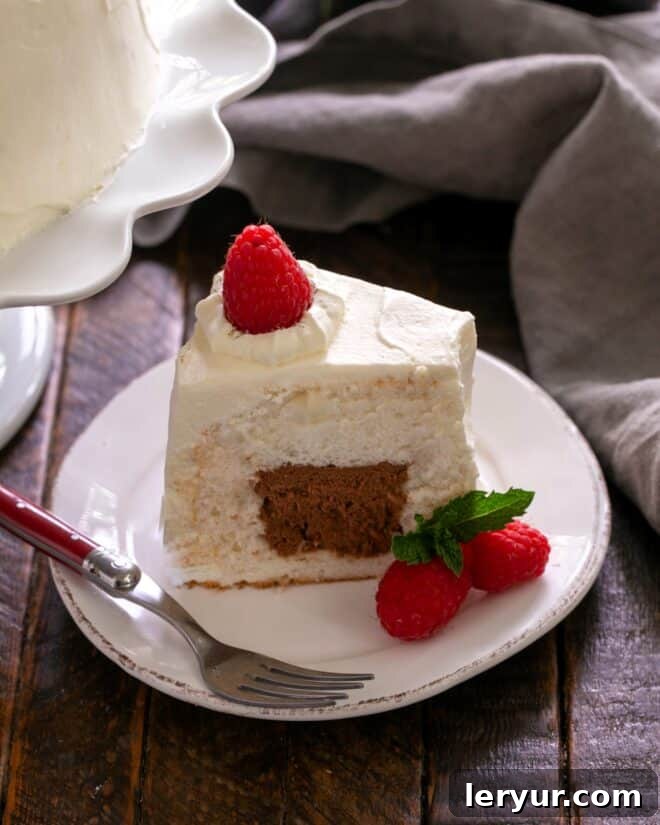
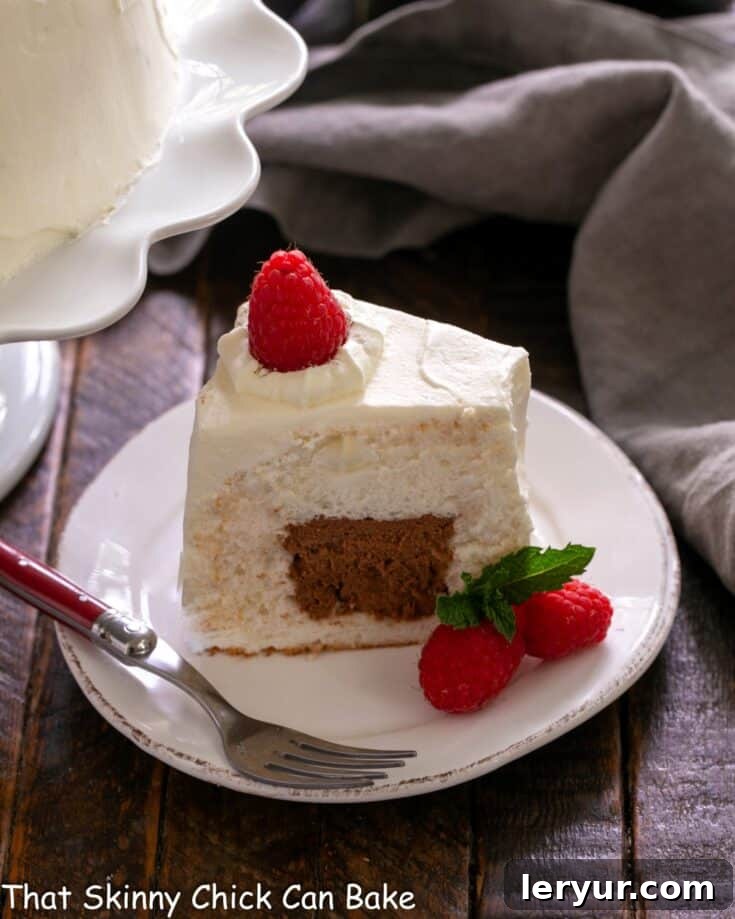
Looking for an extraordinary dessert that will captivate your guests and satisfy every chocolate craving? This Mousse Filled Angel Food Cake is a revelation! It appears as a classic, ethereal angel food cake on the outside, but with the very first slice, it unveils a luxurious, velvety chocolate mousse surprise within. This unique twist transforms a beloved light cake into an irresistible decadent treat, perfect for any special occasion or simply to elevate your everyday dessert experience.
While the exterior of this creation might resemble your typical, cloud-like Angel Food Cake Recipe, the real magic lies hidden beneath its pristine surface. A rich, egg-free chocolate mousse filling creates an unforgettable contrast of textures and flavors that truly steals the show! Imagine the delicate, airy crumb of angel food cake meeting the smooth, intense richness of chocolate mousse – it’s a match made in dessert heaven that promises to delight with every forkful.
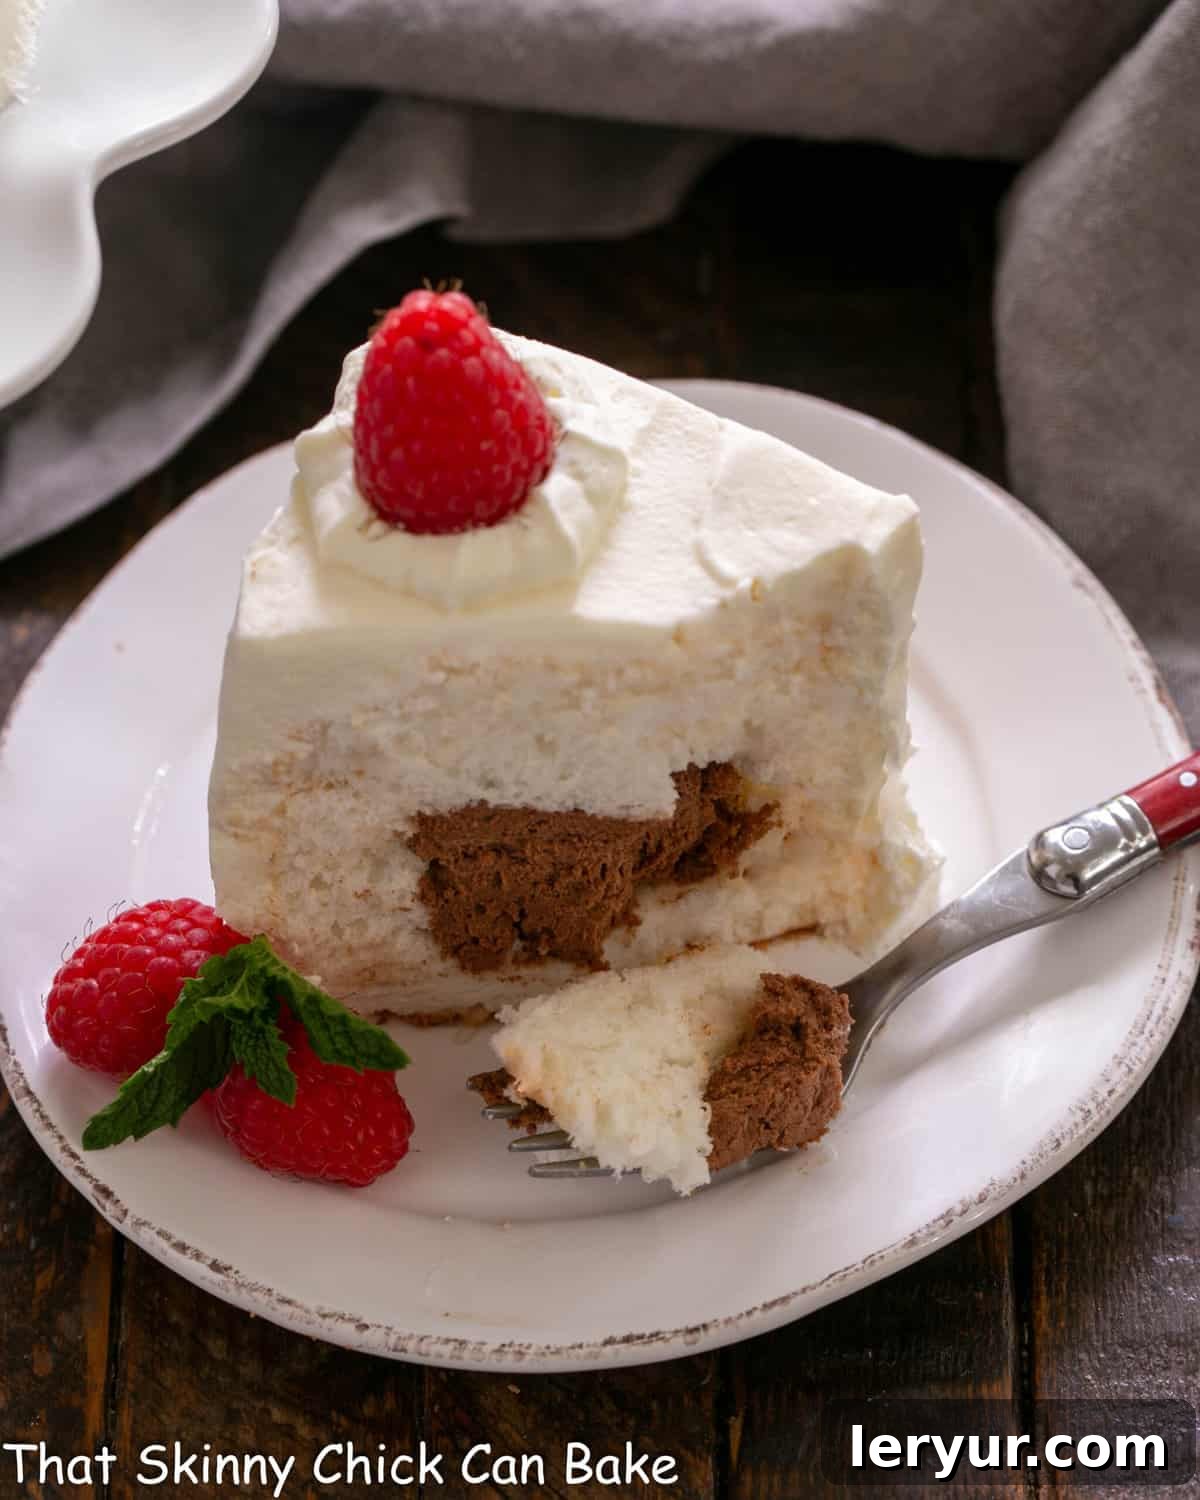
Why This Mousse Filled Angel Food Cake is a Must-Make
This exquisite Chocolate Mousse Angel Food Cake has a cherished history in my family, dating back to when my children were small. It was a crowd-pleaser then, and after misplacing and finally meticulously recreating the recipe for my blog in 2011 (which admittedly had just two dark photos and minimal details!), I knew it was time for a proper revival. This updated version brings all the joy and deliciousness back to the forefront, proving that some recipes are truly timeless.
Here’s why this elevated angel food cake should be next on your baking list:
- An Elevated Classic for Everyone: If your family adores the light, incredibly airy texture of traditional angel food cake, this enhanced version with its hidden chocolate treasure will undoubtedly be a huge hit. It takes a beloved classic and introduces an exciting element that makes it even more special.
- A Chocoholic’s Dream: Let’s be honest, a plain angel food cake, while delightful, typically doesn’t send a true chocoholic into a frenzy. However, this mousse-filled angel food cake changes everything. The rich, creamy chocolate mousse center provides the deep cocoa satisfaction that chocolate lovers crave, transforming a simple cake into a decadent indulgence they won’t forget.
- Surprisingly Light Indulgence: Despite the luxurious whipped cream frosting and rich chocolate mousse filling, this dessert remains remarkably lighter than many other elaborate cake recipes. The delicate nature of the angel food cake provides a perfect balance, allowing you to enjoy a truly indulgent treat without feeling overly heavy. It’s the ideal dessert for gatherings where you want something impressive yet refreshingly light after a meal.
- Perfect for Any Occasion: Whether it’s a birthday, an anniversary, a holiday gathering, or just a weekend treat, this Mousse Filled Angel Food Cake fits seamlessly. Its elegant presentation and unexpected filling make it a fantastic centerpiece that will garner compliments and curiosity from all your guests.
- A Versatile Dessert Canvas: While the chocolate mousse is stellar, the concept of a filled angel food cake opens up a world of possibilities for future experiments. This recipe provides a solid foundation for creating other exciting variations down the line.
Prepare to impress and delight with this unforgettable dessert that combines the best of light baking with rich, chocolatey indulgence.
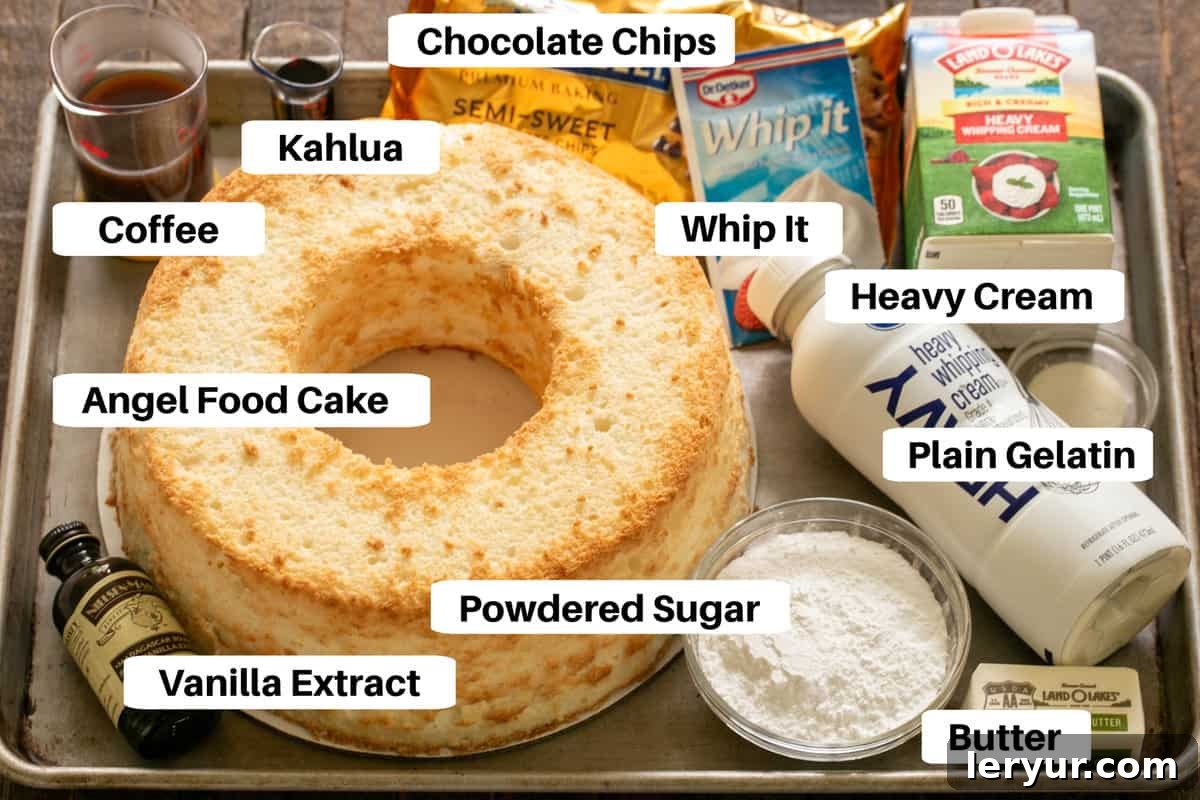
Essential Ingredient Notes for Your Mousse Filled Angel Food Cake
Crafting the perfect Mousse Filled Angel Food Cake begins with understanding the role of each ingredient. Here’s a detailed guide to ensure you achieve the best possible results:
- Angel Food Cake: The foundation of this spectacular dessert. You’ll need a large angel food cake, ideally one that serves 10-12 people, to accommodate the generous amount of mousse. If your cake is too small, you’ll end up with delicious leftover mousse – not necessarily a bad thing, but something to be aware of!
- Store-Bought vs. Homemade: While a high-quality bakery angel food cake is a convenient option, making your own homemade angel food cake allows for superior freshness and control over texture. If you opt for homemade, be prepared to stock up on eggs, as a traditional recipe typically calls for about 12 egg whites. Whichever you choose, ensure it is completely cooled before beginning the assembly process.
- Heavy Cream: This is a superstar ingredient, essential for both the rich chocolate mousse and the fluffy whipped cream frosting. Look for heavy cream or whipping cream with a butterfat content of 36% or higher. Higher fat content ensures a more stable, richer, and airier whipped cream that holds its shape beautifully. Cold cream whips best, so keep it chilled until you’re ready to use it.
- Semi-Sweet Chocolate: The heart of your chocolate mousse. You can use good quality semi-sweet chocolate chips or finely chopped semi-sweet chocolate bars. The quality of your chocolate will directly impact the flavor of your mousse, so choose wisely. Dark chocolate (around 60-70% cacao) can also be used for a more intense chocolate flavor, while milk chocolate would make it sweeter.
- Strong Coffee: Often referred to as chocolate’s best friend, strong brewed coffee doesn’t necessarily make your mousse taste like coffee, but rather intensifies and deepens the chocolate flavor. It brings out the subtle complexities in the cocoa, resulting in a richer, more profound chocolate experience. Ensure it’s freshly brewed and strong for the best effect.
- Kahlua (Coffee Liqueur): Similar to coffee, Kahlua enhances the chocolate notes, adding a sophisticated depth and a hint of a coffee-caramel essence. It complements the chocolate beautifully without overpowering it. If you prefer to avoid alcohol, you can substitute it with an equal amount of strong coffee or a splash of vanilla extract.
- Butter: I typically use salted butter in my baking as I find it balances sweetness, but unsalted butter works perfectly well too. If you opt for unsalted butter, remember to add a tiny pinch of salt when melting it with the chocolate. Salt acts as a flavor enhancer, bringing out the best in the chocolate.
- Plain Gelatin: This is a crucial stabilizing agent for your chocolate mousse, giving it that perfect light, airy yet firm texture. It prevents the mousse from becoming too runny, ensuring it holds its shape when sliced. Look for unflavored gelatin, such as Knox brand, in the baking aisle near the flavored Jello in most supermarkets. Proper blooming (softening in cold liquid) is key to its effectiveness.
- Powdered Sugar (Confectioners’ Sugar): Used to sweeten the whipped cream frosting, powdered sugar is ideal because its fine texture dissolves easily, preventing a gritty mouthfeel. It also contains a small amount of cornstarch, which naturally helps to stabilize the whipped cream, making it less likely to weep or deflate. Always sift powdered sugar before using to eliminate any lumps.
- Whip-It (Whipped Cream Stabilizer): This optional but highly recommended product, often found by Dr. Oetker, is a game-changer for whipped cream. It’s usually located in the baking aisle of major supermarkets. Whip-It significantly helps to maintain the structure of your whipped cream, preventing it from breaking down or deflating, especially if the cake won’t be consumed immediately. If you plan to serve the cake within a few hours, you might skip it, but for extended freshness, it’s a great addition.
- Vanilla Extract: Always opt for real vanilla extract over artificially flavored versions. The pure, rich flavor of real vanilla makes a noticeable difference in both the mousse and the whipped cream, adding a layer of warmth and complexity that artificial extracts simply cannot replicate.
With these carefully selected ingredients, you’re well on your way to creating a truly unforgettable Mousse Filled Angel Food Cake that’s both impressive and delicious.
Step-by-Step Guide: Crafting Your Mousse Filled Angel Food Cake
Creating this show-stopping Mousse Filled Angel Food Cake is a surprisingly straightforward process. Follow these detailed steps to assemble your stunning dessert:
Frequently Asked Questions About Mousse Filled Angel Food Cake
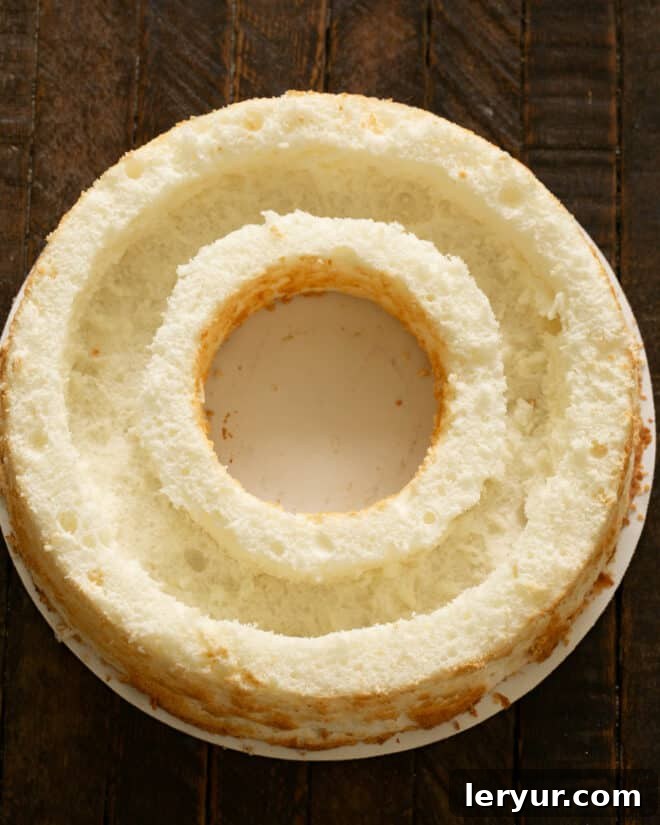
Filling an angel food cake is a simple yet effective way to add an extra layer of flavor and texture. The process involves carefully removing a portion of the cake to create a cavity for your chosen filling. First, use a long, serrated knife to gently slice off about 1 inch from the top of the cake, reserving this piece. Next, using your hands or a small knife, carefully hollow out the inner part of the cake, creating a “trench.” It’s crucial not to break through the bottom or sides, leaving about a 1-inch border. Once the trench is formed, spoon your desired filling, like our luscious chocolate mousse, into the cavity. Finally, gently replace the reserved top slice of cake, pressing it lightly to secure it. This method ensures your filling is beautifully encased, creating that wonderful surprise element when the cake is cut.
Slicing an angel food cake, especially one that’s filled and frosted, requires a specific technique to prevent it from squishing or tearing. The most effective tool is a long, thin serrated knife. Instead of pressing straight down, use a gentle sawing motion, allowing the serrations to do the work. This method allows the knife to glide through the delicate, airy structure of the cake without compressing it. A straight-edged knife will often smash the cake, leaving uneven and unappealing slices. For an even cleaner cut, you can lightly spray your knife with non-stick cooking spray or wipe it with a damp cloth between slices, especially if the mousse or frosting is sticky.
Storing a filled angel food cake differs significantly from storing a plain one due to the perishable nature of the mousse and whipped cream. While a plain angel food cake can be covered with plastic wrap and kept at room temperature for 2-3 days (and up to 4 additional days in the refrigerator, or frozen for up to 3 months), a mousse-filled and whipped cream-frosted cake absolutely must be refrigerated. It is generally best consumed on the day it’s assembled for optimal freshness and texture. However, it will remain safe and delicious to eat for about 2-3 days when properly refrigerated. To prevent the plastic wrap from sticking to the delicate whipped cream frosting, insert a few toothpicks into the top of the cake before covering. This creates a small tent, keeping the plastic elevated and protecting your beautiful frosting.
Yes, you can absolutely prepare the chocolate mousse ahead of time! In fact, it’s often recommended. The mousse needs time to chill and firm up to the right consistency before being used as a filling. You can make the mousse a day in advance, cover it tightly with plastic wrap (pressing the wrap directly onto the surface of the mousse to prevent a skin from forming), and refrigerate it. Before filling the cake, give it a gentle whisk if it seems too stiff, or let it sit at room temperature for 10-15 minutes to soften slightly for easier spreading. This advanced preparation can significantly streamline your cake assembly process on the day of serving.
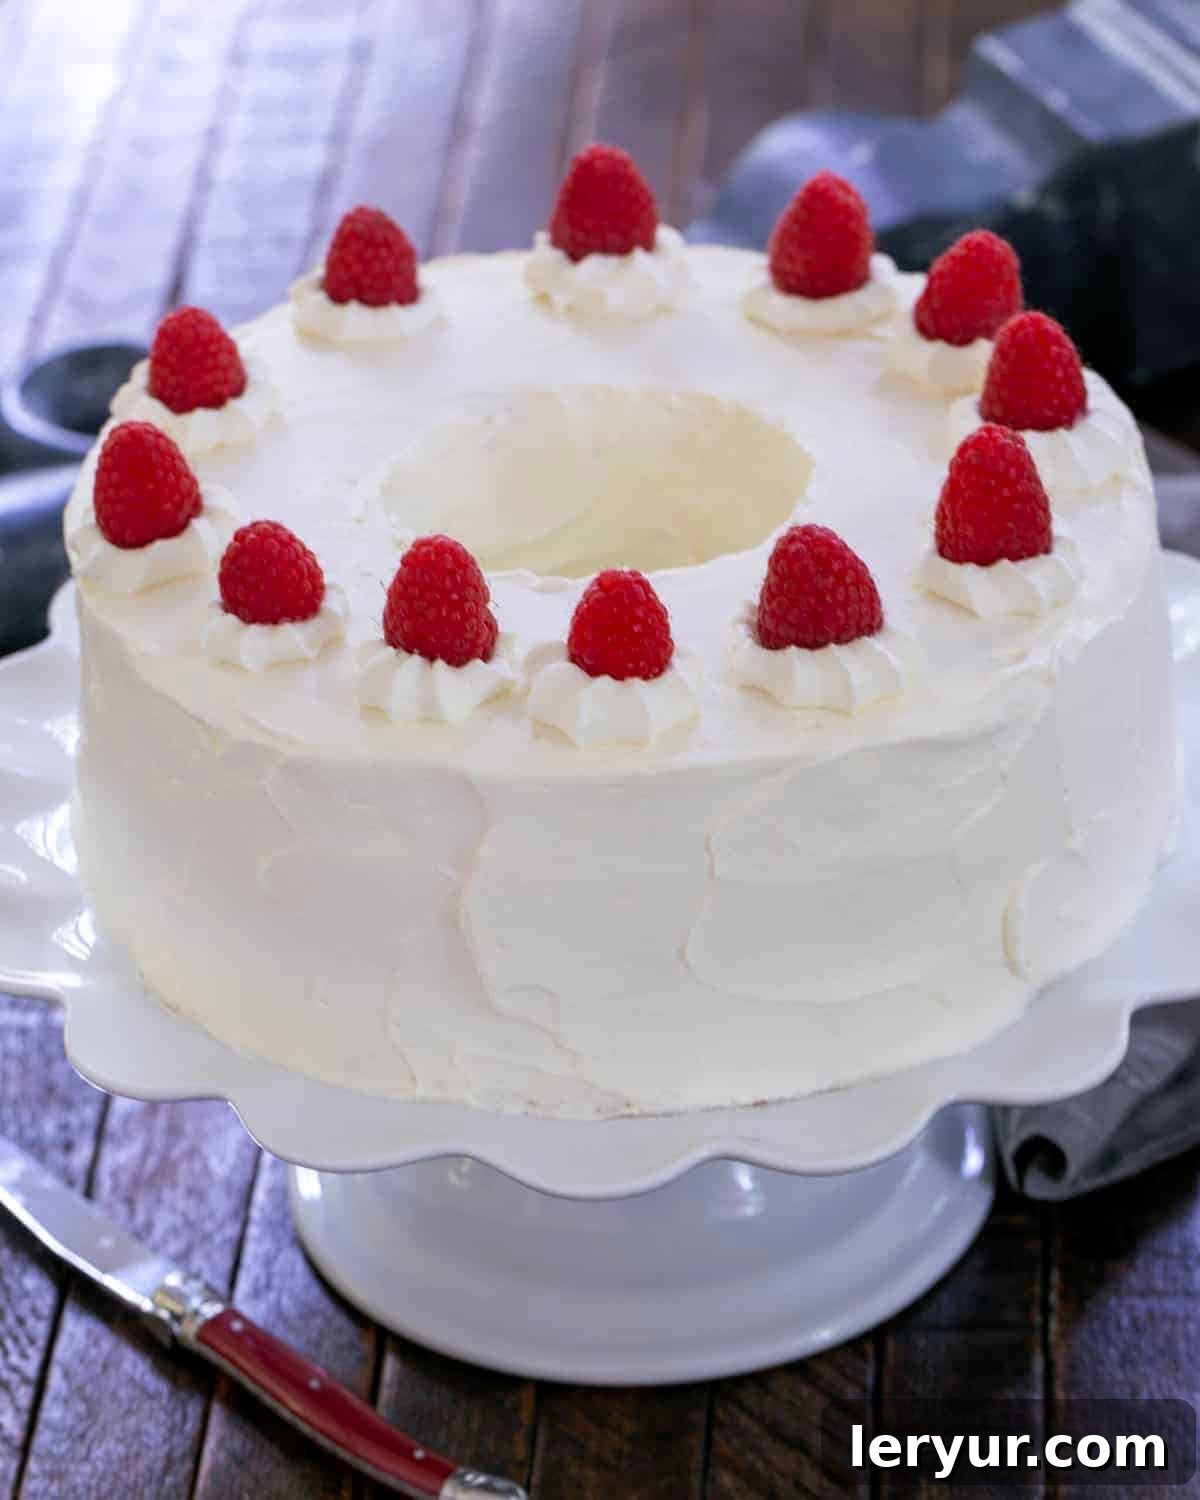
Garnishing your Mousse Filled Angel Food Cake can enhance its visual appeal and add an extra layer of flavor. Fresh berries, such as raspberries, strawberries, or blueberries, are classic choices that offer a vibrant color contrast and a touch of tartness to balance the richness of the chocolate. A dusting of cocoa powder or powdered sugar over the whipped cream frosting provides an elegant finish. For more chocolate indulgence, shave some semi-sweet or dark chocolate over the top. Mint sprigs can also add a fresh, aromatic touch. Consider adding a few chocolate curls or small chocolate-covered espresso beans for an extra sophisticated look.
Expert Tips for Crafting the Perfect Angel Food Cake from Scratch
While this recipe focuses on filling an angel food cake, many of you might opt to bake your own homemade version. Angel food cake is notoriously delicate, but with these expert tips, you can achieve a perfect, cloud-like texture every time:
- PRO-Tip: Scrupulously Clean Equipment is Paramount: This is arguably the most critical tip for baking angel food cake. Any trace of oil, grease, or fat (even a tiny speck of egg yolk) on your mixing bowl or beaters will prevent the egg whites from whipping properly and achieving their full volume. Since a classic angel food cake requires 12 egg whites, you absolutely want to get it right the first time! Dedicate a clean, dry glass or metal bowl and spotless beaters for this task.
- Use the Right Pan: Always use a two-piece angel food cake pan, also known as a tube pan with a removable bottom. Crucially, do not grease the pan. The egg whites need to cling to the sides of the pan as they rise, and greasing it will cause the cake to deflate.
- PRO-Tip: Egg Separation Temperature vs. Whipping Temperature: Eggs separate best when they are cold, as the yolk is firmer and less likely to break. However, egg whites whip up with more volume and stability if they are slightly warmer, closer to room temperature. A good compromise is to separate your eggs when they are cold, then let the whites sit out for about 30-60 minutes to come to around 60°F (15-18°C) before whipping.
- Master Egg Separation with Three Bowls: To avoid contaminating your batch of whites, use the “three-bowl method.” Crack each egg over an empty bowl, letting the white fall into it while transferring the yolk to a separate “yolk bowl.” Once you’ve confirmed the white is yolk-free, transfer it to your main “whites bowl.” This way, if a yolk breaks, you only contaminate one white, not the entire batch.
- Whip Egg Whites Correctly: Start whipping the egg whites on low speed until they become foamy and bubbly. Then, gradually increase the speed to medium. Begin adding the granulated sugar very slowly, a tablespoon at a time, allowing it to dissolve into the whites. Continue whipping until they reach soft to medium peaks. They should be fluffy and glossy, holding their shape but still pliable, not stiff or dry in appearance. Overbeating can make the cake tough.
- Always Use Cake Flour: Cake flour is essential for the delicate, tender crumb of angel food cake. It has a lower protein content and less gluten than all-purpose flour, which prevents the cake from becoming chewy or dense. Sift the cake flour thoroughly before folding it into the egg whites to ensure a light, airy texture and prevent lumps.
- Gentle Folding is Key: Once the flour is sifted and ready, gently fold it into the whipped egg whites in several additions. Use a spatula and a light, upward motion, being careful not to deflate the precious air you’ve incorporated into the whites. The batter should remain fluid, droopy but not stiff, and should flow into the pan with the help of your spatula.
- Maintain Oven Temperature: Do Not Open the Oven Door! During baking, avoid opening the oven door, especially in the first 30-40 minutes. Fluctuations in temperature can cause the delicate structure of the cake to collapse, resulting in a dense cake. Trust the baking time and your oven.
- Test for Doneness (No Toothpick Test!): Unlike most cakes, the toothpick test is not reliable for angel food cake. To check for doneness, gently tap the top of the cake with your fingertip. If the indentation springs back immediately, the cake is done. If the indentation remains, bake for a few more minutes and recheck. The top should also be golden brown and slightly cracked.
- Cool Upside Down: This is a crucial step for maintaining the cake’s height and airy texture. Immediately after removing it from the oven, invert the pan. Many angel food cake pans have small “feet” for this purpose. If yours doesn’t, invert it over the neck of a glass bottle (like a soda or wine bottle). Cool the cake completely upside down for 2-3 hours before attempting to remove it from the pan. This prevents the cake from collapsing under its own weight as it cools.
By following these detailed tips, you’ll be well on your way to baking a truly magnificent Homemade Angel Food Cake that serves as the perfect base for our indulgent chocolate mousse filling.
More Irresistible Cake Recipes You’ll Love:
If you enjoyed the delightful experience of this Mousse Filled Angel Food Cake, you’re in for a treat with these other fantastic cake creations. Each recipe offers a unique flavor profile and baking adventure:
- Homemade Angel Food Cake: This is the very recipe I use and recommend as the perfect foundation for our mousse-filled masterpiece. If you’re inspired to bake your angel food cake from scratch, this comprehensive guide will walk you through every step to achieve that signature light and airy texture.
- Angel Cake Sandwiches: A fun and versatile dessert idea! These individual servings are perfect for parties or picnics, featuring slices of angel food cake filled with a creamy, fruity, or chocolatey spread, creating delightful handheld treats.
- Strawberry Angel Food Dessert: Light, fresh, and bursting with seasonal flavor. This simple yet elegant dessert layers angel food cake with fresh strawberries and whipped cream, making it an ideal choice for spring and summer gatherings.
- More of the Best Dessert Recipes: Explore a wider collection of my most cherished dessert recipes, ranging from cookies and pies to puddings and more. You’re sure to find your next favorite sweet indulgence here!
- More Best Cake Recipes: Dive deeper into the world of cakes with an array of recipes for every occasion. Discover everything from classic layer cakes to bundt cakes, cupcakes, and other filled delights that are guaranteed to impress.
Stay connected with me through social media! You can find me sharing daily deliciousness and baking inspiration on Instagram, Facebook, and Pinterest. Don’t forget to tag me when you whip up one of my recipes – I absolutely love seeing your culinary creations! And if this Mousse Filled Angel Food Cake brings a smile to your face, please consider giving it a 5-star rating in the recipe card below. Your feedback helps other bakers discover these delightful recipes!
Mousse Filled Angel Food Cake
30 minutes
1 hour
1 hour 30 minutes
12
A sweet, airy angel food cake filled with a creamy chocolate mousse
Ingredients
- One Homemade Angel Food Cake or large bakery angel food cake (see link in the post to my cake recipe)
For the Mousse:
- 1 ¾ cups heavy whipping cream
- 12 ounces semi-sweet chocolate chips (or finely chopped semi-sweet chocolate)
- 3 ounces strong brewed coffee
- 1 tablespoon Kahlua (optional, or substitute with more strong coffee)
- 4 tablespoons butter (salted or unsalted, add a pinch of salt if using unsalted)
- 1 teaspoon plain gelatin (such as Knox brand)
For the Whipped Cream Icing:
- 1 cup heavy whipping cream
- ½ cup powdered sugar, sifted
- 1 envelope Whip It, whipped cream stabilizer (optional, but recommended for stability)
- 1 teaspoon pure vanilla extract
Instructions
- If you are using a homemade angel food cake, ensure it is completely baked and cooled before proceeding with the recipe.
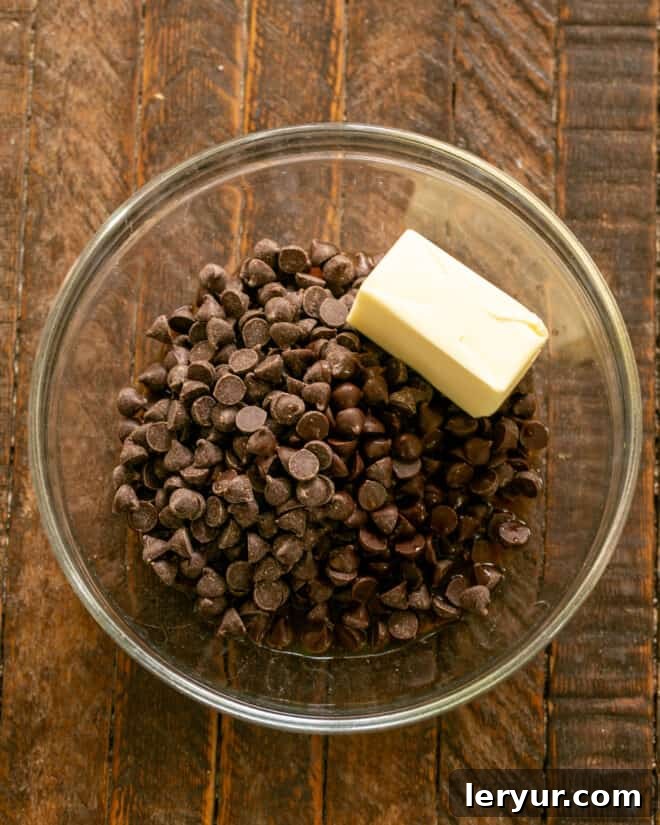
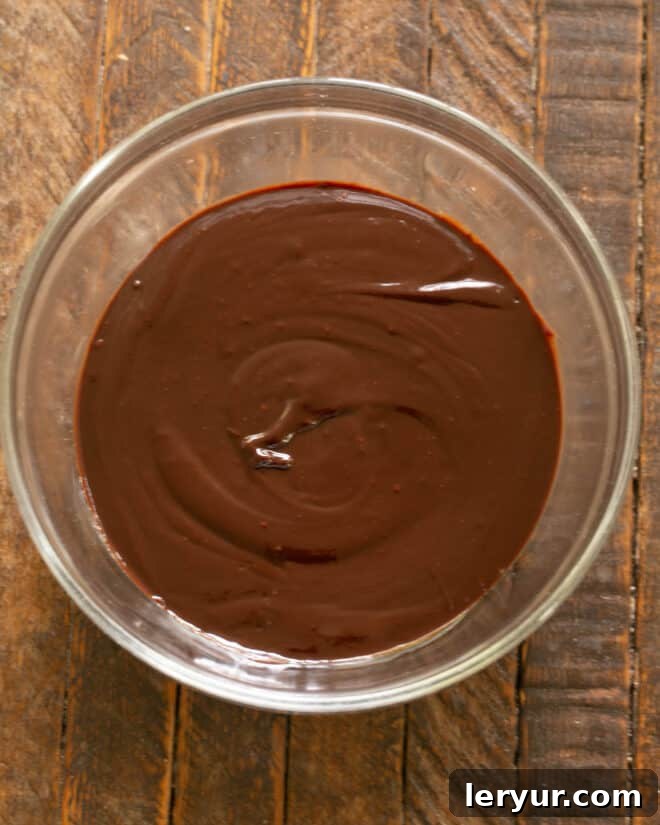
- In a microwave-safe bowl, combine the semi-sweet chocolate chips, strong coffee, Kahlua (if using), and butter. Melt the mixture in the microwave, stirring every 30 seconds until completely smooth and glossy. Allow the chocolate mixture to cool until it is just slightly warm to the touch.
- In a small bowl, sprinkle the plain gelatin over ¼ cup of the heavy whipping cream. Let it sit for 5 minutes to “bloom” or soften. Once bloomed, microwave for about 5-10 seconds (or gently warm on the stovetop) until the gelatin is fully dissolved and clear.
- Stir the dissolved gelatin mixture into the cooled chocolate mixture until thoroughly combined.
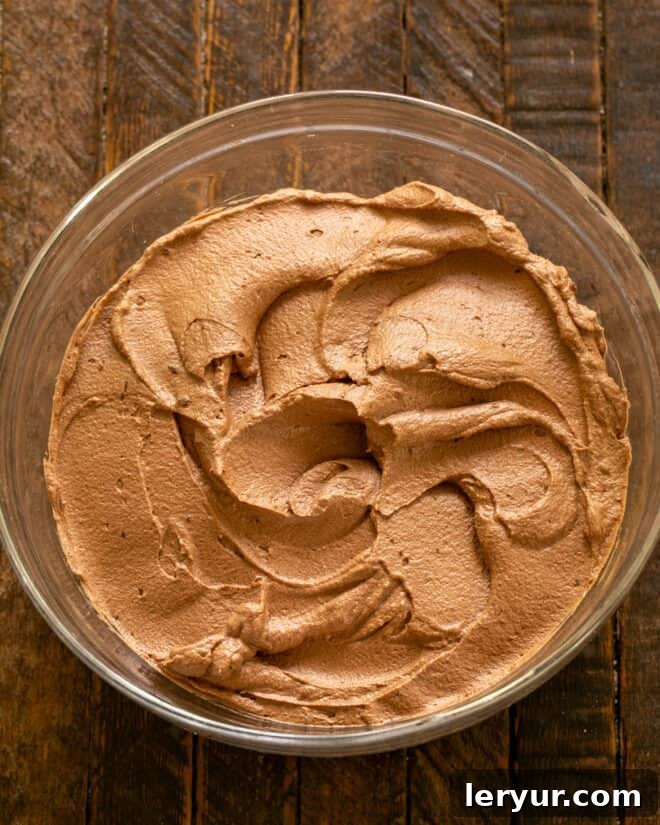
- In a separate, very clean bowl, whip the remaining 1½ cups of heavy whipping cream until soft peaks form. Gently fold ¼ cup of the whipped cream into the chocolate mixture to lighten it. Then, fold in half of the remaining whipped cream, followed by the last half, until just combined and no streaks remain. Be careful not to overmix. Refrigerate the chocolate mousse for approximately one hour to allow it to firm up slightly.
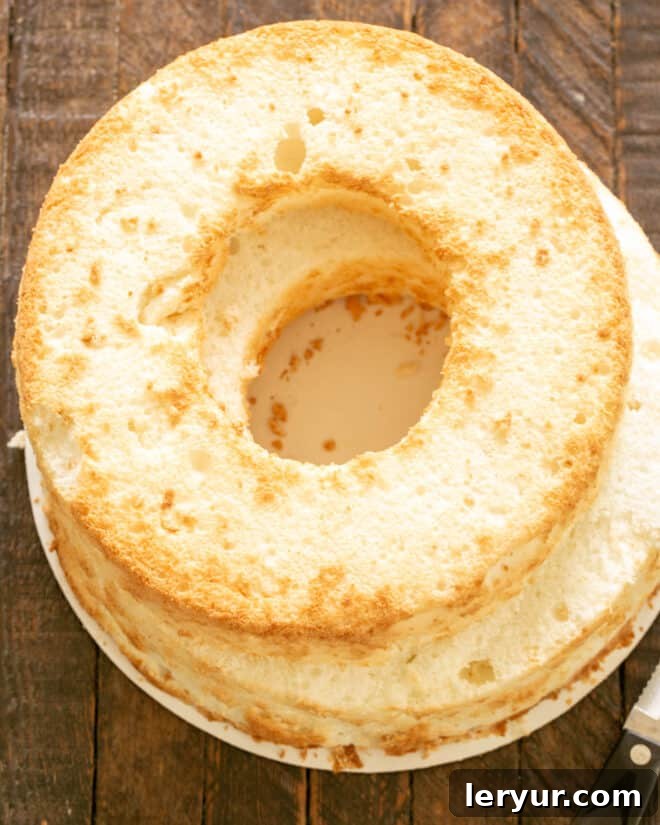
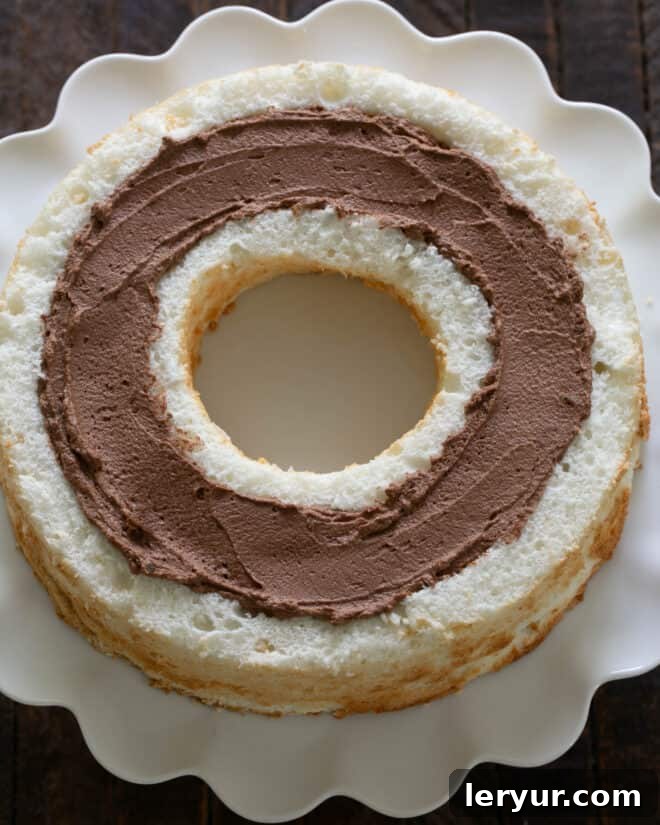
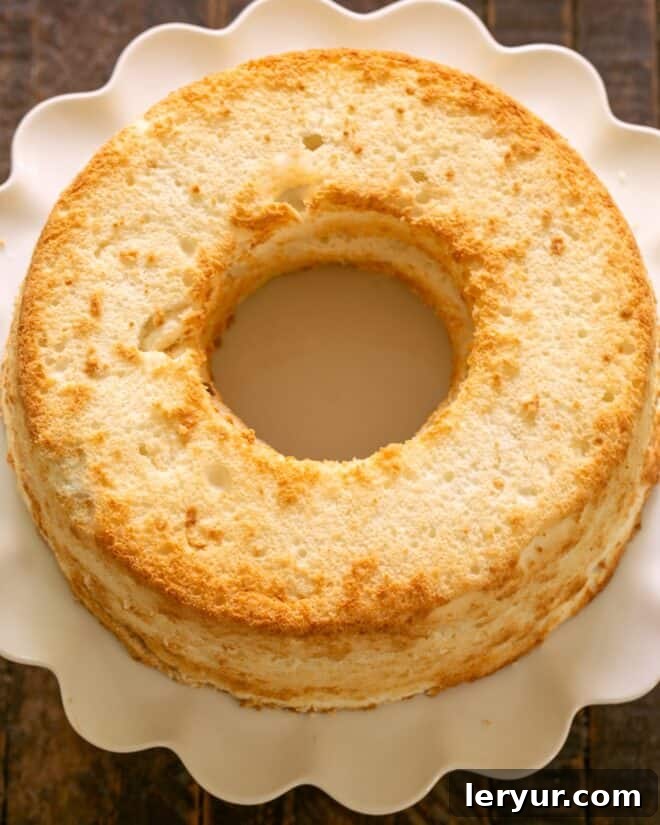
- To assemble the cake, use a long, serrated knife to carefully slice off the top of the angel food cake, about an inch down. Set this top layer aside. Next, carefully cut out a trench in the bottom section of the cake, leaving about an inch of cake around the bottom and sides. Save any removed cake pieces for snacking!
- Spoon the chilled chocolate mousse generously into the trench you’ve created in the angel food cake. Smooth the top of the mousse with a spatula, then carefully place the reserved top round of cake back onto the filled cake.
- To prepare the whipped cream icing, whip 1 cup of heavy cream with the sifted powdered sugar, Whip It (if using), and vanilla extract until soft to medium peaks form. Frost the entire cake with this creamy icing. Chill the cake in the refrigerator for at least 30 minutes before serving to allow the mousse to set completely and the frosting to firm up.
Notes
Store-bought angel food cakes can vary in size, but they are generally smaller than those made at home. If you use a store-bought cake, you might find yourself with extra chocolate mousse filling. Don’t let it go to waste! This leftover mousse makes a delightful standalone dessert. Serve it in small bowls, perhaps with a dollop of extra whipped cream, a sprinkle of cocoa powder, or some fresh chocolate shavings for a luxurious treat.
Recommended Products
As an Amazon Associate and member of other affiliate programs, I earn from qualifying purchases.
- KitchenAid 9-Speed Digital Hand Mixer
- Whip It
- Unflavored Knox Gelatin
Nutrition Information:
Yield:
12
Serving Size:
1
Amount Per Serving:
Calories: 393Total Fat: 32gSaturated Fat: 20gTrans Fat: 1gUnsaturated Fat: 10gCholesterol: 72mgSodium: 84mgCarbohydrates: 27gFiber: 2gSugar: 22gProtein: 3g
Thatskinnychickcanbake.com occasionally offers nutritional information for recipes contained on this site. This information is provided as a courtesy and is an estimate only. This information comes from online calculators. Although thatskinnychickcanbake.com attempts to provide accurate nutritional information, these figures are only estimates.
Varying factors such as product types or brands purchased can change the nutritional information in any given recipe. Also, many recipes on thatskinnychickcanbake.com recommend toppings, which may or may not be listed as optional and nutritional information for these added toppings is not listed. Other factors may change the nutritional information such as when the salt amount is listed “to taste,” it is not calculated into the recipe as the amount will vary. Also, different online calculators can provide different results.
To obtain the most accurate representation of the nutritional information in any given recipe, you should calculate the nutritional information with the actual ingredients used in your recipe. You are solely responsible for ensuring that any nutritional information obtained is accurate.
HOW MUCH DID YOU LOVE THIS RECIPE?
Please leave a comment on the blog or share a photo on Pinterest