
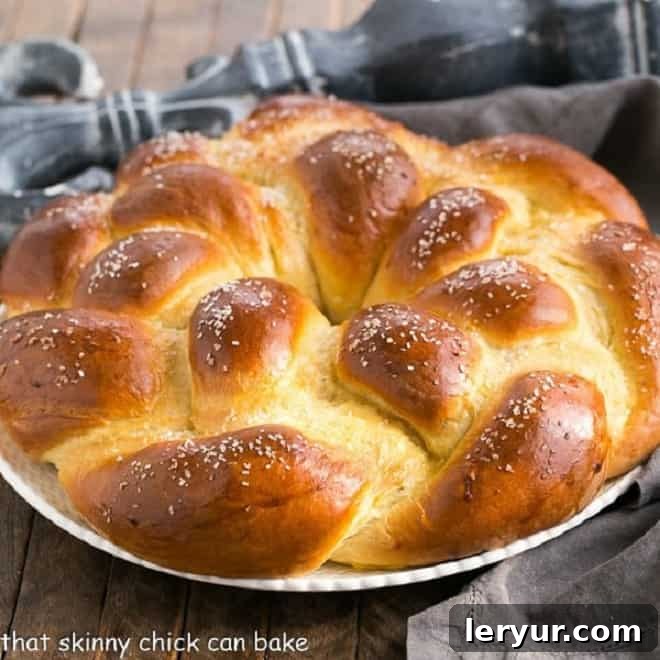
This Braided Easter Bread Recipe offers a delightful blend of tenderness, a subtle sweetness, and a captivating vanilla aroma, making it the perfect centerpiece for your Easter brunch or any festive spring gathering. More than just a simple loaf, this homemade delight is destined to become a cherished Easter tradition in your family. Serve it warm with a pat of butter and your favorite jam, or enjoy it toasted the next day for an equally enchanting breakfast.
Crafting this exquisite Easter Bread is an experience in itself, resulting in an incredibly tender, rich egg bread that promises to have everyone at your table vying for the very last slice. Its beautiful presentation and comforting flavor make it a truly spectacular addition to your holiday menu, elevating any meal with its artisanal charm.
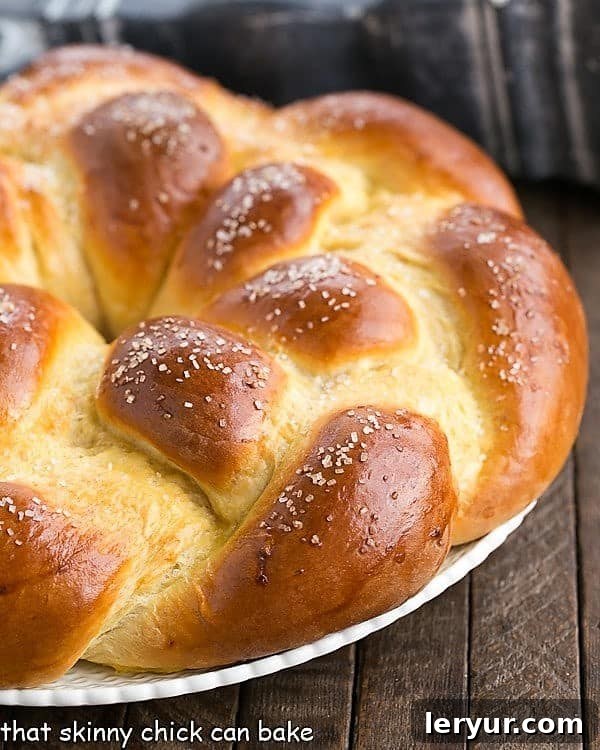
Why This Braided Easter Bread Will Be Your New Holiday Favorite
When the idea of baking a special Braided Bread for Easter morning first sparked, my initial thought was to weave vibrant, dyed Easter eggs directly into the dough for an extra festive touch. However, practicality soon set in. While my son, Nick, would be home for the holiday, a bread yielding 16 generous servings would still take more than a mere couple of days to disappear. And honestly, I had a slight concern about those hard-boiled eggs turning a bit, well, “funky” if left at room temperature for too long within the bread. So, I ultimately decided against that particular decorative addition, opting instead to focus on perfecting a simple yet utterly delicious holiday bread that truly shines on its own.
The beauty of this particular Sweet Braided Easter Bread lies in its exquisite balance of flavor and texture, combined with its remarkable versatility. It’s more than just a recipe; it’s an invitation to create lasting memories around your Easter table. Here’s why this recipe deserves a permanent spot in your annual holiday baking tradition:
- A Beloved Family Tradition: Prepare this recipe once, and if your family is anything like mine, its comforting taste and beautiful presentation will quickly become an anticipated part of your Easter celebration every single year. It’s the kind of bread that gathers everyone around.
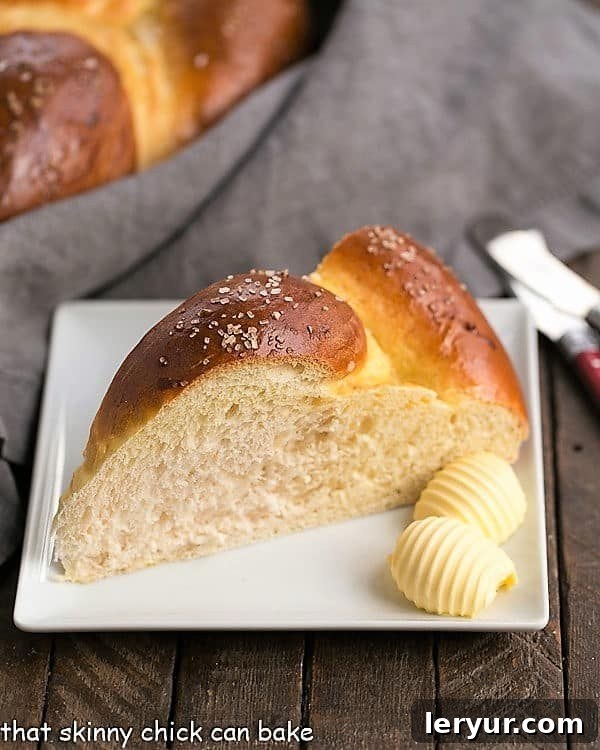
- Irresistibly Soft and Delicious: This sweet braided bread boasts an incredibly soft, cloud-like crumb that practically melts in your mouth. The delicate vanilla scent and subtle sweetness perfectly complement the rich, eggy flavor, making each bite a pure delight.
- Excellent for Freezing: Don’t let its generous size intimidate you! This bread freezes exceptionally well, making it super easy to save extra slices for later enjoyment. Simply wrap individual slices or the entire cooled loaf tightly in plastic wrap and then foil, and freeze for up to three months. When thawed, it retains its fresh taste and texture beautifully.
- The Ultimate French Toast: While divine on its own, any leftover slices of this Braided Egg Bread transform into the most extraordinary French toast. The slightly sweet, rich dough soaks up the custard perfectly, yielding a breakfast or brunch treat that is truly out of this world. It’s a fantastic way to extend the enjoyment of your holiday baking.
Mastering the Art of Braiding Dough: Expert Tips for a Perfect Loaf
I find immense satisfaction in the process of braiding dough, transforming simple strands into a beautiful, intricate loaf. However, I’ll admit, forming a perfectly round, braided wreath can sometimes give me pause. My last attempt at a round braided loaf was a delicious Finnish Pulla, where a decorative dough bow artfully concealed the juncture of the six strands, nicely camouflaging my amateur finishing touch. No such luck with Easter bread, as a bow felt more appropriate for Christmas than a spring holiday. This time, I had to rely solely on my braiding skills, which involved a bit of weaving and unweaving the strands a couple of times! But in the end, I think it turned out wonderfully, resulting in a truly massive and impressive loaf!
Don’t be intimidated by the braiding process; it’s a skill that improves with practice, and these expert tips will help you achieve a stunning result:
- Achieve Even Strands: To create a symmetrical, three-stranded braided loaf, precision is key. After your dough has completed its first rise and has been punched down, divide it into three equal-sized pieces. Using a kitchen scale for this step is highly recommended to ensure uniform braids and even baking.
- Form Consistent Ropes: Roll each of the three dough portions into a long, uniform 24-inch rope. It’s important that each rope maintains a consistent diameter from one end to the other, though slightly tapered ends are perfectly acceptable and can even help with the final joining. Aim for smoothness and elasticity.
- Prepare Your Surface: Line the three ropes on a lightly floured surface. You only need enough flour to prevent sticking, not so much that it dries out the dough. Arrange them side by side, parallel to each other.
- Initial Setup for Braiding: Traditionally, when plaiting bread dough, you might pinch the three ends at the top together to secure them. For this wreath-shaped bread, simply have the ends touching at the top; you’ll be joining them into a ring later.
- The Braiding Technique (Right Over Middle, Left Over Middle): If you’re familiar with braiding hair, this process will feel quite natural. If not, follow these steps:
- Start with the strand positioned on the **right**. Cross it over the **middle** strand, so it now lies between the original center strand and the strand on the left. The former right strand is now the new middle.
- Next, take the strand currently on the **left**. Cross it over the **new middle** strand, placing it between the current center strand and the strand on the right. The former left strand is now the new middle.
- Continue this alternating pattern, going back and forth, from right over middle to left over middle, forming a long, beautiful braid.
- As you braid, periodically do some gentle tweaking and adjusting to ensure there are no large gaps in the braid and that it maintains an even tension.
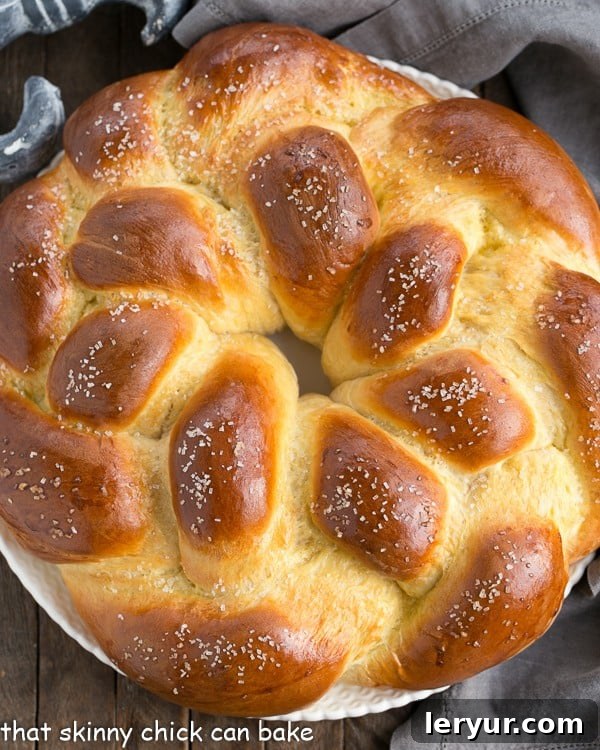
- Forming the Wreath and Sealing the Ends: Once your long braid is complete, carefully bring the two ends together to form a perfect ring or wreath shape. Gently pinch and press the loose ends from each side of the braid firmly together to seal them. Don’t worry if it’s not absolutely seamless; a little trimming of excess dough is perfectly fine if needed. Remember, homemade bread has a rustic charm, and its incredible taste will far outweigh any minor imperfections in its appearance!
- The Golden Sheen (Egg Wash): After the final rise, brush the dough generously with an egg and water glaze. This essential step gives your finished bread a gorgeous, golden-brown crust and a beautiful, inviting sheen that makes it truly irresistible.
- Finishing Touches: I love to sprinkle my braided Easter bread with coarse sanding sugar for an extra sparkle and subtle crunch. However, feel free to customize! You could use festive Easter-colored sugar, add a savory touch with sesame seeds, or simply leave it plain for a classic look.
Step-by-Step Guide: Crafting Your Perfect Braided Easter Bread
Creating this magnificent Braided Easter Bread, while impressive in appearance, follows the fundamental principles of any classic yeast bread. Don’t let the braiding intimidate you; it’s a straightforward process that anyone can master with a little guidance. Here’s a comprehensive breakdown of how to bring this delicious creation to life:
- Prepare the Dough: The journey begins with combining your ingredients to form a smooth, elastic dough. This initial mixing and kneading phase is crucial for developing the gluten structure, which gives the bread its signature chewy yet tender texture. Ensure all ingredients are at the right temperature for optimal yeast activity. After mixing, allow the dough to complete its first proofing. This is where the yeast works its magic, causing the dough to double in size and develop its rich flavor.
- Shape the Strands: Once your dough has beautifully risen, gently punch it down to release the air. Then, divide the dough into three equal portions – using a kitchen scale here ensures consistency. Roll each portion into a long, uniform rope of approximately 24 inches. The goal is even thickness along the length of each rope for a symmetrical braid.
- Master the Braid: Arrange your three ropes side by side on a parchment-lined baking sheet. Now comes the fun part: braiding! Follow the “right over middle, left over middle” technique (detailed in the “Expert Tips” section above) to create a beautiful, even braid. Take your time, adjusting the strands as needed to prevent large gaps.
- Form the Wreath: Once the braid is complete, carefully bring the two ends of the braided rope together to form a festive ring or wreath shape. This circular form is highly symbolic for Easter, representing eternity and renewal.
- Secure the Ends: Pinch the ends of the braid firmly together to create a seamless connection. Don’t be afraid to press them together well; a secure join will prevent the bread from separating during baking. A little bit of trimming can help achieve a neater connection.
- Second Proof, Glaze, and Bake: Cover your formed wreath with a clean tea towel and allow it to undergo a second, shorter proofing period. This allows the dough to relax and rise once more, contributing to a lighter texture. Before baking, brush the risen dough with an egg wash, which gives the bread its stunning golden-brown crust and a beautiful shine. Finally, transfer it to a preheated oven and bake until it reaches a perfect golden hue and sounds hollow when tapped.
As someone who grew up with three sisters, I am certainly undaunted when it comes to braiding, whether it’s hair or dough! If you’re a newcomer to this technique, don’t worry—the video in the recipe card below provides an excellent visual guide to help you master the process with confidence.
The moment my kitchen filled with the inviting, yeasty scent of freshly baked bread, as the braided Easter bread dough puffed up to its gargantuan size, I knew something special was happening. When my husband, Bill, declared his first slice was “ridiculously good,” I had my definitive verdict. Even with my admittedly haphazard connection of the strands, this slightly sweet, incredibly tender Easter egg bread was an absolute home run! And the best part? We’ve been enjoying some absolutely awesome French toast with the delicious leftovers.
Pro Tip for a Truly “Egg” Bread: If your family can devour this magnificent loaf in a day or two, feel free to make it a literal Easter “Egg” Bread! After you’ve braided the dough and formed it into a ring, gently tuck some hard-boiled, vibrantly colored Easter eggs into the crevices of the braid. Then, proceed with the final rise and bake as directed. Should any eggshells happen to crack during baking, simply embrace it and call it a charmingly rustic loaf—that excuse works every time and only adds to its homemade appeal!
Frequently Asked Questions About Braided Easter Bread
Easter breads are deeply steeped in symbolism and tradition across many cultures. The common ring or wreath shape of the bread often resembles the crown of thorns that Jesus wore during his crucifixion, serving as a poignant reminder of his sacrifice. Furthermore, the three distinct braids often found in these breads are widely believed to represent the Holy Trinity: the Father, the Son, and the Holy Spirit, adding profound spiritual meaning to this beloved holiday treat. It’s a beautiful way to connect food with faith.
Different cultures around the world celebrate Easter with their unique and cherished versions of sweetened, leavened bread. The Russian Paska, also highly popular in Ukraine, is a rich, sweet, and often beautifully molded yeast bread, frequently adorned with religious symbols. The Koach, a traditional Czech holiday bread, is typically made with three stacked rings, once again symbolizing the Holy Trinity. And, of course, Scandinavian countries boast their own delightful braided breads, like the aromatic Finnish Pulla, which are perfectly suited for Easter celebrations with their soft texture and cardamom spice. Our Braided Easter Bread fits perfectly into this rich tapestry of global Easter traditions.
Absolutely! This recipe is wonderful for make-ahead convenience. You can prepare the dough up to the first rise, then punch it down, shape it into the braids, and place it on your baking sheet. Instead of the second rise, cover it tightly with plastic wrap and refrigerate overnight. In the morning, simply take it out of the fridge and let it come to room temperature and complete its second rise (this might take a bit longer) before applying the egg wash and baking. You can also bake the bread completely, allow it to cool, and then freeze it as described above.
To keep your Braided Easter Bread fresh, store it at room temperature in an airtight container or a large resealable bag for up to 2-3 days. For longer storage, it freezes exceptionally well. Slice the cooled bread, wrap individual slices tightly in plastic wrap, then place them in a freezer-safe bag or container. It will keep in the freezer for up to 3 months. Thaw slices at room temperature or gently warm them in a toaster or oven.
While the braiding might look intricate, the process of making this Easter bread is quite straightforward for anyone with basic baking experience, especially with yeast dough. The most time-consuming parts are the rising times, which are mostly hands-off. The detailed instructions and tips for braiding, along with the accompanying video, are designed to guide even novice bakers to success. Don’t be afraid to try; the reward of homemade holiday bread is well worth the effort!
Explore More Delicious Holiday Breads and Recipes
If you loved this Braided Easter Bread, you might also enjoy exploring these other fantastic bread recipes, perfect for holidays and beyond:
- Italian Easter Bread from A Family Feast: Discover another delightful regional variation.
- Romanian Easter Braid from All Roads Lead to the Kitchen: A unique take on the classic Easter bread.
- Paska Ukrainian Easter Bread from Cupcakes and Kale Chips: Dive into another rich, sweet Easter tradition.
- Swiss Butter Braid: A beautiful and buttery bread for any occasion.
- Plaited Easter Bread with Cream Cheese Filling: For those who love a sweet surprise inside!
- Spinach Torta Rustica: A savory option for your holiday table.
- Plus, explore more of my Best Bread Recipes for everyday baking and special occasions.
Stay connected and share your baking journey with me through social media @ Instagram, Facebook, and Pinterest. Don’t forget to tag me when you try one of my recipes! And if you absolutely love the results, please consider giving it a 5-star rating in the recipe card below. Your feedback truly helps!
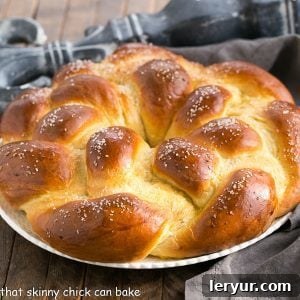
Braided Easter Bread Recipe
30 minutes
30 minutes
1 hour
1 loaf (approximately 16 servings)
A tender, slightly sweet, and aromatic braided Easter egg bread, gracefully formed into a symbolic wreath. This beloved recipe is adapted from Allrecipes.com and perfected for your holiday table, promising a soft crumb and unforgettable flavor.
Ingredients
- ½ cup granulated sugar
- 2 packages* instant yeast (I recommend Red Star Platinum yeast for consistent results)
- 1 tablespoon pure vanilla extract
- 1 teaspoon salt
- 6 to 6½ cups all-purpose flour, plus more for dusting
- 1½ cups whole milk
- 6 tablespoons unsalted butter, cubed (plus extra for greasing your bowl)
- 4 large eggs, divided (3 for the bread dough, 1 for the egg wash)
- 2 tablespoons cold water
- Sanding sugar, or other decorative sugar/seeds, optional
Instructions
- In the large bowl of your stand mixer, fitted with the whisk attachment, thoroughly combine the granulated sugar, instant yeast, salt, and 2 cups of the all-purpose flour. Whisk together until well blended.
- In a microwave-safe bowl or saucepan, gently heat the milk and cubed butter until the butter is melted and the mixture reaches approximately 120°F (49°C). Be careful not to overheat; if it gets too hot, let it cool down slightly before proceeding. Add this warm milk and butter mixture to the dry ingredients in your stand mixer. Mix on low speed until the wet and dry ingredients are just incorporated. Then, add 3 of the eggs and the vanilla extract. Beat on high speed for 2 minutes to develop the gluten.
- Remove the whisk attachment and switch to the dough hook. Gradually add enough of the remaining all-purpose flour, half a cup at a time, mixing until a soft, slightly sticky dough forms. Continue to knead with the dough hook for about 4-5 minutes, or if kneading by hand, for up to 8 minutes, until the dough is smooth and elastic.
- Lightly grease a large clean bowl with a little butter or cooking spray. Place the kneaded dough into the greased bowl, turning it once to ensure the top is lightly coated. Cover the bowl snugly with plastic wrap and place it in a warm spot (an ideal temperature is around 85°F/29°C) to rise until doubled in size, which typically takes about 45 minutes to 1 hour, depending on your environment.
- Once the dough has doubled, gently punch it down to release the air. Turn the dough out onto a lightly floured surface. Using a kitchen scale for accuracy, divide the dough into three equal portions. This ensures your braids are uniform.
- Roll each of the three dough portions into a rope, approximately 24 inches long. Ensure the ropes are of similar diameter for an even braid. Place the three ropes side by side on a large baking sheet lined with parchment paper. Braid them using the “right over middle, left over middle” technique (as detailed in the main article). Once braided, gently bring the two ends of the braid together to form a beautiful ring or wreath shape. Firmly pinch the ends together to seal them securely.
- Cover the braided wreath with a clean tea towel and let it rise again in a warm place for about 20 minutes, or until it has noticeably doubled in size. This second rise contributes to the bread’s light and airy texture.
- While the bread is undergoing its second rise, preheat your oven to 375°F (190°C).
- In a small bowl, whisk together the remaining egg and the 2 tablespoons of cold water to create an egg wash. Once the bread has finished its second rise, carefully and gently brush this egg wash evenly over the entire surface of the dough, ensuring every part is coated for a beautiful golden crust. If desired, sprinkle with sanding sugar or your chosen topping.
- Bake in the preheated oven for 25-30 minutes, or until the bread is beautifully golden brown and sounds hollow when tapped on the bottom. If you notice any areas rising more rapidly or browning too quickly at the halfway point, you can brush with a little more glaze to even out the color. Allow to cool slightly on a wire rack before slicing and serving.
Notes
- *Standard yeast packets typically contain ¼ ounce or 2¼ teaspoons of yeast each.
- Total time listed does not include the essential proofing (rising) times for the dough. These times are crucial for flavor and texture development.
- For best results, ensure your milk and butter mixture is not too hot when added to the yeast, as excessive heat can kill the yeast.
- When kneading, the dough should be soft and slightly sticky, not overly dry. Add flour gradually.
- This bread makes exceptional French toast the next day!
Recommended Products for Perfect Easter Bread
As an Amazon Associate and member of other affiliate programs, I earn from qualifying purchases, helping to support this blog.
- Nielsen-Massey Madagascar Bourbon Pure Vanilla Extract, 4 ounces
- Roul’Pat Silicone Counter-Sized Mat
- French Rolling Pin
Nutrition Information:
Yield:
16
Serving Size:
1 slice
Amount Per Serving:
Calories: 158Total Fat: 6gSaturated Fat: 4gTrans Fat: 0gUnsaturated Fat: 2gCholesterol: 60mgSodium: 201mgCarbohydrates: 20gFiber: 1gSugar: 7gProtein: 5g
HOW MUCH DID YOU LOVE THIS RECIPE?
Please leave a comment on the blog or share a photo on Pinterest