
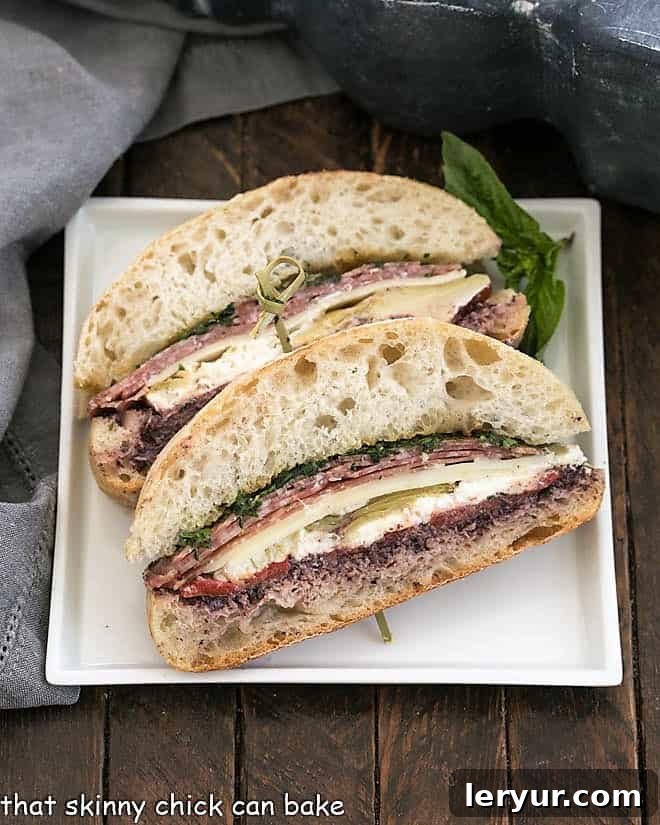
The Ultimate Pressed Brick Sandwich: Your Go-To Italian Picnic & Game Day Delight
The Pressed Brick Sandwich is a culinary marvel, ingeniously crafted with layers of exquisite Italian meats, creamy cheeses, savory olive paste, and vibrant vegetables. This compacted masterpiece transforms simple ingredients into an extraordinary treat perfect for game days, relaxed picnics, or epic road trips. Say goodbye to soggy, squashed sandwiches and hello to a deliciously dense, flavor-packed meal that travels incredibly well.
Imagine sinking your teeth into this magnificent Italian-inspired Picnic Sandwich on your next summer adventure or tailgate party. Its unique preparation not only melds flavors beautifully but also ensures it stands up to any journey, delivering a gourmet experience wherever you go. You’ll find yourself instantly hooked, making this a staple for all your outdoor gatherings and lunchtime cravings!
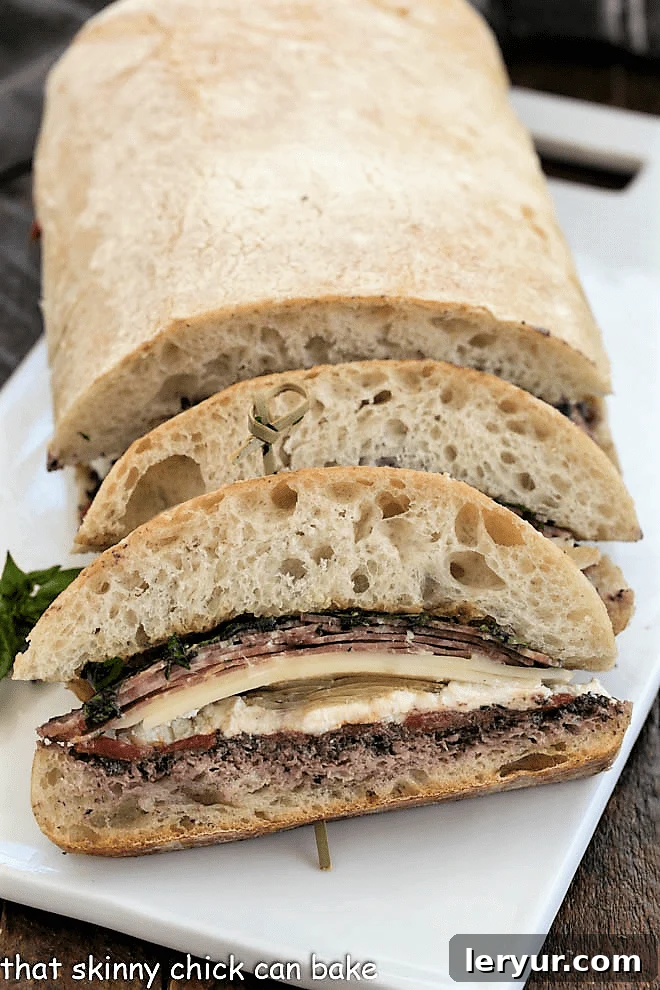
Why This Pressed Italian Sandwich is a Must-Make
More than just a sandwich, this recipe is a smart solution for anyone who loves delicious, portable food. Here’s why the Pressed Brick Sandwich deserves a spot in your recipe repertoire:
- Flavor Explosion in Every Bite: Each layer of this sandwich is thoughtfully selected to create a symphony of tastes and textures. From the robust Italian meats to the tangy goat cheese and briny artichokes, every ingredient plays a vital role in delivering a truly unforgettable flavor profile. The pressing process allows these flavors to meld and intensify, resulting in a more cohesive and satisfying experience.
- Remarkably Versatile and Adaptable: One of the greatest strengths of this recipe is its flexibility. While our suggested Italian combination is undeniably delicious, you are fully encouraged to customize it to your heart’s content. Swap out prosciutto for smoked turkey, provolone for cheddar, or add a pesto spread instead of olive paste. It’s an ideal canvas for exploring your favorite sandwich fillings, making it a fresh experience every time.
- Travel-Friendly & Mess-Proof: The unique “brick pressing” method is not just a gimmick; it’s a game-changer for portability. By compacting the sandwich, you eliminate air pockets and securely bind the fillings, preventing them from shifting or falling out. This means your sandwich will arrive at its destination perfectly intact, without the usual mess or sogginess, making it superior to traditional sandwiches for picnics, tailgates, or school lunches.
- Perfect for Make-Ahead Meals: This sandwich is designed to be made in advance, often tasting even better after the flavors have had time to meld under pressure. Prepare it the night before your event, refrigerate, and simply slice when ready to serve. This frees up your time on the day of your gathering, allowing you to focus on enjoying the company rather than last-minute preparations.
The inspiration for this magnificent creation often comes from memorable food experiences. I vividly recall a chilly football game last fall at Indiana University, a day that started with sleet – not ideal for someone who prefers warmth! Despite our hasty purchases of hats and scarves, the true warmth came from my dear Italian friend’s world-famous stromboli, generously packed with a delightful medley of meats and cheeses. While her exact recipe remained elusive, a search through my kitchen archives led me to a beloved classic: Martha Stewart’s take on the pressed brick sandwich. This version, laden with Mediterranean treasures like roasted peppers, marinated artichokes, savory salami, delicate prosciutto, and creamy Provolone, proved to be an equally spectacular choice for our tailgate, satisfying every craving with its rich, layered goodness.
Essential Ingredients for Your Pressed Brick Sandwich
Crafting the perfect pressed sandwich begins with selecting quality ingredients. Here’s a closer look at what you’ll need and why each component is crucial:
- Kitchen Staples: These fundamental items form the base of our simple yet flavorful vinaigrette and seasoning.
- Olive Oil: Opt for a good quality extra virgin olive oil for its rich, fruity notes that enhance the overall flavor.
- Salt and Freshly Ground Black Pepper: Essential for seasoning and bringing out the best in all the other ingredients.
- Dijon Mustard: Adds a zesty tang and acts as an emulsifier for the vinaigrette, ensuring a smooth, well-blended dressing.
- Balsamic Vinegar: Provides a touch of sweet and sour depth, balancing the richness of the meats and cheeses.
- Roasted Red Bell Peppers: These add a wonderful sweetness and a soft, yielding texture. You can either use convenient jarred peppers (drained and sliced) or roast your own for an even fresher flavor, then slice them into ¾-inch strips.
- Prosciutto: This delicate, thinly sliced Italian cured ham brings a salty, slightly sweet, and incredibly tender element. Its paper-thin texture is ideal for layering.
- Genoa Salami: A classic Italian dry sausage, Genoa salami offers a robust, peppery, and slightly garlicky flavor. Thinly sliced, it provides a satisfying chewiness.
- Loaf of Ciabatta Bread: The star bread of this sandwich! Ciabatta’s rustic crust and airy, open crumb are perfect for holding a generous amount of fillings. Its sturdy structure also stands up well to pressing. If ciabatta isn’t available, a good quality sourdough or crusty Italian bread can be excellent alternatives. Remember to slice it in half horizontally.
- Black Olive Paste (Tapenade): This intensely flavorful spread, made from finely chopped black olives, capers, and olive oil, adds a briny, umami-rich depth. If you’re not a fan of black olives, finely chopped green olives can be substituted for a milder, tangier profile.
- Fresh Goat Cheese: Its creamy texture and distinct tangy, earthy flavor provide a lovely counterpoint to the savory meats. If goat cheese isn’t to your taste, alternative spreadable cheeses like mild Ricotta, herbed Boursin, or even a soft cream cheese can work beautifully.
- Marinated Artichoke Hearts: Drained and chopped, these offer a delightful tartness and tender bite. Their unique flavor pairs wonderfully with the Italian elements.
- Provolone Cheese: Sliced provolone brings a mild, slightly nutty, and creamy flavor that melts wonderfully (even without heat, as the pressing helps it meld). Its firm texture holds well within the sandwich.
- Mixed Fresh Herbs: Fresh herbs are key to brightening the entire sandwich. A combination of flat-leaf parsley and basil is fantastic, adding vibrant color and aromatic freshness. Feel free to experiment with other herbs like oregano or chives.
Step-by-Step Guide to Making Your Pressed Brick Sandwich
Creating this impressive sandwich is surprisingly straightforward, allowing for plenty of personalization. Remember, the beauty of this recipe lies in its adaptability, so feel free to adjust ingredients based on your preferences. For instance, my husband often picks out the artichoke hearts, and while I enjoy goat cheese, I sometimes prefer to swap it for fresh mozzarella or even creamy Brie for a different twist. This sandwich is truly a celebration of Italian flavors, packed with savory meats, delectable cheeses, crisp vegetables, and a rich olive spread.
- Prepare the Ciabatta Bread: Begin by carefully slicing your ciabatta loaf in half horizontally. To create ample space for all the delicious fillings and to prevent the sandwich from becoming overly bready or soggy, partially hollow out the bottom half of the loaf. Gently pull out some of the soft interior bread, creating a slight trough.
- Whisk the Vinaigrette: In a small bowl, whisk together the Dijon mustard and balsamic vinegar until well combined. Gradually drizzle in the olive oil while continuously whisking until a smooth, emulsified vinaigrette forms. Season with salt and freshly ground black pepper to taste. Set aside.
- Begin Layering the Flavors: Start building your sandwich by spreading the black olive paste evenly over the hollowed-out bottom crust of the ciabatta. If you’re using homemade olive paste, ensure it’s well-drained, as excess moisture can make the bread soggy. Next, artfully arrange the sliced roasted red bell peppers over the olive paste.
- Add Cheeses and Artichokes: Crumble the fresh goat cheese over the pepper layer, distributing it evenly. Then, scatter the drained and chopped marinated artichoke hearts over the goat cheese.
- Drizzle and Layer Meats: Drizzle about half of your prepared vinaigrette generously over the goat cheese and artichoke layer. This adds moisture and binds the flavors. Next, arrange the sliced provolone cheese, followed by the delicate prosciutto and savory Genoa salami. Feel free to overlap the meats for maximum coverage and flavor.
- Final Drizzle and Herbs: Drizzle the remaining vinaigrette over the meat layers. Finally, sprinkle a generous amount of mixed fresh herbs (such as flat-leaf parsley and basil) over the top. These add a burst of fresh flavor and vibrant color.
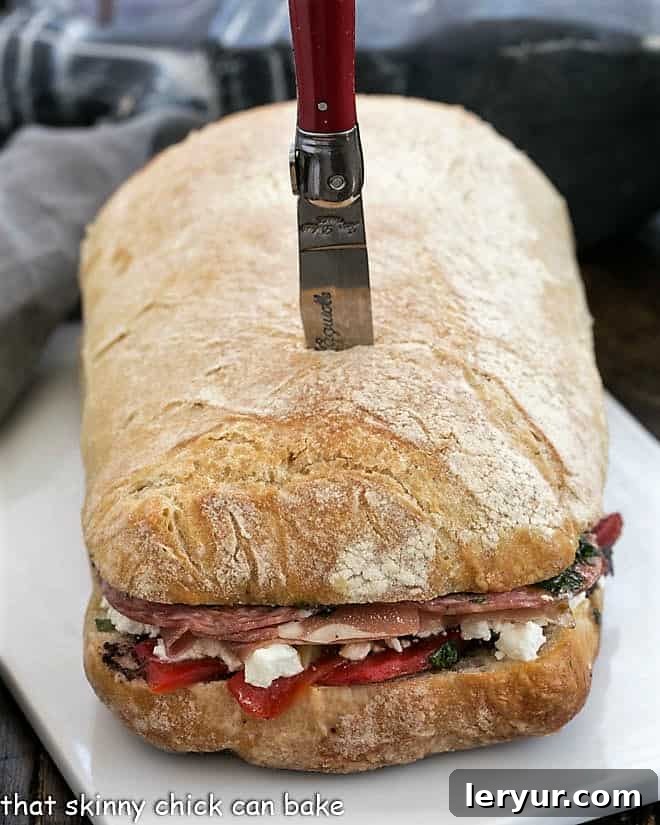
- Top and Wrap: Carefully place the other half of the ciabatta loaf on top of the fillings, gently pressing down to secure everything. Tightly wrap the entire sandwich in plastic wrap, ensuring it’s completely sealed.
- The Pressing Process: Place the wrapped sandwich on a sturdy baking sheet or cutting board. For even compression, place another cutting board on top of the sandwich. Then, weigh it down using a heavy object – a cast iron skillet works perfectly, or a couple of clean bricks. This steady, even pressure is crucial for compacting the sandwich, melding the flavors, and preventing sogginess.
- Chill and Meld: Transfer the weighted sandwich to the refrigerator and let it chill for at least one hour, or ideally, several hours (even overnight for best results). This pressing and chilling time allows the flavors to truly meld and the sandwich to become wonderfully compact and easy to slice.
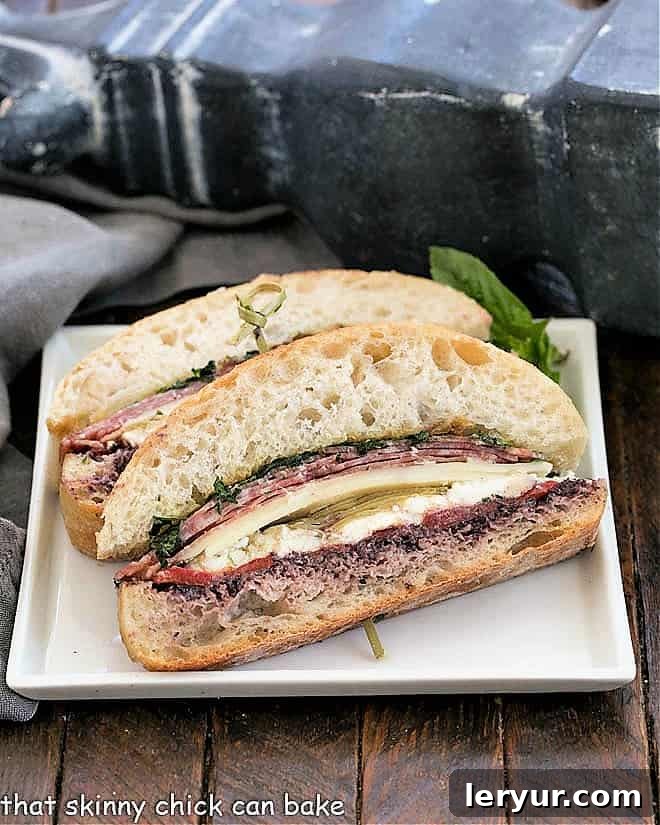
- Slice and Serve: Once chilled and pressed, unwrap the sandwich. Using a sharp serrated knife, slice it into individual portions. Serve immediately and enjoy your perfectly pressed, flavor-packed Italian picnic sandwich!
Frequently Asked Questions About Pressed Sandwiches
If you’re like me, the world of sandwiches can be a bit bewildering with terms like “submarine,” “hoagie,” and “hero.” This pressed brick or picnic sandwich adds another delicious layer of confusion, but we’re here to clear things up!
The world of long sandwiches is rich with regional variations and unique characteristics:
A Sub Sandwich, aptly named for its submarine shape, is a broad category encompassing many elongated sandwiches. Typically served cold on a long Italian roll, it’s generously filled with various meats, cheeses, fresh vegetables like lettuce and tomatoes, and a savory dressing.
A Hero, popular in New York, can be served hot or cold. Its name reportedly comes from a New York columnist who described it as a sandwich so massive, you’d have to be a hero to finish it! Beyond traditional deli meats, heroes can feature hearty fillings such as chicken parmesan or meatballs.
A Hoagie originated in Philadelphia, named by Italian immigrants working at the Philadelphia Naval Yard on Hog’s Island (hence “hoggie,” then “hoagie”). It’s traditionally a cold sandwich, brimming with Italian meats and cheeses.
A Grinder is a New England favorite, served hot or cold. It often goes beyond cold cuts and cheeses, incorporating cooked fillings like sliced chicken, roast beef, or meatballs, often with a toasted bun.
A Pressed Brick Sandwich stands apart. While it shares the “long sandwich” characteristic, it’s distinct from the “submarine” family. It’s built on a hollowed-out ciabatta or similar sturdy bread and, crucially, compacted under heavy weight (like bricks or a heavy pan). This pressing method allows flavors to meld beautifully, condenses the fillings, and makes it incredibly portable and less prone to falling apart. It’s often referred to as a Picnic Sandwich because it’s ideal for transportation and sharing at outdoor events.
The beauty of a pressed brick sandwich lies in its versatility. Think of your absolute favorite sandwich combinations and then imagine them enhanced by the pressing process. For instance, if you adore BLTs, elevate it with double layers of crispy bacon, fresh lettuce, and ripe tomatoes, then introduce creamy avocado slices or even a generous smear of homemade guacamole. Slices of creamy Brie cheese would also be a fantastic addition, melting slightly under the pressure to create a luxurious texture. Alternatively, explore a gourmet ham and cheese theme by using various artisanal hams (like Black Forest or honey-glazed) and an assortment of cheeses (Swiss, Gouda, sharp cheddar), paired with your preferred condiments like honey mustard or a tangy fig jam. The possibilities are truly endless!
When properly stored, a pressed brick sandwich holds up remarkably well. If your sandwich is kept refrigerated or in a well-insulated cooler and not left at room temperature for more than 2 hours, it should stay fresh and delicious for up to 3 days. To maximize its freshness and prevent it from drying out, always ensure any leftovers are tightly wrapped in plastic wrap or aluminum foil before returning them to the refrigerator. The pressing method actually helps it maintain its integrity longer than an unpressed sandwich, making it an excellent make-ahead option.
Absolutely! This sandwich is incredibly adaptable for vegetarian diets. Instead of meats, load it with layers of grilled vegetables like zucchini, eggplant, and bell peppers. Add sun-dried tomatoes, fresh mozzarella, pesto, roasted red pepper hummus, and plenty of fresh basil and spinach. The pressing method works just as well to meld these flavors and create a satisfying vegetarian meal.
The pressing itself makes this sandwich ideal for transport. After it’s fully pressed and sliced, wrap individual portions or the whole remaining sandwich tightly in plastic wrap or foil. Place it in an airtight container or a large zip-top bag to prevent any air exposure or crushing. For picnics or road trips, store it in a cooler with ice packs to keep it perfectly chilled until serving time. Its compact nature means it takes up less space and is far less prone to becoming smushed than a fluffy, unpressed sandwich.
More Game Day & Entertaining Recipes to Score Big!
Recalling that memorable football game, which was delayed for over an hour due to lightning strikes, I can still feel the numbness in my fingers and toes. I eventually retreated to the car, listening to the game on the radio – a decision my college friends would surely not find surprising! This year, I think I’ll opt for warmer venues for November football games. But regardless of the weather, great food is essential for any game day celebration or gathering. Here are a few more delicious recipes guaranteed to be crowd-pleasers:
- Hearty Game Day Chili from Aggie’s Kitchen – The ultimate comfort food for a chilly game day.
- Ganache-Topped Cosmic Brownies – A nostalgic, chocolatey treat that’s always a winner.
- Easy Antipasto Skewers – Perfect bite-sized appetizers, packed with Italian flair.
- Festive Football Sandwich Cookies – Adorable and delicious, great for themed parties.
- Quick & Easy S’mores Dessert Dip – A warm, gooey dessert that’s fun to share.
- Best Game Day Snacks Collection – A comprehensive list of winning appetizers and bites.
- More Top Game Day Recipes – Even more inspiration for your next big event.
- Discover more delightful Sandwich Recipes for any occasion.
Stay connected and share your culinary creations with us on social media! Find us on Instagram, Facebook, and Pinterest. Don’t forget to tag us when you try one of our recipes! We love seeing your delicious results. If you enjoyed this Pressed Brick Sandwich, please show your support by giving it a 5-star rating in the recipe card below – your feedback means the world to us!
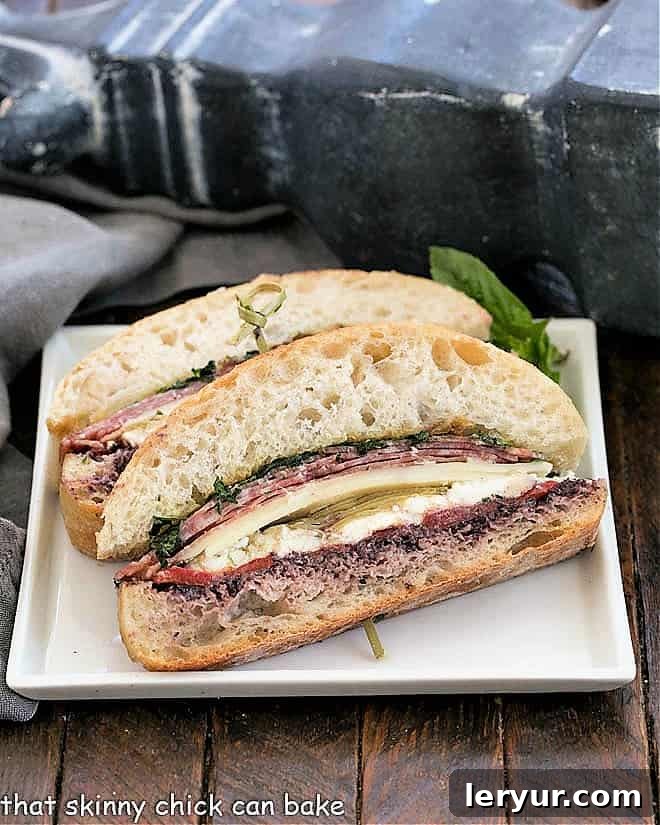
Pressed Brick Sandwich
15 minutes
15 minutes (does not include pressing time)
10 servings
Layers of wonderful meats and vegetables are dressed with a vinaigrette and sandwiched in a loaf of ciabatta, then compacted for a most delightful treat!
Rated 5 out of 5 stars by 37 reviewers.
Ingredients
- 3 whole roasted red bell peppers (use jarred or roast your own), sliced into ¾-inch strips
- 1 ½ teaspoons Dijon mustard
- 1 tablespoon balsamic vinegar
- 6 ounces prosciutto, thinly sliced
- ¼ cup olive oil
- Salt and freshly ground pepper to taste
- 1 loaf ciabatta bread, sliced horizontally
- ½ cup black-olive paste (tapenade)
- 4 ounces fresh goat cheese, crumbled
- 8 ounces marinated artichoke hearts, drained and chopped
- 4 ounces sliced Provolone cheese
- 6 ounces prosciutto, thinly sliced (additional for layering)
- ¼ pound Genoa salami, thinly sliced
- 1-2 cups loosely packed mixed fresh herbs (such as flat-leaf parsley and basil)
Instructions
Make the vinaigrette:
- Combine Dijon mustard and balsamic vinegar in a small bowl. Gradually whisk in the olive oil until emulsified. Add salt and freshly ground pepper to taste. Set aside.
Assemble the sandwich:
- Slice the ciabatta loaf horizontally. Carefully remove some of the soft bready interior from the bottom half of the loaf to create space for fillings. Spread the black olive paste evenly on the bottom crust, then layer with the sliced roasted red pepper strips.
- Crumble the fresh goat cheese over the peppers. Arrange the chopped marinated artichoke hearts on top of the goat cheese.
- Drizzle half of the prepared vinaigrette evenly over the goat cheese and artichoke layers.
- Arrange the sliced Provolone cheese, followed by the prosciutto and Genoa salami, over the artichoke hearts.
- Drizzle with the remaining vinaigrette. Sprinkle generously with the mixed fresh herbs. Place the top crust of the ciabatta on the sandwich.
- Tightly wrap the entire sandwich with plastic wrap. Place it on a baking sheet or cutting board, then set a heavy object (like a cast-iron skillet or a couple of bricks) on top to press for at least 1 hour in the refrigerator. For best results, press for several hours or overnight. Slice to serve.
Notes
Total time listed does not include the essential pressing time (minimum 1 hour).
This recipe is adapted from Martha Stewart’s original concept.
Recommended Products
As an Amazon Associate and member of other affiliate programs, I earn from qualifying purchases.
- Le Creuset 10-inch Skillet
- OXO Cutting Board
Nutrition Information:
Yield:
10 servings
Serving Size:
1 slice
Amount Per Serving (estimated):
Calories: 361
Total Fat: 21g
Saturated Fat: 7g
Trans Fat: 0g
Unsaturated Fat: 13g
Cholesterol: 34mg
Sodium: 1379mg
Carbohydrates: 26g
Fiber: 3g
Sugar: 3g
Protein: 17g
HOW MUCH DID YOU LOVE THIS RECIPE?
Please leave a comment on the blog or share a photo on Pinterest