
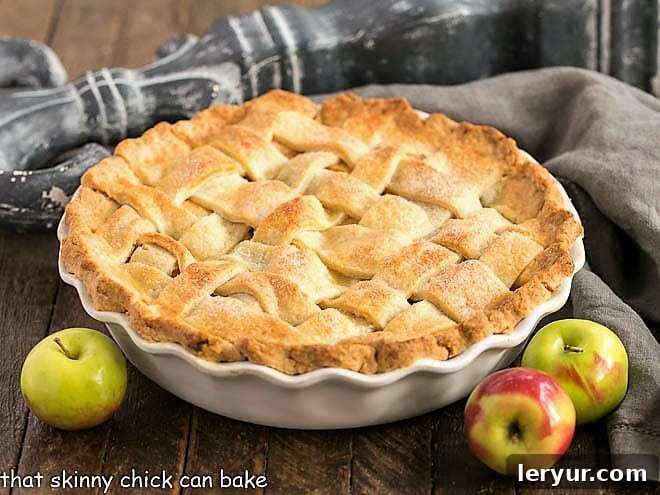
If you’ve ever dreamt of baking an apple pie that earns rave reviews, one that boasts a perfect balance of sweet and tart filling encased in an impeccably flaky crust, then your journey ends here. This guide unlocks the secrets to crafting the Best Apple Pie Recipe, transforming common baking challenges into triumphs.
While the thought of making homemade pie crust might seem daunting, the superior taste and texture compared to store-bought alternatives are undeniably worth the effort. And for those who often find their apple pie filling to be disappointingly watery or prone to creating an unsightly gap beneath the top crust, rest assured – we have ingenious solutions to achieve that ideal, luscious consistency. This Homemade Apple Pie delivers a warm, inviting fall-spiced apple filling and a tender, golden flaky crust, culminating in the ultimate dessert for autumn gatherings and festive holiday tables.
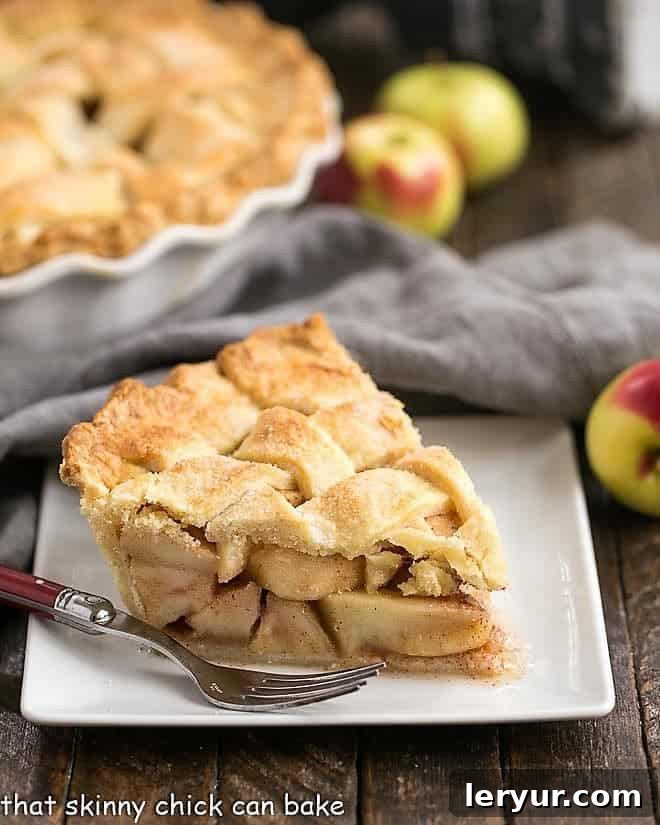
Unveiling the Secrets to Your Best Apple Pie Yet
Achieving pie perfection can feel like a culinary quest, but with the right techniques, a blue-ribbon-worthy pie is within your reach. This particular recipe stands out for several compelling reasons, promising to elevate your apple pie from good to truly exceptional.
- The Flawless Pie Crust: My continuous search for a foolproof pie crust led me to this remarkable recipe from Nick Malgieri, a celebrated cookbook author and baking maestro. Crafted entirely with butter, this crust offers an unparalleled richness and depth of flavor. While I sometimes consider adding a touch of shortening for enhanced pliability, the all-butter version remains a star. I’ll share updates on my shortening experiments with my Thanksgiving pumpkin pie!
- Revolutionary Apple Filling Technique: Malgieri’s approach to apple pie filling is truly spot-on, employing a method I’ve championed for years: precooking the apples. This crucial step prevents the common issue of a large gap forming between the top crust and the filling as the apples shrink during baking. It’s a brilliant technique that ensures a beautifully full and uniformly cooked pie, preventing those disappointing air pockets.
- A Symphony of Flavors and Textures: The harmonious combination of a rich, buttery crust and perfectly cinnamon-spiced apples creates an authentic, old-fashioned apple pie experience. Each bite delivers a nostalgic warmth and comfort that’s hard to replicate.
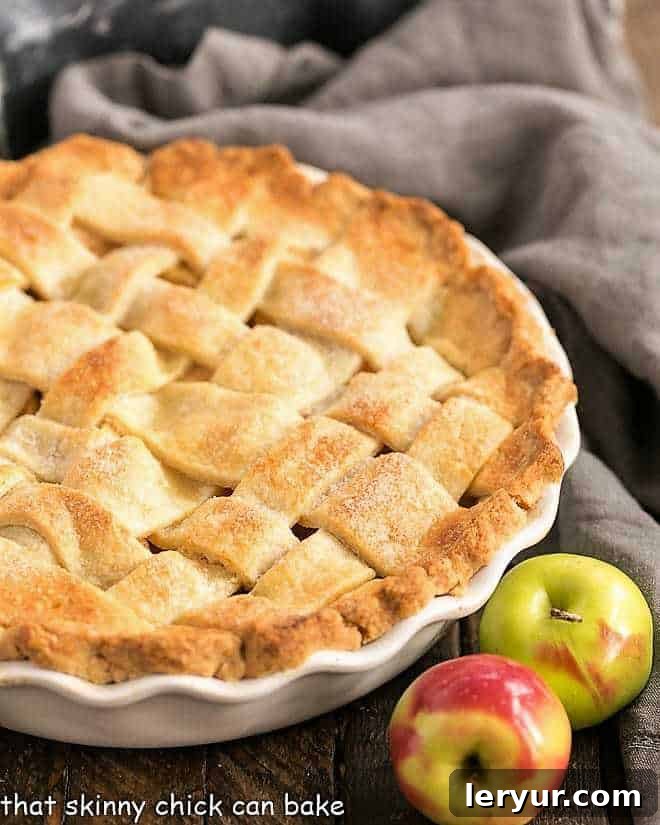
- State Fair Quality, Right at Home: This homemade apple pie recipe isn’t just delicious; it’s designed to impress. With its stunning lattice crust (optional, but highly recommended!) and perfectly balanced flavors, it’s the kind of pie that could easily win a blue ribbon at any state fair, right from your own kitchen.
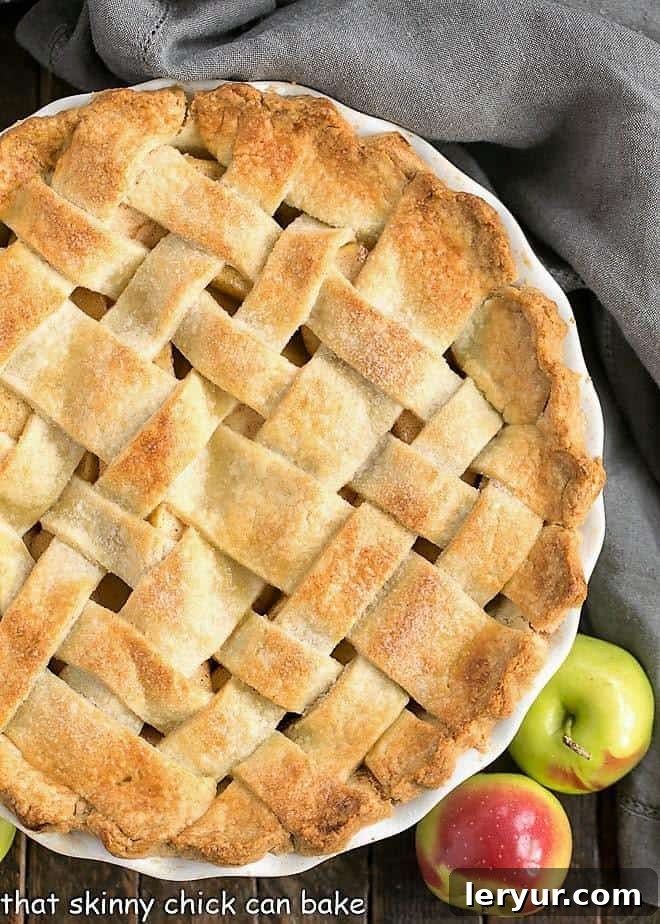
Mastering Apple Pie: Expert Tips for Success
While summer calls for vibrant fruit pies like peach and raspberry, as soon as fall and winter arrive, the perfect apple pie reigns supreme. Baking an apple pie from scratch, especially with crisp, fresh local apples and a homemade crust, is a culinary feat that will truly delight your family and friends. Don’t be intimidated – give these expert tips a try!
- Embrace Apple Variety: For the most complex and flavorful apple pie, don’t limit yourself to just one type of apple. Combining varieties offers a beautiful interplay of sweetness, tartness, and textures that elevate the pie’s overall profile.
- Layer for Maximum Fill: Instead of simply pouring your apple filling into the pie plate, take the time to layer the apple slices carefully. This strategic placement allows you to fit significantly more apples into your pie, ensuring a generously filled pie without a collapsed top.
- The Unrivaled Homemade Crust: If you’ve never ventured into making a pie crust from scratch, now is the time. Even if your first attempt isn’t picture-perfect, the flavor and texture will far surpass any store-bought option. The effort is minimal for a truly rewarding taste experience.
- The Golden Finishing Touch: For a stunning, glossy, and beautifully browned crust, consider applying a simple glaze before baking. A mixture of egg yolk with about a teaspoon of water, heavy cream, or half-and-half works wonders. For an extra touch of elegance and crunch, sprinkle coarse sugar over the glazed crust.
Selecting the Perfect Apples for Your Pie
The foundation of a truly exceptional apple pie lies in the quality and variety of the apples you choose. Different apples bring unique characteristics to the filling, influencing both flavor and texture. A thoughtful selection can make all the difference.
- Classic Choices and Beyond: Granny Smith apples are a consistently reliable choice, offering a tartness that balances the pie’s sweetness and a firm texture that holds up well during baking. However, if you can find Northern Spy apples, they create an incredibly flavorful pie with a tender, yet still structured, bite. Jonathans are another terrific option, known for their sweet-tart flavor.
- PRO-Tip: The Power of Blending: The ultimate secret to a pie with complex, nuanced flavor is to use a mixture of apples. I frequently combine Granny Smiths with Golden Delicious. This blend provides a delightful contrast: one is firmer, the other softer; one is tarter, the other sweeter. Both are highly recommended for baking, and their combination ensures a well-rounded and exciting filling.
- Seek Local Guidance: When in doubt, check with your local grocery store’s produce department. Often, they will have signs indicating which apple varieties are best suited for baking, cooking, or eating fresh. Don’t hesitate to ask the produce manager for their recommendations – they are often a wealth of local knowledge!
Crafting the Ultimate Flaky Homemade Pie Crust
A truly great apple pie begins with an extraordinary crust. While store-bought crusts offer convenience, they simply cannot replicate the delicate flakiness and rich, buttery flavor of a homemade version. Embracing the process of making your own crust is a rewarding step towards pie perfection.
- Beyond Appearance: Even if your first homemade crust isn’t perfectly round or has a few cracks, the taste will be vastly superior to any pre-made option. Don’t let perfection be the enemy of deliciousness!
- The Key to Flakiness – Cold Fat: The secret to a perfectly flaky crust lies in incorporating small, distinct pieces of cold fat (butter, in this case) throughout the dough. These tiny pockets of fat melt during baking, releasing steam and creating those coveted flaky layers. Use a pastry blender or a food processor to mix your dough until it resembles coarse cornmeal with visible pea-sized bits of butter. Overmixing will develop the gluten too much, resulting in a tough, less flaky crust.
- Pre-Cooking the Apples: A Game-Changer for Filling: As mentioned, sautéing your apple slices in some butter until they are just tender (but not mushy) serves a dual purpose. Firstly, it prevents that common gap from forming under the top crust as the apples shrink. Secondly, it ensures that all the apples cook thoroughly and evenly, preventing a crunchy, undercooked filling.
- Spice it Right: While cinnamon is a classic and sufficient spice for apple pie, a touch of freshly grated nutmeg can add a wonderful layer of warmth and complexity. Remember, a little nutmeg goes a long way, so use it sparingly to avoid overpowering the apple flavor.
- Malgieri’s Secret Ingredient: A unique touch in Nick Malgieri’s pie crust recipe is the addition of baking powder. This ingredient subtly aids in creating a lighter, more ethereal and flaky crust, contributing to its exceptional texture.
- PRO-Tip: Keep Everything Chilled: For a truly top-notch pie crust, it is absolutely critical that both your fats (butter, and any shortening if you choose to add it) and your water are very cold. I even keep some Crisco in the freezer specifically for pie-making, though this recipe uses all butter. Cold ingredients prevent the butter from melting prematurely, which is essential for developing those flaky layers.
- Working with Cold Dough: Keep your dough chilled before rolling it out and aim to get your pie into the oven before the dough has a chance to warm up too much. The cold fat is what creates those tiny air pockets that result in a marvelously flaky crust.
- Food Processor Efficiency: The food processor is an excellent tool for mixing pie crust efficiently. Pulse the ingredients until the mixture resembles coarse cornmeal with a few pea-sized pieces of butter still visible. Be careful not to over-process, as this activates the gluten and leads to a tough crust. Alternatively, you can mix by hand using two knives or a pastry blender.
- Checking for Hydration: After adding water, pinch a small amount of dough between your fingers. If it holds together, it’s ready. If it crumbles, add an additional tablespoon of very cold water, pulse, and recheck. You may need a second additional tablespoon if the dough remains too dry.
- Rolling with Care: Lightly dust your work surface and rolling pin with flour. Roll the dough, making quarter turns after each pass to ensure even thickness and prevent sticking. Redust lightly as needed, but be mindful not to incorporate too much extra flour, as this can toughen the crust. Aim for a thickness of approximately ⅛-inch. Overworking the dough during rolling also activates gluten, resulting in a less tender crust.
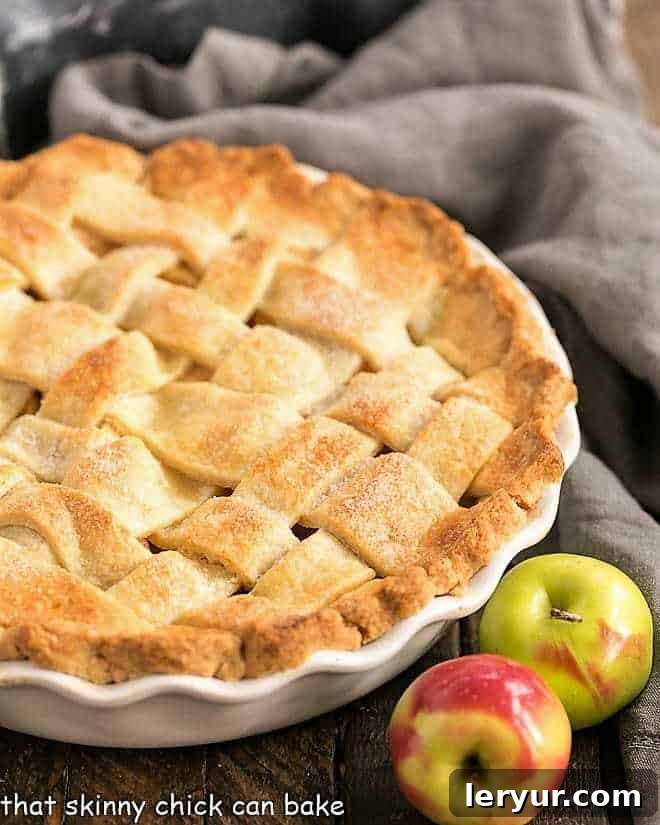
Frequently Asked Questions About Apple Pie
The core ingredients for an irresistible apple pie include: Fresh apples (a blend of varieties like Golden Delicious, Granny Smith, and Jonagolds is ideal for balanced flavor and texture), peeled and sliced just before use to prevent oxidation and browning. You’ll also need quality butter for both the crust and filling, fresh lemon juice (always opt for fresh over bottled for superior taste), sugar (adjusting the amount based on the natural sweetness of your chosen apples), and aromatic spices, primarily cinnamon. Some prefer a blend of apple pie spices which typically includes cinnamon, nutmeg, allspice, ginger, and cardamom – feel free to use your favorite combination. Finally, an egg wash, made from a beaten egg with a dash of water or plain heavy cream, can be used to glaze the crust for a beautiful finish.
For the best apple pie, choose apples that hold their shape well during baking and offer a good balance of sweet and tart. If you’re fortunate enough to live in apple country, you’ll have a wide selection of locally grown varieties. Some of the most popular and highly recommended apples for pie include: Granny Smith, Golden Delicious, Northern Spy, Idared, Pink Lady, Pink Pearl, Ginger Gold, Jazz, Jonagold, Cortland, Honeycrisp, Braeburn, and McIntosh. Mixing a few of these varieties often yields the most complex and delicious results.
Provided your apple pie does not contain a custard base (which requires refrigeration), it can be stored at room temperature for up to two days. To extend its freshness, cover the pie tightly with plastic wrap or aluminum foil and refrigerate for an additional two days. For longer storage, apple pie freezes exceptionally well for up to four months when wrapped airtight. Thaw in the refrigerator overnight and reheat gently for best results.
The key to a perfect apple pie filling, as highlighted in this recipe, is to pre-cook your apple slices. Start by sautéing the apples in butter until they are just tender but not overly soft. This crucial step serves two main purposes: first, it prevents the apples from shrinking excessively during baking, thereby eliminating the unsightly gap that often forms under the top crust. Second, it ensures the apples are thoroughly cooked to a tender consistency before the crust has a chance to over-brown. Season your filling primarily with cinnamon, or add a few gratings of fresh nutmeg for extra depth, remembering that a little nutmeg goes a long way.
Baking times for apple pie can vary significantly based on factors like your oven’s calibration, the specific apple varieties used, the thickness of your apple slices, and the total volume of apples in the pie. Therefore, the times listed in recipes should be considered suggestions. To determine if your pie is fully baked, gently pierce a few apples through the crust with a sharp knife. The knife should slide in easily without resistance – this is simpler with a lattice crust but can also be done through the air vents of a full top crust. Since the apples in this recipe are pre-cooked, you’ll primarily be looking for the crust to achieve a golden-brown hue and for the filling to visibly bubble and thicken.
Yes, absolutely! It is generally preferable to freeze fruit pies before baking rather than after. To do so, prepare the pie as directed, ensuring you create a few air vents in the top crust if you’re not making a lattice design. Then, wrap the unbaked pie tightly and airtight in plastic wrap, followed by aluminum foil. For freezing and baking, it’s best to use a metal pie pan, as glass (Pyrex) or ceramic dishes can sometimes crack when transferred directly from a cold freezer to a hot oven. When ready to bake, place the frozen pie directly into a preheated oven at 375°F (190°C) and bake for approximately 90 minutes, or until the juices are bubbling thickly from the vents and the apples are tender when poked with a knife.
Explore More Delicious Dessert Recipes:
- Must Make Fall Desserts from Noble Pig – A curated collection of autumnal treats perfect for any occasion.
- Favorite Apple Recipes – Discover more delightful ways to enjoy the versatility of apples in baking.
- Pumpkin Roll – A festive and elegant dessert, perfect for fall and holiday celebrations.
- Cream Cheese Filled Apple Bundt Cake – A moist and flavorful bundt cake with a luscious cream cheese swirl.
- Plus, browse all my Best Pie Recipes for endless inspiration!

Stay connected with us through social media on Instagram, Facebook, and Pinterest. Don’t forget to tag us when you try one of our recipes! We love seeing your creations. If you adore the results, please consider leaving a 5-star rating in the recipe card below – your feedback helps others discover these wonderful recipes!
Perfect Apple Pie
30 minutes
50 minutes
1 hour 20 minutes
8 servings
A terrific recipe for the perfect apple pie with a few tricks included!
Ingredients
Crust:
- 2 ½ cups flour
- 1 tablespoon sugar
- ½ teaspoon salt
- ¼ teaspoon baking powder
- 2 sticks cold butter, cut into tablespoon slices
- 4-6 tablespoons of very cold water*
Filling:
- 3 pounds apples**, peeled and each cut into 8 slices
- 3 tablespoons butter
- 1 tablespoon fresh lemon juice
- ⅔ cup sugar***
- 1 teaspoon cinnamon
- 1 egg
- Dash of salt
Instructions
- Combine flour, sugar, salt, and baking powder in a food processor and pulse a couple of times to mix.
- Add butter and pulse till the mixture looks like coarse cornmeal, about 20 short pulses.
- Sprinkle with 4 tablespoons of water and pulse about 5 times or until the dough starts to come together.
- Squeeze a small amount of dough between your fingers. If it doesn’t hold together add up to 2 more tablespoons of water, pulsing after each addition until the dough holds together. Recheck the dough after each addition till it holds together.
- Put half of the dough on a piece of plastic wrap and form into a disk. Wrap completely and repeat with the other half.
- Refrigerate disks for at least an hour before rolling.
- Melt butter in large saute pan. Saute apples for about a minute, gently stirring to coat apples with butter.
- Add lemon juice and sugar and cook until the apples are just tender about 5 more minutes. Sprinkle with cinnamon and mix to combine.
- Allow to cool while rolling out the bottom crust.
- Preheat oven to 400º.
- Place the bottom crust into a 9-inch pie plate. Fill with apples.
- Roll out the top crust and place over the apples. Seal edges and flute if desired. Cut a few vents into the top crust to allow steam to escape. Alternatively, you can cut the top crust into slits and weave it to make a lattice crust.
- If desired, whisk the egg with salt. Brush lightly over the crust and sprinkle with sugar.
- Reduce oven temperature to 375º, and bake for about 40 minutes, until the top is browned and the filling is bubbling. Cool on rack.
- Serve with vanilla ice cream if desired.
Notes
*I like to add a few ice cubes to a Pyrex measuring cup with a spout with about a half cup of water…use that to pour into your measuring spoon.
**I used Golden Delicious, Granny Smith, and Jonagold.
***You may use more or less sugar depending on the sweetness of the apples.
Check the expiration date on your baking powder. Its shelf life is much shorter than baking soda.
Adapted from Nick Malgieri.
Recommended Products
As an Amazon Associate and member of other affiliate programs, I earn from qualifying purchases.
- Silicone Pastry Brush
- Ceramic pie plate
- Kitchen Scale
- French Rolling Pin
- Food Processor
- Pastry Blender
Nutrition Information:
Yield:
8
Serving Size:
1 slice
Amount Per Serving:
Calories: 552Total Fat: 28gSaturated Fat: 18gTrans Fat: 1gUnsaturated Fat: 9gCholesterol: 95mgSodium: 395mgCarbohydrates: 72gFiber: 5gSugar: 36gProtein: 6g
HOW MUCH DID YOU LOVE THIS RECIPE?
Please leave a comment on the blog or share a photo on Pinterest