
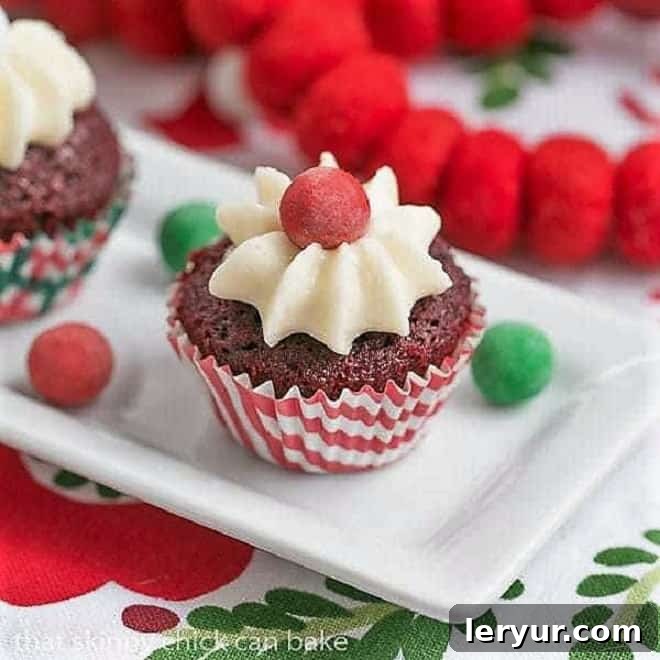
Mini Red Velvet Cupcakes: The Ultimate Bite-Sized Holiday Dessert
Prepare to fall in love with these Mini Red Velvet Cupcakes, a delightful, bite-sized rendition of a classic favorite. This recipe promises a tender, moist crumb and is crowned with a luscious, pipe-perfect cream cheese frosting. Whether you’re planning a festive holiday gathering, a romantic Valentine’s Day treat, or simply craving a touch of elegance, these miniature marvels are guaranteed to impress. Their vibrant red hue and exquisite flavor make them an irresistible addition to any celebration, offering a sophisticated dessert experience in every tiny bite.
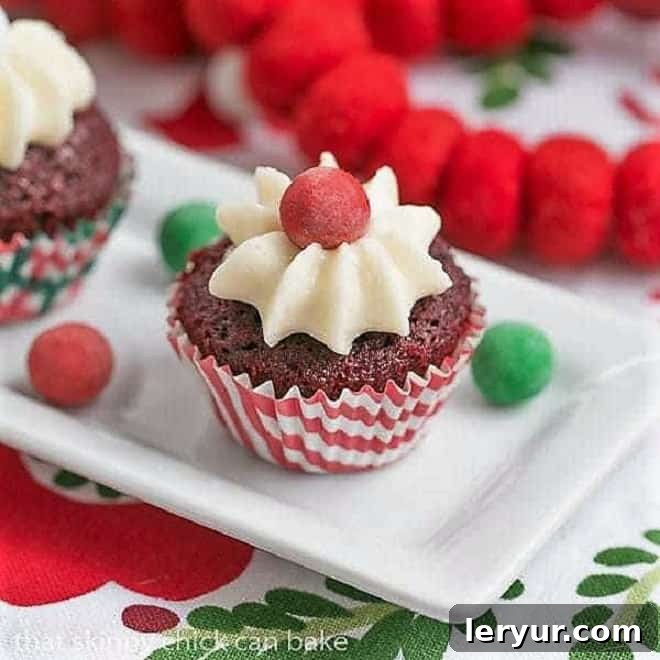
The Irresistible Charm of Mini Red Velvet Cupcakes
There’s an undeniable allure to miniature desserts, and these mini red velvet cakes embody that charm perfectly. They offer all the rich flavor and beloved texture of a full-sized cake but come with numerous advantages that make them a standout choice for any occasion. From their convenient portioning to their adaptable elegance, here’s why these tiny treats are a must-make:
- Perfect Portions for Guilt-Free Indulgence: Their petite size allows for delightful indulgence without the overwhelming feeling of a large slice of cake. This makes it easy to enjoy one, or even two, without overdoing it, perfect for those who want to savor a sweet moment.
- Effortless Festive Appeal: With minimal effort, these cupcakes can be transformed into stunning festive centerpieces. Imagine topping them with candy-coated chocolate balls in vibrant holiday colors for Christmas, or scattering delicate heart-shaped sprinkles for Valentine’s Day. Even simple changes in paper liners, like seasonal patterns, can instantly elevate their appearance, making them suitable for any special event throughout the year.
- Ideal for Dessert Buffets and Gatherings: Serving mini cupcakes at a party or dessert buffet is a brilliant solution for hosts. Guests can easily pick up a treat without the need for plates or cutlery, ensuring a cleaner and more convenient serving experience. Their small stature also makes them perfect for creating visually appealing arrangements on a tiered stand.
- Versatile for Year-Round Celebrations: While their iconic red color makes them a natural fit for Christmas and Valentine’s Day, the exquisite flavor profile of red velvet transcends seasons. These mini cupcakes are equally delightful for birthdays, bridal showers, baby reveals, or even a simple weekend treat. Just adjust the decorations to match your theme!
- Kid-Friendly Perfection: Children adore these bite-sized delights. Their small size is perfect for little hands, and the vibrant red hue paired with sweet cream cheese frosting is always a hit, making them a fantastic option for school parties or family gatherings.
- Quicker Baking Time: One of the practical benefits of mini cupcakes is their reduced baking time compared to their larger counterparts. This means you can whip up a large batch more efficiently, saving you precious time in the kitchen.
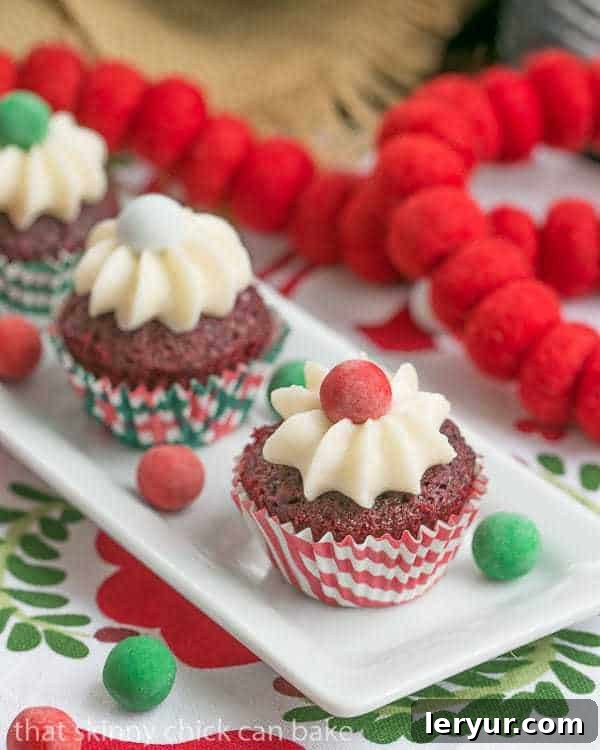
Crafting the Perfect Mini Red Velvet Cupcakes: A Tried-and-True Recipe
Among the countless red velvet recipes available, this particular one holds a special place in my heart, and I’m confident it will in yours too. It’s the one and only red velvet recipe I’ve ever felt the need to make, a true gem passed down from a wonderfully knowledgeable foodie friend. What makes this recipe truly stand out is its meticulous balance of ingredients, resulting in an exceptionally moist, velvety, and tender crumb that is the hallmark of a truly great red velvet cake.
The Secret Behind the Perfect Texture: Buttermilk and Premium Ingredients
The magic behind the signature tender crumb and delicate tang of these red velvet cupcakes lies significantly in the use of buttermilk. Its natural acidity reacts beautifully with the baking soda, creating air pockets that contribute to a light, airy texture while adding a subtle depth of flavor that can’t be replicated. While cocoa powder is present, its role is more about enhancing depth rather than dominating with a strong chocolate flavor, a common characteristic of authentic red velvet. For the best results, ensure all your perishable ingredients, especially butter, eggs, and cream cheese, are brought to room temperature before you begin. This crucial step guarantees a smooth, emulsified batter and a lump-free, silky frosting.
PRO-Tip: Buttermilk Substitute Made Easy!
Don’t have buttermilk on hand? No need to rush to the store! You can easily make a homemade substitute with just two common ingredients you likely already have. Simply add one tablespoon of white vinegar or lemon juice to a 1-cup liquid measuring cup. Then, fill the remainder of the cup to the 1-cup line with regular milk (any fat percentage will work, though whole milk is often preferred for richness). Stir the mixture gently and let it sit for 5-10 minutes. During this time, the milk will slightly curdle and thicken, creating a perfect acidic stand-in for buttermilk, ready to be measured out for your recipe.
The Dreamy Cream Cheese Frosting: A Baker’s Delight
A true red velvet cupcake is incomplete without a generous dollop of rich, tangy, and impossibly smooth cream cheese frosting. This recipe delivers a frosting that is not just delicious but also a dream to pipe – a rare and welcome characteristic for any baker! The perfect harmony of cold cream cheese, softened butter, a hint of vanilla, and precisely sifted powdered sugar creates a creamy, velvety topping that flawlessly complements the subtle cocoa notes of the cupcakes. Its smooth and stable consistency makes it incredibly easy to work with, allowing you to create elegant swirls and designs every time. Once you taste this homemade masterpiece, you’ll understand why no store-bought or bakery frosting can truly compare to its fresh, delightful flavor and impeccable texture.
A Family Favorite That Stands Apart
My daughter, Katie, has an undeniable passion for all things red velvet, and her excitement for these scaled-down cupcakes was palpable. Their perfect balance of flavor, moisture, and the irresistible frosting made them an instant hit, quickly becoming a cherished family favorite. This recipe is more than just ingredients and instructions; it’s about the joy of baking and sharing truly exceptional treats with loved ones. If you, like Katie, are captivated by the magic of red velvet, then you’ll undoubtedly appreciate this recipe and the extensive inspiration it offers. For those eager to explore more red velvet creations, be sure to check out this comprehensive red velvet recipe roundup for a wealth of ideas!
Baking Tips for Flawless Mini Red Velvet Cupcakes Every Time
Achieving consistently perfect mini red velvet cupcakes is easier than you might think with a few essential baking practices. Follow these expert tips to ensure your cupcakes are always moist, tender, and beautifully baked, making your baking experience smooth and rewarding:
- Ensure Room Temperature Ingredients: This cannot be stressed enough! Eggs, buttermilk, and butter at room temperature emulsify more effectively, leading to a smoother, more uniform batter. This translates to a more consistent texture in your finished cupcakes.
- Accurate Measurement is Key: Baking is a precise science. Always use proper measuring techniques, especially for flour. Spoon your cake flour into the measuring cup and level it off with a straight edge; never scoop directly from the bag, as this can compact the flour and result in dry, dense cupcakes.
- Avoid Overmixing the Batter: Once you add the dry ingredients to the wet, mix only until they are just combined. Overmixing develops the gluten in the flour, which can lead to tough, chewy cupcakes rather than the desired tender crumb. A few small lumps in the batter are perfectly acceptable.
- Properly Fill Cupcake Liners: For mini cupcakes, aim to fill each paper liner approximately two-thirds full. This provides ample space for the cupcakes to rise beautifully without overflowing, ensuring a neat and appealing dome.
- Monitor Baking Time Closely: Mini cupcakes bake much faster than standard ones. Keep a watchful eye on them, especially during the last few minutes of the recommended baking time. Insert a toothpick into the center of a cupcake; it should come out clean or with a few moist crumbs attached, but never with wet batter. Overbaking is the primary culprit for dry cupcakes.
- Cool Completely Before Frosting: Patience is a virtue here! Ensure your mini cupcakes are entirely cooled to room temperature before you even think about applying the frosting. Attempting to frost warm cupcakes will cause your beautiful cream cheese frosting to melt and slide right off, creating an unfortunate mess.
Creative Decoration Ideas for Your Mini Red Velvet Cupcakes
One of the most delightful aspects of baking mini cupcakes is the endless array of decoration possibilities. Unleash your creativity and elevate your mini red velvet creations with these fun and festive ideas, perfect for making your treats visually stunning:
- Classic Cream Cheese Swirl: The simplest yet most elegant approach involves piping a beautiful swirl of your homemade cream cheese frosting using a star or round piping tip. This classic look never fails to impress.
- Festive Sprinkles Galore: Sprinkles are an instant mood lifter! Opt for red and green mixes for Christmas, delicate red and pink combinations for Valentine’s Day, or a vibrant rainbow assortment for birthdays and other joyous celebrations.
- A Touch of Edible Glitter: For an added touch of sophistication and sparkle, dust your frosted cupcakes with edible red, gold, or silver glitter. This instantly transforms them into gourmet treats, ideal for formal gatherings.
- Mini Chocolate Shavings or Chips: Sprinkle fine dark or white chocolate shavings, or even mini chocolate chips, over the frosting for an added layer of texture and a delightful chocolatey accent that complements the red velvet flavor.
- Fresh Berry Toppers: For a burst of fresh flavor and vibrant color, top each cupcake with a single fresh raspberry, a couple of small blueberries, or a tiny strawberry slice. This is especially appealing during warmer months.
- Playful Candy Accents: Beyond the charming candy-coated chocolate balls, consider other small candies like mini chocolate hearts, crushed peppermints for a festive twist, or elegant edible pearls for a sophisticated finish.
- Themed Cupcake Toppers: Small decorative paper flags, edible images, or themed picks can instantly customize your cupcakes for any event, from adorable baby shower celebrations to elegant anniversary parties.
Make-Ahead and Storage Tips for Convenience
These mini red velvet cupcakes are exceptionally well-suited for make-ahead baking, a huge advantage when you’re planning for busy holidays, parties, or just want to have treats ready for unexpected guests. Here’s how to ensure your cupcakes remain fresh and delicious for days:
- Storing Unfrosted Cupcakes: Once your cupcakes have completely cooled, transfer them to an airtight container. At room temperature, they will stay fresh for up to 2 days. If you need to store them longer, they can be kept in the refrigerator for up to 5 days. For extended freshness, unfrosted cupcakes can be frozen for up to 3 months. When ready to use, simply thaw them at room temperature before applying the frosting.
- Storing Frosted Cupcakes: Due to the cream cheese in the frosting, frosted cupcakes must be stored in an airtight container in the refrigerator. They will maintain their quality and flavor for 3-4 days. For the best taste and texture, allow them to sit at room temperature for about 30 minutes before serving to let the frosting soften slightly.
- Freezing Frosted Cupcakes: Yes, you can even freeze frosted cupcakes! To prevent the frosting from sticking, first place the frosted cupcakes on a baking sheet and freeze them until the frosting is firm (this usually takes 1-2 hours). Once firm, transfer them to an airtight container, layering them carefully with parchment paper if needed. They can be frozen for up to 2 months. Thaw them overnight in the refrigerator or at room temperature for a few hours before serving.
More Holiday and Red Velvet Dessert Inspirations
If these mini red velvet cupcakes have sparked your inner baker, and you’re eager for more delightful treats to complete your holiday spread or simply can’t get enough of that rich red velvet flavor, explore these fantastic recipes from my kitchen and those of my talented foodie friends:
More Christmas Week Delights:
- Eggnog Pound Cake from The Redhead Baker
- Quince, Cranberry and Persimmon Crisps from Pineapple and Coconut
- Eggnog Truffles from Crumb: A Food Blog
- Peppermint Fudge from The Bitter Side of Sweet
- Gingerbread Cake with Orange Cream Glaze from Comfortably Domestic
- No-Bake Chocolate Peppermint Cheesecake from Rants From My Crazy Kitchen
- Easy White Chocolate Peppermint Fudge from Big Bear’s Wife
- Molasses Ginger Cookies from Karen’s Kitchen Stories
- Caramel Bacon Bark from Dixie Chik Cooks
- Mini Vanilla Bean Cheesecakes
More Red Velvet Delights You’ll Love:
- Red Velvet Blondies from Crazy for Crust
- Cheesecake Filled Red Velvet Cake from That Skinny Chick Can Bake
- Caramel Filled Red Velvet Cookies from TidyMom
- Red Velvet Cupcakes from That Skinny Chick Can Bake
- Red Velvet Oreo Truffles from The Little Kitchen
- Red Velvet Cookies with White Chocolate Chips
Essential Tools for Your Baking Adventure
Having the right kitchen tools can significantly enhance your baking experience and help ensure perfect results, especially when creating delicate treats like mini cupcakes. Here are some indispensable essentials that will make your baking journey smoother and more enjoyable:
- Mini Muffin Pan: Absolutely crucial for achieving those adorable, uniform bite-sized shapes. A good quality non-stick pan ensures easy release of your precious mini cupcakes and promotes even baking.
- 10-Piece Mixing Bowl Set: A versatile set of mixing bowls in various sizes is a baker’s best friend. They are perfect for separating wet and dry ingredients, mixing batters without spills, and preparing your frosting efficiently.
- KitchenAid 9-Speed Hand Mixer: While mixing by hand is always an option, an electric hand mixer drastically cuts down on prep time and ensures your batter and frosting are perfectly smooth, aerated, and lump-free, yielding superior results.
- The Pampered Chef Icing Decorator (or quality Piping Bag & Tips): Essential for achieving that professional-looking, elegant swirl of cream cheese frosting. A good piping bag coupled with a selection of tips allows for creative, consistent, and beautiful decorations every time.
Mini Red Velvet Cupcakes Recipe
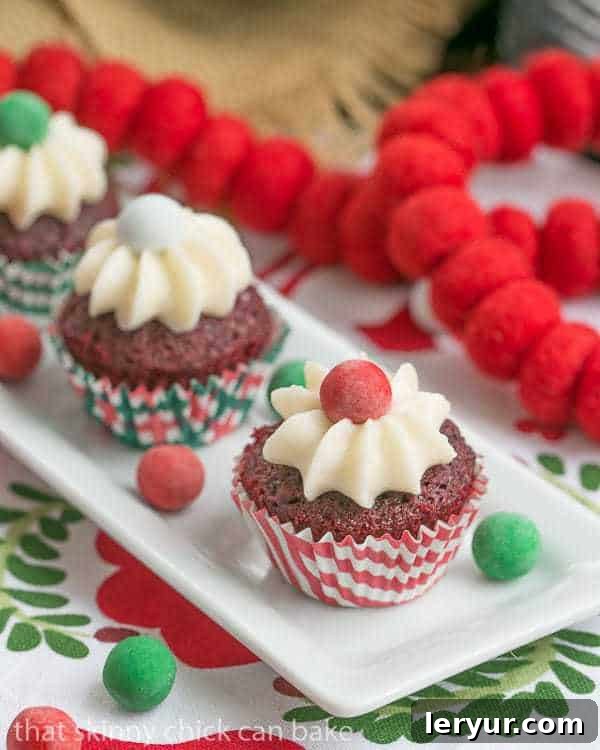
The BEST red velvet recipe, I promise! And these mini cupcakes are perfect for a holiday dessert buffet!
Prep Time: 30 minutes
Cook Time: 15 minutes
Total Time: 45 minutes
Yield: 72 mini cupcakes
Ingredients
For the Cupcakes:
- 3½ cups cake flour
- ½ cup unsweetened cocoa (not Dutch processed)
- 1½ teaspoons salt
- 2 cups canola oil
- 2¼ cups granulated sugar
- 3 large eggs
- 3 ounces red food coloring (liquid or gel, for vibrant color)
- 1½ teaspoons vanilla extract
- 1¼ cups buttermilk
- 2 teaspoons baking soda
- 2½ teaspoons white vinegar
For the Cream Cheese Frosting:
- 8 ounces cream cheese, cold
- 6 tablespoons unsalted butter, at room temperature
- 2 teaspoons vanilla extract
- 3 cups powdered sugar, sifted
Instructions
- Prepare for Baking: Preheat your oven to 350ºF (175ºC). Line three 24-count mini-muffin tins with paper liners. Set aside.
- Combine Dry Ingredients: In a medium bowl, whisk together the cake flour, unsweetened cocoa powder, and salt. Set aside.
- Cream Wet Ingredients: In the bowl of an electric mixer, beat the canola oil and granulated sugar on medium speed until well blended and light in color, about 2-3 minutes. Beat in the eggs, one at a time, ensuring each egg is fully incorporated before adding the next.
- Add Color and Vanilla: Lower the mixer speed to low (to prevent splashing!) and carefully add the red food coloring and vanilla extract. Mix until thoroughly combined and the batter has an even, vibrant red hue.
- Alternate Dry and Wet: With the mixer still on low speed, gradually add the dry flour mixture to the wet ingredients, alternating with the buttermilk. Begin by adding about half of the flour mixture, mix briefly until just combined, then add half of the buttermilk, mix again, followed by the remaining flour, and finally, the remaining buttermilk. Mix only until the ingredients are just combined; do not overmix.
- Final Mix: Scrape down the sides of the bowl with a spatula to ensure all ingredients are incorporated. Mix briefly for a few more seconds.
- Activate Leavening: In a small separate dish, combine the baking soda and white vinegar. Stir until it fizzes vigorously, then quickly add this activated mixture to the cupcake batter with the mixer running. Beat for exactly 10 seconds to fully incorporate the leavening agents.
- Bake the Cupcakes: Fill each prepared mini cupcake liner approximately two-thirds full with batter. Bake for 12-15 minutes, or until a cake tester or toothpick inserted into the center of a cupcake comes out clean.
- Cool Completely: Let the mini cupcakes cool in their pans for a few minutes before carefully transferring them to a wire rack to cool completely. It is crucial they are fully cooled before proceeding to frosting.
- Prepare Cream Cheese Frosting: In the bowl of an electric mixer, beat the cold cream cheese, room temperature unsalted butter, and vanilla extract until just blended and smooth.
- Sweeten the Frosting: Gradually add the sifted powdered sugar, one cup at a time, beating on low speed until fully incorporated and the frosting is smooth, creamy, and at the correct piping consistency. You may find you prefer slightly more or less powdered sugar to achieve your desired sweetness and thickness. This recipe yields approximately 2 cups of rich frosting.
Recommended Products
As an Amazon Associate and member of other affiliate programs, I earn from qualifying purchases.
- KitchenAid 9-Speed Digital Hand Mixer
- King Arthur Cake Flour
- Non-Stick Mini Muffin Pan
Nutrition Information
Amount Per Serving (1 mini cupcake):
- Calories: 147
- Total Fat: 8g
- Saturated Fat: 2g
- Trans Fat: 0g
- Unsaturated Fat: 6g
- Cholesterol: 14mg
- Sodium: 108mg
- Carbohydrates: 17g
- Fiber: 0g
- Sugar: 11g
- Protein: 1g
© Liz Berg
Cuisine: American / Category: Cupcakes