
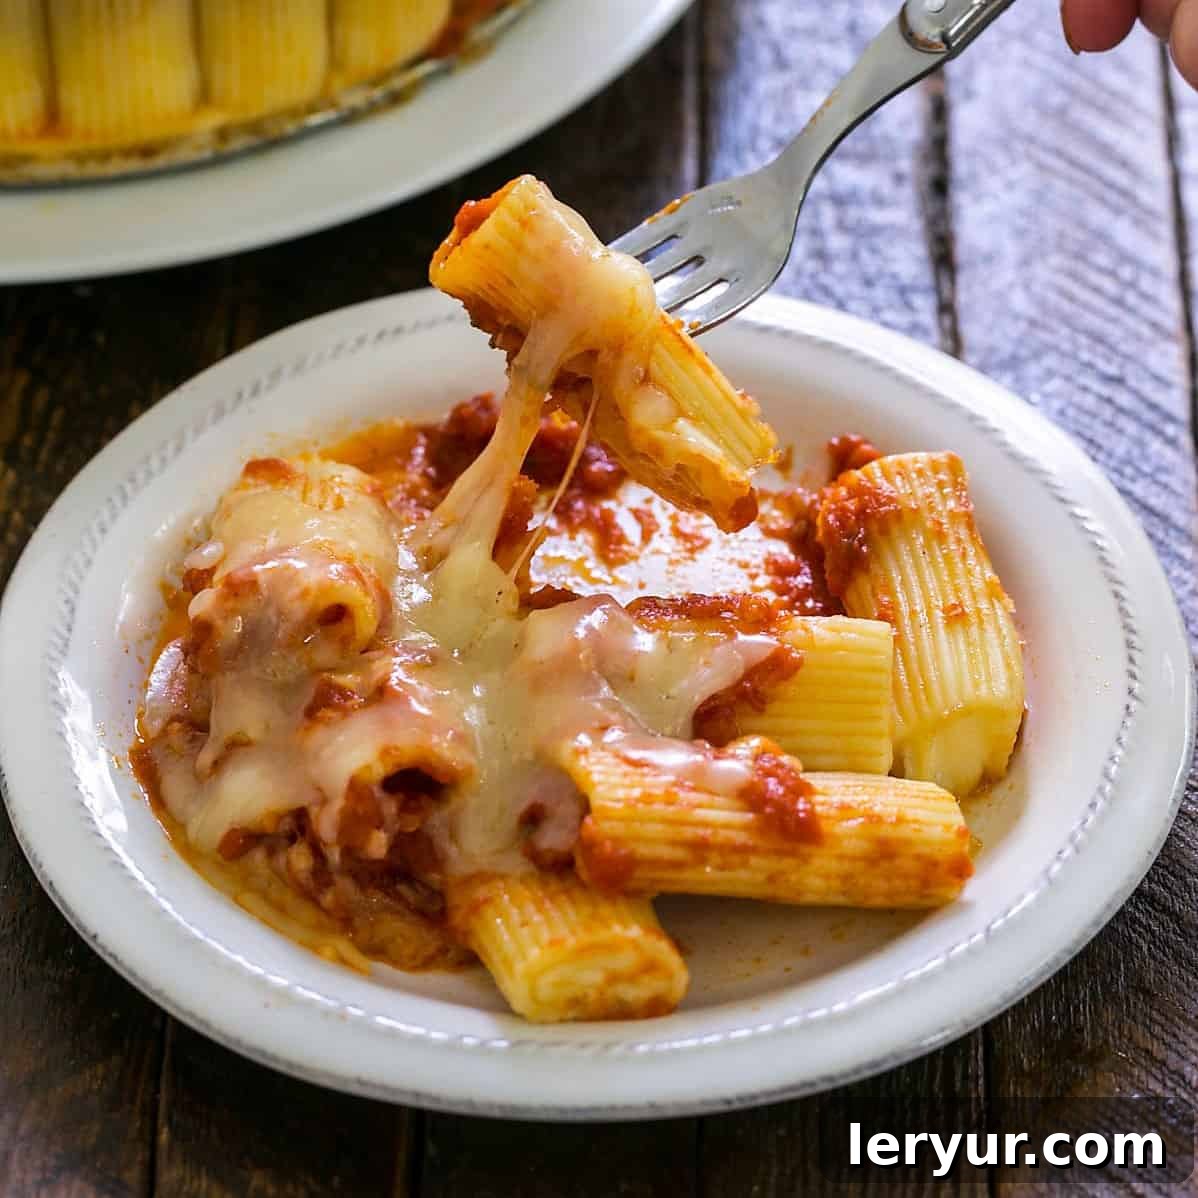
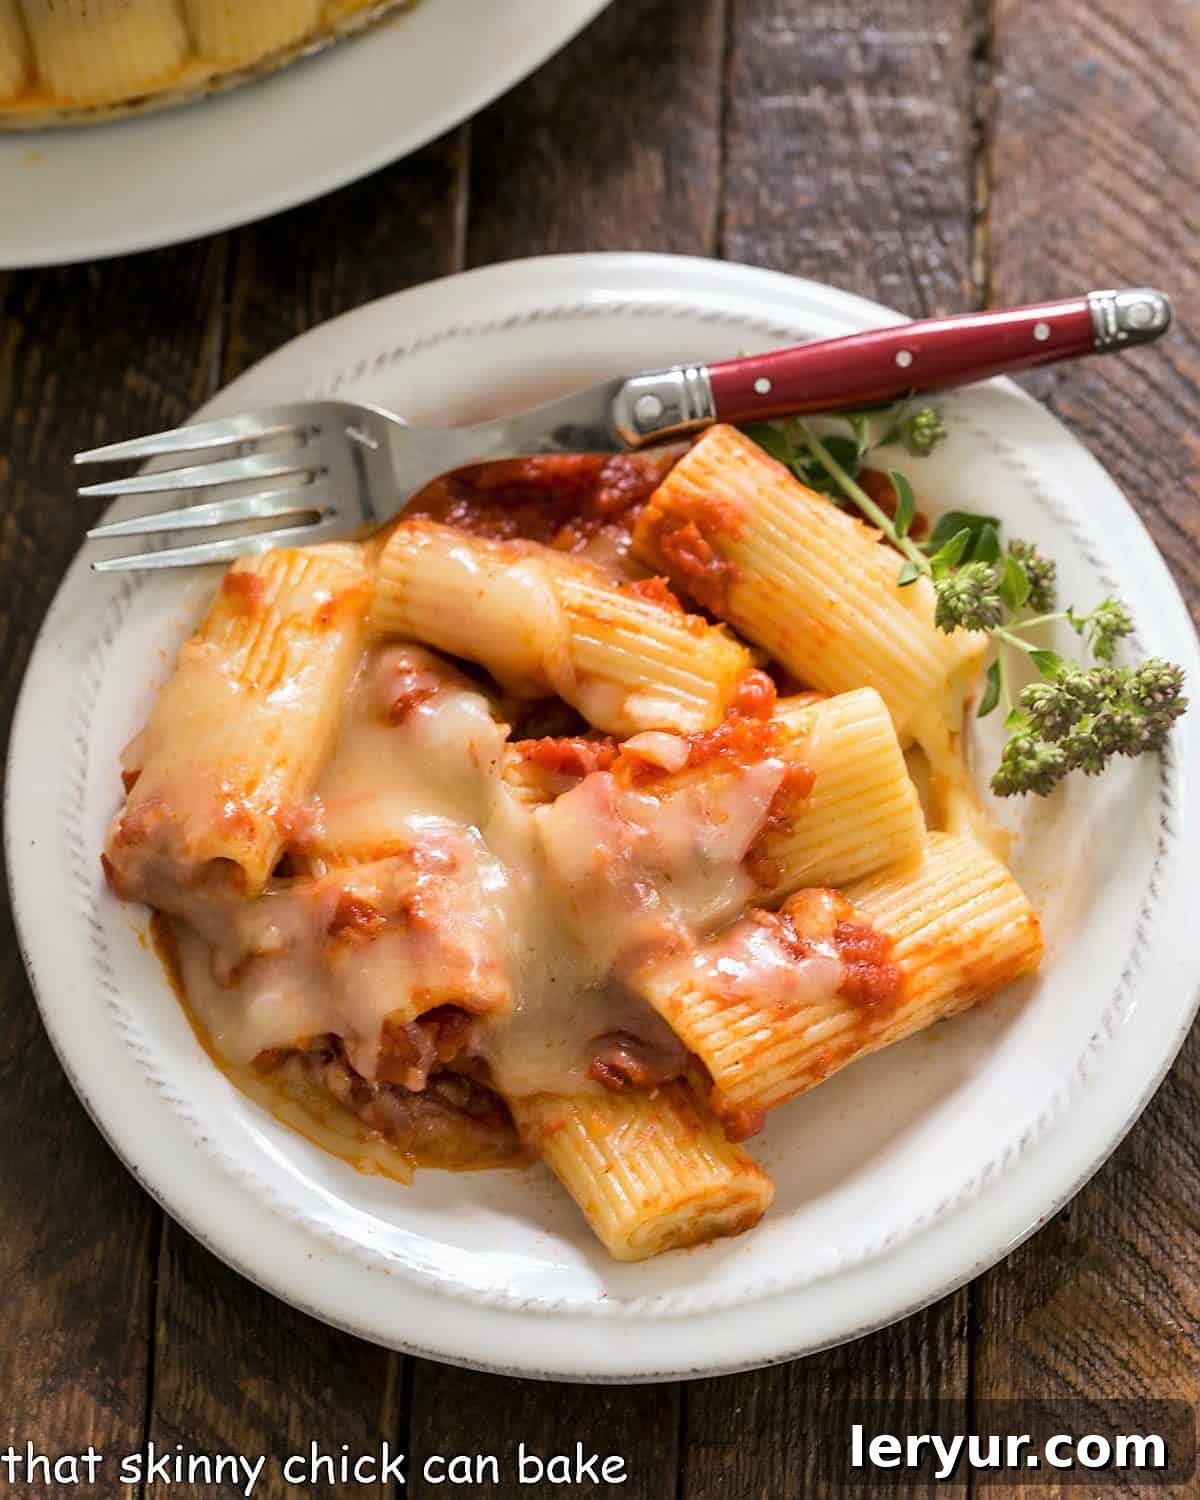
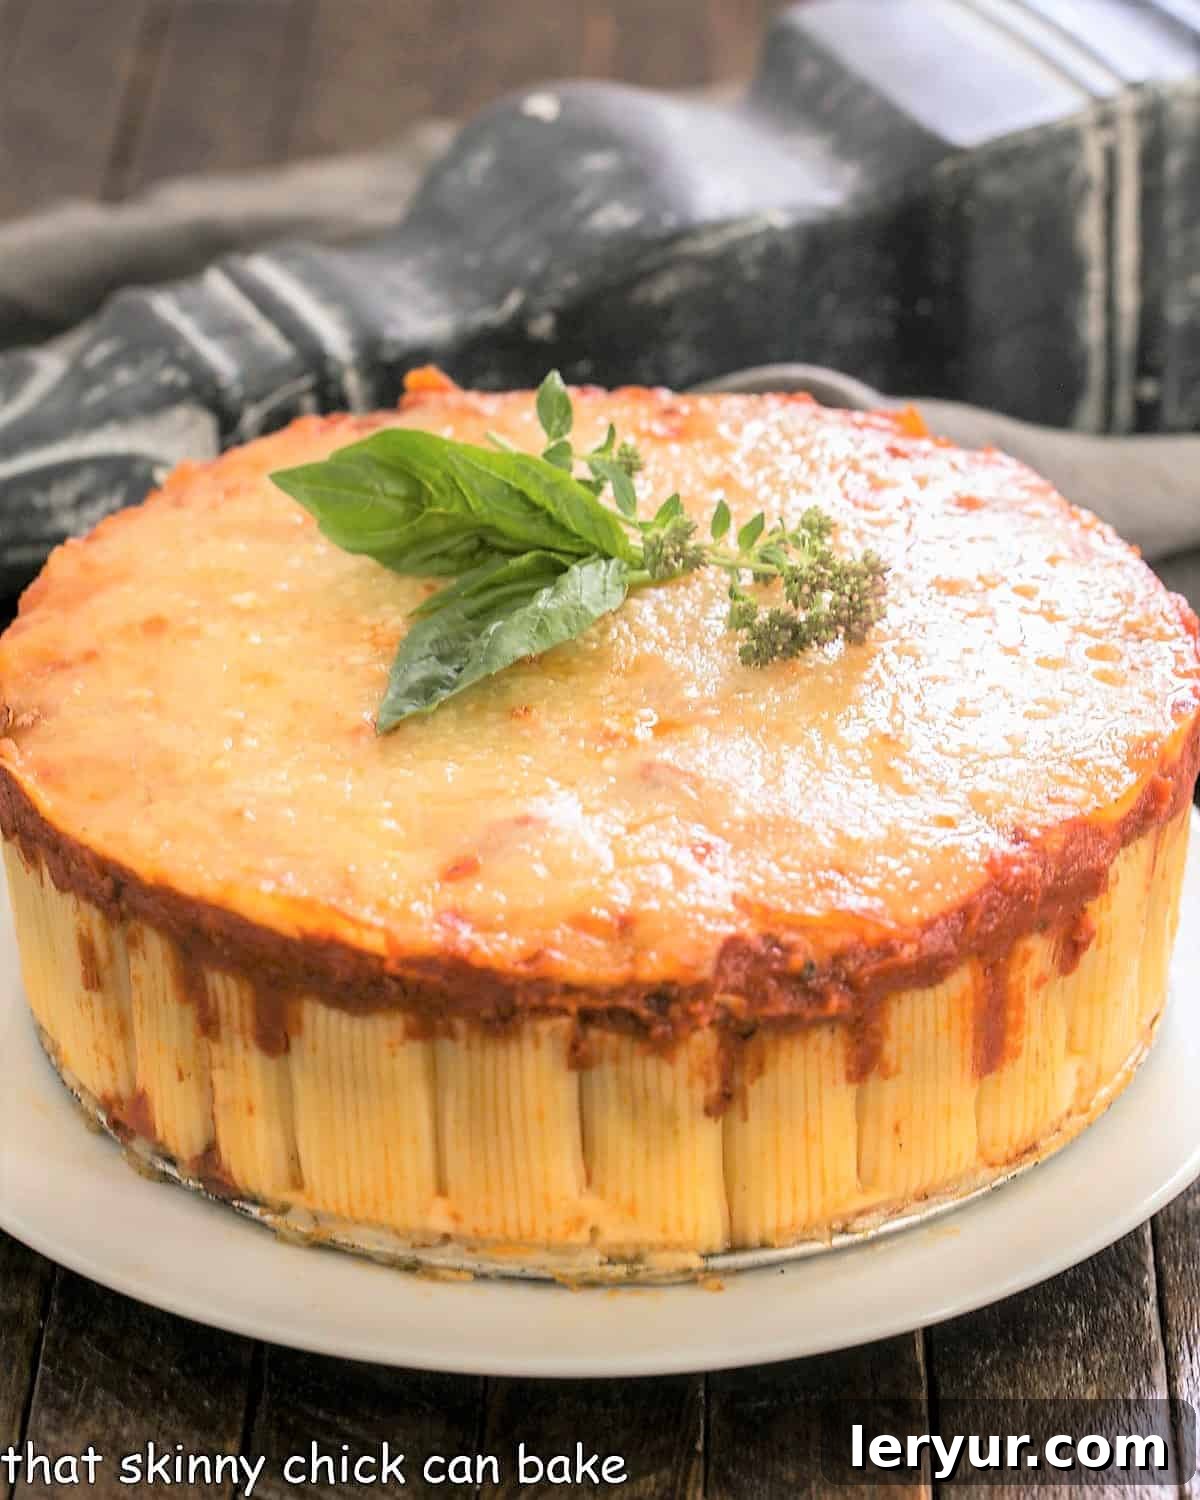
Welcome to the ultimate comfort food experience: Mozzarella Baked Rigatoni. This dish is not just a meal; it’s a celebration of rich flavors, gooey cheese, and perfectly cooked pasta, designed to bring warmth and joy to any table. Imagine tender rigatoni tubes, each lovingly stuffed with stringy mozzarella, nestled in a vibrant marinara sauce, and crowned with even more cheese before being baked to golden perfection. It’s a true showstopper that promises a delightful culinary adventure for the whole family.
Far from your average pasta bake, this recipe elevates the classic by meticulously stuffing each rigatoni noodle, creating an incredible texture and an explosion of cheesy goodness in every bite. Once assembled in a springform pan, it transforms into a visually stunning creation that’s as impressive to look at as it is delicious to eat when the sides are removed. Prepare yourself for a dish that is both elegant in presentation and deeply satisfying in flavor – a guaranteed crowd-pleaser that embodies the heart of Italian-American comfort cuisine.
Why This Mozzarella Baked Rigatoni is a Must-Try
If you’re looking for a dish that delivers on flavor, comfort, and a touch of culinary magic, this Mozzarella Baked Rigatoni is your answer. Here’s why it deserves a spot in your recipe rotation:
- Timeless and Irresistible Flavors: The combination of simple, classic ingredients – creamy mozzarella, tangy marinara, and hearty pasta – creates a symphony of tastes that appeals to everyone. It’s an homage to traditional Italian-American cooking, elevated with a unique presentation.
- The Ultimate Meatless Meal: This dish is a satisfying vegetarian option that doesn’t compromise on richness or substance. It’s packed with protein from the cheese and robust flavor from the sauce, making it a complete and fulfilling main course that even meat-lovers will adore.
- Unparalleled Comfort Food: Few things rival the comforting embrace of warm, cheesy pasta. This baked rigatoni, with its layers of melted cheese and savory sauce, offers a cozy, soul-satisfying experience perfect for chilly evenings, family gatherings, or simply when you need a little culinary hug.
- A Show-Stopping Presentation: Arranging the stuffed rigatoni upright in a springform pan creates a breathtaking spiral effect. When the pan sides are removed, you reveal a beautiful, edible centerpiece that is sure to impress your guests and make any meal feel special.
- Customizable and Versatile: While perfect as is, this recipe also serves as an excellent base for customization. You can easily add your favorite vegetables, switch up the cheeses, or even incorporate some cooked ground meat for a heartier version, adapting it to suit your preferences and dietary needs.
Understanding Rigatoni: The Perfect Pasta for Stuffing
Before diving into the recipe, let’s appreciate the star of our show: rigatoni. Rigatoni is a type of tube-shaped pasta with ridges, originating from Italy. Its name comes from the Italian word “rigato,” which means “ridged” or “lined.” Unlike smooth penne or curved macaroni, rigatoni tubes are typically larger, slightly curved, and feature distinctive ridges along their exterior.
These characteristics make rigatoni exceptionally well-suited for hearty sauces and, in our case, for stuffing. The wide opening and sturdy structure of each tube are ideal for holding generous amounts of cheese. The ridges on the outside also serve a purpose, expertly capturing and clinging to the rich marinara sauce, ensuring every bite is bursting with flavor. The robust nature of rigatoni means it holds its shape beautifully during baking, preventing it from becoming mushy and instead providing a delightful chew.
Crafting Your Mozzarella Baked Rigatoni: A Step-by-Step Guide
Creating this impressive baked rigatoni dish is a fun and rewarding process. While it requires a bit of patience for the stuffing, the results are absolutely worth the effort. Follow these steps to assemble your cheesy masterpiece.
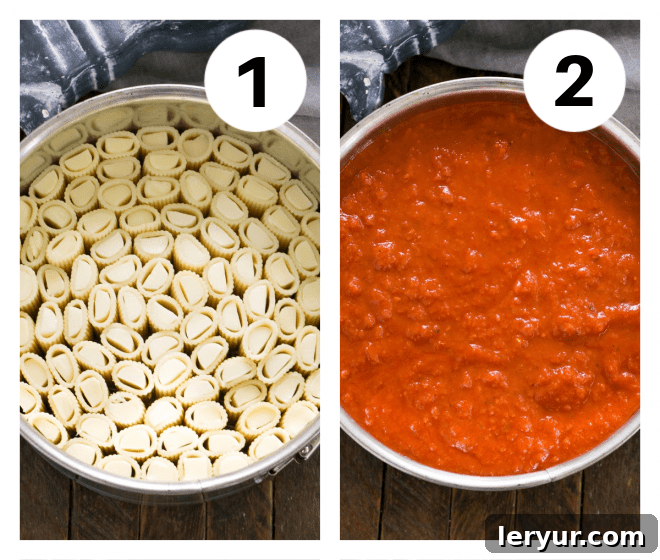
- Prepare the Rigatoni and Cheese: Begin by cooking your rigatoni according to package directions, ensuring it’s al dente. It’s crucial not to overcook it, as it will soften further in the oven. Once cooked, drain the pasta and let it cool slightly to make handling easier. While the pasta cools, prepare your string cheese by trimming each stick to fit snugly inside the rigatoni tubes. You may need to cut them in half lengthwise depending on the width of your rigatoni.
- Stuff and Arrange: This is where the magic happens! Carefully stuff each individual rigatoni noodle with a trimmed piece of string cheese. Once stuffed, begin arranging them upright, one by one, in your prepared 8-inch springform pan. Start from the outer edge of the pan and work your way inward, packing the tubes tightly to create a beautiful, cohesive spiral. This tight arrangement is key to achieving that striking presentation when the pan is opened.
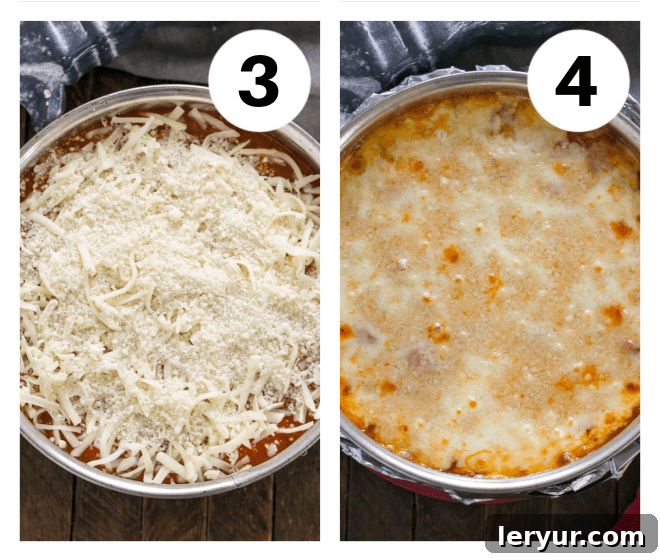
- Add Sauce and Cheeses: Once all the rigatoni is arranged, generously pour your favorite marinara sauce over the entire assembly, ensuring it seeps into all the nooks and crannies. Don’t be shy; the sauce will infuse the pasta with incredible flavor. Next, sprinkle a generous layer of shredded mozzarella cheese evenly over the top, followed by a dusting of grated Parmesan cheese. These layers will melt into a golden, bubbly crust during baking.
- Bake to Perfection: Place the springform pan on a foil-lined baking sheet to catch any potential drips. Cover the pan loosely with foil to prevent the cheese from browning too quickly. Bake as directed in your recipe card (typically 15 minutes covered, then 15 minutes uncovered) until the pasta is heated through, the sauce is bubbling, and the top is beautifully golden brown and irresistible.
Ingredients for Your Cheesy Baked Rigatoni
Gathering the right ingredients is the first step to creating this delectable pasta bake. Here’s what you’ll need:
- 1 pound Rigatoni: Choose a good quality brand for the best texture.
- 3 cups Marinara Sauce: A 32 oz jar of your favorite high-quality marinara sauce works perfectly. Rao’s is often recommended for its rich flavor.
- 2 (12-ounce) packages String Cheese: These are the secret to easily stuffing the rigatoni. You’ll trim them to fit.
- 8 ounces Shredded Mozzarella: For that ultimate cheesy topping and melty goodness.
- ½ cup Grated Parmesan Cheese: Adds a sharp, salty depth of flavor to the crust.
Full Step-by-Step Instructions
Here are the detailed steps to bring this delightful Mozzarella Baked Rigatoni to life in your kitchen:
- Cook the Pasta: Cook 1 pound of rigatoni according to the package instructions in well-salted water until al dente. Drain the pasta thoroughly and let it cool slightly. This prevents it from becoming too soft during baking and makes it easier to handle for stuffing.
- Preheat Oven: Preheat your oven to 400°F (200°C).
- Prepare Baking Pan: Grease an 8-inch springform pan generously with non-stick cooking spray. Set it aside.
- Stuff and Arrange Rigatoni: Take each string cheese stick and cut it to fit the length of your rigatoni noodles. For wider noodles, you might need to cut the cheese sticks in half lengthwise. Insert one piece of trimmed string cheese into each rigatoni noodle. Carefully arrange the stuffed rigatoni noodles upright in the prepared springform pan. Begin at the outside edge of the pan and work your way towards the center, packing them tightly together to create a neat, circular pattern.
- Add Sauce: Pour the 3 cups of marinara sauce evenly over the top of the arranged rigatoni, ensuring it cascades down into the tubes and covers the pasta well.
- Top with Cheese: Evenly sprinkle the 8 ounces of shredded mozzarella cheese over the sauce. Then, generously sprinkle the ½ cup of grated Parmesan cheese on top of the mozzarella.
- Prepare for Baking: Place the springform pan on a foil-lined baking sheet. This will catch any potential drips and make cleanup easier. Cover the springform pan loosely with aluminum foil.
- Bake: Bake in the preheated oven for 15 minutes with the foil cover. After 15 minutes, remove the foil and continue baking for another 15 minutes, or until the cheese is melted, bubbly, and lightly browned on top, and the sauce is simmering.
- Rest and Serve: Once baked, remove the pan from the oven and let it cool for about 15 minutes. This resting period is crucial as it allows the cheese to set slightly, making it much easier to remove the sides of the springform pan and slice the baked rigatoni without it falling apart. Carefully remove the sides of the springform pan. Cut the baked rigatoni into wedges or spoon out individual portions.
Notes for a Perfect Baked Rigatoni
Allow plenty of time to stuff the rigatoni. It is a bit tedious, but you’ll love the results!
I needed to cut my string cheese sticks in half lengthwise to fit inside each noodle, then trimmed the excess from the top after insertion. This ensures the cheese fits perfectly and melts beautifully within the pasta.
This recipe is an adaptation from Hugs and Cookies, who was inspired by Hello, Yummy’s Honeycomb Pasta Bake. Culinary inspiration often leads to wonderful new creations!
Perfect Pairings: Recommended Side Dishes
To complete your comforting Italian-American meal, consider serving your Mozzarella Baked Rigatoni with one of these delicious sides:
- The Best Caesar Salad Recipe: A crisp, tangy Caesar salad provides a refreshing counterpoint to the rich pasta.
- Italian Chopped Salad Recipe: A vibrant chopped salad with a medley of fresh vegetables adds texture and brightness.
- Easy Roasted Green Beans: Simple, tender-crisp roasted green beans seasoned with garlic and Parmesan offer a healthy and flavorful side.
- Homemade Garlic Bread: A classic choice! Warm, crusty garlic bread is perfect for soaking up every last drop of the delicious marinara sauce.
Frequently Asked Questions About Baked Rigatoni
Rigatoni is a wide, ribbed, tube-shaped pasta. Its sturdy structure and large opening make it ideal for stuffing with cheese, as it holds its shape well during baking and ensures a delightful cheesy bite in every piece. The ridges also help the marinara sauce cling to the pasta, maximizing flavor.
For this recipe, we recommend using string cheese sticks, which are convenient and melt beautifully. Trim them to fit the length of your rigatoni tubes. If your rigatoni is particularly wide, you may need to slice the string cheese sticks in half lengthwise. Gently insert one piece into each noodle. If you were using a softer filling like ricotta, a piping bag with a tip slightly smaller than the pasta opening would be the most efficient method.
Garlic bread or a crusty artisan loaf with herbed olive oil for dipping is always a fantastic and classic accompaniment. To jazz up your olive oil, add dried basil, oregano, a pinch of red pepper flakes, salt, and even a drizzle of aged balsamic vinegar. A nice crisp green salad, like a Caesar or Italian chopped salad, provides a refreshing contrast to the richness of the pasta. Simple roasted vegetables such as broccoli, asparagus, or green beans would also be a delicious and balanced menu addition.
Absolutely! While this recipe is designed as a delicious meatless meal, you can easily add cooked ground beef, Italian sausage, or even shredded chicken to the marinara sauce for a heartier dish. Simply brown your chosen meat, drain any excess fat, and stir it into the marinara before pouring it over the stuffed rigatoni.
Yes, you can! Assemble the entire dish (stuff the rigatoni, add sauce and cheese) up to one day in advance. Cover it tightly with plastic wrap and refrigerate. When ready to bake, let it sit at room temperature for about 30 minutes before baking as directed, adding an extra 5-10 minutes to the covered baking time to ensure it heats through evenly.
Store any leftover Mozzarella Baked Rigatoni in an airtight container in the refrigerator for up to 3-4 days. To reheat, you can warm individual portions in the microwave or place the entire dish back in the oven (covered with foil) until heated through, adding a splash of water or broth if the sauce seems too thick.
Explore More Delicious Pasta Recipes: You May Also Like:
If you love this Mozzarella Baked Rigatoni, be sure to check out these other fantastic pasta dishes:
- Classic Lasagna from 365 Days of Baking: Layers of pasta, meat sauce, and creamy cheese for a truly satisfying meal.
- Ricotta Stuffed Pasta Shells: Large pasta shells filled with a rich ricotta and spinach mixture, baked in marinara.
- The Best Spaghetti Sauce: A versatile and flavorful sauce that’s perfect for any pasta night.
- Spaghetti Casserole: A fun and comforting twist on traditional spaghetti, baked into a hearty casserole.
- Discover more of the Best Pasta Recipes for every occasion and craving.
We hope you’ll try this incredible Mozzarella Baked Rigatoni and make it a new family favorite! Its comforting flavors and impressive presentation are sure to delight. Stay in touch through social media @ Instagram, Facebook, and Pinterest. Don’t forget to tag me when you try one of my recipes! And if you love the results, please give it a 5-star rating and share your experience!
Nutrition Information:
Yield:
10
Serving Size:
1
Amount Per Serving:
Calories: 425Total Fat: 23gSaturated Fat: 13gTrans Fat: 0gUnsaturated Fat: 8gCholesterol: 74mgSodium: 1018mgCarbohydrates: 28gFiber: 2gSugar: 5gProtein: 26g
Please note that the nutritional information provided is an estimate only. Factors such as specific product brands, variations in ingredients, and cooking methods can alter the actual nutritional content. This information is intended as a courtesy and should not be considered a substitute for professional dietary advice. For the most accurate nutritional assessment, it is recommended to calculate the values based on the exact ingredients you use.