
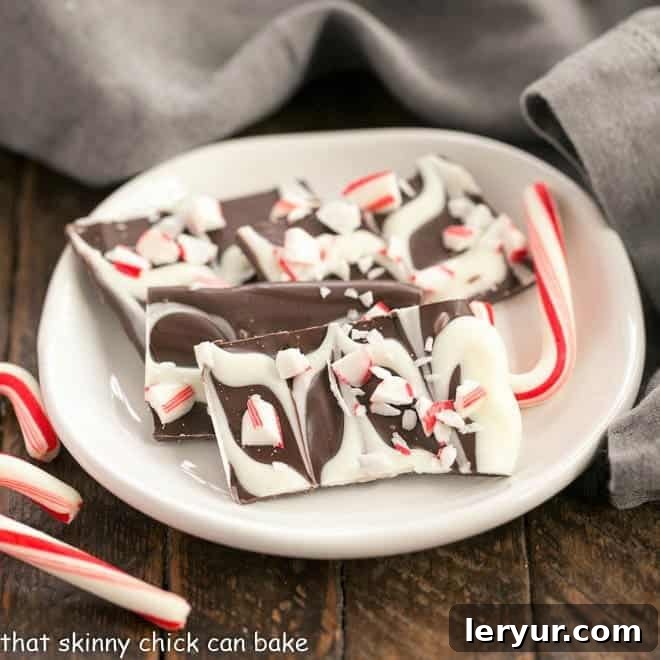
The holiday season brings with it a special kind of magic, and for many, that magic is intimately woven into the treats we share. While classic white chocolate peppermint bark has long held a cherished spot in festive traditions, this year, I decided to elevate the experience. Introducing the exquisite Swirled Peppermint Bark – a decadent blend of rich dark chocolate and creamy white chocolate, infused with refreshing peppermint and crowned with delightful candy cane crunch. This recipe isn’t just a dessert; it’s a testament to how a simple twist can transform a beloved classic into something truly extraordinary and visually stunning.
Creating homemade holiday treats doesn’t have to be complicated to be impressive. This Peppermint Bark Recipe is designed to be incredibly easy and utterly foolproof, making it perfect for both seasoned bakers and kitchen novices. Beyond its delightful taste, its gorgeous swirled appearance makes it an ideal candidate for holiday gifting, adding a personal touch that store-bought treats simply can’t match. Imagine presenting friends and family with a beautifully packaged assortment of this festive bark – it’s guaranteed to spread holiday cheer and earn you rave reviews!
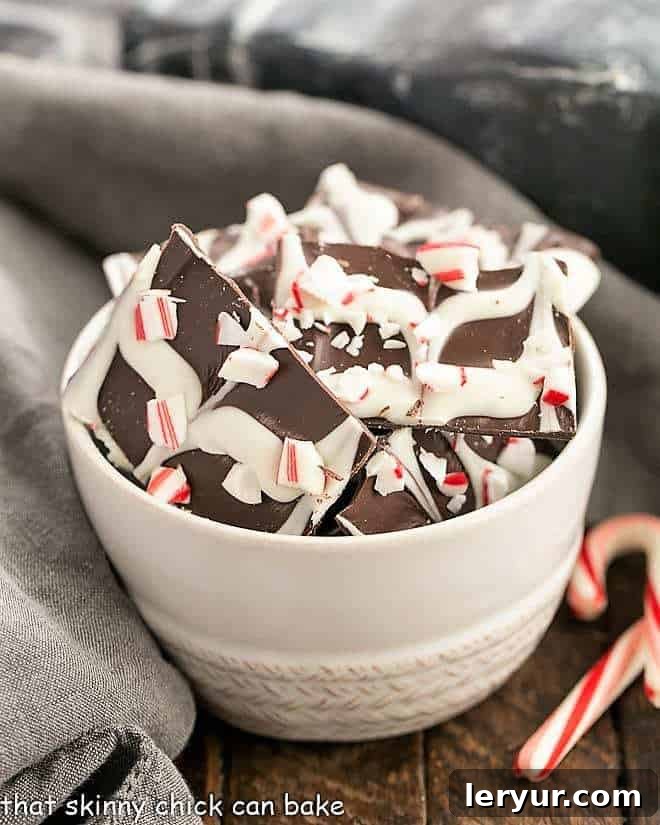
Why This Swirled Peppermint Bark is Your New Holiday Essential
Among the myriad of holiday sweets, our Swirled Peppermint Bark stands out as a true star. There are several compelling reasons why this particular recipe should be at the top of your festive baking list this season:
- A Family Favorite with a Twist: My children, like many, adore anything minty, especially during Christmas. While classic peppermint bark is always a hit, the addition of a rich dark chocolate base to our traditional white chocolate peppermint bark adds a depth of flavor that appeals to a broader palate. Even for those (like my picky husband) who typically prefer mint in their toothpaste, the balanced sweetness and cool freshness of this swirled bark often win them over, making it a truly inclusive holiday treat.
- Elegance Made Simple: This year, I decided to elevate our annual peppermint bark recipe by starting with a luscious dark chocolate layer, then artfully swirling in peppermint-spiked white chocolate, and finishing with a generous sprinkle of vibrant crushed candy canes. This layering and swirling technique transforms a simple bark into a sophisticated, eye-catching dessert that looks far more intricate than it actually is. It’s the perfect way to impress guests and loved ones without spending hours in the kitchen.
- Effortless & Accessible: In the hustle and bustle of the holiday season, simplicity is a gift in itself. This recipe requires minimal ingredients – essentially just chocolate, peppermint extract, and candy canes – and comes together with remarkable ease. There’s no need for complex baking techniques or specialized equipment. Just melt, swirl, sprinkle, and chill! This makes it an ideal project for busy weeknights, last-minute gift preparations, or even a fun activity to do with kids.
- Perfect for Holiday Gifting: Beyond being a delightful treat for your own home, this swirled peppermint bark is an excellent candidate for homemade food gifts. Its festive appearance, delicious flavor, and impressive presentation make it a thoughtful and personal present that shows you’ve put in extra care. Package it in pretty tins, cellophane bags, or decorative boxes tied with a ribbon for a truly special gift that everyone will appreciate.
If you’re looking for more delightful treats to share or gift this holiday season, I also highly recommend exploring these other cherished recipes: a rich Oreo White Chocolate Fudge, elegant Coconut White Chocolate Truffles, and comforting Old Fashioned Amish Sugar Cookies. Each offers a unique flavor and texture to complement your holiday spread.
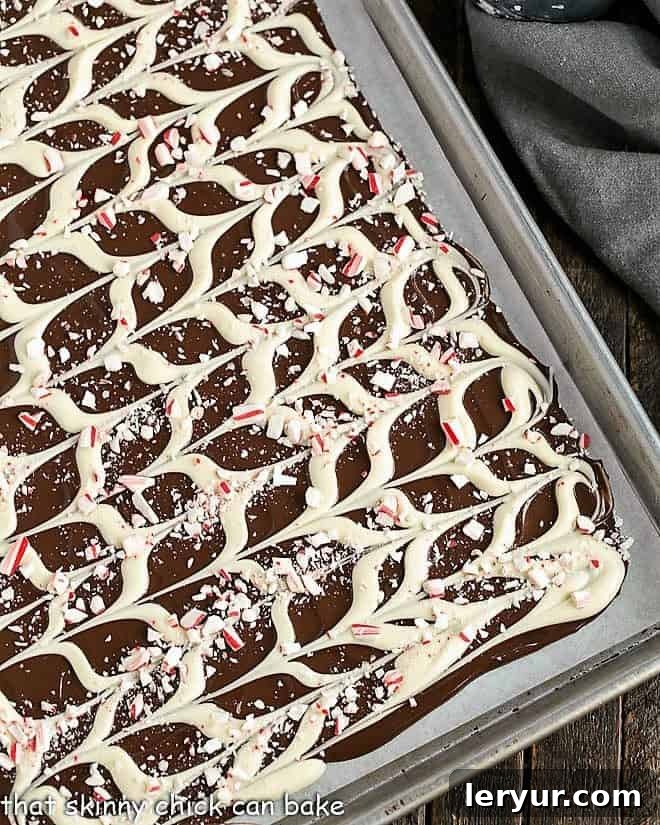
Mastering the Swirl: Expert Tips for Perfect Peppermint Bark
Creating perfect peppermint bark is a delightful art, and whether you prefer a classic white chocolate bark, a sophisticated layered chocolate bark, or our beautiful swirled version, the principles for success are similar. These expert tips will help you achieve a flawless finish every time (unless, of course, you’re one of those rare individuals who only enjoys mint in their toothpaste!).
- Choosing Your Chocolate Base: While I often lean towards the classic white chocolate peppermint bark for its simplicity, remember that you have many delicious options. For a pure white bark, simply mix melted white chocolate, crushed candy canes, and a touch of peppermint extract. Spread it on a lined baking sheet and chill until firm before breaking. For this recipe, we’re combining the best of both worlds!
- Understanding Chocolate Bloom: With white chocolate, you typically worry less about “chocolate bloom.” This harmless discoloration, appearing as grayish streaks or a powdery film on dark chocolate, occurs when the cocoa butter separates and recrystallizes due to improper tempering or temperature fluctuations. While it doesn’t affect taste, it can make your bark look less appealing.
- Layered vs. Swirled Bark: If you enjoy the rich notes of dark chocolate, a layered bark is a fantastic option. A layer of white chocolate on top can cleverly camouflage any minor bloom that might occur on your dark chocolate base. Our swirled method, however, offers both visual appeal and a harmonious blend of flavors.
- PRO-Tip: Preventing Bloom for a Shiny Finish: To minimize the chances of bloom and achieve a beautifully glossy finish, you can add a small amount of vegetable oil or shortening (about 1 teaspoon per 10-12 ounces of chocolate) to your chocolate as you melt it. This helps stabilize the cocoa butter. The key is to melt your chocolate gently. Avoid fully melting it in the microwave or double boiler; instead, remove it from the heat when only a few small lumps remain, and let the residual heat finish the melting process while stirring.
- Using Chocolate Melting Wafers: For absolute ease and consistent results, I highly recommend using quality Chocolate Melting Wafers. These are specifically designed for melting smoothly without the need for intricate tempering. Simply follow the package instructions for proper melting techniques.
- Timing is Crucial: Be aware that dark chocolate melts can harden quickly, especially if your kitchen is chilly during the winter months (I speak from experience!). It’s essential to have both your dark and white chocolates melted and ready to go simultaneously. This allows you to swiftly drizzle on the white chocolate and create your beautiful swirls before the dark chocolate sets. Work efficiently but carefully!
- PRO-Tip: Achieving the Perfect Swirl Design: For precise control when applying the white chocolate, I find it incredibly helpful to transfer the melted white chocolate into a quart-sized Ziploc bag. Snip off a tiny corner of the bag to create a makeshift piping tool. Pipe lines of white chocolate across the melted dark chocolate base. Then, take a clean table knife and gently drag it perpendicularly through both layers of chocolate. This creates a mesmerizing, marbled design that is both elegant and fun. Experiment with different patterns for unique results!
- The Power of Peppermint: Extract vs. Oil: It’s important to distinguish between peppermint extract and peppermint oil. Peppermint oil is significantly more potent, meaning a little goes a very long way – often just a drop or two is sufficient. I typically use peppermint extract for its milder flavor and easier measurement, but if you opt for oil, start with the smallest amount and taste test (if possible) before adding more.
- Cooling and Breaking: Once your bark is swirled and sprinkled, pop the entire baking tray into the refrigerator. Chilling it thoroughly is key to ensuring it hardens completely and allows for clean breaks. Once firm, you can either gently break it into rustic shards or use a knife to cut it into more uniform pieces.
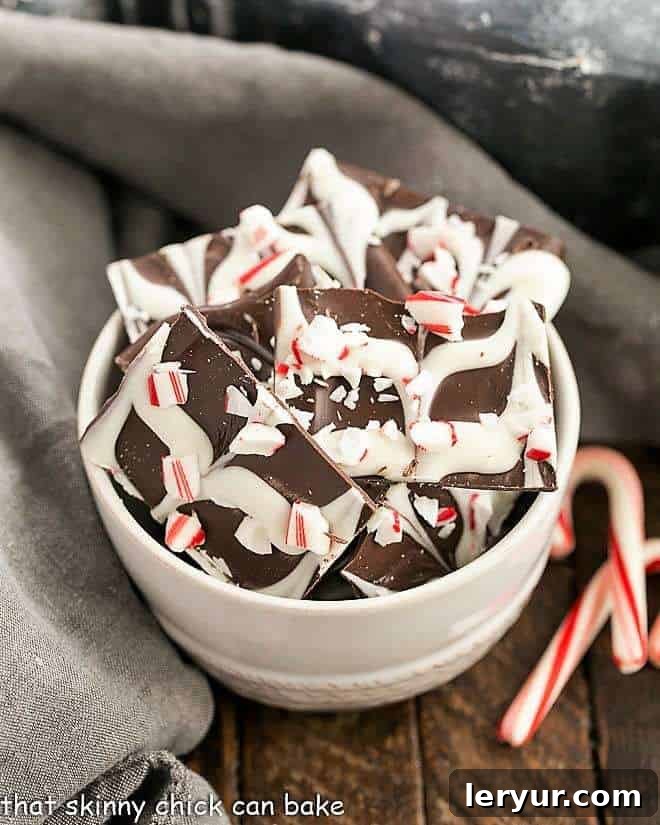
Frequently Asked Questions About Peppermint Bark
When stored properly in an airtight container, homemade peppermint bark will maintain its freshness and quality for up to two weeks at room temperature. However, if your kitchen tends to be on the warmer side, it’s best to store your container in the refrigerator to prevent the chocolate from softening or blooming prematurely. For extended storage beyond two weeks, you can even freeze peppermint bark; simply wrap it tightly in plastic wrap and then aluminum foil before placing it in a freezer-safe bag or container for up to 2-3 months.
Breaking peppermint bark can be fun, and there are a few methods to achieve different looks. To minimize fingerprints and ensure cleaner breaks, fold the edges of the parchment paper (which the bark is resting on) over the bark to create convenient holding spots. Then, gently bend the parchment-covered bark to encourage it to snap into irregular pieces. Adjust your holding spots as needed. For more control or uniform pieces, you can also use a sharp knife to make strategic scores or cuts into the hardened chocolate before breaking. If you’re aiming for dramatic, rustic shards, a fun (and stress-relieving!) method is to cover the top of the bark with foil or another sheet of parchment paper and gently tap it with a hammer or a rolling pin. Just be careful not to overdo it!
Generally, yes, most homemade and store-bought peppermint bark is naturally gluten-free, as its primary ingredients – chocolate, peppermint extract, and candy canes – do not typically contain gluten. However, it’s always prudent to be cautious, especially if you or your recipients have severe gluten sensitivities or celiac disease. When using store-bought ingredients like chocolate melts or candy canes, it wouldn’t hurt to quickly check the ingredient labels on the package to ensure there are no hidden gluten-containing additives or cross-contamination warnings from the manufacturer. When in doubt, or if purchasing from a small bakery, feel free to ask the maker of the bark about their ingredients.
Absolutely! Peppermint bark freezes beautifully, making it an excellent make-ahead holiday treat. To freeze, ensure the bark is completely hardened and broken into pieces. Layer the pieces between sheets of parchment paper in an airtight freezer-safe container or bag. It can be stored in the freezer for up to 2-3 months. When you’re ready to enjoy it, simply transfer the container to the refrigerator overnight, or let it come to room temperature for a few hours. This slow thawing process helps prevent condensation and maintains the chocolate’s texture and appearance.
The best chocolate for peppermint bark ultimately depends on your preference and desired outcome. For the easiest melting and setting without tempering, chocolate melting wafers (often labeled as “candy melts” or “tempering chocolate”) are highly recommended, especially for beginners. For a richer, more gourmet flavor, high-quality baking chocolate bars (like Ghirardelli, Lindt, or Callebaut) are fantastic. If using baking bars, consider chopping them finely to aid in even melting and follow our tips for gently melting to minimize bloom. A good quality semi-sweet or bittersweet dark chocolate (around 60-70% cocoa) pairs wonderfully with the sweetness of white chocolate and peppermint. Always choose a chocolate you genuinely enjoy eating on its own!
More Festive Holiday Recipes to Explore
The holiday season is a wonderful time to experiment with new flavors and revisit old favorites. If you’ve enjoyed making this swirled peppermint bark, you’re sure to love these other delightful mint and chocolate-inspired creations:
- Indulge in the nostalgic taste of Homemade York Peppermint Patties.
- Discover the irresistible charm of White Chocolate Candy Cane Cookies.
- Add a whimsical touch to your dessert table with festive Peppermint Bark Snowflakes.
- Explore a treasure trove of the Best Holiday Recipes for every celebration.
- And for even more festive inspiration, dive into our collection of Delicious Christmas Recipes.
Stay connected for more delicious recipes and kitchen tips! Follow along on social media @ Instagram, Facebook, and Pinterest. Don’t forget to tag me when you create one of my recipes! If you adore the results, please consider giving it a 5-star rating in the recipe card below.
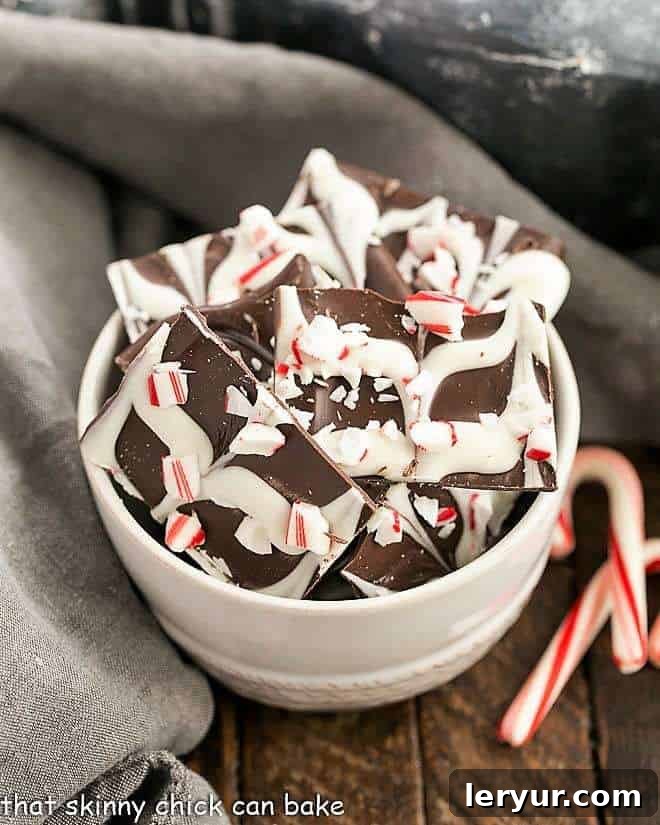
Swirled Peppermint Bark Recipe
15 minutes
2 minutes
1 hour
1 hour 17 minutes
1 ½ pounds bark
Dark chocolate, white chocolate and candy cane pieces swirled together for a fabulous holiday treat!
Ingredients
- Equal Parts dark and white chocolate melts, melted according to package directions*
- ¼ teaspoon peppermint extract
- Candy canes, crushed, about ¼+ cup
Instructions
- Line a baking pan with parchment paper.
- Gently melt the dark chocolate in the microwave. Pour the melted dark chocolate onto the parchment-lined baking pan and spread it evenly with an offset spatula.
- Gently melt the white chocolate. Stir in the peppermint extract until well combined. Using a Ziploc bag with a snipped corner (or a piping bag), pour the white chocolate on top of the dark chocolate in parallel lines from one short end of the pan to the other.**
- Take the tip of a table knife or a skewer and drag it through both layers of chocolate, making perpendicular cuts from one long side to the other. This creates the beautiful swirled design.
- Immediately sprinkle the crushed candy cane pieces generously over the swirled chocolate while it is still wet.
- Chill the bark in the refrigerator until it is completely hard and firm, then break it into bite-sized pieces.
Notes
*You may also use 10 ounces each of chopped semi-sweet or dark chocolate and white chocolate baking bars instead of melts. For best results, use good quality chocolate.
If you opt for real chocolate bars (not chocolate melts), you might consider adding 1 teaspoon of vegetable oil or shortening to the dark chocolate during melting. This can help minimize chocolate bloom and achieve a smoother finish.
**For better control and precision when applying the white chocolate lines, I find it helpful to place the melted white chocolate into a quart-sized Ziploc bag, then snip off a small corner to create a makeshift piping bag.
Nutrition Information:
Yield:
12
Serving Size:
1
Amount Per Serving:
Calories: 266Total Fat: 12gSaturated Fat: 7gTrans Fat: 0gUnsaturated Fat: 4gCholesterol: 3mgSodium: 23mgCarbohydrates: 42gFiber: 1gSugar: 33gProtein: 2g
HOW MUCH DID YOU LOVE THIS RECIPE?
Please leave a comment on the blog or share a photo on Pinterest