
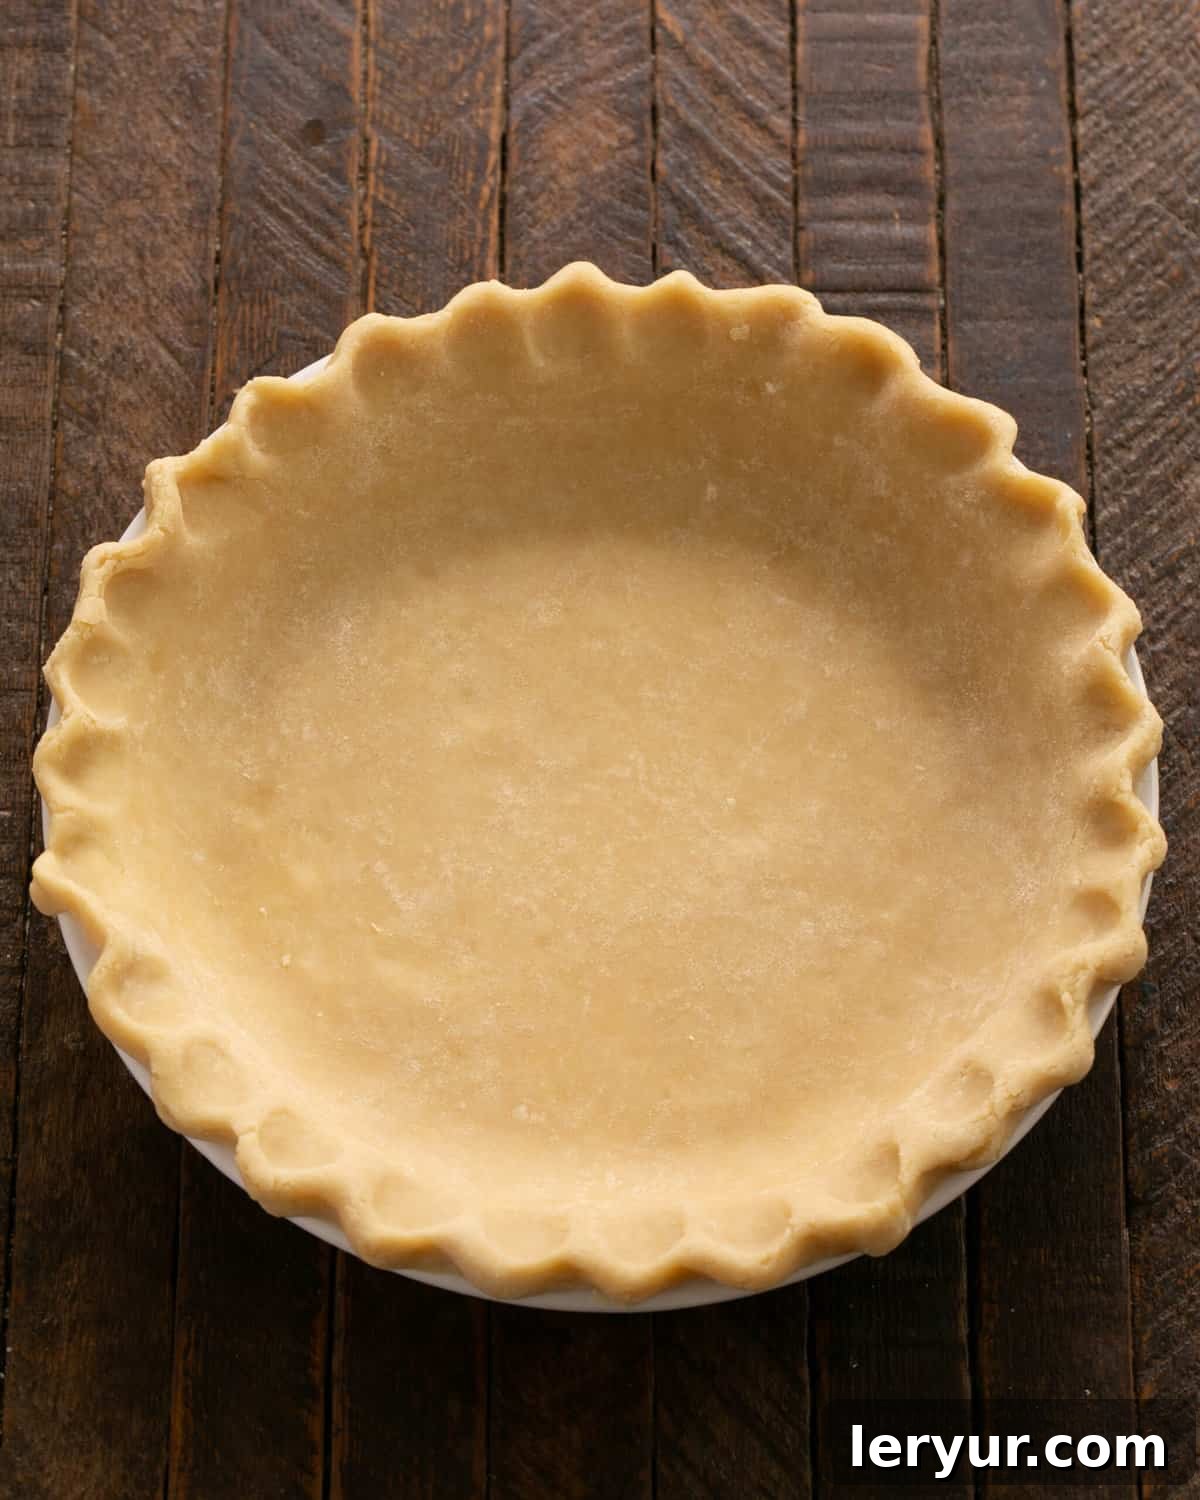
Welcome to the ultimate guide for crafting the **perfect homemade pie crust**! Forget the daunting notion that making pie crust from scratch is complicated. With this **easy pie crust recipe**, you’re about to unlock the secret to a tender, flaky foundation for all your sweet and savory culinary creations. Utilizing the efficiency of a food processor, this method streamlines the process, ensuring consistent results every time. The magic lies in the carefully balanced combination of cold butter and shortening, a duo celebrated by bakers for delivering unparalleled flavor alongside that coveted, melt-in-your-mouth flakiness that simply can’t be replicated by store-bought alternatives. Prepare to impress your family and friends with a pie crust that is not just good, but truly exceptional.
There’s an undeniable satisfaction that comes from serving a pie with a crust made entirely by your own hands. This isn’t just a recipe; it’s an invitation to elevate your baking game. Whether you’re a seasoned baker or just starting your journey, our step-by-step instructions and insightful tips will empower you to master the art of pie crust making. Say goodbye to tough, bland crusts and hello to golden, buttery layers that enhance every bite of your favorite fillings. Get ready to transform your kitchen into a bakery and your pies into masterpieces.
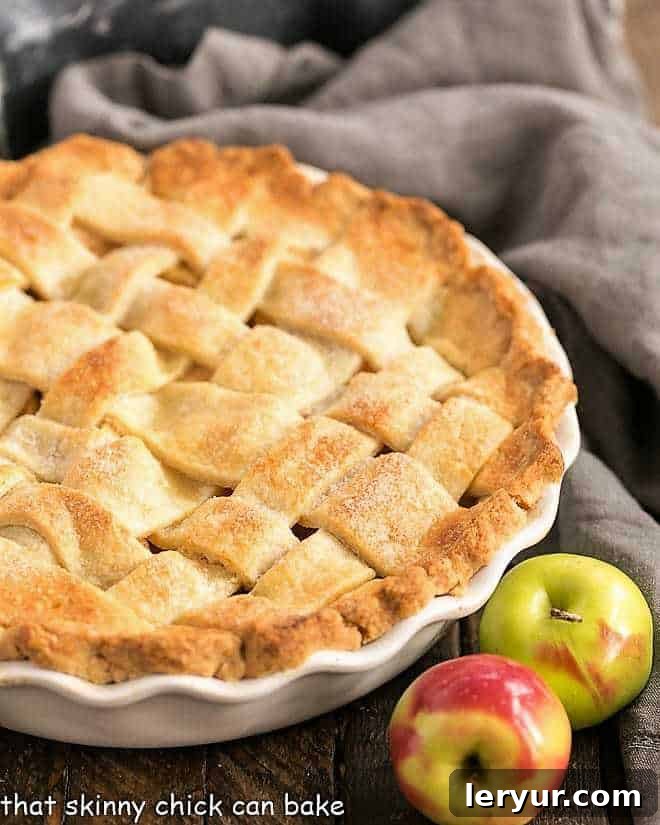
Why This Is the Best Easy Pie Crust Recipe You’ll Ever Make
Creating a truly magnificent pie starts with a stellar crust, and this recipe delivers on every front. Here’s why you absolutely must make this **flaky pie crust** for your next baking adventure:
- **Effortless Preparation with a Food Processor:** One of the biggest advantages of this recipe is its reliance on a food processor. This modern kitchen marvel minimizes mess and significantly reduces the effort traditionally associated with pie crust making. All the mixing happens within the enclosed appliance, keeping your countertops clean and your hands free from sticky dough. More importantly, the rapid pulsing action ensures that the butter and shortening remain cold, which is paramount for achieving a truly flaky texture. It prevents overworking the dough, a common pitfall that leads to tough crusts, making this an ideal method for beginners and experienced bakers alike.
- **The Perfect Fat Blend for Unbeatable Texture and Flavor:** This recipe champions the classic combination of butter and shortening (or lard), a time-honored secret for **tender, flavorful pie crusts**. Butter contributes rich, dairy notes and a beautiful golden hue, enhancing the overall taste profile of your pie. Shortening, with its higher melting point and pure fat content, is key to achieving that incredibly flaky, melt-in-your-mouth texture that is the hallmark of a great pie crust. Together, they create a dough that is both incredibly delicious and wonderfully malleable, making it easy to roll out and shape without tearing.
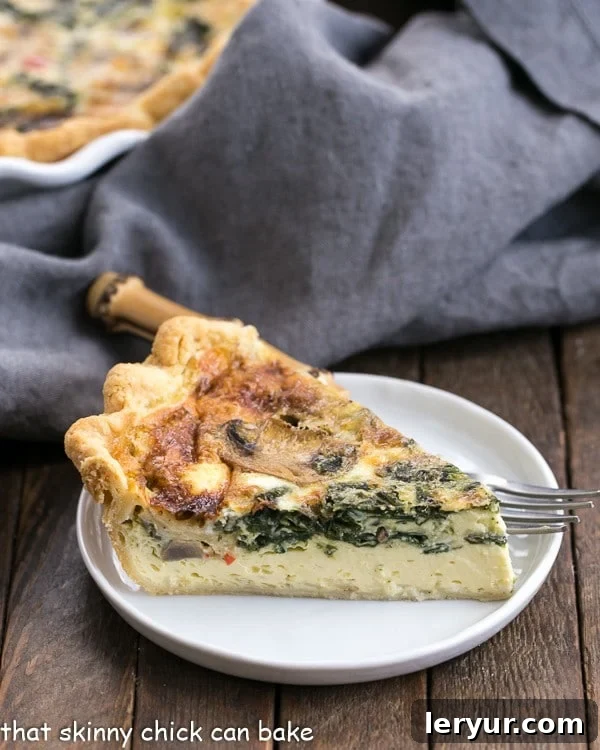
- **Versatility for Every Occasion:** This robust and flavorful pie crust is incredibly versatile, making it suitable for both **sweet and savory pie recipes**. Whether you’re dreaming of a classic apple pie, a vibrant berry tart, or a hearty spinach and mushroom quiche, this crust is your ideal canvas. The small amount of sugar included in the recipe is subtle enough not to interfere with savory fillings, but if you prefer, it can be easily omitted when making a savory pie or quiche, giving you complete control over your culinary creations.
Key Ingredients for the Best Flaky Pie Crust
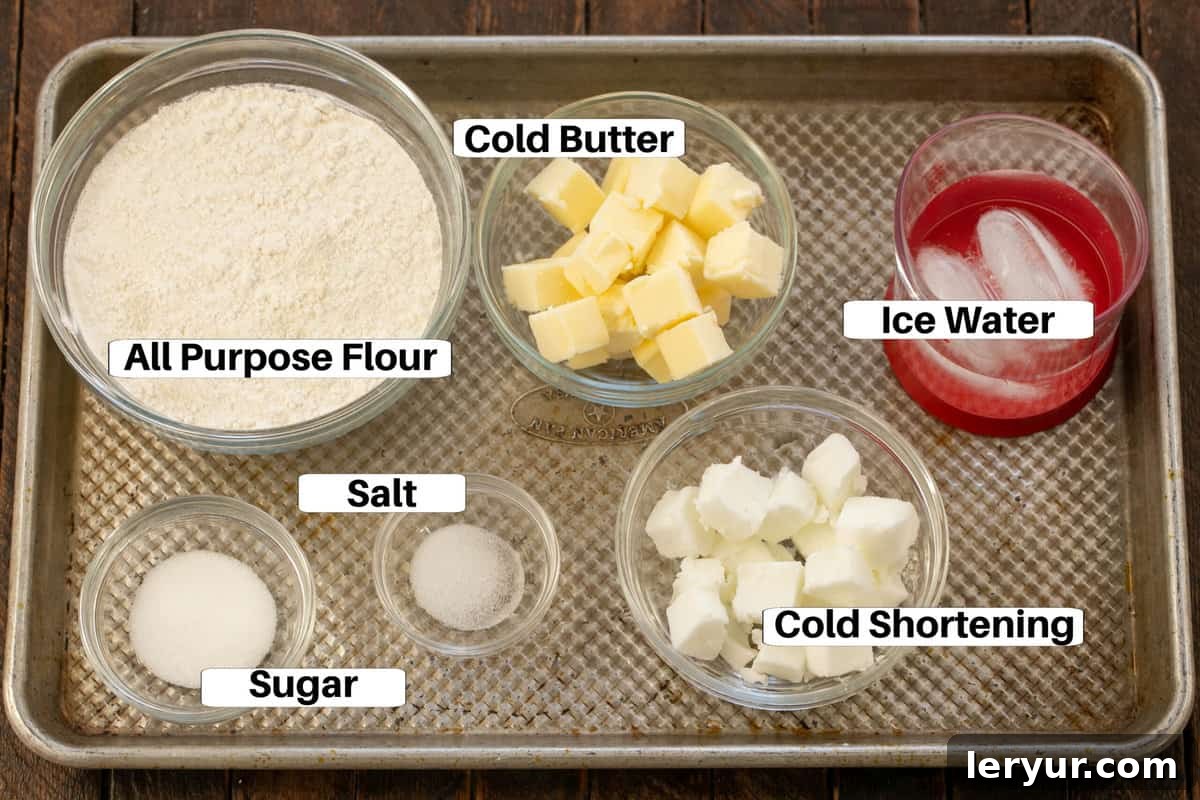
Understanding the role of each ingredient is crucial for making a **perfect pie crust**. Here’s a breakdown of what you’ll need and why:
- All-purpose Flour: The foundation of our crust. All-purpose flour provides the necessary structure. It’s important to measure it correctly to avoid a tough crust.
- Salt: Essential for balancing the flavors and enhancing the richness of the fats. Don’t skip it, even in sweet pies!
- Sugar: Just a touch of granulated sugar adds a hint of sweetness and helps with browning, resulting in a beautiful golden crust. As mentioned, it can be omitted for savory pies and quiches without compromising the texture.
- Butter (Cold and Cubed): This is where much of the flavor and flakiness comes from. Using **cold butter** is non-negotiable. When cold butter pieces melt in the oven, they release steam, creating pockets of air that result in distinct, tender layers. Cube your butter and keep it chilled until you’re ready to use it.
- Shortening (or Lard, Cold and Cubed): The secret weapon for incredible tenderness and ease of handling. Shortening has a higher melting point than butter, which means it stays solid longer during baking, creating larger steam pockets and contributing significantly to the crust’s flakiness. If you opt for lard, look for **leaf lard**, which is known for producing the most tender and flavorful pie crusts. It’s often available at specialty butcher shops. Like butter, keep your shortening or lard very cold.
- Ice Water: This is the binding agent that brings the dough together. The “ice” part is critical as it helps maintain the overall cold temperature of your dough, preventing the butter and shortening from melting prematurely. The exact amount will vary based on factors like flour type and ambient humidity, so add it gradually until the dough just comes together.
Mastering Your Homemade Pie Crust: Expert Tips for Success
Achieving a truly **flaky and tender pie crust** is an art, but with these pro tips, you’ll be baking like a seasoned pastry chef in no time:
- PRO-Tip: The Power of Two Fats. As highlighted in our ingredient notes, the combination of butter and shortening (or leaf lard) is the ultimate secret weapon for the best pie crust. Butter provides that irresistible, rich flavor and a beautiful golden color, while shortening contributes to the incredible flakiness and makes the dough much easier to roll and shape without tearing. Don’t be tempted to use just one; the synergy of both is what makes this crust truly special.
- PRO-Tip: Keep Everything Cold. This is perhaps the most crucial rule in pie crust making. Cold fats (butter and shortening) are essential for achieving a flaky texture. Before you even start, ensure your butter is cubed and very cold. For best results, place your measured shortening in the freezer for 15-20 minutes while you prep your other ingredients. When these tiny bits of cold fat hit the oven’s heat, they create steam, separating the layers of dough and giving you that desirable flaky structure.
- Maintaining Cold Dough: Beyond the initial ingredients, keeping your dough cool throughout the process is vital. Work quickly, and if your kitchen is warm or the dough starts to feel soft, don’t hesitate to pop it back into the refrigerator for 10-15 minutes. A chilled dough is easier to handle, less likely to stick, and most importantly, preserves those precious pockets of cold fat.
- Flour Wisely When Rolling: When it’s time to roll out your pie dough, resist the urge to use excessive flour on your work surface or rolling pin. While a light dusting is necessary to prevent sticking, too much extra flour can be incorporated into your dough, leading to a tough, dry, and less tender crust. Aim for just enough to keep things from adhering, and re-dust sparingly as needed.
- PRO-Tip: Precise Flour Measurement. Speaking of flour, accurate measurement is key. Do not scoop flour directly from the bag with your measuring cup, as this compacts it, leading to too much flour. Instead, use a spoon to lightly fluff the flour in its container, then spoon it into your measuring cup. Level off the excess with a straight edge, like the back of a knife or an offset spatula. This ensures your flour is loosely packed and measured correctly for a tender dough.
- The Right Amount of Water: Adding too much water is another common mistake that can result in a tough dough. You want just enough ice water for the dough to come together when pinched between your fingers. It should be moist but not sticky. Start with the lower end of the recommended water amount and add more a tablespoon at a time, pulsing briefly after each addition, until the dough just barely holds together. It’s better to have a slightly crumbly dough that you can gently press into a disk than a wet, sticky one that requires more flour.
- Don’t Overwork the Dough: Whether you’re using a food processor or blending by hand, avoid overworking the dough. Overworking develops the gluten too much, leading to a tough, inelastic crust. The food processor makes this easy by limiting the pulses. When mixing by hand, stop as soon as the dough just comes together.
- Chilling Time is Essential: Once formed, your pie dough needs to chill for at least an hour (or longer!). This allows the gluten to relax, making the dough easier to roll, and ensures the fats firm up again, contributing to that desirable flakiness. This step is not optional!
Step-by-Step: Crafting Your Easy Food Processor Pie Crust
Follow these simple steps to create a beautifully flaky pie crust with minimal effort:
Frequently Asked Questions About Homemade Pie Crust
Absolutely! While a food processor offers speed and convenience, a fantastic pie crust can certainly be made by hand. The traditional method involves using a hand-held pastry blender, or even two knives, to “cut” the cold fats into the flour mixture. Work quickly to prevent the butter and shortening from warming up too much. Aim for a texture that resembles coarse meal with some pea-sized pieces of fat still intact. This method requires a bit more elbow grease but yields equally delicious results.
Homemade pie dough is excellent for make-ahead convenience! You can prepare the dough up to 3 days in advance. Simply keep it tightly wrapped in plastic wrap and stored in the refrigerator. For longer storage, pie dough freezes beautifully for up to 3 months. To freeze, wrap each dough disk meticulously in several layers of plastic wrap, then place it inside a freezer-quality Zip-loc bag to prevent any freezer burn or absorption of freezer odors. When you’re ready to use it, defrost the dough overnight in the refrigerator, then let it sit at room temperature for about 15-20 minutes before rolling to make it more pliable.
Blind baking, also known as pre-baking, is the process of baking a pie crust without its filling. This technique is typically used for two main reasons: firstly, when the pie filling is unbaked (like a pudding, mousse, or cream filling) and requires a fully cooked and cooled crust; and secondly, to prevent the bottom crust from becoming soggy, especially with very wet fillings. To blind bake, you first “dock” the crust by gently pricking holes across its surface with a fork. This allows steam to escape, minimizing blistering or rising off the bottom of the pan. An alternative, and often more effective, method is to line the docked crust with parchment paper or aluminum foil and fill it with pie weights, dried beans (navy beans or lentils work wonderfully), or even rice. These weights help hold the crust’s shape and prevent shrinking or puffing during baking. Bake until the edges are golden brown, then remove the weights and paper/foil and continue baking until the bottom is lightly browned and fully cooked. Remember, you can reuse dried beans or pie weights; just store them in an airtight container for future use.
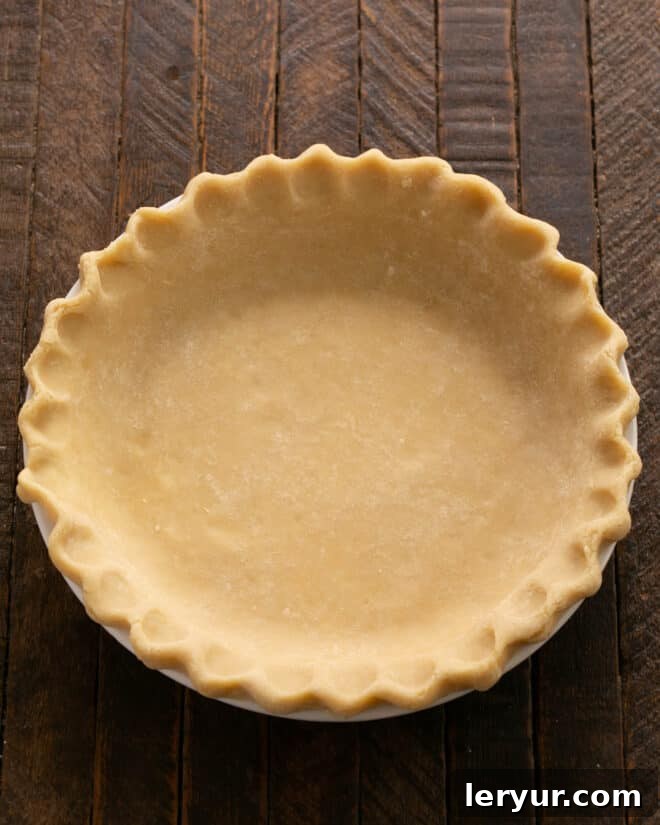
Fluting or crimping a pie crust creates a decorative edge, transforming a simple pie into a work of art. The traditional method involves using two fingers from one hand to gently press the crust from the outside, while simultaneously using one finger from your other hand to press between them from the inside. This motion creates a beautiful, wavy, scalloped edge. For a simpler look, you can use the tines of a fork to make linear indentations around the perimeter of the crust. If you’re feeling creative, you can also use small cookie cutters to make decorative shapes (like leaves or stars) from leftover dough scraps and attach them to the rim of the pie with an egg wash (a mixture of beaten egg and a splash of water or milk) before baking for an extra special touch.
Preventing sticking is key to a smooth rolling process. First and foremost, ensure your pie dough is adequately chilled. Cold dough is less sticky and easier to handle. Always work on a clean, lightly floured surface. A marble pastry board is often recommended because its cool surface helps keep the dough chilled, but any clean countertop will work with sufficient flour. After your first pass with the rolling pin, lift the dough, give it a quarter turn, and then roll again, re-dusting your surface and rolling pin with flour as needed. This prevents the dough from adhering to one spot and ensures even rolling. The key is to use enough flour to prevent sticking, but not so much that it dries out the dough. If the dough starts tearing or becoming too elastic, cover it and chill it in the refrigerator for 10-15 minutes to allow the gluten to relax.
While this recipe focuses on a versatile, all-purpose crust, it’s helpful to know about other common types. This particular pie crust is also known as Pâte Brisée, which is French for “short pastry.” It’s a rich, flaky, and tender dough commonly used for both sweet and savory applications, including fruit pies, tarts, and quiches, thanks to its balanced flavor profile. Another popular type is Pâte Sucrée, a “sweet pastry.” This dough is richer, often includes egg yolks, and has a higher sugar content, giving it a cookie-like texture. It’s primarily used for dessert tarts, sweet pies, and filled cookies, where its sweetness complements the filling. Understanding these distinctions allows you to choose the perfect crust for any recipe, ensuring the best possible outcome.
Explore More Delicious Pie Recipes!
Now that you’ve mastered the art of the perfect pie crust, it’s time to put it to good use! Here are some of our favorite pie recipes that would be absolutely divine with your homemade crust:
- Indulgent Strawberry Cream Pie: A dreamy, no-bake filling cradled in a buttery, flaky crust.
- Classic Fresh Peach Pie: Celebrate summer’s bounty with juicy peaches encased in a golden crust.
- Rich French Silk Pie Recipe: A decadent chocolate experience that demands a perfectly blind-baked crust.
- Sweet Blueberry Peach Custard Pie: A delightful blend of fruits and creamy custard in your homemade shell.
- Plus, don’t miss our full collection of the Best Pie Recipes for endless inspiration!
Stay connected with us for more delicious recipes and baking tips! Follow us on Instagram, Facebook, and Pinterest. We’d love to see your creations, so don’t forget to tag us when you try one of our recipes! If you adore the results, please consider leaving a 5-star rating in the recipe card below – your feedback helps fellow bakers discover these wonderful recipes!
Homemade Pie Crust Recipe: Your Go-To Guide for Flaky Perfection
20 minutes
20 minutes (plus chilling time)
2 single pie crusts (sufficient for one double-crust pie or two single-crust pies/tarts)
Craft a truly exceptional homemade pie crust with ease! This recipe combines the rich flavor of butter with the tender flakiness of shortening, all made effortlessly in your food processor. Perfect for any sweet or savory pie, tart, or quiche.
Average Rating: 5 out of 5 stars based on 24 reviews.
Ingredients
For the Flaky Crust:
- 2 ½ cups (300g) all-purpose flour, spooned and leveled
- ½ teaspoon salt
- 1 tablespoon granulated sugar (omit for savory pies if preferred)
- 12 tablespoons (1 ½ sticks / 170g) cold unsalted butter, cut into ½-inch pieces
- 8 tablespoons (1 stick / 113g) cold shortening (Crisco) or leaf lard, cut into similar ½-inch pieces
- 6-8 tablespoons ice water, or just enough until the dough holds together when pinched
Optional Egg Glaze for a Golden Shine:
- 1 large egg yolk
- 1 tablespoon cream (or milk)
Instructions
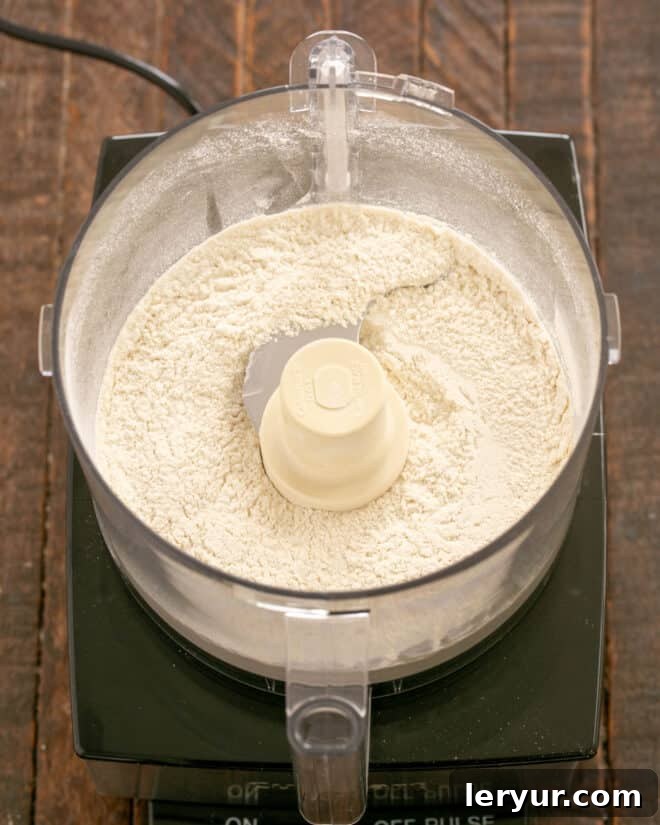
- Prepare Dry Ingredients: In the bowl of a food processor fitted with a steel blade, combine the flour, salt, and sugar. Pulse 2-3 times to thoroughly mix these dry ingredients.
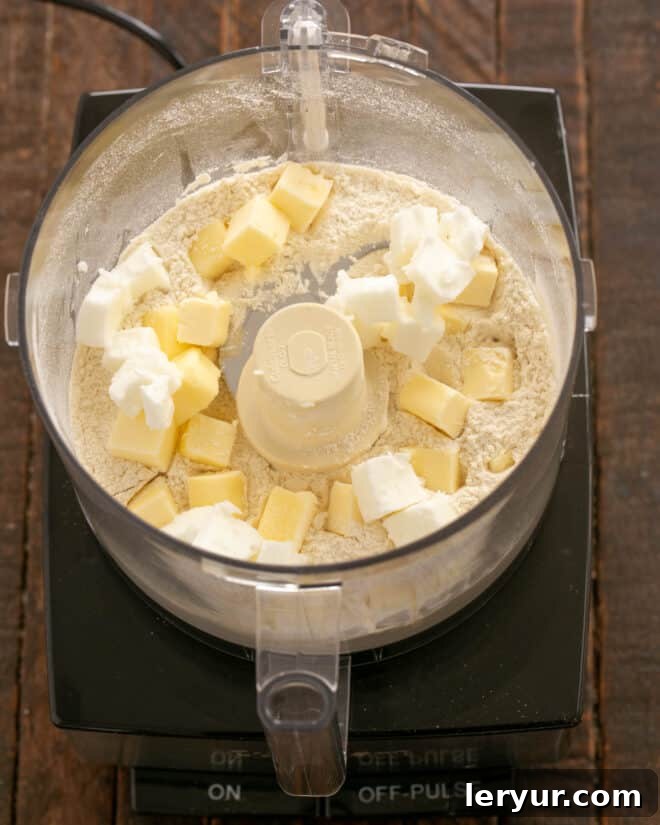
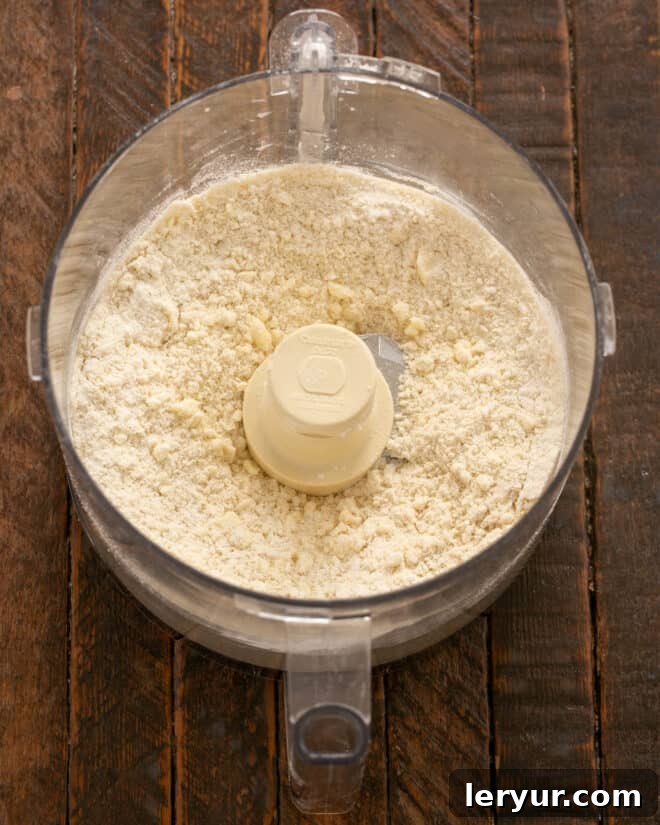
- Incorporate Fats: Add the cold, cubed butter and shortening (or lard) to the food processor. Pulse 3-5 times in short bursts until the mixture resembles coarse cornmeal with some pea-sized pieces of fat still visible. It’s crucial not to over-process at this stage, as visible pieces of fat are key to flakiness.
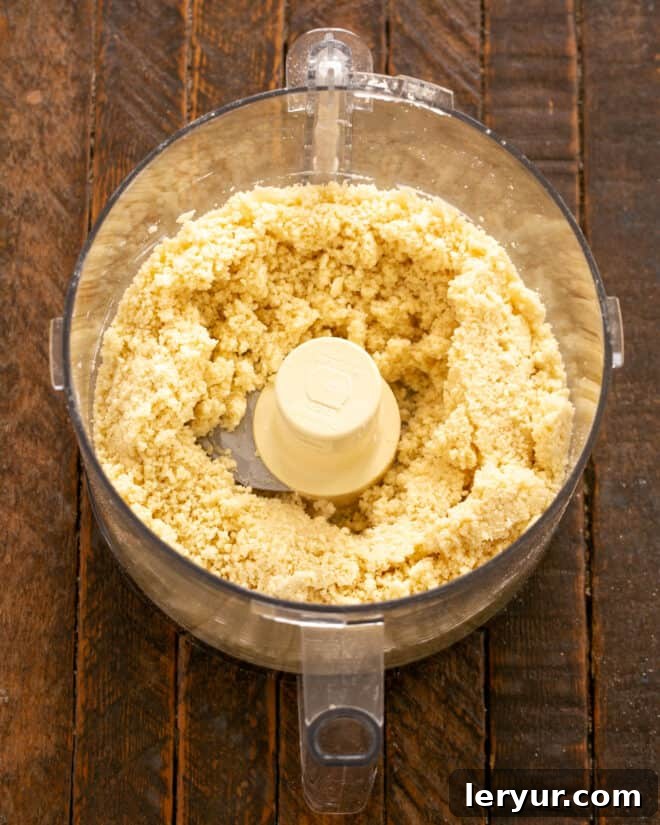
- Add Ice Water: With the food processor running on low speed, slowly drizzle in the ice water, one tablespoon at a time, through the feed tube. Continue pulsing just until the dough begins to come together and forms a shaggy ball. You may not need all the water; stop as soon as the dough holds when lightly pinched. Avoid making the dough too wet or sticky.
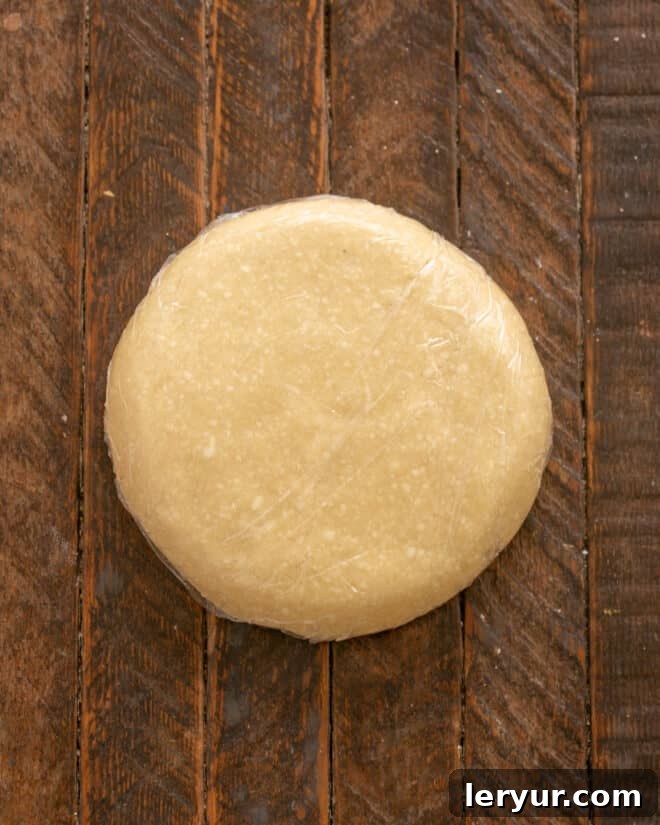
- Form and Chill Dough Disks: Turn the dough out onto a lightly floured surface. Gently gather it into a ball, then divide it in half. Flatten each half into a disk, about 1 inch thick. Wrap each disk tightly in plastic wrap to prevent drying.
- Refrigerate: Transfer the wrapped dough disks to the refrigerator and chill for at least 1 hour, or preferably longer (up to 3 days). This resting period allows the gluten to relax, making the dough easier to roll, and ensures the fats firm up again for maximum flakiness.
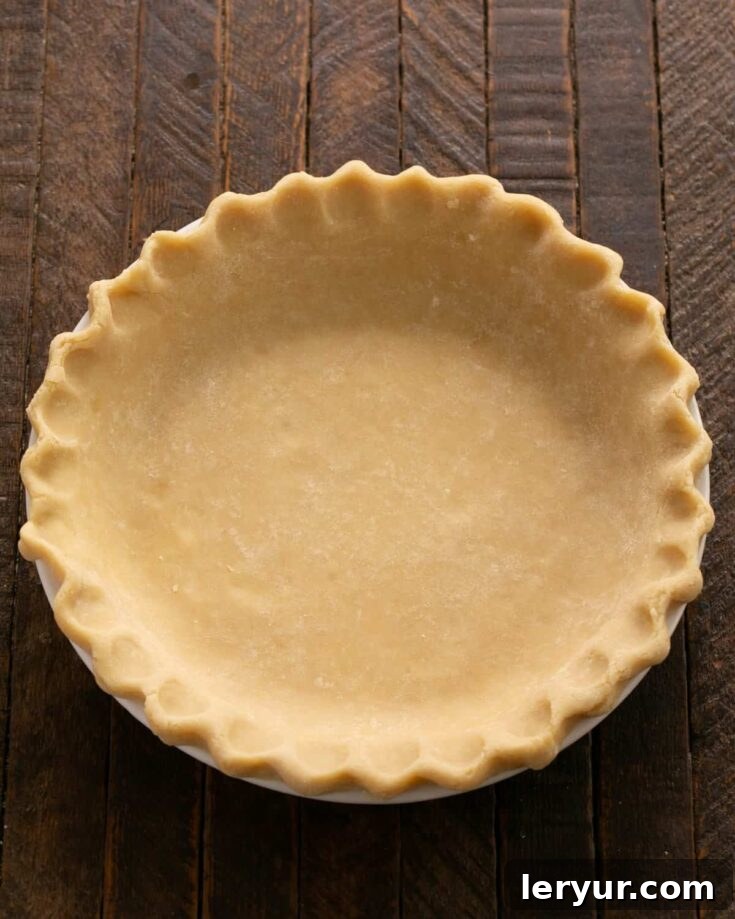
- Roll and Prepare Pie Plate: When ready to bake, remove one disk of dough from the refrigerator. On a lightly floured surface, roll out the dough from the center outwards into a 12-inch circle (or desired size for your pie plate). Carefully transfer the rolled dough into your pie tin. Gently press it into the bottom and sides, then trim any excess dough, leaving about a ½-inch overhang. Flute or crimp the edges decoratively. If your recipe calls for blind baking, dock (prick) the bottom of the crust all over with a fork.
- Final Chill (Optional but Recommended): For best results, place the prepared pie crust (in its plate) back into the refrigerator for 15-30 minutes while you prepare your pie filling. This helps the crust hold its shape during baking.
- Apply Glaze (If Desired): If using the optional egg glaze, whisk together the egg yolk and cream until well combined. Carefully brush this mixture onto any exposed parts of the crust before baking for a beautiful golden sheen.
- Bake: Bake the pie crust as directed in your specific pie recipe. If blind baking for a no-bake filling, follow the blind baking instructions provided in the notes below or in your pie recipe until the crust is golden brown and fully cooked.
Chef’s Notes & Blind Baking Guide
Tips for a Perfectly Flaky Crust:
- **Always Use Cold Ingredients:** This cannot be stressed enough. Cold butter and shortening create pockets of steam for flakiness.
- **Don’t Overwork the Dough:** Overworking develops gluten, leading to a tough crust. Mix just until combined.
- **Chill Thoroughly:** Chilling relaxes the gluten and re-firms the fats, making the dough easier to roll and ensuring a flaky result.
How to Blind Bake Your Pie Crust (Essential for no-bake fillings or preventing soggy bottoms):
- Chill Your Crust: Ensure your fluted pie crust is well chilled in the pie plate.
- Line and Weight: Line the chilled crust with parchment paper or aluminum foil (non-stick foil is a great choice), making sure to cover the edges to prevent them from over-browning. Fill the lined crust with pie weights, dried beans, or rice to weigh down the bottom and sides.
- Initial Bake: Bake in a preheated oven at 375°F (190°C) for 20-25 minutes, or until the edges are lightly golden.
- Remove Weights and Finish Baking: Carefully remove the parchment/foil and pie weights. Return the crust to the oven and continue baking for another 10-15 minutes, or until the bottom of the crust is golden brown and appears dry. Let cool completely before adding your filling.
Recommended Baking Tools
As an Amazon Associate and member of other affiliate programs, I earn from qualifying purchases.
- Nonstick Foil
- Pie Weights
- Ceramic Pie Plate
- French Rolling Pin
- Pastry Blender
- Food Processor
Nutrition Information (Estimated):
Yield:
2 crusts (8 servings total)
Serving Size:
1/8 of recipe (approximately 1 crust = 4 servings)
Amount Per Serving:
Calories: 471
Total Fat: 36g
Saturated Fat: 19g
Trans Fat: 1g
Unsaturated Fat: 15g
Cholesterol: 89mg
Sodium: 283mg
Carbohydrates: 32g
Fiber: 1g
Sugar: 2g
Protein: 5g
Thatskinnychickcanbake.com occasionally offers nutritional information for recipes contained on this site. This information is provided as a courtesy and is an estimate only. This information comes from online calculators. Although thatskinnychickcanbake.com attempts to provide accurate nutritional information, these figures are only estimates. Varying factors such as product types or brands purchased can change the nutritional information in any given recipe. Also, many recipes on thatskinnychickcanbake.com recommend toppings, which may or may not be listed as optional and nutritional information for these added toppings is not listed. Other factors may change the nutritional information such as when the salt amount is listed “to taste,” it is not calculated into the recipe as the amount will vary. Also, different online calculators can provide different results. To obtain the most accurate representation of the nutritional information in any given recipe, you should calculate the nutritional information with the actual ingredients used in your recipe. You are solely responsible for ensuring that any nutritional information obtained is accurate.
HOW MUCH DID YOU LOVE THIS RECIPE?
Please leave a comment on the blog or share a photo on Pinterest!