
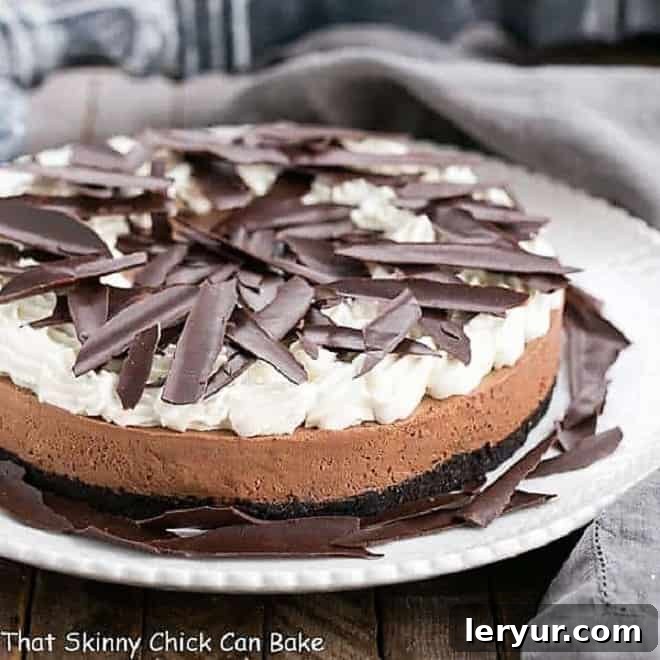
Indulge in the simplest yet most luxurious chocolate experience with this incredible Easy Chocolate Mousse Tart. Designed to be completely egg-free and a true no-bake marvel, this recipe revolutionizes dessert making. All you need are a few staple ingredients like rich heavy cream and premium chocolate to effortlessly create a dessert that tastes like it came from a high-end patisserie. Prepare to delight your senses and impress your guests with this stunning and surprisingly simple chocolate masterpiece.
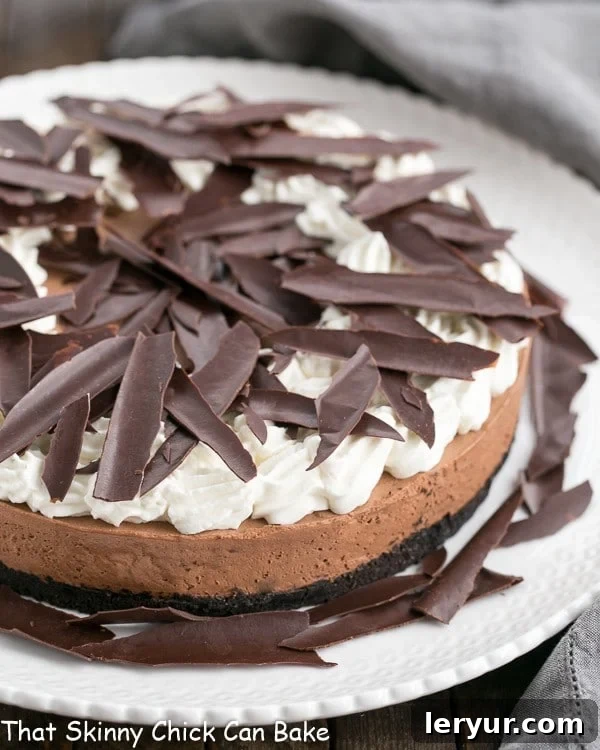
This No-Bake Chocolate Mousse Tart isn’t just easy to make; it’s a celebration of chocolate in its purest, most decadent form. It features a rich, creamy chocolate mousse filling nestled within a crisp, flavorful crust, all crowned with an elegant, one-ingredient chocolate garnish. Forget complicated techniques or lengthy baking times – this Decadent Chocolate Tart comes together with minimal effort, allowing you more time to savor its exquisite taste.
Why This Easy Chocolate Mousse Tart Belongs on Your Dessert Menu
In a world full of complex recipes, sometimes the simplest creations yield the most profound joy. This Easy Chocolate Mousse Tart is a shining example. Here’s why it’s destined to become a staple in your repertoire:
- Effortless Elegance: Truly No-Bake! Forget turning on your oven. This dessert comes together beautifully with just refrigeration, making it perfect for hot summer days or when you simply want to avoid heating up your kitchen. Its no-bake nature also significantly cuts down on prep time and simplifies the entire process.
- Egg-Free Perfection: Safety and Simplicity. Many traditional mousse recipes rely on raw eggs for their signature silky texture. Our recipe eliminates this concern entirely, making it safe for everyone to enjoy without compromising on that luxurious mouthfeel. By using only chocolate and heavy cream, we achieve an equally exquisite, rich, and airy mousse that’s incredibly stable and delicious. This is a game-changer for those with egg allergies or concerns about consuming raw eggs.
- Decadence from Simple Ingredients. You might be surprised at the depth of flavor and texture achieved with such a short ingredient list. This recipe proves that you don’t need dozens of components to create a truly spectacular dessert. The quality of your chocolate and cream will shine through, resulting in a pure, unadulterated chocolate experience.
- Inspired by Culinary Excellence. This particular recipe draws its origins from an old issue of Fine Cooking magazine, a publication renowned for its reliable and delicious recipes. This background adds a layer of assurance that you’re making a dessert perfected by culinary experts.
Mastering the Art of This Chocolate Mousse Tart: Expert Tips for Success
While this Chocolate Mousse Tart recipe is undeniably easy, a few expert insights can elevate your creation from great to absolutely unforgettable. Pay attention to these details, and you’ll be rewarded with a perfect tart every time.
- The Secret to a Better Crust: Salted Butter. For your cookie crust, don’t shy away from using salted butter. The subtle hint of salt doesn’t make the crust taste salty; rather, it beautifully enhances and balances the sweetness of the chocolate wafers and sugar, adding a layer of complexity that’s often missed. If you only have unsalted butter, add a tiny pinch (about ⅛ teaspoon) of fine sea salt to your crust mixture.
- Achieving Perfect Whipped Cream: Stiff Peaks are Key. The airy texture of your mousse largely depends on properly whipped cream. When we talk about “stiff peaks,” it means that when you lift your electric mixer beaters or whisk out of the cream, the peaks of cream that form will stand upright and hold their shape without collapsing or slumping back into the bowl. This indicates enough air has been incorporated, providing the necessary structure for the mousse.
- A Quick Fix for Overwhipped Cream. Don’t panic if you accidentally overwhip your cream and it starts to look clumpy or grainy. This happens to the best of us! To rescue it, simply add a tablespoon or two of fresh, unwhipped heavy cream to the bowl and gently fold or slowly mix it in by hand until the texture becomes smooth and creamy again. This trick often saves the day, preventing you from having to start over.
- The Gentle Art of Folding: Preserving Airiness. Folding is a crucial technique for combining the lightened chocolate mixture with the whipped cream without deflating the air you’ve worked so hard to incorporate. Use a rubber spatula and follow these steps:
- Start by adding a large dollop of whipped cream to the chocolate mixture to lighten it, whisking gently until combined. This step helps to equalize the densities, making the final fold easier.
- Then, gently add the lightened chocolate mixture to the bowl with the remaining whipped cream.
- Using your spatula, cut down through the middle of the mixture, across the bottom of the bowl, and then bring the spatula up along the side, folding the mixture over itself.
- Rotate the bowl slightly after each fold and repeat the motion. The goal is to gently combine the ingredients until no streaks of chocolate or cream remain, but to do so with restraint to maintain as much volume and air as possible. Rushing this process will result in a denser mousse.
- Quality Matters: Choose Your Chocolate Wisely. Since chocolate is the star of this dessert, using a good quality semi-sweet chocolate will make a noticeable difference in the final flavor. Opt for a brand you enjoy eating on its own.
- Patience with Chilling. The specified chilling time of at least 6 hours (or preferably overnight) is critical. This allows the mousse to fully set, firming up to that perfect sliceable consistency, and ensures the crust is robust. Don’t rush this step!
How to Garnish: Crafting a Stunning Presentation with Chocolate Shards
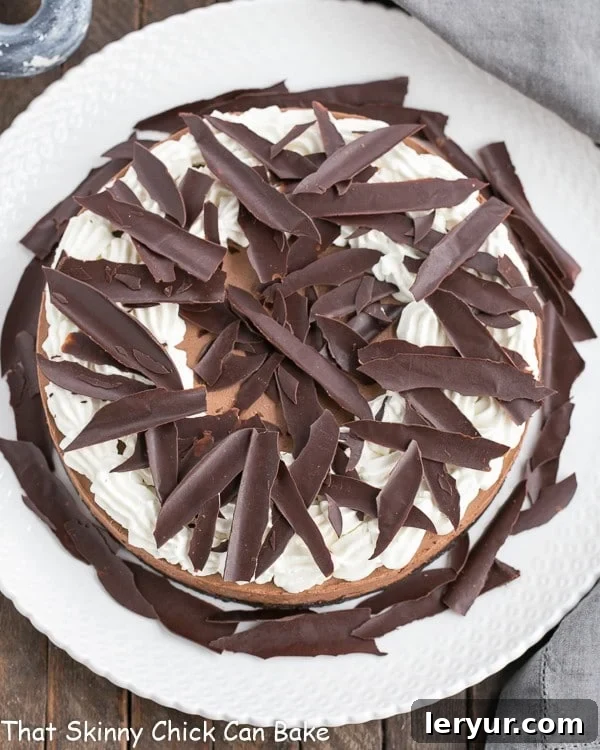
While classic chocolate curls are always lovely, for this particular Chocolate Mousse Tart, I opted for something a bit more modern and surprisingly easier: chocolate shards. And let me tell you, they really kicked this dessert up a notch or two, adding an artistic, contemporary flair that instantly elevates the presentation. My first attempt wasn’t perfectly scattered, but the effect was still impressive and far less fiddly than traditional curls.
The process is wonderfully simple:
- Melt the Chocolate: Begin by melting about 4 ounces of your preferred chocolate (semi-sweet, dark, or even milk chocolate works). You can do this gently in a microwave-safe bowl in 30-second intervals, stirring in between, or over a double boiler. Ensure it’s smooth and lump-free.
- Spread and Cover: Pour the melted chocolate onto a sheet of waxed paper or parchment paper. Using an offset spatula or the back of a spoon, spread it out thinly and evenly. The thinner the layer, the more delicate your shards will be.
- Roll and Chill: Place another sheet of waxed paper directly on top of the melted chocolate, gently pressing it down to remove any air bubbles. Then, carefully roll the layered waxed paper into a loose cylinder or log. Transfer this roll to the refrigerator or freezer and chill until the chocolate is completely firm and brittle, typically 15-30 minutes depending on your freezer/fridge temperature.
- Unroll and Discover: Once chilled, simply unroll the waxed paper. The chocolate will naturally break into beautiful, irregular shards, perfect for decorating your tart. This technique creates a dramatic, professional-looking garnish with minimal effort.
For more detailed instructions on making these delightful chocolate shards, you can find a comprehensive guide here. Alternatively, you can always opt for a dusting of cocoa powder, fresh berries, or classic chocolate shavings for a different look.
Frequently Asked Questions About Chocolate Mousse Tarts
Mousse is a French term meaning “froth” or “foam,” aptly describing its signature light and airy texture. In culinary terms, a mousse is any sweet or savory dish characterized by its rich, yet delicate and aerated consistency. This airy quality is typically achieved through the incorporation of whipped ingredients, such as whipped cream or beaten egg whites, folded into a flavorful base.
Absolutely, yes! While traditional French mousses often use beaten raw egg whites for their signature lightness, many modern recipes, like this one, achieve a wonderfully fluffy and stable mousse using only whipped cream. This not only makes the dessert egg-free but also addresses safety concerns associated with raw eggs, making it accessible to a wider audience and simpler to prepare.
The chocolate mousse filling itself is typically gluten-free, as it primarily consists of chocolate and cream. However, the gluten content of a chocolate mousse tart depends entirely on its crust. In this recipe, the crust made from Nabisco Famous Wafers contains gluten. For a gluten-free version, simply substitute the chocolate wafers with a gluten-free alternative like gluten-free chocolate cookies or a crust made from finely ground nuts (e.g., almonds or pecans mixed with butter).
Chocolate mousse is a luxurious and often ethereal chilled dessert that combines melted chocolate (or cocoa powder) with an aerating agent, most commonly whipped egg whites, whipped cream, or a combination of both. Its defining characteristic is its rich chocolate flavor paired with an incredibly light, melt-in-your-mouth texture. It’s typically served chilled, often garnished with additional whipped cream, chocolate shavings, or berries.
This no-bake chocolate mousse tart is an excellent make-ahead dessert! It requires a minimum of 6 hours to chill and set, but it can be prepared up to 2-3 days in advance. Store it covered in the refrigerator. For best presentation, add the whipped cream topping and chocolate garnish just before serving.
Yes, you can! This tart freezes beautifully. Once the tart has fully set in the refrigerator, you can cover it tightly with plastic wrap and then aluminum foil. It can be stored in the freezer for up to 1 month. To serve, transfer it to the refrigerator to thaw for several hours or overnight until it reaches a desirable consistency. Add any fresh garnishes after thawing.
For a classic rich chocolate flavor, semi-sweet chocolate is often recommended, as it offers a good balance of sweetness and cocoa intensity. If you prefer a darker, more intense chocolate flavor, you can use bittersweet chocolate. For a sweeter, milder profile, milk chocolate can be used, though it may result in a slightly softer mousse. Always use high-quality chocolate for the best results, as it forms the core flavor of the dessert.
Variations and Customizations for Your Chocolate Mousse Tart
While this Easy Chocolate Mousse Tart is perfect as is, it also serves as a fantastic canvas for your culinary creativity. Here are some ideas to customize your tart:
- Crust Alternatives: Beyond chocolate wafers, consider using crushed Oreo cookies (cremes removed) for an even richer chocolate flavor, or graham cracker crumbs for a classic cheesecake-like base. For a gluten-free and nutty option, blend walnuts, pecans, or almonds with melted butter and a touch of sugar.
- Flavor Boosts for the Mousse: Infuse your mousse with additional flavors. A teaspoon of espresso powder can deepen the chocolate notes without adding coffee flavor. Orange zest, a splash of liqueur like Kahlúa, Grand Marnier, or even a hint of mint extract can transform the profile.
- Creative Toppings: While chocolate shards are beautiful, don’t limit yourself! Fresh berries (raspberries, strawberries, blueberries) add a lovely contrast in color and tartness. A drizzle of caramel sauce or hot fudge, a sprinkle of toasted nuts, or even mini chocolate chips can provide extra texture and flavor.
- Layered Delight: For an extra impressive presentation, consider creating a thin layer of raspberry or cherry compote at the bottom of the crust before adding the mousse.
You May Also Love These Chocolate & Mousse Desserts:
- Kahlua Coffee Poke Cake from Belly Full
- Layered Mousse Cake
- Chocolate Mousse Torte
- Layered Chocolate Meringue Cake
- Chocolate Mousse Cake with Ladyfingers
- More Decadent Chocolate Dessert Recipes
Stay in touch and share your culinary creations with me through social media @ Instagram, Facebook, and Pinterest. Don’t forget to tag me when you try one of my recipes! If you’re thrilled with the results, please consider giving it a 5-star rating in the recipe card below – your feedback helps others discover delicious recipes.
Easy Chocolate Mousse Tart Recipe
40 minutes
40 minutes (plus chilling)
12 servings
A simple, no-bake chocolate mousse tart adapted from Fine Cooking, offering rich decadence without the fuss.
Average Rating: 4.8 out of 5 stars (based on 65 reviews)
Ingredients
- 6 tablespoons salted butter, melted; plus extra for greasing the pan
- 8 ounces chocolate wafer cookies, finely ground into crumbs (such as Nabisco Famous Wafers)
- 2 tablespoons granulated sugar
- 9 ounces quality semisweet chocolate, finely chopped
- 2 teaspoons pure vanilla extract, divided
- A pinch of salt (if using unsalted butter for crust, add ⅛ tsp more)
- 3 ¼ cups heavy cream, divided (cold)
- ½ cup powdered sugar
Instructions
- Lightly butter a 9-inch springform pan. Set aside.
- In a medium bowl, thoroughly mix together the melted butter, chocolate cookie crumbs, and granulated sugar. Press this mixture evenly over the bottom of the prepared springform pan to form a firm crust. Refrigerate the crust while you prepare the mousse.
- In a large heatproof bowl, combine the chopped semisweet chocolate, 1 teaspoon of the vanilla extract, and the pinch of salt. In a microwave-safe measuring cup or small saucepan, heat ¾ cup of the heavy cream until it’s almost boiling (tiny bubbles form around the edges).
- Pour the hot cream over the chocolate mixture. Let it sit undisturbed for 1 minute to allow the chocolate to melt, then whisk gently until the mixture is completely smooth and glossy. Cover the bowl and refrigerate for approximately 30 minutes, or until the chocolate mixture has cooled down but is still liquid.
- While the chocolate mixture cools, beat 1-½ cups of the remaining heavy cream in a separate medium bowl with an electric mixer on medium-high speed until stiff peaks form.
- Once the chocolate mixture is cool, whisk it briefly to loosen it slightly. Add a large dollop (about ¼) of the whipped cream into the chocolate mixture and whisk gently to lighten it. Then, carefully fold the lightened chocolate mixture into the remaining whipped cream using a rubber spatula. Use a gentle cutting and folding motion until no streaks of chocolate or cream are visible, being careful not to deflate the air from the whipped cream.
- Gently scrape the chocolate mousse into the prepared crust in the springform pan. Carefully spread the mousse to the edges and smooth the top with an offset spatula. Cover the pan loosely with plastic wrap and refrigerate for at least 6 hours, or preferably overnight, until the mousse is firmly set.
- Before serving, beat the remaining 1 cup of heavy cream, powdered sugar, and the remaining 1 teaspoon of vanilla extract in a medium bowl with an electric mixer until medium-stiff peaks form.
- To remove the tart from the pan, run a thin, sharp knife around the inner edge of the springform pan to loosen it, then gently release and remove the side of the pan. Slide a thin metal spatula or knife under the crust to carefully loosen it from the bottom of the pan, then use a large spatula to transfer the tart to your serving plate.
- Mound or pipe the freshly whipped cream over the top of the mousse. Garnish with chocolate curls, homemade chocolate shards (as described above), or chocolate shavings. For clean slices, dip your knife into very hot water, wipe it dry, and then slice the tart. Repeat for each slice.
- Store any leftover chocolate mousse tart covered in the refrigerator for up to 3-4 days.
Notes
For an extra impressive and easy garnish, make chocolate shards to adorn your finished tart!
Watch a video on how to make Chocolate Shards for an elegant presentation!
Watch “How to Make Chocolate Shards” Video (Opens in new window)
Recommended Products for This Recipe
As an Amazon Associate and member of other affiliate programs, I earn from qualifying purchases.
- Pyrex Measuring Cups
- KitchenAid 9-Speed Digital Hand Mixer
- 9-inch springform pan
Nutrition Information:
Yield:
12
Serving Size:
1 slice
Amount Per Serving:
Calories: 494Total Fat: 39gSaturated Fat: 23gTrans Fat: 1gUnsaturated Fat: 13gCholesterol: 88mgSodium: 194mgCarbohydrates: 37gFiber: 2gSugar: 28gProtein: 4g
HOW MUCH DID YOU LOVE THIS RECIPE?
Please leave a comment on the blog or share a photo on Pinterest