
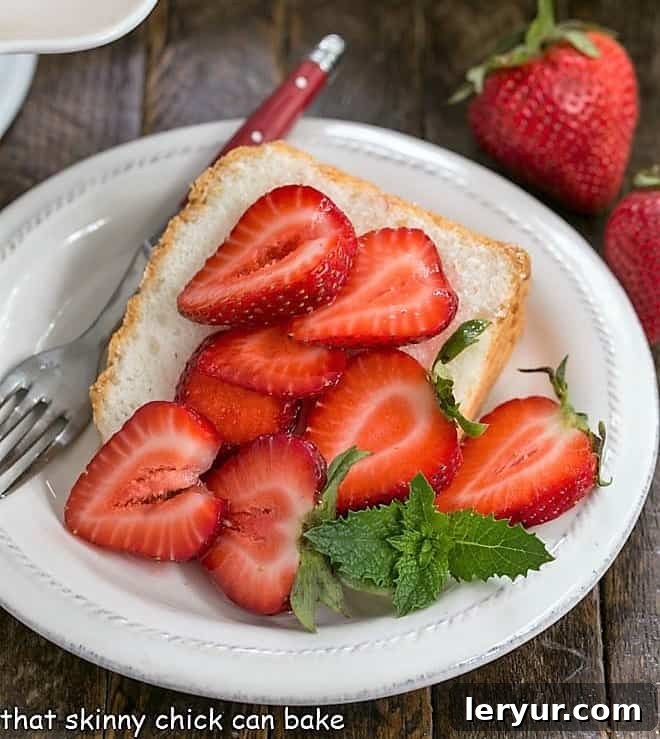
Discover the secrets to baking the most exquisite Angel Food Cake from Scratch with this comprehensive guide. Light, sweet, and wonderfully ethereal, this classic dessert is an absolute delight, especially when adorned with fresh, seasonal berries or juicy peaches. While a boxed mix offers convenience, the unparalleled flavor and delicate texture of a homemade Angel Food Cake truly elevate the experience, making it a must-try for any baking enthusiast.
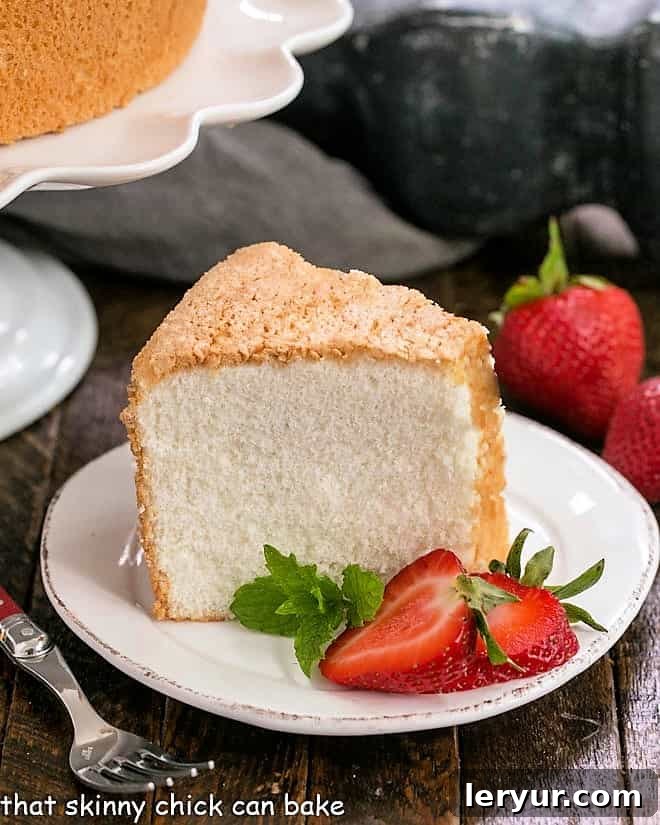
Why You Should Master Homemade Angel Food Cake
It might seem daunting to bake an angel food cake from scratch, particularly if you’re accustomed to the ease of a box mix. However, the journey is incredibly rewarding, and the resulting cake far surpasses any store-bought or pre-packaged alternative. This delicate dessert is more than just a sweet treat; it’s a versatile base for an array of vibrant, fresh fruit toppings, making it a staple for any home baker.
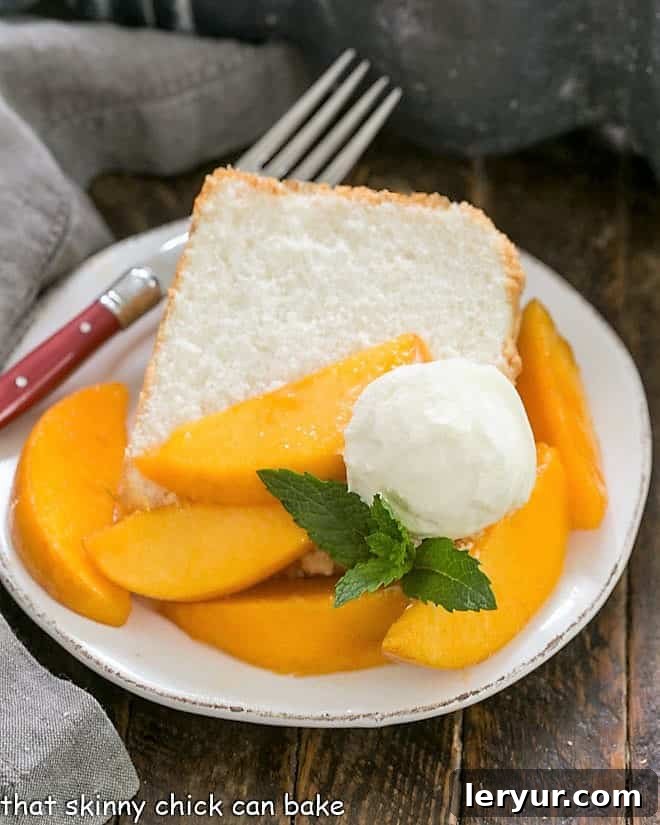
- Showcase Seasonal Fruit: When you have an abundance of fresh, ripe fruit on hand – think succulent strawberries, sweet Southern peaches, or a medley of summer berries – an Angel Food Cake serves as the perfect canvas. Its tender crumb readily absorbs the delicious fruit juices, transforming into a harmonious blend of flavors. Add a dollop of fresh whipped cream or a scoop of vanilla ice cream, and you have a truly memorable, show-stopping dessert.
- A Lighter Indulgence: For those craving something sweet without a heavy calorie count, Angel Food Cake is an excellent choice. Made almost entirely from egg whites and containing no butter or oil, it’s one of the lightest and airiest cakes you can prepare, offering a guilt-free indulgence.
- Unbeatable Flavor and Texture: The taste of a truly homemade Angel Food Cake is simply incomparable. It boasts a unique, slightly chewy, yet incredibly tender and airy texture that melts in your mouth, infused with subtle vanilla and almond notes that cannot be replicated by artificial mixes.
Inspired by the season’s bounty of beautiful local strawberries and Southern peaches, I knew it was time to revisit this classic. There’s nothing quite like showcasing nature’s candy on a freshly baked, cloud-like cake. If you’re fortunate enough to have strawberries in season, consider making a Fresh Strawberry Compote to elevate your cake. With a fresh supply of eggs and my trusted angel food cake pan at the ready, I embarked on creating this ethereal dessert.
The origins of Angel Food Cake trace back to the late 1800s, with its roots most likely in the Pennsylvania Dutch community. It earned its heavenly name due to its remarkably light, white, and fluffy texture, which was said to be “food for angels.” This historical context adds a charming layer to the experience of baking and enjoying this timeless classic.
Essential Ingredient Notes for a Flawless Angel Food Cake
Creating the perfect Angel Food Cake relies heavily on understanding the role of each ingredient. Here’s a closer look at what you’ll need and why it matters:
- Cake Flour: This is non-negotiable for an authentic Angel Food Cake. Cake flour has a lower protein content (and thus less gluten) compared to all-purpose flour. This reduction in gluten is critical for achieving that signature soft, tender, and delicate crumb that distinguishes angel food cake from other types of cakes. Do not substitute with all-purpose flour, as it will result in a tougher cake.
- Granulated Sugar: While some recipes might call for superfine sugar or a blend including powdered sugar, regular granulated sugar works beautifully. Sugar not only provides sweetness but also plays a vital role in stabilizing the egg whites and creating a fine, even crumb. Ensure it’s measured accurately.
- Egg Whites: The star of the show! You’ll need a significant number of egg whites, typically from large eggs.
PRO-Tip: The ideal temperature for egg whites is crucial for maximum volume and stability. They should be around 60 degrees Fahrenheit (about 15-18 degrees Celsius) – warmer than straight from the refrigerator, but slightly cooler than true room temperature. This temperature allows the egg white proteins to denature and whip more effectively, creating a stable foam without becoming too fragile. - Cream of Tartar: This acidic powder is an unsung hero in angel food cake. Its acidity lowers the pH of the egg whites, helping to stabilize the protein structure. This stabilization allows the egg whites to expand significantly without collapsing, creating a much stronger and more voluminous foam, which is essential for the cake’s characteristic rise and airy texture.
- Salt: A small amount of fine table salt (avoid coarse kosher salt here) is important. It acts as a flavor enhancer, balancing the sweetness and bringing out the subtle notes of vanilla and almond, ensuring the cake doesn’t taste flat.
- Vanilla Extract: Always opt for pure vanilla extract over imitation. Its rich, aromatic notes are fundamental to the classic Angel Food Cake flavor profile, adding warmth and depth to the sweetness.
- Fresh Lemon Juice: Like cream of tartar, fresh lemon juice introduces acidity that helps stabilize the egg whites. It also adds a bright, subtle citrus undertone that complements the sweetness without being overtly lemony. Avoid bottled lemon juice for the best results.
- Almond Extract: This is an optional but highly recommended addition. Almond extract lends a delicate, sophisticated nuttiness that pairs wonderfully with vanilla, enhancing the overall flavor complexity of the cake. If you’re not a fan of almond, you can omit it.
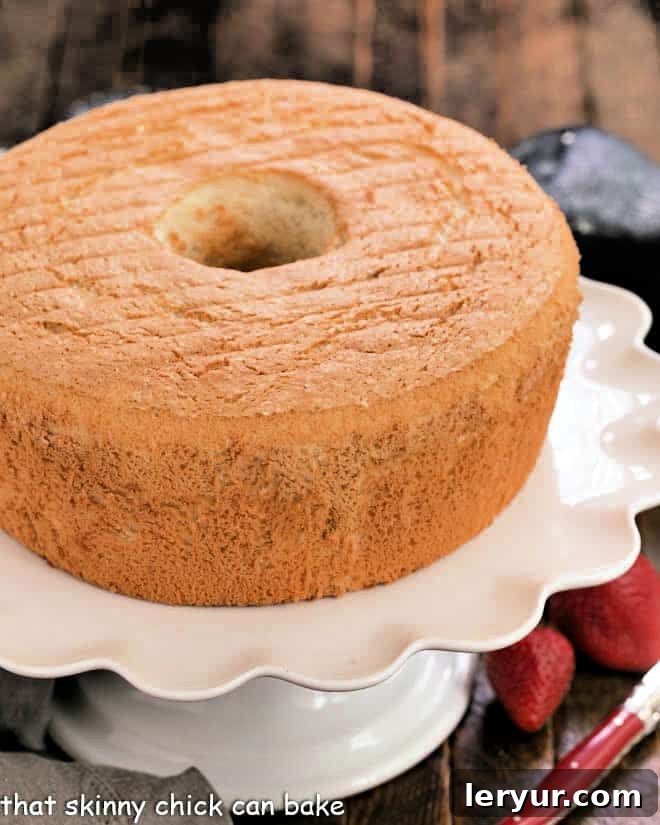
Mastering the Art: How to Bake the Best Angel Food Cake from Scratch
Baking a truly exceptional Angel Food Cake is a delicate art, but with these detailed tips and techniques, you’ll achieve a light, fluffy, and perfectly risen cake every time. The secret lies in precise execution and understanding the science behind the ingredients.
- Egg White Preparation is Key: You’ll need about a dozen large egg whites for this recipe. Separate your eggs carefully when they are cold, as yolks are firmer and less likely to break. However, for optimal whipping, the egg whites should be allowed to warm up slightly to around 60 degrees Fahrenheit (approximately 15-18°C) before beating. This specific temperature allows the proteins to denature more easily and create a stable, voluminous foam.
- Spotless Equipment: This cannot be stressed enough: any trace of grease, oil, or even a speck of egg yolk will prevent your egg whites from whipping properly. Before you begin, thoroughly wash your mixer bowl and beaters. If you’re unsure, wipe them down with a clean paper towel dampened with white vinegar; the acid will cut through any residual grease. This ensures the egg whites can build and hold air effectively.
- Whipping the Egg Whites: The Stages:
- Begin whipping the egg whites on low speed. This initial slow beating creates small, uniform bubbles, laying a strong foundation for the foam.
- Gradually increase the speed to medium. Continue beating until the whites develop into a soft, foamy consistency with small, even bubbles. This stable foam is crucial for the cake’s structure and its impressive rise. Avoid over-beating at this stage.
- Stabilizing and Sweetening: Once a stable foam has formed, add the cream of tartar and salt. The cream of tartar, as an acid, will significantly help to stabilize the egg whites, allowing them to expand up to eight times their initial volume without collapsing. Its acidity lowers the pH, making the proteins more elastic and capable of holding more air. Then, slowly and gradually (a tablespoon at a time) add the granulated sugar while the mixer is still running at medium speed. This slow addition ensures the sugar dissolves completely and integrates smoothly into the egg whites, creating a glossy, stable meringue.
- Achieving Soft Peaks: This is a critical point. Continue beating until the egg whites form *very soft peaks*. When you lift the beater, the whites should form gentle mounds that softly curl over, not stand stiffly. This is different from the stiff peaks required for meringues or pavlovas. Over-beating at this stage will create an unstable structure, causing the cake to fall and become dense. The final batter, once the flour is folded in, should be pourable, indicating the perfect consistency of whipped whites.
- The Right Pan is Paramount: Use an ungreased tube pan, preferably a two-piece model, specifically designed for angel food cake. The batter needs to cling to the sides of the pan to climb and rise properly during baking. A non-stick surface, or a greased/floured pan, will prevent this adhesion, leading to a deflated cake. The tube in the center also ensures even heat distribution, allowing the cake to bake thoroughly.
- The Art of Folding: “Folding” is a gentle culinary technique used to incorporate a heavier ingredient into a lighter, airy mixture without deflating it. For this recipe, the dry ingredients (cake flour and sugar mixture) must be carefully folded into the delicate egg whites.
To fold: Add about 1/3 of the flour mixture to the egg whites. Using a large rubber spatula, cut down through the center of the bowl, scrape along the bottom and sides, then bring the batter up and fold it over the top. Rotate the bowl about 90 degrees and repeat this motion gently and repeatedly until the flour is just incorporated. Avoid overmixing, as this will deflate the egg whites and result in a dense cake. - Pouring the Batter: When the batter is perfectly mixed, it should be pourable into the tube pan, not spooned in. If you find yourself scooping it, it’s a sign that the egg whites might have been over-beaten or overmixed during the folding process. Gently smooth the top with an offset spatula.
- Testing for Doneness:
PRO-Tip: Forget the toothpick test for Angel Food Cake! It’s not the most accurate indicator. Instead, bake the cake until its top is golden brown and, when lightly pressed with the tip of your finger, it springs back. This resilience indicates that the cake’s structure is fully set. Baking typically takes about 50-60 minutes. - Crucial Upside-Down Cooling:
PRO-Tip: Cooling an Angel Food Cake upside down is absolutely vital to its light and fluffy texture. This prevents gravity from compressing the delicate, warm cake as it cools, maintaining its height and airy structure. Many tube pans come with small “feet” on the rim for this purpose. If your pan doesn’t have feet, invert it over the neck of a sturdy glass bottle (like a soda bottle) or funnel until it’s completely cool, which can take 2-3 hours. - Removing and Slicing: Once the cake is completely cool, run a thin, sharp knife carefully around the edges of the pan to loosen it. Then, push up the bottom of the pan to release the cake. To slice, use a long, serrated knife with a gentle sawing motion to avoid tearing or squashing the delicate cake.
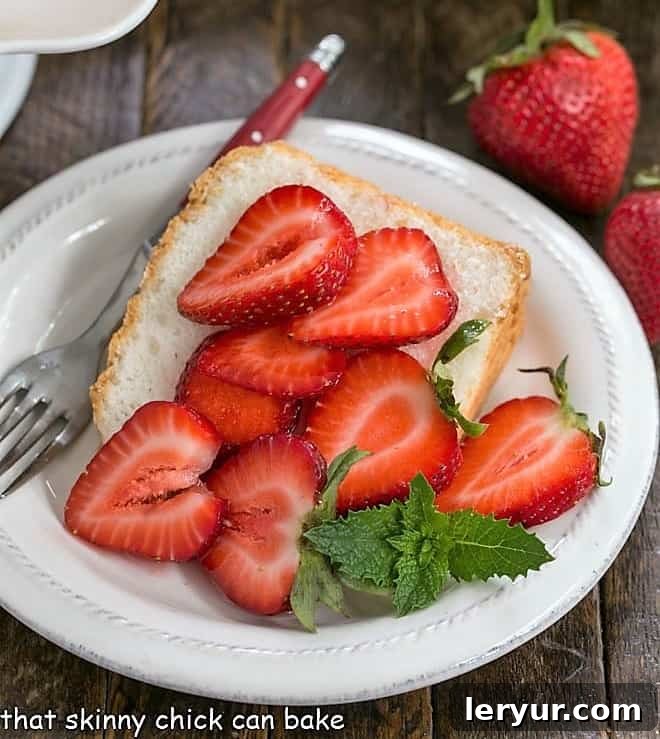
Frequently Asked Questions About Angel Food Cake
Angel Food Cake is a traditional American sponge cake known for its exceptionally light, airy, and fluffy texture. Unlike its rich counterpart, Devil’s Food Cake, which is dark and chocolaty, angel food cake is distinctly white, made exclusively from stiffly beaten egg whites, sugar, and cake flour, with no egg yolks or added fats. It is characteristically baked in an ungreased tube pan, which is crucial for its signature rise and shape.
No, traditional Angel Food Cake is not gluten-free as it contains cake flour, which is derived from wheat and thus contains gluten. However, there are numerous recipes available that substitute cake flour with a gluten-free flour blend to create a gluten-free version.
The traditional and highly recommended pan for Angel Food Cake is a two-piece aluminum tube pan. This type of pan is ungreased, allowing the delicate batter to cling to the sides as it rises, which is essential for its characteristic height and airy structure. Non-stick pans or greased/parchment-lined pans will hinder this adhesion, causing the cake to struggle to rise and potentially collapse. The central tube also ensures even heat penetration, allowing the cake to bake evenly from the inside out.
While the tube pan is ideal, you can use other pans, provided they are not greased or lined. Loaf pans, sheet pans, or even jelly roll pans can be adapted, but be prepared to adjust baking times and expect a slightly different shape and rise. The key is to ensure the batter has a surface to grip for proper expansion.
For best freshness, wrap a plain Angel Food Cake tightly in plastic wrap and store it at room temperature for 2-3 days. If you need to keep it longer, refrigerate it for up to a week. For extended storage, a well-wrapped Angel Food Cake can be frozen for up to 6 months. Thaw at room temperature or in the refrigerator. If your cake is frosted with whipped cream, or filled with delicate ingredients like mousse or custard, it must be stored in the refrigerator to maintain its quality and food safety.
Yes, cooling an Angel Food Cake upside down is a non-negotiable step for achieving its signature light and fluffy texture. When the cake is warm and fresh out of the oven, its delicate structure is still fragile. If cooled right side up, gravity would cause the cake to compress and deflate, leading to a denser, shorter cake. Inverting the pan suspends the cake, allowing it to cool slowly and set in its expanded form. Many modern angel food cake pans come with small “feet” on the rim for this purpose. If your pan lacks these, simply invert it over the neck of a sturdy glass bottle, like a soda bottle, until it is completely cooled.
Having a surplus of egg yolks after making Angel Food Cake is a delicious opportunity! Many recipes specifically call for yolks, allowing you to create rich and decadent dishes. Consider making luscious custards, silky crème brûlée, creamy puddings, homemade ice cream, vibrant lemon curd, or classic tiramisu. For a savory option, pasta carbonara is a simple, indulgent entree that uses several yolks. Here are some recipe ideas based on the number of yolks you have:
- 3 egg yolks – Classic Tiramisu
- 4 egg yolks – White Chocolate Creme Brulee
- 5 egg yolks – Caramel Swirl Ice Cream
- 6 egg yolks – Chocolate Pots de Creme
- 7 egg yolks – Classic Creme Brulee
Several factors can contribute to an Angel Food Cake falling or sinking. Common culprits include:
- Underbaking: If the cake isn’t fully baked, its structure hasn’t properly set, leading to collapse as it cools.
- Overbeaten Egg Whites: Whipping egg whites beyond soft peaks creates a fragile foam that can’t support the cake’s structure, causing it to fall.
- Overmixing Dry Ingredients: Aggressively folding in the flour mixture can deflate the delicate egg whites, resulting in a dense, sunken cake.
- Opening the Oven Door: Opening the oven door too early or too frequently can cause a sudden drop in temperature, leading the cake to deflate.
- Greased Pan: If the pan was greased or non-stick, the batter couldn’t cling to the sides to rise, resulting in a short and potentially sunken cake.
This can be incredibly frustrating! Here are the most common reasons why an Angel Food Cake might fall out of the pan when inverted:
- Not Fully Baked: An underbaked cake lacks the structural integrity to hold itself in the pan when inverted.
- Greased or Non-Stick Pan: Angel Food Cake batter needs to adhere to the pan sides to climb and set. If your pan was greased, floured, or has a non-stick coating, the cake won’t have anything to grip, causing it to slip out.
- Too Much Sugar: An excessive amount of sugar can weaken the protein structure of the egg whites, making the cake too fragile to hold its shape.
- Not Enough Flour: Insufficient flour means there isn’t enough dry structure to bind the cake together.
- Accidental Pan Release: For two-piece tube pans, accidentally pressing the bottom of the pan when inverting can prematurely release the cake.
While egg-separating tools exist, they are not always foolproof. The most reliable method is the “three-bowl technique” to prevent any yolk contamination:
- Crack your first egg and carefully separate the white into a small, temporary collection bowl. Discard or save the yolk in a separate bowl dedicated to yolks.
- Once you confirm the white in the temporary bowl is completely yolk-free, transfer it to a larger bowl where all the clean egg whites will be collected.
- Repeat this process for each subsequent egg, using the temporary bowl for each individual white. This way, if a yolk accidentally breaks into a white, you only contaminate one egg white, not the entire batch.
Remember, eggs separate best when cold, but egg whites whip best when slightly warmer, so let them sit out after separating.
Angel Food Cake’s delicate flavor makes it incredibly versatile for toppings. My personal favorite is a simple combination of fresh berries and lightly sweetened whipped cream. Fresh strawberries can be sliced, tossed with a little sugar, and allowed to macerate for 15-30 minutes to release their juices, creating a natural compote. Blueberries, raspberries, blackberries, or a mixed berry compote also work beautifully.
Beyond berries, consider these delicious options:
- Fruit Sauces: A warm cherry compote, peach puree, or a vibrant mango sauce.
- Creamy Indulgences: A scoop of your favorite ice cream, drizzled with rich fudge or chocolate sauce, or a decadent caramel or salted caramel sauce.
- Citrusy Brightness: Zesty lemon curd offers a wonderful tart contrast to the cake’s sweetness.
- Frostings: While often served plain, the whole cake can be lightly frosted with a classic American buttercream for a sweeter finish, or a luxurious Swiss meringue buttercream for a silky, less-sweet alternative.
Explore More Delicious Cake Recipes
If you enjoyed baking this Angel Food Cake, you might also like to try these other delightful cake recipes:
- Red Velvet Cake from Saving Room for Dessert
- Black Magic Snack Cake
- Devil’s Food Cake
- Hummingbird Cake
- Sour Cream Pound Cake
- And for a unique twist, try this Mousse Filled Angel Food Cake.
- Discover even more of the Best Cake Recipes to expand your baking repertoire.
Stay connected for more delicious recipes and baking inspiration! Follow us on Instagram, Facebook, and Pinterest. Don’t forget to tag us when you bake one of our creations! If you love the results, please consider giving this recipe a 5-star rating in the recipe card below.
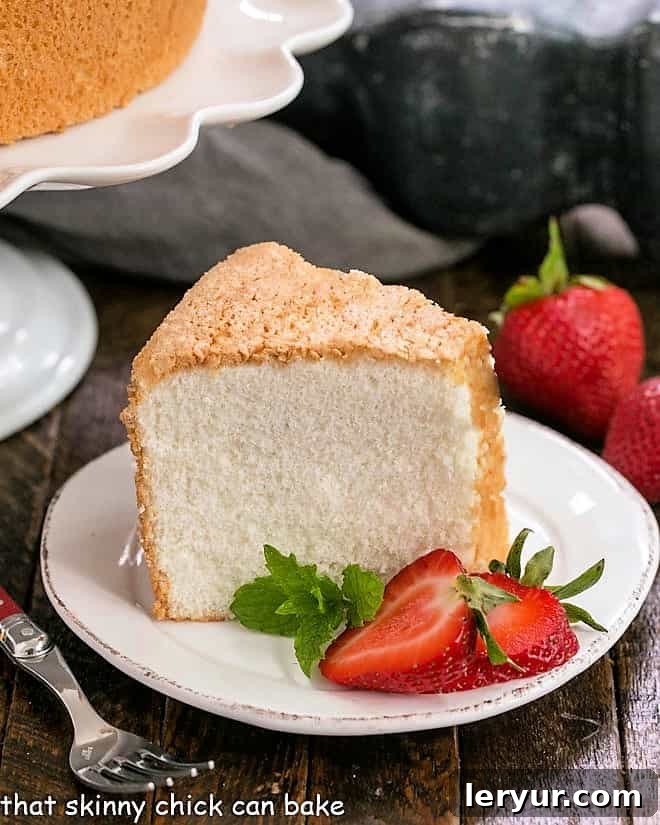
The Best Angel Food Cake Recipe
30 minutes
1 hour
2-3 hours
3 hours 30 minutes
12 servings
A classic recipe for a remarkably light, airy, and utterly delicious homemade Angel Food Cake, perfect for any occasion.
Ingredients
- 1 cup sifted cake flour
- 1 ½ cups granulated sugar, divided
- 12 large egg whites, at 60°F (slightly cooler than room temperature)
- 1 teaspoon cream of tartar
- ¼ teaspoon fine table salt
- 2 teaspoons pure vanilla extract
- 1 teaspoon fresh lemon juice
- ½ teaspoon almond extract (optional, but recommended)
Instructions
- Prepare Oven and Dry Ingredients: Preheat your oven to 325°F (160°C). In a small bowl, whisk together the sifted cake flour and ¾ cup of the granulated sugar. Set aside the remaining ¾ cup sugar in a separate small bowl.
- Whip Egg Whites: In the clean bowl of your stand mixer (ensure it’s grease-free), begin beating the egg whites on low speed until they start to froth and become bubbly.
- Add Stabilizers: Add the cream of tartar and salt to the frothy egg whites. Increase the mixer speed to medium and continue beating until the whites form very soft, fluffy mounds. They should hold their shape briefly but still be pliable.
- Incorporate Sugar: With the mixer still running at medium speed, gradually beat in the remaining ¾ cup sugar, adding it one tablespoon at a time. Continue beating until all the sugar is incorporated, and the egg whites become shiny and form soft peaks that gently curl when the beaters are lifted. Do not beat to stiff peaks.
- Add Flavorings: Gently mix in the vanilla extract, fresh lemon juice, and almond extract (if using) until just blended.
- Fold in Flour Mixture: Sift about 3 tablespoons of the reserved flour-sugar mixture over the egg white mixture. Using a large rubber spatula, gently fold it in using a cut-down-through-the-center, scrape-along-the-sides, bring-up-and-fold-over motion. Rotate the bowl 90 degrees and repeat. Continue sifting in the flour-sugar mixture, 3 tablespoons at a time, and gently folding until all the dry ingredients are just incorporated. Be careful not to deflate the egg whites.
- Fill Pan: Gently pour the batter into an ungreased 9-inch tube pan with a removable bottom. Smooth the top with an offset spatula. The batter should be pourable; if it needs to be scooped, it may be over-beaten.
- Bake: Bake for 50-60 minutes, or until the cake is golden brown and the top springs back when lightly pressed with your fingertip. The toothpick test is not reliable for Angel Food Cake.
- Cool Upside Down: Immediately upon removing from the oven, invert the cake pan. If your pan has feet around the rim, rest it on them. If not, invert the pan onto the neck of a sturdy bottle. Allow the cake to cool completely in this position for 2-3 hours. This prevents the cake from collapsing due to gravity.
- Remove and Serve: Once fully cooled, run a thin knife carefully around the outer edge of the pan to loosen the cake. Push up the removable bottom and run the knife around its edge to release the cake completely. To slice, use a long, serrated knife with a gentle sawing motion. Serve immediately with your favorite toppings or cover loosely with plastic wrap for later enjoyment.
Notes
Recipe adapted from Cook’s Illustrated, ensuring a reliable and delicious outcome every time.
Recommended Baking Tools
As an Amazon Associate and member of other affiliate programs, I earn from qualifying purchases.
- Angel Food Cake Pan
- Silicone Spatulas
- KitchenAid KSM150PSER Artisan Tilt-Head Stand Mixer
Nutrition Information:
Yield:
12
Serving Size:
1
Amount Per Serving:
Calories: 159
Total Fat: 0g
Saturated Fat: 0g
Trans Fat: 0g
Unsaturated Fat: 0g
Cholesterol: 0mg
Sodium: 100mg
Carbohydrates: 34g
Fiber: 0g
Sugar: 25g
Protein: 5g
Thatskinnychickcanbake.com occasionally offers nutritional information for recipes contained on this site. This information is provided as a courtesy and is an estimate only. This information comes from online calculators. Although thatskinnychickcanbake.com attempts to provide accurate nutritional information, these figures are only estimates.
Varying factors such as product types or brands purchased can change the nutritional information in any given recipe. Also, many recipes on thatskinnychickcanbake.com recommend toppings, which may or may not be listed as optional and nutritional information for these added toppings is not listed. Other factors may change the nutritional information such as when the salt amount is listed “to taste,” it is not calculated into the recipe as the amount will vary. Also, different online calculators can provide different results.
To obtain the most accurate representation of the nutritional information in any given recipe, you should calculate the nutritional information with the actual ingredients used in your recipe. You are solely responsible for ensuring that any nutritional information obtained is accurate.
How Much Did You Love This Recipe?
Please leave a comment on the blog or share a photo on Pinterest!