
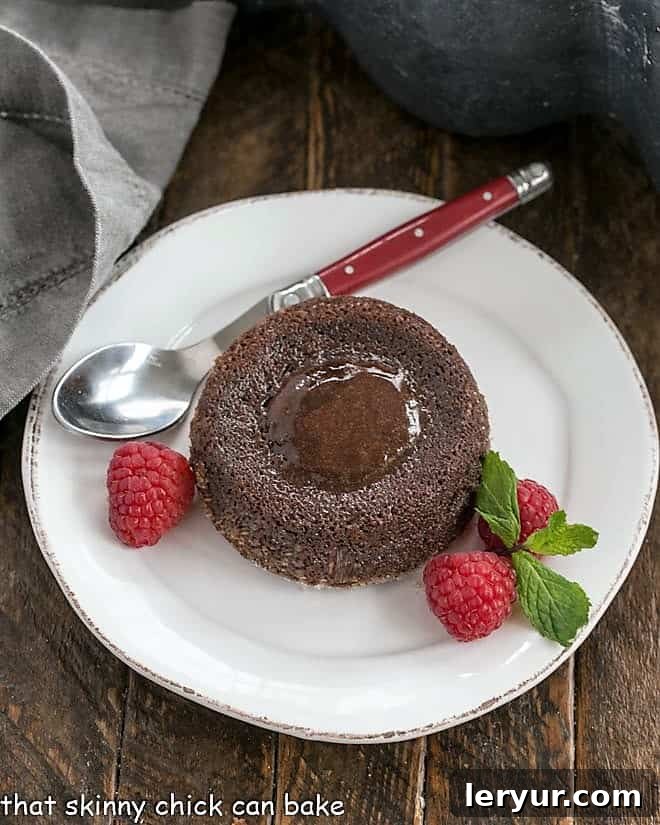
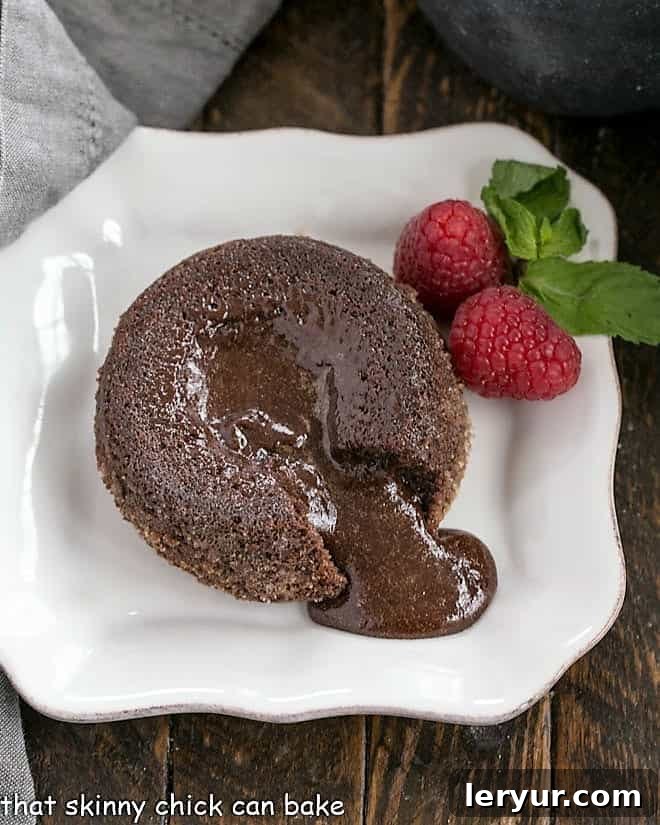
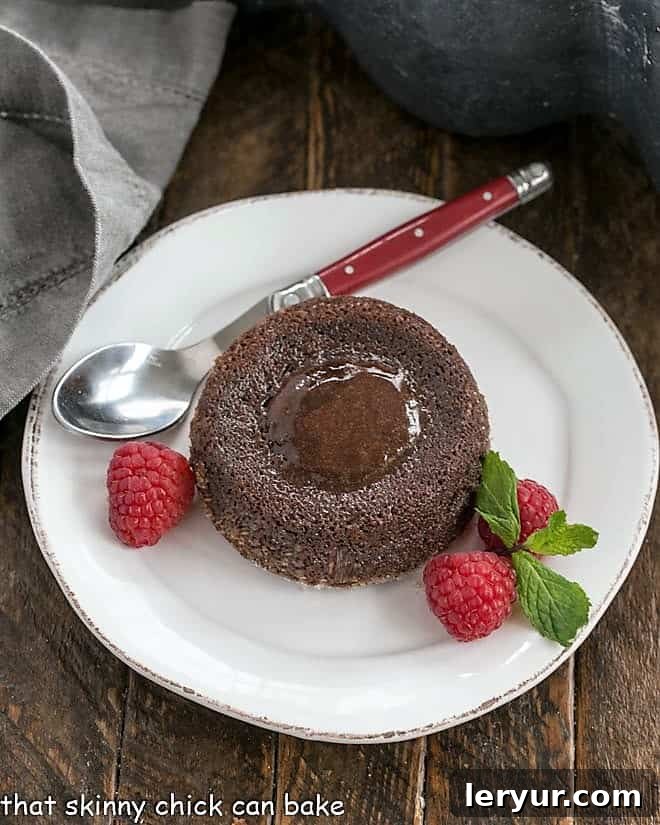
Molten Lava Cakes are the quintessential decadent dessert, renowned for their individual chocolate cake exterior and a luxurious, warm, fudgy center that majestically oozes with the first delightful bite. This recipe unveils the secrets to crafting these impressive yet surprisingly simple chocolate masterpieces, perfect for any occasion that calls for a touch of elegance and indulgence.
For many, Chocolate Lava Cakes transcend being merely a dessert; they are a cherished holiday tradition, a celebratory treat, or simply a spontaneous act of chocolate worship. Their appeal lies in their effortless preparation, rapid baking time, and incredible versatility. Whether served with a delicate dusting of powdered sugar, vibrant fresh berries, a dollop of fluffy whipped cream, or a scoop of creamy vanilla ice cream, these cakes promise a memorable culinary experience. The sheer excitement my family shows when the signature ramekins emerge from the cupboard is a testament to the irresistible charm of this delightful confection.
The Allure of Chocolate Lava Cakes: A Culinary History
While their exact origin is debated, with culinary giants Jean-Georges Vongerichten and Jacques Torres both laying claim to their invention in the 1980s, one thing is certain: Molten Lava Cakes quickly captured the hearts (and palates) of dessert lovers worldwide. This recipe, a refined version of one I first perfected back in 2011, focuses on a more intimate, yet equally satisfying, 4-ounce serving. These smaller portions strike the perfect balance, delivering an intensely rich and luscious chocolate experience without overwhelming the senses. They are a testament to the fact that sometimes, less truly is more, especially when it comes to concentrated chocolate bliss.
One charming aspect of homemade lava cakes is their unique character. The delightful two-toned effect you might observe on the crust of some cakes, where areas appear slightly more golden or caramelized, is often a happy accident resulting from the sugar dusting on the ramekins. Not every speck of sugar releases evenly, creating beautiful variations. Personally, I find this adds to their rustic charm. While my family enjoys the perfectly inverted cakes, I often find myself scraping up every last bit of the melted chocolate-sugar-butter goodness clinging to the ramekins—a secret indulgence I believe might just be the best part!
Mastering the Molten Lava Cake Recipe: A Step-by-Step Guide
Creating these individual chocolate sensations is surprisingly straightforward, turning even novice bakers into dessert maestros. The key lies in careful preparation and precise baking. Here’s a detailed breakdown of the process to ensure your lava cakes are nothing short of perfection:
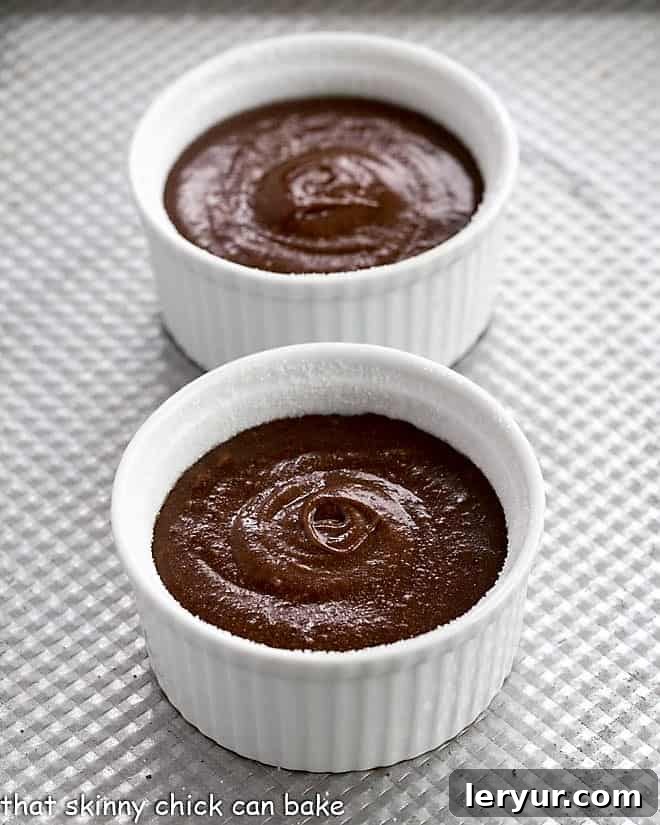
- Prepare the Ramekins with Precision: This crucial first step ensures your beautiful cakes release cleanly. Begin by thoroughly greasing the inside of each ramekin with softened butter, ensuring full coverage right up to the rim. Next, cut a small round of parchment paper to fit the bottom of each ramekin and press it firmly into place. Grease the parchment as well. Finally, generously dust the entire buttered interior with granulated sugar, rotating the ramekin to ensure an even coating. The sugar not only aids in preventing sticking but also creates a lovely, slightly caramelized crust.
- Preheat Your Oven to Perfection: Achieving the perfect molten center requires a hot oven. Preheat your oven to 450°F (230°C). A high temperature is essential for quickly setting the exterior of the cake while leaving the interior gloriously fudgy and liquid.
- Craft the Silky Batter: The heart of your lava cake lies in its rich, chocolatey batter. In a microwave-safe bowl, combine high-quality semi-sweet chocolate, chopped into small pieces, with unsalted butter, cut into cubes. Melt them together in 30-second intervals in the microwave, stirring well after each interval, until the mixture is completely smooth and glossy. Set this aside to cool slightly. In a separate large bowl, combine whole eggs, additional egg yolks, granulated sugar, and pure vanilla extract. Beat this mixture on high speed for a full 10 minutes until it becomes thick, pale, and significantly increased in volume. This aeration is vital for the cake’s light texture. Gently fold the cooled chocolate mixture into the egg mixture until just combined, then carefully fold in the cake flour. Overmixing will develop gluten and result in a tougher cake, so be delicate.
- Divide Evenly for Consistent Results: Spoon the prepared batter evenly among your buttered and sugared ramekins. Ensure each ramekin holds roughly the same amount of batter for uniform baking.
- Bake Until Edges Are Set: Transfer the filled ramekins to the preheated oven. Bake for approximately 9-10 minutes. The visual cues for doneness are key: the edges of the cakes should appear firm and set, while the very centers should still have a slight jiggle when gently nudged. This jiggle indicates the molten interior.
- Remove and Loosen: Once baked, carefully remove the ramekins from the oven. Let them rest for just 1-2 minutes. Then, using a thin metal spatula or a small knife, gently run it around the perimeter of each cake to loosen it from the ramekin. This step is critical for a clean release.
- Cool, Invert, and Serve Immediately: Allow the cakes to cool for another 2-3 minutes. This brief cooling period helps the exterior structure firm up enough to withstand inversion without crumbling. Place a dessert plate upside down over each ramekin, then, holding the plate and ramekin together, quickly and confidently invert the cake onto the plate. Lift the ramekin and parchment paper to reveal your stunning molten lava cake. Serve these delectable treats immediately, while they are still warm and their centers are wonderfully gooey.
Expert Tips for Flawless Molten Lava Cakes Every Time
Achieving that perfect balance between a tender cake and a flowing molten center requires a few insider tricks. Here are invaluable tips to guarantee your lava cakes are always a showstopper:
- Choose High-Quality Chocolate: The foundation of an exceptional chocolate lava cake is the chocolate itself. Opt for good quality chocolate bars (semi-sweet or bittersweet, depending on your preference for sweetness) rather than chocolate chips. Chocolate bars typically contain fewer stabilizers and melt more smoothly, resulting in a richer, more luxurious “lava.”
- Master Ramekin Preparation: Don’t underestimate this step! Proper ramekin preparation is paramount for ensuring your lava cakes release effortlessly. Beyond butter and sugar, consider using a baking spray that contains flour, such as Baker’s Joy. This creates an extra layer of non-stick insurance. Ensure every crevice is covered.
- Timing is Everything: Bake and Serve Warm: Molten lava cakes are best enjoyed warm, straight from the oven. Plan to bake them while you’re enjoying dinner or just before your guests are ready for dessert. Reheating baked lava cakes can often lead to the “lava” solidifying, transforming them into regular mini chocolate cakes.
- Understand the Doneness Cues: This is the most critical aspect of baking lava cakes. Bake until the sides of the cakes are visibly set and firm, but the very centers still have a slight, delicate jiggle when gently nudged. This “jiggle” is your indicator that the interior remains perfectly molten. If you bake them for too long, you’ll lose that signature ooey-gooey center, resulting in a delicious, but standard, chocolate cupcake.
- Effortless Release: After removing from the oven, let the cakes cool in their ramekins for about 2 minutes. This brief rest period allows the exterior to firm up slightly. Before inverting, use a thin, flexible knife or a metal spatula to carefully run around the entire edge of each cake, ensuring it’s completely loosened from the ramekin. This prevents any sticking and ensures a beautiful presentation.
How to Serve Molten Lava Cakes and Impress Your Guests
The beauty of molten lava cakes is not just in their taste but also in their impressive presentation and the delight they bring to any gathering. I once whipped these up in about 30 minutes before a big Colts-Packers game gathering, and they were an absolute hit! Here’s how to serve them to perfection:
- Embrace the Warmth: These lava cakes are undeniably best when served still warm from the oven. The contrast between the warm, flowing chocolate and any cool accompaniments is pure magic.
- Classic Garnishes for a Pop of Flavor and Color: Elevate your presentation with simple yet effective garnishes. A generous dollop of freshly whipped cream, a scoop of premium vanilla bean ice cream, or a medley of fresh berries (raspberries, strawberries, blueberries) adds both visual appeal and complementary flavors. A light, elegant dusting of powdered sugar is also a beautiful and classic choice.
- Pair with Perfect Beverages: Offer hot coffee, a comforting tea, or even a sophisticated after-dinner digestif like a cordial or a glass of port wine. The warmth of the beverages complements the rich chocolate beautifully.
There were absolutely no complaints as my green-jerseyed family devoured these without a single accouterment. My daughter, Katie, ever the diplomat, had her Peyton Manning pin perfectly placed on her Packer attire, a nod to both teams. With their chocolate cravings utterly satisfied, they were out the door, leaving Lambeau (the dog) and me to enjoy the quiet house—and perhaps another lava cake or two!
Frequently Asked Questions About Molten Lava Cakes
Absolutely! You can prepare the batter and pour it into your greased ramekins, then cover them tightly with plastic wrap and refrigerate for up to 24 hours. When you’re ready to bake, remove the ramekins from the refrigerator about an hour before baking to allow them to come closer to room temperature. If they’re still quite cool, you might need to add an extra minute or two to the baking time. Always look for those tell-tale firm edges and a slightly jiggly center to ensure the molten core remains perfect. This make-ahead option makes them ideal for entertaining, as you can do most of the work in advance. Over the years, I’ve made countless versions, and no matter the recipe, the anticipation alone makes my family practically hyperventilate! These are truly a dream for any chocolate lover.
The “lava” in these individual cakes is indeed a warm, but not fully cooked, batter. While the heat from baking does partially cook the eggs, a truly molten center means the eggs may not reach a temperature that fully sterilizes them. Therefore, due to the presence of partially cooked eggs, it’s generally advised not to serve this dessert to very young children, the elderly, or individuals with compromised immune systems. For complete safety for everyone, if you have access to pasteurized eggs, using them in the recipe makes the dessert 100% safe. Alternatively, if you possess a very accurate food thermometer and are comfortable with the process, you can gently pasteurize eggs at home before incorporating them into the batter.
No ramekins? No problem! You can absolutely still enjoy molten lava cakes. A standard muffin tin is an excellent alternative. Be sure to prepare the muffin tin thoroughly by greasing and flouring each cavity or lining them with paper muffin liners and greasing the interiors. Keep in mind that cakes baked in a muffin tin will be smaller than those in standard ramekins, so their baking time will be significantly shorter. Watch them very carefully and remove them from the oven as soon as the edges are set and only the very centers show a slight jiggle. Other heat-safe ceramic bowls or even teacups (ensure they are oven-safe!) can also work in a pinch, just be mindful of their size and adjust baking times accordingly.
If you happen to have any leftover lava cakes (a rare occurrence!), you can store them in an airtight container at room temperature for up to 2 days, or in the refrigerator for up to 4 days. To reheat, the best method is to gently warm them in a preheated oven at 300°F (150°C) for about 5-8 minutes, or until just warm through. Be cautious not to overheat, as this will cook the molten center. You can also microwave them for 15-30 seconds, but keep a close eye to prevent overcooking.
The most common reason for a lava cake lacking its signature molten center is simply overbaking. The sweet spot is a fine line between a set exterior and a gooey interior. Ensure your oven temperature is accurate (an oven thermometer can help!), and rely on the visual and tactile cues: firm edges with a visibly jiggly center. Also, make sure your ingredients are at the correct temperature (e.g., melted chocolate mixture isn’t too hot when folded in, which can start to cook the eggs prematurely). Trust your instincts and pull them out as soon as they hit that perfect jiggle!
Explore More Chocolate Indulgences You May Also Like
Having experimented with countless lava cake recipes over the years, I’ve discovered that while the amounts or types of chocolate, eggs, sugar, or flour may vary, the core principle of a delectable, flowing chocolate center remains the same. This particular version stands out for its simplicity and impressive results. Remember to meticulously watch the baking time to ensure that only the very center appears enticingly undercooked, delivering that desired molten effect.
Allowing a short cooling time before unmolding is also key; it gives the cake’s exterior a chance to firm up sufficiently for a clean release. I always recommend running a thin knife around the edge of each ramekin before flipping them, which guarantees an easier and more elegant unmolding process. Your favorite chocoholic (or even a casual dessert admirer) will undoubtedly thank you for introducing them to these irresistible treats!
- Classic Chocolate Lava Cake Recipe (for larger 6-8 ounce ramekins)
- Elegant White Chocolate Lava Cakes (perfect for 4-ounce ramekins)
- Lava Cakes with Kahlua Whipped Cream (a boozy twist for 6-ounce ramekins)
- Innovative Chocolate Lava Cookies (a creative twist on the classic)
- Plus, discover more of my best Homemade Chocolate Desserts for every craving!

And speaking of game day, guess who always sports her retro Packers jersey? Lambeau, our loyal pup, is always ready for a treat!
Stay connected and share your culinary creations with me! Find me on social media @ Instagram, Facebook, and Pinterest. Don’t forget to tag me when you try one of my delicious recipes! And if you absolutely love the results, please show your support by giving it a 5-star rating in the recipe card below. Your feedback truly means the world!
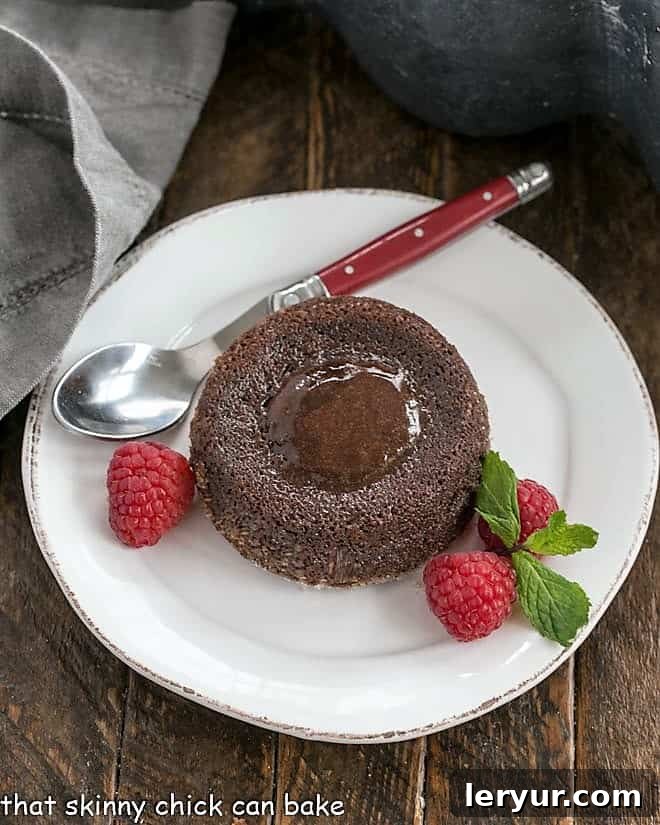
Chocolate Lava Cakes
20 minutes
10 minutes
30 minutes
4 servings
Rich, individual chocolate cakes with molten chocolate centers!
Ingredients
- ½ cup butter, cut into pieces
- 4 ounces semi-sweet chocolate, chopped
- 2 whole eggs
- 2 egg yolks
- ½ cup sugar (plus more to dust buttered ramekins)
- ½ teaspoon vanilla
- 1 tablespoon cake flour
- Berries, sweetened whipped cream or ice cream to garnish
Instructions
- Preheat oven to 450ºF (230°C). Butter and sugar four 6-8-ounce ramekins and set aside. Alternatively, line a muffin tin or smaller ramekins with paper muffin liners, then grease the interiors thoroughly. Note that if using a muffin tin, you will likely yield more than 4 lava cakes.
- In a microwave-safe bowl, combine the chopped semi-sweet chocolate and cut butter. Melt them together by heating in 30-second intervals, stirring vigorously after each, until the mixture is completely smooth and homogenous. Set aside to cool slightly.
- In a large mixing bowl, combine the whole eggs, egg yolks, granulated sugar, and vanilla extract. Using an electric mixer, beat the mixture on high speed for approximately 10 minutes until it becomes thick, pale, and significantly aerated.
- Gently fold the slightly cooled chocolate and butter mixture into the aerated egg mixture until just combined. Then, carefully fold in the cake flour until no streaks of flour remain. Be careful not to overmix. Spoon the batter evenly into the prepared ramekins.
- Bake for 9-10 minutes, or until the edges of the cakes are set and firm, but the centers still exhibit a distinct jiggle when gently nudged. This indicates the perfect molten interior.
- Remove the cakes from the oven and allow them to cool in their ramekins for about 2 minutes. Carefully run a thin knife or metal spatula around the edges to loosen. Place a dessert plate on top of each ramekin, then quickly and confidently invert the cake onto the plate. Remove the ramekin and parchment paper. Serve immediately with fresh berries, whipped cream, or a scoop of ice cream, if desired.
Notes
This recipe is adapted from Ghirardelli, ensuring a rich and authentic chocolate experience.
Important Note on Safety: Since the “lava” center consists of batter that is not completely cooked, this dessert should be consumed with caution. It is generally not recommended for very young children, the elderly, pregnant individuals, or anyone with a compromised immune system. If you are concerned, consider using pasteurized eggs to ensure 100% safety for all consumers, or ensure the cakes are baked slightly longer for a less “molten” but still delicious fudgy center.
Recommended Products
As an Amazon Associate and member of other affiliate programs, I earn from qualifying purchases.
- Reynolds Cookie Baking Sheets Non-Stick Parchment Paper, 25 Sheet, 4 Count
- KitchenAid KSM150PSER Artisan Tilt-Head Stand Mixer with Pouring Shield, 5-Quart, Empire Red
Nutrition Information:
Yield:
4 servings
Serving Size:
1 cake
Amount Per Serving:
Calories: 413Total Fat: 18gSaturated Fat: 10gTrans Fat: 0gUnsaturated Fat: 8gCholesterol: 201mgSodium: 71mgCarbohydrates: 59gFiber: 4gSugar: 52gProtein: 8g
HOW MUCH DID YOU LOVE THIS RECIPE?
Please leave a comment on the blog or share a photo on Pinterest