
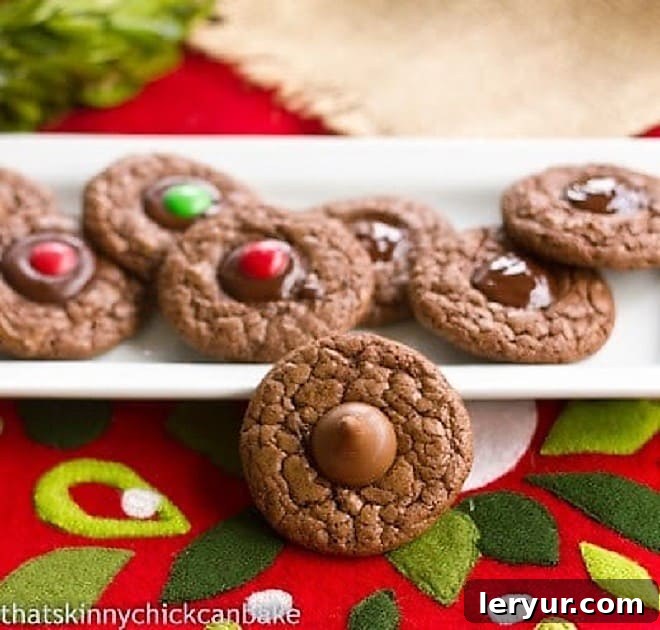
Indulge in the irresistible charm of these Double Chocolate Thumbprint Cookies! While perfectly dressed for festive holiday gatherings, their rich flavor and delightful texture make them a cherished treat to bake and enjoy throughout the entire year. These cookies have truly earned a heartfelt seal of approval from my family, and we’re confident they’ll win yours over too!
Thumbprint cookies are renowned for their incredible versatility, offering a delightful canvas for your culinary creativity. Whether you’re celebrating a special occasion or simply satisfying a sweet craving, you can effortlessly customize them by adding your favorite chocolate kisses, creamy caramels, or a luscious ganache filling. Each bite promises a burst of flavor, making these cookies a truly adaptable and beloved dessert.
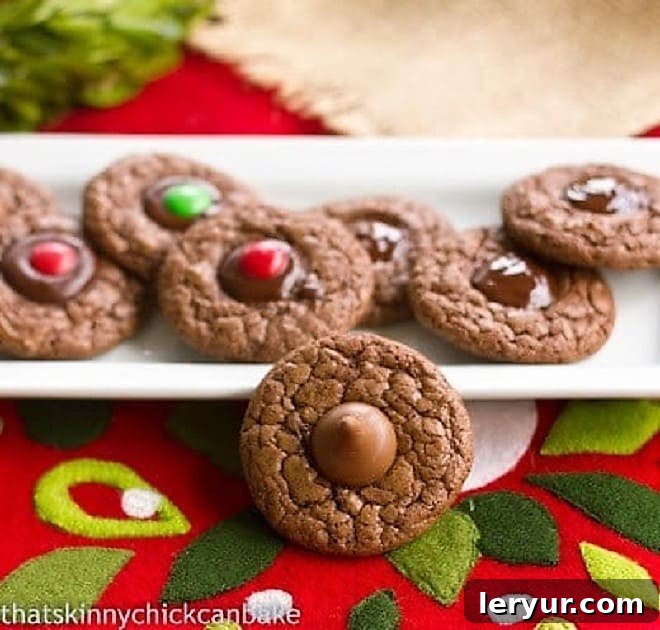
Why These Double Chocolate Thumbprint Cookies Are a Must-Bake This Season (And Beyond!)
There are countless reasons why these Double Chocolate Thumbprint Cookies deserve a prime spot in your baking repertoire. From their decadent flavor profile to their endless customization options, they truly are a baker’s delight:
- Unapologetically Double Chocolate: Who can resist the allure of double chocolate? This recipe delivers an intense cocoa experience with both cocoa powder in the dough and a rich chocolate filling, making it an undeniable hit with chocoholics of all ages. The deep cocoa flavor of the cookie base perfectly complements the sweet and creamy chocolate filling, creating a symphony of taste in every bite.
- Endless Customization Options: The beauty of thumbprint cookies lies in their adaptability. While classic Hershey’s Kisses of various flavors are fantastic, don’t stop there! Get creative with caramel-filled Rolos, mini Reese’s Peanut Butter Cups, chocolate stars, or even a dollop of peanut butter for a delightful twist. For a truly gourmet touch, consider seasonal flavors like peppermint bark Kisses during the holidays or a raspberry jam for a fruity contrast. The possibilities are truly boundless, allowing you to tailor each batch to your specific preferences or the occasion.
- A Recipe You Can Trust: This cookie base was expertly adapted from a recipe featured in the esteemed Fine Cooking magazine. This pedigree ensures a foundation of quality and deliciousness, guaranteeing cookies that are not only tasty but also reliably perfect every time. The original recipe featured a sophisticated chocolate ganache filling, which remains an equally exquisite alternative to candy, offering a smoother, more intense chocolate experience. Baking with a trusted recipe ensures consistent results, making these a go-to treat.
- Perfect for Gifting and Sharing: Their attractive appearance and irresistible flavor make these cookies ideal for holiday cookie platters, thoughtful hostess gifts, or simply sharing with loved ones during any celebration. They travel well, hold their shape, and are always a welcome addition to any gathering, bringing smiles wherever they go. Personalize them with different fillings and decorations to make each gift extra special.
- Simple Yet Impressive: Despite their gourmet taste and elegant presentation, these double chocolate thumbprints are surprisingly easy to make. The straightforward process means even novice bakers can achieve impressive results. You can whip up a batch for an impromptu treat or prepare them ahead for special occasions without stress, allowing you more time to enjoy the festivities.
I recall a delightful (and slightly amusing) incident when I first mentioned baking a batch of these chocolate thumbprints to my husband. I made the “mistake” of casually dropping that I planned to swap the traditional chocolate ganache filling for creamy Caramel Kisses. Instantly, I was met with what my dear friend Patti affectionately calls the “hamster look” of disappointment – a subtle yet unmistakable pout that spoke volumes about his chocolate purist tendencies. Recognizing the gravity of the situation (and his unwavering love for classic chocolate), I quickly assured him, “Alright, alright, I can certainly make some with ganache too!” My reward for this culinary compromise was truly worth it: his reaction after taking his first bite of the ganache-filled version was pure bliss. He was so utterly smitten that he immediately suggested adding these decadent treats to our annual repertoire of tried-and-true holiday cookies that we lovingly share with friends and neighbors. It’s safe to say, these cookies passed the ultimate taste test with flying colors, proving their universal appeal!
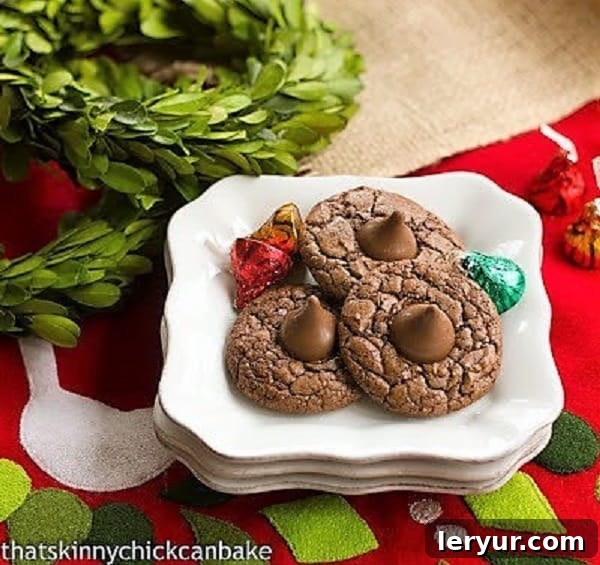
Mastering the Art of Double Chocolate Thumbprint Cookies: A Step-by-Step Guide
These cookies are not just delicious; they’re also a joy to make, a perfect project for bakers of all skill levels! I remember my son, Nick, was home for Thanksgiving break when I first made these, and I promised him the majority of these double chocolate thumbprints to share with his friends in the dorm. Like me, he’s a huge fan of caramel, and after his taste test, he gave them a resounding two thumbs up. This enthusiastic endorsement is a testament to how truly amazing and incredibly simple these cookies are to bring to life in your own kitchen.
The beauty of this recipe is its inherent flexibility, particularly when it comes to the filling. You can customize it to your heart’s content, allowing your creativity to shine. Whether you opt for any flavored Hershey’s Kiss variety, miniature Reese’s Peanut Butter Cups, or a classic plain chocolate ganache, the results will be spectacular. Each choice adds its own unique character to the cookie. The ultimate secret to a perfect thumbprint is patience: always ensure the cookies have cooled for a few minutes after baking, before gently inserting your chosen candy or filling the well with ganache. This crucial step prevents the candy from melting completely and helps the cookie maintain its beautiful shape and structure, guaranteeing a pristine and delicious final product.
Here’s a simple breakdown of the process to create these delightful treats, ensuring success with every batch:
- Prepare the Cookie Dough: Begin by meticulously following the recipe instructions to create a rich, intensely chocolatey cookie dough. It’s vital to ensure all your ingredients, especially butter and eggs, are at softened room temperature. This allows for optimal blending, resulting in a smooth, homogenous dough that bakes evenly and yields a tender crumb.
- Portion the Dough: Utilize a medium-sized cookie scoop to portion out uniform rounds of dough. This step is more important than it seems, as consistent portions ensure that all your cookies bake evenly, preventing some from being overdone while others are undercooked. Place these neatly scooped dough balls onto prepared baking sheets, ensuring you leave adequate space (about 1.5-2 inches) between each to allow for natural spreading during baking.
- Bake to Perfection: Place your baking sheets in the preheated oven and bake the cookies as directed in the recipe. Keep a close eye on them; they are typically done when they appear slightly puffed up and exhibit subtle crackles around their edges. They might still seem quite soft in the center when first removed, which is absolutely perfect for their tender texture. Avoid overbaking, as this can lead to dry cookies.
- Create the Thumbprint (or Add Candy): Once the cookies are hot out of the oven, this is the crucial moment for creating their signature look and adding the filling!
- For Ganache: If your chosen filling is a rich chocolate ganache, immediately and gently create a well (or “thumbprint”) in the center of each warm cookie. You can use the rounded side of a half-teaspoon measuring spoon, a clean thumb, or even the back of a small wooden spoon for this. This depression will perfectly cradle your luscious ganache.
- For Candies (like Kisses): If you’re using candies such as Hershey’s Kisses or mini Reese’s, allow the cookies to cool on the baking sheet for just a few minutes (typically about 4-5 minutes). This brief cooling period allows the cookie to set slightly. Then, gently press an unwrapped candy into the center of each warm cookie. The residual heat will slightly melt the base of the candy, helping it adhere perfectly to the cookie without fully liquefying.
- Cool and Enjoy: After the filling is in place, allow the cookies to finish cooling completely on a wire rack. If you’ve used ganache, ensure it has sufficient time to set and firm up properly, which might take an hour or two at room temperature. Once thoroughly cooled, your homemade masterpieces are ready to be savored! Dive into these delightful treats and enjoy the fruits of your labor.

Expert Tips for Flawless Double Chocolate Thumbprint Cookies Every Time
Achieving bakery-quality thumbprint cookies at home is easier than you think with these professional insights and clever tricks. These tips will help you consistently bake perfect, beautiful, and delicious Double Chocolate Thumbprints:
- PRO-Tip: The Power of a Cookie Scoop for Consistency: Using a medium cookie scoop isn’t just about convenience; it’s arguably the most important secret to consistent-sized cookies. Uniform portions ensure that all your cookies bake evenly, resulting in a batch where every single thumbprint is perfectly cooked through and beautifully presented. This consistency is especially crucial when you plan on gifting your cookies or arranging them on a decorative platter, as it elevates the overall aesthetic.
- Shaping for Perfection: For cookies that are wonderfully round and uniform, consider this simple yet effective technique: after portioning the dough with your scoop, gently chill the dough balls for about 10-15 minutes in the refrigerator. Once slightly firm, roll each dough ball smoothly between your palms. This extra step helps create a perfectly smooth, spherical shape that prevents jagged edges and yields an attractive, professional-looking cookie that will spread beautifully in the oven.
- Maintaining Your Cookie Scoop: A Hot Water Hack: If you, like many home bakers, find your cookie scoop or disher starts to stick and resist releasing the dough cleanly after a few uses due to dough build-up, here’s a game-changing hack. When a quick spray with non-stick cooking spray like Pam no longer does the trick, utilize your hot water dispenser (or a small bowl of very hot water). Briefly rinse and heat up the gadget under the hot water for a few seconds. The heat and moisture will quickly dislodge any sticky residue, allowing for effortless, clean releases and helping you form perfectly round, consistent balls of dough every single time.
- PRO-Tip: Reshaping Hot Cookies for a Polished Finish: Right after your cookies emerge from the oven, while they are still hot and pliable, you can work a little magic to perfect their shape. Carefully (always use an oven mitt or hot pad in one hand to stabilize the pan to prevent burns) use a flat spatula to gently tap or nudge any slightly irregular cookies back into a perfect round. This quick maneuver, performed while the cookies are still warm and soft, can significantly enhance the visual appeal of your entire batch, making them look professionally baked.
- Unleash Your Inner Chocolatier with Diverse Fillings: While classic chocolate and caramel-filled Hershey’s Kisses are always a crowd-pleaser and a fantastic starting point, don’t hesitate to experiment and unleash your creativity! Consider options like white chocolate Kisses, festive peppermint Kisses for the holidays, a dollop of fruit jam, or even chopped nuts and sprinkles pressed into a ganache filling. The choice of filling is where you can truly make these cookies your own, reflecting your personal taste, the season, or the theme of your event. Each variation offers a delightful surprise.
- Cooling is Crucial for Structure and Setting: Patience during the cooling process is paramount for both the cookie’s structure and the setting of its filling. Allowing the cookies to cool completely on the baking sheet for the initial 4-5 minutes before transferring them to a wire rack helps them firm up and prevents them from breaking apart when moved. This is especially vital before pressing in candies or filling with ganache, as a too-hot cookie might cause your filling to melt excessively, run off, or compromise the cookie’s delicate structure.

Beyond the Bake: Serving and Storing Your Double Chocolate Thumbprint Cookies
Once your delectable Double Chocolate Thumbprint Cookies are baked to perfection and cooled, it’s time to think about serving and storage to ensure they remain fresh, beautiful, and utterly irresistible for as long as possible.
Serving Suggestions for Every Occasion
These versatile cookies are ideal for a myriad of occasions, making them a perfect addition to any event:
- Holiday Platters: Their festive appearance, especially with varied fillings and colorful toppings, makes them an absolute showstopper on any holiday cookie assortment. Mix and match different flavored Kisses or ganache with sprinkles for a vibrant and varied display that will impress your guests.
- Gifts from the Heart: Package them lovingly in pretty tins, decorative boxes, or cellophane bags tied with a festive ribbon for a thoughtful homemade gift. A batch of these cookies is always a cherished and delicious present that’s sure to be appreciated by friends, family, and neighbors alike.
- Coffee Break Companion: Elevate your daily ritual by pairing these rich cookies with a warm cup of coffee, a soothing mug of tea, or a comforting hot chocolate for an indulgent afternoon treat. The flavors complement each other beautifully.
- Dessert Table Staple: Arrange them artfully on a dessert table for parties, gatherings, or potlucks. Their individual portion size makes them easy to pick up and enjoy, making them a hassle-free and universally loved crowd-pleaser.
Storage Tips for Maintaining Peak Freshness
To keep your Double Chocolate Thumbprint Cookies tasting their absolute best, proper storage is paramount. Follow these guidelines to maximize their freshness:
- Room Temperature Storage: Once completely cooled, store your baked cookies in an airtight container at room temperature for up to 3-5 days. To prevent them from sticking together, especially if your fillings are soft or slightly gooey, separate layers of cookies with sheets of parchment paper.
- Refrigeration for Extended Freshness: If you’ve used a filling that might benefit from cooler temperatures (though not typical for the ganache or Kisses in this recipe, it’s good to know for other variations), or if you simply want to extend their shelf life, store the cookies in an airtight container in the refrigerator for up to a week. For optimal flavor and texture, allow them to come to room temperature for about 15-20 minutes before serving.
- Freezing Baked Cookies: These cookies freeze beautifully, making them an excellent make-ahead option! Once the cookies are completely cooled and any ganache filling has set, place them in a single layer on a baking sheet and freeze until solid (this usually takes about 1-2 hours). Once fully frozen, transfer them to a freezer-safe airtight container or a heavy-duty freezer bag, separating layers with parchment paper. They can be frozen for up to 2-3 months without losing quality. Thaw them at room temperature for a few hours before serving.
- Freezing Dough for Future Baking: You can also prepare the cookie dough ahead of time and freeze it. Form the dough into individual balls as if ready to bake, then arrange them on a baking sheet and freeze until solid. Once frozen, transfer the dough balls to a freezer bag. This way, you can bake fresh cookies on demand! Thaw the dough balls in the refrigerator overnight before baking, then proceed with the recipe as usual. This is a fantastic time-saving trick for busy schedules.
Frequently Asked Questions (FAQs) About Double Chocolate Thumbprint Cookies
Here are answers to some common questions you might have about making these delicious double chocolate thumbprint cookies:
Can I use different types of chocolate for the dough?
Absolutely! While this recipe specifically calls for semisweet chocolate, feel free to experiment with other types to tailor the flavor to your preference. You can use dark chocolate for a more intense, less sweet cocoa flavor, or even a mix of milk and semisweet chocolate for a sweeter, creamier profile. Just ensure the quality of the chocolate you choose is good, as it significantly impacts the final taste and texture of your cookies.
What if I don’t have a cookie scoop?
No problem at all! While a cookie scoop is recommended for consistency, you can easily work without one. You can use two spoons to scoop and shape the dough into approximate tablespoon-sized balls, or simply roll small, even portions of dough between your palms. The main goal is to get consistently sized balls for even baking, so try to make them as uniform as possible.
How do I prevent my Hershey’s Kisses from melting completely into the cookies?
The key to keeping your Kisses (or any candy filling) from melting too much is timing. You need to let the cookies cool for about 4-5 minutes on the baking sheet immediately after they come out of the oven. This crucial cooling period allows the cookie to set slightly and firm up, but it will still be warm enough for the Kiss to gently soften and adhere without fully melting into a puddle. Gently press the unwrapped Kiss into the center, and it should hold its shape beautifully as the cookie continues to cool.
Can I make these cookies ahead of time?
Yes, these cookies are excellent for making ahead, both in dough form and after baking! The prepared cookie dough can be refrigerated for up to 3 days, or even frozen for up to 3 months (as described in the storage tips). Baked cookies, once completely cooled, can be stored in an airtight container at room temperature for several days or frozen for up to 2-3 months. This makes them perfect for holiday meal prep or having delicious treats on hand.
My cookies spread too much while baking. What might have gone wrong?
Several factors can cause cookies to spread more than desired:
- Butter Temperature: If your butter was too soft, nearly melted, or excessively warm, it can lead to excessive spreading. Ensure it’s at a cool room temperature – soft enough to indent with a finger, but not greasy.
- Flour Measurement: Too little flour can also cause dough to be too wet and spread. Measure precisely, preferably by weight if possible, or use the “spoon and level” method rather than scooping directly from the bag.
- Oven Temperature: An oven that isn’t hot enough can contribute to cookies spreading too rapidly before they set. Double-check your oven thermometer to ensure accuracy.
- Dough Temperature: Chilling the scooped dough balls for 15-20 minutes before baking can often significantly help prevent spreading by firming up the butter.
You May Also Love These Irresistible Recipes
If you’re a fan of these delightful double chocolate thumbprint cookies, we’re sure you’ll adore these other fantastic recipes from our collection and fellow bakers. Expand your repertoire and discover new favorites for every occasion, from festive holiday treats to everyday delights:
- Mice Cookies from Kim of Cravings of a Lunatic – a charming, whimsical, and fun treat perfect for festive times, especially during the holidays!
- Cranberry Sauce Brownies from Chung-Ah of Damn Delicious – a unique and delicious twist on classic brownies, offering a delightful balance of sweet and tart.
- Best Gingerbread Cookies – a timeless classic, perfectly spiced with warm ginger and molasses, wonderfully aromatic, and ideal for cutting into festive shapes.
- White Chocolate Candy Cane Cookies – festive, minty, and utterly delicious, these are a must-bake for the holiday season, combining creamy white chocolate with refreshing peppermint.
- How to Freeze Cookie Dough – an essential guide for every savvy baker, providing practical tips to prepare dough ahead of time, save effort, and enjoy fresh-baked cookies on demand.
- Explore all my Best Cookie Recipes for even more inspiration and sweet delights to satisfy every craving and occasion!

We love hearing from you! Stay in touch through social media @ Instagram, Facebook, and Pinterest. Don’t forget to tag me when you try one of my recipes! And if you absolutely love the results, please consider giving it a 5-star rating in the recipe card below. Your feedback means the world to us and helps other bakers discover these delightful recipes!
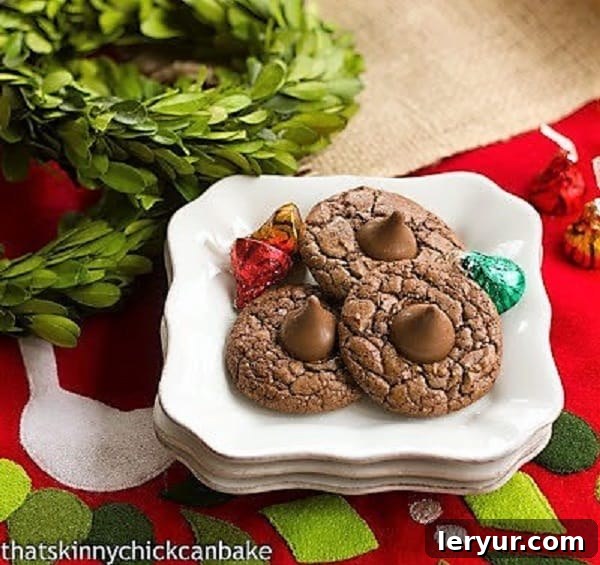
Double Chocolate Thumbprints Recipe
20 minutes
10 minutes
30 minutes
5 dozen (approximately 60 cookies)
These decadent chocolate-laden thumbprint cookies, lovingly adapted from a Fine Cooking recipe, are perfect for any occasion. Filled with your choice of ganache or delightful Hershey’s Kisses, they are a true chocoholic’s dream!
Ingredients
For the Rich Chocolate Cookie Dough:
- 1 ⅓ cups all-purpose flour
- ½ teaspoon fine sea salt
- ½ teaspoon baking powder
- ¼ teaspoon baking soda
- 1 stick (4 ounces) unsalted butter, at softened room temperature
- 1 ⅓ cups granulated sugar
- ½ cup unsweetened cocoa powder, sifted (for a smooth, lump-free dough)
- 3 large eggs
- 1 teaspoon pure vanilla extract
- 3 ounces semisweet chocolate, melted and cooled slightly
For the Delectable Fillings:
- 3 ounces semisweet chocolate, coarsely chopped (approximately ½ cup, for ganache)
- 4 tablespoons unsalted butter, cut into 3 pieces (for ganache)
- Optional Garnish: M&M’s, sprinkles, or a dusting of powdered sugar
- Alternative Filling: Use Caramel or Classic Milk Chocolate Hershey’s Kisses (or any preferred flavor) instead of ganache
Instructions
- Prepare Your Workspace: Preheat your oven to 350°F (175°C). Line several cookie sheets with parchment paper or silicone baking mats and set them aside.
- Combine Dry Ingredients: In a medium bowl, whisk together the flour, salt, baking powder, and baking soda until thoroughly combined. This ensures leavening agents are evenly distributed.
- Cream Butter and Sugar: In a large mixing bowl, using an electric mixer (stand or hand-held), beat the softened butter, granulated sugar, and sifted cocoa powder on medium speed. Continue mixing for about 2 minutes, or until the mixture is light, fluffy, and well blended.
- Incorporate Eggs and Vanilla: Add the eggs one at a time, beating well after each addition until fully incorporated. Scrape down the sides of the bowl as needed. Stir in the vanilla extract until just combined.
- Add Chocolate and Dry Mix: Pour in the slightly cooled, melted semisweet chocolate and mix until just combined. Gradually add the whisked dry flour mixture to the wet ingredients, mixing only until it’s just incorporated and no streaks of flour remain. Be careful not to overmix, as this can lead to tough cookies.
- Scoop and Bake: Drop rounded tablespoons of cookie dough onto the prepared cookie sheets, spacing them about 1 ½ inches apart. Bake for 8-10 minutes, or until the cookies are puffed up and exhibit slight crackles on their surface. They might still seem soft in the center, which is perfect.
- Create Wells for Ganache: If you plan to use a ganache filling, immediately upon removing the cookies from the oven, use the rounded side of a half-teaspoon measuring spoon or your thumb to gently make a deep well in the center of each warm cookie. Allow the cookies to sit on the cookie sheet for 4-5 minutes before carefully transferring them to a wire rack to finish cooling completely.
- Add Kisses for Filling: If opting for Hershey’s Kisses, let the baked cookies cool on the baking sheet for 4-5 minutes. Then, unwrap your chosen Kiss and gently press it into the center of each warm cookie. The residual heat will slightly soften the base of the Kiss, helping it adhere.
- Prepare the Ganache (if using): To make the chocolate ganache filling, place the coarsely chopped semisweet chocolate and cut butter pieces in a microwave-safe bowl. Heat in the microwave in 20-30 second intervals, stirring with a rubber spatula until smooth and fully melted. Set aside until the ganache cools to room temperature and slightly thickens, reaching a spoonable consistency.
- Fill and Garnish: Once the cookies are completely cooled, spoon the prepared chocolate ganache mixture into the wells of each cookie. If desired, immediately place an M&M, a sprinkle, or a small piece of complementary candy in the center of the ganache before it sets.
- Set the Filling: Allow the filled cookies to sit at room temperature for about 1 hour, or until the chocolate ganache firms up. If you’re in a hurry, you can place them in the refrigerator for about 20-30 minutes to speed up the setting process.
Baker’s Notes
Feel free to customize your thumbprint cookies! You can fill them with a rich, homemade chocolate ganache for a sophisticated touch, or choose from any delightful flavor of Hershey’s Kisses you love for a fun and easy variation. Consider seasonal Kiss flavors for holiday baking!
Recommended Baking Tools
As an Amazon Associate and member of other affiliate programs, I earn from qualifying purchases, at no extra cost to you.
- OXO Good Grips Medium Cookie Scoop
- USA Pan Bakeware Half Sheet Pan
- KitchenAid 9-Speed Digital Hand Mixer
Nutrition Information:
Yield:
60 cookies
Serving Size:
1 cookie
Approximate Amount Per Serving:
Calories: 134Total Fat: 5gSaturated Fat: 3gTrans Fat: 0gUnsaturated Fat: 2gCholesterol: 23mgSodium: 82mgCarbohydrates: 21gFiber: 1gSugar: 16gProtein: 2g
HOW MUCH DID YOU LOVE THIS RECIPE?
Please leave a comment on the blog or share a photo on Pinterest – we cherish your feedback!