
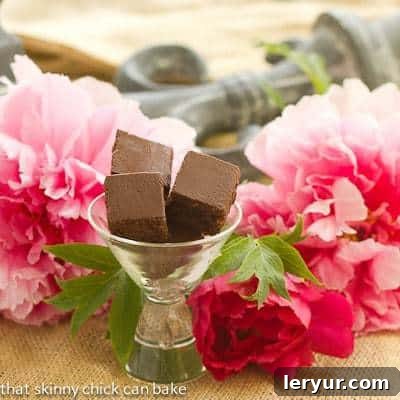
Indulge in the ultimate chocolate experience with these incredibly rich and fudgy Refrigerator Brownies. Designed to captivate any chocolate lover, this recipe delivers a decadent trifecta of deep cocoa flavor, melty chocolate chips, and a silky smooth frosting that will leave you swooning with every bite.
Prepare to fall in love with these Frosted Chocolate Chocolate Chip Brownies. They’ve earned rave reviews from my family and friends, and I’m confident they’ll become a cherished favorite in your home, too. Each square is packed with an abundance of chocolate, promising a truly unforgettable dessert.
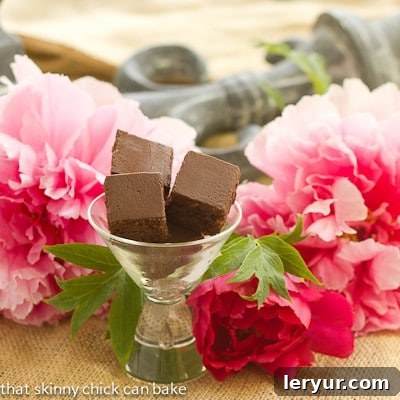
Decadent Refrigerator Brownies: A Chocolate Lover’s Dream
You might be thinking, “Another brownie recipe?” And while it’s true my kitchen often becomes a brownie-baking haven, these Refrigerator Brownies hold a special place. I wasn’t even planning to share this particular gem until my husband, a true chocolate connoisseur, insisted. With so many brownie variations cycling through our home, it takes a lot for one to stand out. But the rich, dense texture and intense chocolate flavor of these chilled brownies truly made them worthy of a dedicated post.
What sets Refrigerator Brownies apart isn’t just their incredible flavor profile; it’s the magical transformation that happens when they spend time in the fridge. Chilling these brownies intensifies their fudginess, creating a more cohesive, almost truffle-like texture that melts in your mouth. The frosting also firms up beautifully, providing a delightful contrast to the brownie base and making them incredibly satisfying, especially on a warm day or when you crave a denser, more substantial treat. It’s this unique quality that makes them a year-round delight, perfect for everything from casual gatherings to elegant dessert tables.
The Art of Perfect Brownie Slicing: Tips for Flawless Presentation
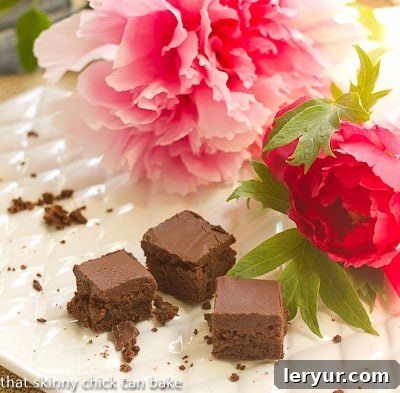
You might wonder why I’ve chosen to include a detailed slicing tutorial alongside this brownie recipe. The truth is, even the most delicious brownies deserve to look as good as they taste! While my personal efforts for the batch pictured here were a little rushed – whipped up quickly for an impromptu celebration after a demanding volunteer gig – I promise my standards for perfect slices are usually much higher. The main culprit for my less-than-perfect cuts that day? Insufficient chilling time. But rest assured, I know my audience appreciates perfection, and I’m here to share the secrets to achieving it every time.
Achieving clean, precise brownie slices can elevate your dessert from homemade deliciousness to bakery-worthy perfection. This isn’t just about aesthetics; it also makes serving easier and ensures each guest gets a uniform, satisfying piece. Here are my tried-and-true steps to mastering the art of brownie slicing:
- Thoroughly Chill Your Brownies or Bar Cookies: This is arguably the most critical step. Brownies, especially fudgy ones like these Refrigerator Brownies, need to be completely cold to firm up. This solidification prevents crumbling and ensures a clean cut. Aim for at least 2-4 hours in the refrigerator, or even overnight if possible. The colder they are, the sharper your cuts will be.
- Line Your Pan for Easy Removal: Before baking, line your baking pan with parchment paper or non-stick foil, leaving an overhang on two sides. Once the brownies are completely cooled and chilled, you can simply lift them out of the pan using these overhangs. This prevents damage to your pristine brownies and makes the cutting process much simpler.
- Use a Long, Sharp Knife: A sharp knife is non-negotiable. A long, thin blade (like a chef’s knife or even a large serrated knife for some textures) will glide through the brownie more smoothly, reducing drag and tear.
- Measure for Even Slices (Optional, but Recommended): If “eye-balling” isn’t your strong suit, don’t hesitate to use a ruler. Gently make hash marks along the vertical and horizontal edges of your brownie slab at your desired intervals. This provides a clear guide and ensures perfectly uniform squares or rectangles.
- The Hot Knife Technique: This is the game-changer. Dip your sharp knife into very hot water (from the tap or a kettle) for about 10-15 seconds, then quickly wipe it completely dry with a paper towel. The hot blade will melt through the chocolate and butter in the brownie, creating an incredibly smooth, clean cut without sticking. Make one slice, then wipe the knife clean, reheat it, and dry it off before making the next cut. Repeat this process for every single slice. This prevents sticky buildup and maintains a clean edge.
That’s it – primarily, chilling your bars until firm, then slicing with a hot, clean, dry knife. This technique applies beautifully to a variety of baked goods, ensuring a professional finish every time. For visual proof, take a look at these other well-cut examples:
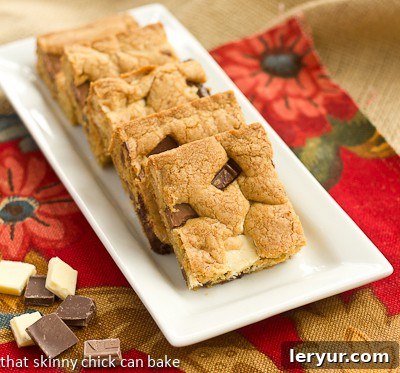
Brown Butter Chocolate Chunk Bars
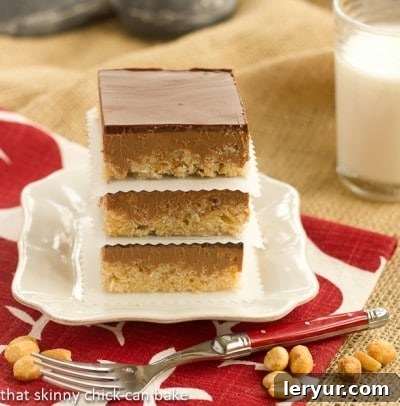
Chocolate Peanut Butter Krispie Bars
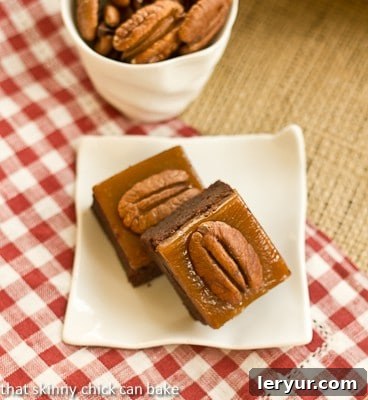
Turtle Brownies
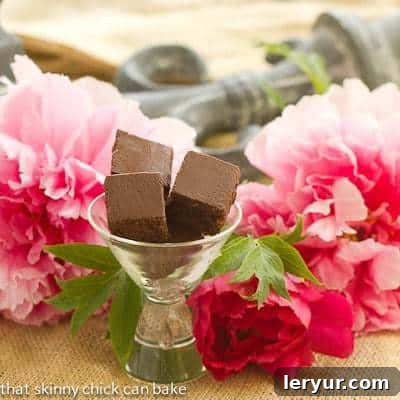
Refrigerator Brownies
20 minutes
30 minutes
50 minutes
25 brownies
These rich, fudgy, and intensely chocolatey refrigerator brownies are topped with a smooth, luscious frosting, perfect for any chocolate craving!
Ingredients
For the brownies:
- ¼ cup all-purpose flour
- 1 teaspoon baking powder
- ½ teaspoon salt
- ½ cup unsalted butter
- 3 ounces unsweetened chocolate (chopped)
- ½ cup light brown sugar
- ½ cup granulated sugar
- 2 large eggs
- 1 large egg yolk
- 1 teaspoon pure vanilla extract
- ½ cup semi-sweet chocolate chips
For the rich chocolate frosting:
- 1 cup semi-sweet chocolate chips
- 4 tablespoons unsalted butter
- 1 teaspoon pure vanilla extract
- ½ cup powdered sugar
- 1-2 tablespoons whole milk
Instructions
- Prepare for Baking: Preheat your oven to 350ºF (175ºC). Line an 8-inch square baking pan with non-stick foil or regular foil sprayed generously with non-stick cooking spray, ensuring an overhang on two sides for easy removal. Set aside.
- Melt Chocolate Base: In a microwave-safe bowl, combine the ½ cup butter and 3 ounces unsweetened chocolate. Microwave in 30-second increments, stirring well after each interval, until the mixture is completely melted and smooth. Be careful not to overheat the chocolate.
- Combine Wet Ingredients: Whisk the brown sugar and granulated sugar into the melted chocolate mixture. Let it cool for a couple of minutes to prevent the eggs from scrambling. Then, whisk in the 2 eggs, 1 egg yolk, and 1 teaspoon vanilla extract until fully incorporated and smooth.
- Fold in Dry Ingredients and Chips: In a separate small bowl, whisk together the flour, baking powder, and salt. Gradually add the dry ingredients to the chocolate mixture, folding gently with a spatula until just combined. Be careful not to overmix, as this can lead to tough brownies. Finally, gently fold in the ½ cup semi-sweet chocolate chips.
- Bake to Perfection: Pour the brownie batter into your prepared pan and smooth the top with an offset spatula. Bake for 25-30 minutes, or until a toothpick inserted into the center comes out with moist crumbs clinging (not wet batter, but not completely dry, indicating a fudgy texture). Remove from the oven and allow to cool completely in the pan on a wire rack before frosting. This is crucial for structure.
- Prepare the Frosting: While the brownies cool, begin the frosting. Place the 1 cup semi-sweet chocolate chips and 4 tablespoons butter in a microwave-safe bowl. Microwave in 30-second increments, stirring thoroughly after each, until melted and smooth.
- Finish the Frosting: Whisk in the 1 teaspoon vanilla extract. Gradually stir in the powdered sugar until smooth. Add one tablespoon of milk, whisking briskly to incorporate. If needed, add up to another tablespoon of milk, a teaspoon at a time, until your desired smooth, shiny, and spreadable consistency is reached.
- Frost and Chill: Immediately spread the prepared frosting evenly over the completely cooled brownies.
- Refrigerate for Best Results: Transfer the frosted brownies to the refrigerator and chill until the frosting is fully set and the brownies are firm, ideally for at least 2-3 hours or overnight. This step is essential for achieving the signature fudgy texture and clean slices. Once chilled, slice and serve!
Nutrition Information:
Yield:
25
Serving Size:
1
Amount Per Serving:
Calories: 173Total Fat: 11gSaturated Fat: 7gTrans Fat: 0gUnsaturated Fat: 4gCholesterol: 37mgSodium: 115mgCarbohydrates: 19gFiber: 1gSugar: 15gProtein: 2g
Thatskinnychickcanbake.com occasionally offers nutritional information for recipes contained on this site. This information is provided as a courtesy and is an estimate only. This information comes from online calculators. Although thatskinnychickcanbake.com attempts to provide accurate nutritional information, these figures are only estimates.
Varying factors such as product types or brands purchased can change the nutritional information in any given recipe. Also, many recipes on thatskinnychickcanbake.com recommend toppings, which may or may not be listed as optional and nutritional information for these added toppings is not listed. Other factors may change the nutritional information such as when the salt amount is listed “to taste,” it is not calculated into the recipe as the amount will vary. Also, different online calculators can provide different results.
To obtain the most accurate representation of the nutritional information in any given recipe, you should calculate the nutritional information with the actual ingredients used in your recipe. You are solely responsible for ensuring that any nutritional information obtained is accurate.
HOW MUCH DID YOU LOVE THIS RECIPE?
Your feedback means the world to me! Please leave a comment on the blog with your thoughts, or share a photo of your delicious creation on Pinterest – I’d love to see it!
Tips for Brownie Baking Success & Flavor Variations
Baking brownies might seem straightforward, but a few key practices can make all the difference between good brownies and truly extraordinary ones. For these Refrigerator Brownies, it’s essential to use good quality chocolate – since chocolate is the star ingredient, its quality profoundly impacts the final flavor. Opt for unsweetened chocolate for the base to provide deep cocoa notes, and high-quality semi-sweet chips for those delightful pockets of melted chocolate.
When melting the butter and unsweetened chocolate, do so gently. Overheating chocolate can cause it to seize and become grainy, affecting the texture of your brownies. Microwaving in short bursts and stirring thoroughly is the safest method. Similarly, once the dry ingredients are added, mix just until combined. Overmixing develops gluten, which can lead to cakey, rather than fudgy, brownies – and for Refrigerator Brownies, fudginess is paramount!
Another crucial element for these brownies is the cooling process. It can be tempting to frost them while they’re still warm, but resist the urge! Warm brownies will cause the frosting to melt and slide off, resulting in a mess rather than a beautiful, set topping. Allowing them to cool completely, then chilling, ensures the brownie structure is firm enough to handle the rich frosting and the subsequent slicing.
Enhancing Your Refrigerator Brownies
While these brownies are spectacular as is, they also lend themselves beautifully to customization. Consider adding a handful of chopped walnuts or pecans to the batter for a delightful textural contrast and nutty flavor. A sprinkle of flaky sea salt over the wet frosting just before chilling can also elevate the chocolate flavor and add a sophisticated touch. For an extra layer of decadence, a drizzle of caramel or a swirl of peanut butter through the frosting before it sets can create an entirely new flavor experience.
These brownies are fantastic on their own, but they also make an excellent base for more elaborate desserts. Serve them slightly chilled with a scoop of vanilla bean ice cream and an extra drizzle of chocolate sauce for an indulgent sundae. Or, pair them with a robust cup of coffee or a glass of cold milk for a comforting treat. The beauty of Refrigerator Brownies is their versatility and their ability to satisfy the deepest chocolate cravings.
Storage and Freshness
Because they are designed to be chilled, these brownies store wonderfully in the refrigerator. Keep them in an airtight container for up to a week. The chilling actually enhances their fudgy texture and ensures the frosting stays firm. They also freeze exceptionally well! Wrap individual slices tightly in plastic wrap, then place them in a freezer-safe bag or container for up to 2-3 months. Thaw in the refrigerator or at room temperature for a quick, delicious treat anytime.
I hope you’ll find these Refrigerator Brownies as irresistibly delicious as my family and I do. They truly are a celebration of chocolate in every rich, fudgy bite. Don’t forget to implement the slicing tips to impress your guests with not just incredible flavor, but also beautiful presentation!
I’d love you to follow my blog via Bloglovin’ to stay updated on all my latest recipes and baking adventures.