
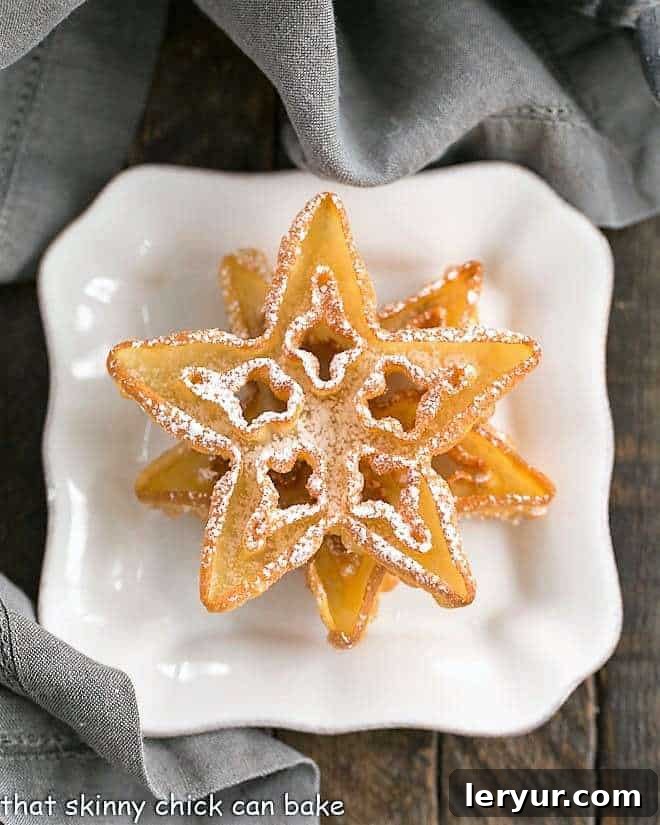
Rosettes, the exquisite Scandinavian fried cookies, are a true culinary delight. With their delicate crispness and festive appearance, especially when elegantly dusted with powdered sugar, they are a beloved addition to any holiday table. This guide shares expert tips and a cherished family recipe to help you master the art of making these beautiful rosette cookies in your own kitchen, creating new traditions and sweet memories.
To embark on this delightful baking journey, you’ll need a specialized tool: a Rosette Iron. This unique piece of equipment is key to achieving their signature intricate shapes, resembling delicate stars and snowflakes. Alongside the iron, ensure you have enough high-quality oil for deep frying, and you’ll be well on your way to crafting a classic holiday treat that captures the magic of the season.

Why Rosette Cookies Are a Must-Make for Your Holidays
Rosettes are more than just cookies; they are edible works of art that bring a special touch to your festive celebrations. Here’s why these delicate fried treats deserve a prime spot in your holiday baking repertoire:
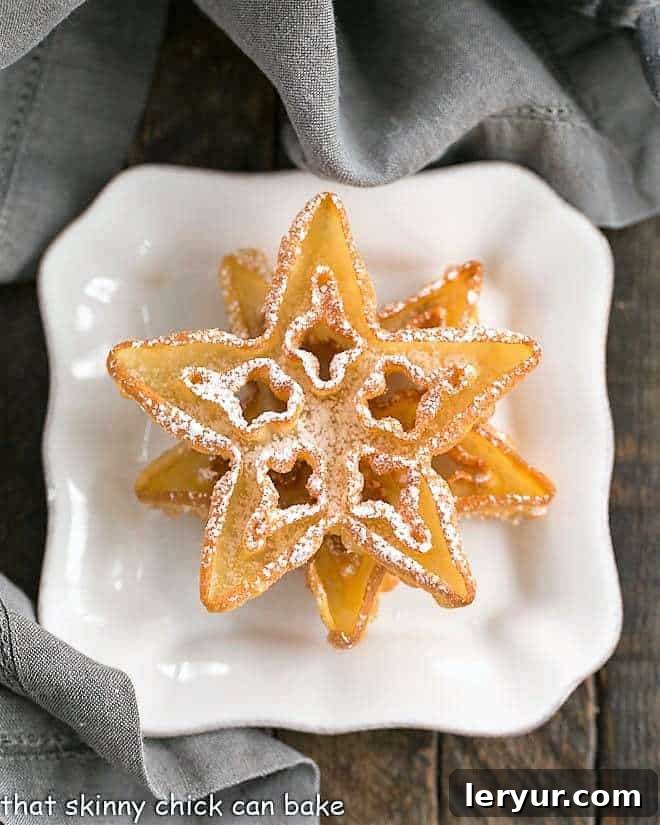
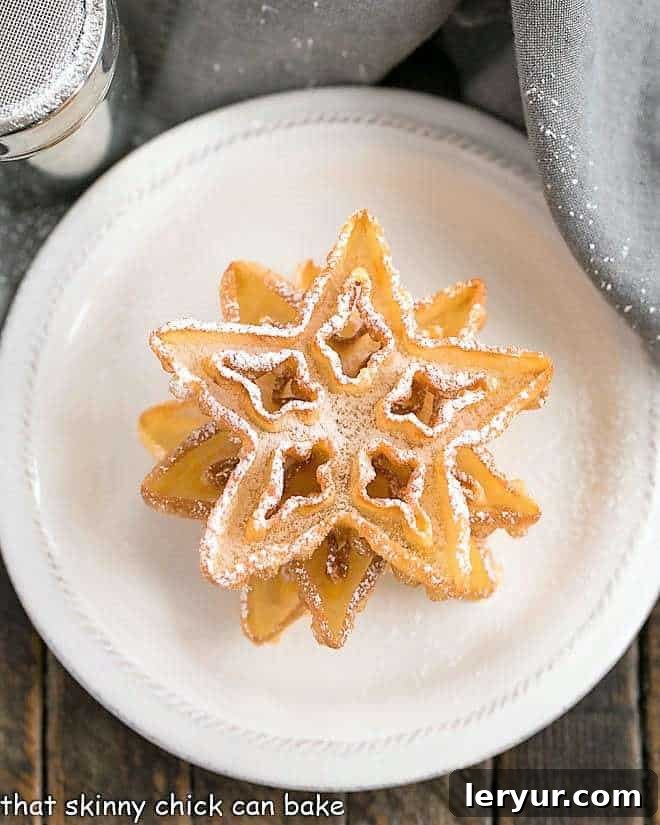
- Elegant Visual Appeal: Their intricate, airy forms make them a truly beautiful and unique addition to any holiday sweets platter. Shaped like delicate snowflakes or charming stars, they effortlessly capture the whimsical spirit of winter, making them a stunning centerpiece.
- Perfect for Cookie Exchanges: Stand out at your next cookie exchange with a batch of homemade rosettes. Their distinctive appearance and delicious crispness are sure to impress and offer a delightful change from more conventional holiday cookies, making them a memorable gift.
- A Dusting of Winter Wonderland: When lightly dusted with powdered sugar, these cookies resemble freshly fallen snow. This simple yet magical aesthetic perfectly complements the holiday season, evoking images of cozy winter evenings and festive cheer.
- Charming Tree Decorations: For an extra festive touch, rosettes can even be hung on the Christmas tree! Simply thread a small ribbon loop through one of their openings after they’ve cooled completely, transforming them into charming, edible ornaments. Just be sure to enjoy them before they get too stale!
- A Taste of Tradition: Beyond their beauty, rosettes carry a rich history, often passed down through generations. Making them can become a cherished family tradition, connecting you to culinary heritage and creating lasting memories that will be treasured for years to come.
While beloved classics like Cream Cheese Sugar Cookies always find their way onto my holiday baking list, my thoughts often drift back to my childhood, recalling the sweet, crispy delight of rosettes. The art of making these delicate cookies is one of the many precious legacies my dear mother imparted to me. She taught me not just a recipe, but a tradition, a piece of culinary history. Now, I’m delighted to share with you all the insights and expert tips for creating perfect rosettes, just as she did, ensuring your holiday baking is both successful and joyful.
The Essential Tool: Your Rosette Iron
At the heart of every successful rosette cookie is the specialized rosette iron. This unique utensil, typically made of cast iron or aluminum, features various decorative molds, most commonly star or snowflake designs, though many other intricate patterns exist. It’s designed to be submerged in hot oil, then dipped into a thin batter, allowing a delicate layer of batter to adhere before being returned to the hot oil to fry. The result is a uniformly shaped, perfectly crisp cookie that would be impossible to achieve without it. The magic lies in the iron’s ability to retain heat, which ensures the batter cooks instantly into its desired form. If you don’t already own one, rosette irons are widely available, especially online, and a worthwhile investment for any holiday baker looking to expand their repertoire with these charming treats.
Crafting the Perfect Rosette Batter
The beauty of rosettes lies not only in their intricate appearance but also in the deceptive simplicity of their ingredients. A basic batter typically consists of eggs, sugar, all-purpose flour, whole milk, a touch of vanilla for flavor, and a pinch of salt to balance the sweetness. The key to a smooth, flawless rosette is in the precise mixing process. You want to whisk the ingredients together until the batter is completely smooth and free of any lumps. However, it’s crucial not to overmix, as this can introduce too much air, leading to unwanted bubbles or an inconsistent texture in your delicate cookies. The ideal consistency should be thin enough to easily coat the hot iron in a uniform layer, yet thick enough to cling without dripping excessively, ensuring both crispness and structural integrity during the frying process. Think of a slightly thinner pancake batter or a delicate crêpe batter; it should flow smoothly but not be watery.
Step-by-Step Guide to Making Flawless Rosettes
Creating rosettes is a delightful process that requires a little patience and attention to detail. Follow these steps carefully to ensure your cookies turn out perfectly crisp and golden every time, making your holiday baking efforts truly rewarding:
- Prepare Your Frying Setup: Begin by heating your oil in a deep-fryer or a heavy, deep saucepan. The oil should be approximately 3 inches deep to ensure the rosette iron can be fully submerged. The ideal temperature for frying rosettes is around 375ºF (190ºC). Use a candy thermometer to monitor the temperature closely, adjusting your burner as needed to maintain a steady heat. A consistent temperature is vital for crisp, non-soggy rosettes. My mom often used lard for an incredibly rich aroma and traditional flavor, but canola oil or other high smoke point vegetable oils are excellent, readily available substitutes that work just as effectively.
- Mix the Batter: In a medium bowl, whisk together the eggs, sugar, and salt until well combined and slightly frothy. Gradually add the flour, milk, and vanilla extract. Continue whisking until the batter is completely smooth and free of any lumps. Remember the crucial pro-tip: avoid overmixing to prevent the incorporation of excessive air bubbles, which can cause imperfections or a less delicate texture in your finished cookies.
- Pre-heat the Rosette Iron: This is a critical step that cannot be rushed! Submerge the rosette iron completely in the hot oil for at least 1 to 2 minutes. The iron must be thoroughly heated to the oil’s temperature; otherwise, the batter will not adhere properly, resulting in incomplete, fragmented, or broken rosettes. A properly heated iron ensures a swift and clean release of the cookie.
- Dip the Hot Iron into Batter: Carefully remove the heated iron from the oil, allowing any excess oil to drip off for just a few seconds. Immediately dip the hot iron into your prepared batter. Only dip about 7/8ths of the way up the sides of the mold. It’s absolutely essential that the batter does not flow over the top of the iron, as this will trap the cookie on the iron and make it incredibly difficult to release the cooked rosette without damaging it.
- Fry to Golden Perfection: Quickly but gently transfer the batter-coated iron back into the hot oil. Fry the rosette until it turns a beautiful golden brown, which typically takes less than a minute (around 30 seconds to a minute, depending on your oil temperature and batter thickness). Observe for even browning and a crisp appearance.
- Drain and Release: Once golden, lift the iron from the oil. Hold it over the pan for a moment to let excess oil drip back into the fryer. Then, carefully transfer the rosette to a rack lined with paper towels to further drain and cool. If the rosette doesn’t easily slip off the iron on its own, use the tip of a dinner knife to gently pry it loose with a few careful nudges around the edges. I often like to detach the rosette and quickly flip it over on the hot iron for a few extra seconds to ensure both sides achieve a beautiful, even golden hue before setting it on the paper towels to cool completely.
- Repeat the Process: For each subsequent cookie, you must reheat the iron in the hot oil for approximately 1 minute before dipping it into the batter again. This re-heating step is crucial for maintaining consistent batter adhesion and even cooking. Continue this process until all your batter is used, ensuring a continuous flow of perfectly formed rosettes.
- Dust and Serve: Allow the rosettes to cool completely on the paper towel-lined rack. Once cool, generously dust them with powdered sugar. This final touch not only adds a delicate sweetness but also beautifully enhances their elegant, snow-dusted appearance, making them visually irresistible.
Troubleshooting Common Rosette Issues
Even with careful instructions, baking can sometimes present unexpected challenges. Here are solutions to common rosette issues you might encounter, ensuring your journey to perfect rosettes is smooth and rewarding:
- Soggy or Greasy Rosettes: The most common culprit for soggy rosettes is oil that isn’t hot enough. If the oil temperature drops too low (below 375ºF/190ºC), the cookies will absorb too much oil instead of crisping up, resulting in a greasy, soft texture. Ensure your oil maintains a steady temperature using a thermometer. Improper storage in an airtight container for too long can also lead to loss of crispness. If your rosettes do become a bit soft, you can often crisp them up again by baking them in a 350ºF (175ºC) oven for a few minutes.
- Batter Not Sticking to the Iron: This issue almost always indicates that your rosette iron isn’t hot enough. It needs to be thoroughly pre-heated in the hot oil for 1-2 minutes before the first dip, and then reheated for about a minute between each cookie. A properly heated iron creates a thermal shock that allows the batter to cling perfectly and cook instantly.
- Rosettes Breaking or Falling Apart: If your rosettes are fragile and break easily upon removal or handling, it might be due to a batter that is too thin, or dipping the iron too deep into the batter, which makes removal difficult and stresses the delicate structure. Ensure your batter has the right consistency (as described above), and only dip the iron about 7/8ths of the way to the top of the mold. Gently detaching them with a knife tip is key.
- Uneven Browning: If one side of your rosette is darker or crisper than the other, it’s often because it wasn’t submerged evenly in the oil or spent more time facing one way. You can gently flip the rosette in the oil for a few extra seconds using the iron or tongs to ensure even golden crispness on both sides before draining.
- Small or Incomplete Rosettes: If your rosettes aren’t filling out the mold or are patchy, it could mean the batter is too thick, or the iron isn’t holding enough heat to allow the batter to spread. Adjust batter consistency with a tiny bit more milk if too thick, and ensure your iron is adequately heated.
Storing and Freezing Your Delicate Treats
Proper storage is key to maintaining the crispness and freshness of your rosettes, ensuring they remain a delightful treat for days to come, or even months if you plan to get a head start on your holiday baking:
- Room Temperature Storage: Once completely cooled to room temperature, rosettes can be stored in an airtight container for 2-3 days. To prevent them from losing their crispness, it’s often best to cover them loosely rather than sealing them completely in an overly humid environment. Always wait to dust them with powdered sugar until just before serving to prevent the sugar from dissolving and making them sticky.
- Freezing for Longer Enjoyment: Rosettes freeze beautifully, making them an excellent make-ahead holiday treat. Ensure they are absolutely completely cool before freezing to prevent condensation and ice crystals. I recommend using a sturdy, freezer-safe container, such as a Rubbermaid or Tupperware, and placing a sheet of wax or parchment paper between layers of cookies to prevent sticking and breakage. Place the container in an area of the freezer where they won’t get jostled around, preserving their delicate shape. They can be frozen for up to 2 months without significant loss of quality.
- Serving Frozen Rosettes: When you’re ready to enjoy your frozen delights, simply remove them from the freezer and allow them to come to room temperature, uncovered, on a wire rack. This slow thawing helps them retain their crispness. Once defrosted, sprinkle generously with fresh powdered sugar before serving. If they seem a little soft, a quick re-crisping in a warm 350ºF (175ºC) oven for a few minutes can work wonders, restoring their delicate crunch.
Rosettes Beyond the Holidays: A Rich Cultural History
While often associated with festive holiday tables, especially Christmas, rosettes boast a fascinating history and cultural significance that stretches beyond the winter season. These delightful fried pastries are deeply rooted in Scandinavian culinary traditions, being particularly popular in Norway and Sweden. In fact, the name “rosettes” itself is derived from the Norwegian word “rosetbakkelser,” which literally translates to “rosette pastries,” clearly highlighting their Nordic origins and long-standing presence in festive baking.
However, their appeal isn’t confined to Northern Europe. Interestingly, similar intricate fried pastries are cherished in other parts of the world, demonstrating a beautiful cross-cultural culinary exchange. For instance, in Spain, especially during the vibrant celebrations of Carnival, you’ll find “Flores de Carnaval” or “Flores de Entroido” (the Galician term for Carnival). These Spanish “flowers” share a striking resemblance to Scandinavian rosettes in both their delicate, often floral, shapes and their frying method. This delightful parallel showcases how simple batters and a hot iron have been adapted and celebrated across diverse cultures, creating beloved festive treats that bring joy and a touch of elegance to various celebrations worldwide.
You May Also Like: More Holiday Cookie Inspirations
- 127 Favorite Christmas Cookies, Candies & Holiday Recipes from Brown Eyed Baker
- Candy Cane Blossoms
- Pecan Pie Thumbprint Cookies
- Stained Glass Cookies
- Holiday Truffle Cookies
- 30+ Christmas Cookies
- Plus, Tips on How to Host a Cookie Exchange
- More Holiday Recipes
Do you have a favorite cookie you love to share or take to a Cookie Exchange? Let me know in the comments below! I always appreciate new ideas for festive treats.
Stay in touch and share your delicious creations! Find me on social media @ Instagram, Facebook, and Pinterest. Don’t forget to tag me when you try one of my recipes! If you love the results, please consider leaving a 5-star rating and a comment – your feedback is always valued!
The Recipe:
Rosettes Recipe
5 minutes
1 hour
1 hour 5 minutes
36 cookies
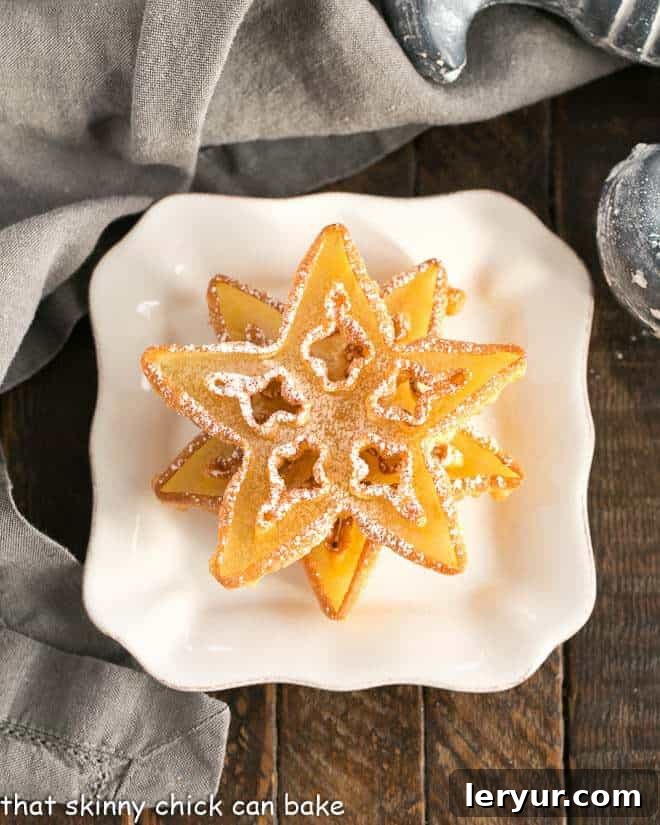
A beautiful, crisp, and delicate Scandinavian fried cookie, perfect for Christmas and other holiday celebrations!
Ingredients
- 2 large eggs
- 1 tablespoon granulated sugar
- 1 cup all-purpose flour
- 1 cup whole milk
- 2 teaspoons vanilla extract
- ¼ teaspoon salt
- Powdered sugar, for dusting
- Canola oil (or lard), for deep frying (approximately 3 cups or enough to fill your pan 3 inches deep)
Instructions
- In a mixing bowl, combine the eggs, sugar, and salt. Whisk vigorously until well combined and slightly frothy. Add the flour, milk, and vanilla extract. Continue whisking until the batter is completely smooth and free of lumps. Be careful not to overmix to avoid incorporating too much air.
- Heat the canola oil (or lard) in a deep-fryer or a heavy, deep saucepan to 375ºF (190ºC). Use a candy thermometer to ensure the temperature is steady.
- Submerge your rosette iron completely into the hot oil and allow it to heat for at least 2 minutes. This crucial step ensures the batter adheres properly.
- Carefully remove the hot iron from the oil, allowing any excess oil to drip off for a few seconds. Immediately dip the heated iron into the prepared batter, ensuring the batter covers about 7/8ths of the iron’s surface, but does not flow over the top.
- Quickly place the batter-coated iron back into the hot oil. Fry until the rosette turns a beautiful golden brown, typically taking about 30 seconds to 1 minute. You can gently flip it on the iron for even browning.
- Lift the iron from the oil, letting excess oil drain. Gently remove the cooked rosette from the iron using the tip of a dinner knife, if necessary. Place the rosette on a paper towel-lined rack to cool and drain further.
- To continue, reheat the iron in the hot oil for approximately 1 minute before dipping it into the batter again. Repeat the frying and draining process until all the batter has been used.
- Once the rosettes are completely cool, generously dust them with powdered sugar just before serving.
Notes
- This recipe is a cherished family favorite, passed down through generations.
- Do not overmix the batter; a smooth consistency without air bubbles is key to delicate rosettes.
- Rosettes freeze exceptionally well. For best results, freeze them without powdered sugar and dust them after they have thawed to room temperature.
Recommended Products
As an Amazon Associate and member of other affiliate programs, I earn from qualifying purchases.
- OXO Good Grips 11-Inch Better Balloon Whisk
- Rosette Iron
- KitchenAid 9-Speed Digital Hand Mixer
Nutrition Information:
Yield: 36 cookies
Serving Size: 1 cookie
Amount Per Serving:
Calories: 35
Total Fat: 0g
Saturated Fat: 0g
Trans Fat: 0g
Unsaturated Fat: 0g
Cholesterol: 11mg
Sodium: 22mg
Carbohydrates: 7g
Fiber: 0g
Sugar: 4g
Protein: 1g
Calories do not include the oil absorbed during the cooking process.
© Liz Berg
/
Category: Holidays
My Mother’s Rosette Legacy: A Personal Touch
Each December, the air in our home would fill with a unique anticipation, signaling the start of a cherished holiday ritual. My mom and Mrs. Homer, my best friend’s mother and a dear family friend, would orchestrate an evening of deep-frying rosettes. While the delicious aroma of the cookies permeated every corner, it was often accompanied by the lingering scent of lard, which my mom, bless her heart, seemed perfectly content with. After a few years, their friendly alternation of homes for this annual cookie-making session ceased, and our kitchen, with its bustling activity and savory smells, became the designated rosette headquarters.
We children would gather around, eyes wide with fascination, watching the delicate cookies emerge from the bubbling oil. It was a magical sight, a glimpse into the heart of holiday preparations, until we were inevitably shooed off to bed, carrying the sweet scent of vanilla and fried dough with us as we drifted to sleep. My mom would then meticulously store her share of these Scandinavian cookies in our basement freezer, a treasure trove hidden from eager hands. During Christmas week, she would carefully package them, transforming them into heartfelt gifts for our dearest friends and neighbors, spreading joy with every delicate pastry.
I distinctly remember, even after I’d left for college, still accompanying my dad on these special deliveries, a tradition that brought immense joy and fostered community spirit. Of course, my sisters and I couldn’t resist the temptation; we’d often sneak a few crispy rosettes from the freezer, the irresistible crunch and delicate sweetness a forbidden pleasure. The tell-tale trail of powdered sugar left on our cheeks or sweaters was often the only evidence of our sweet transgressions. That classic cast iron rosette iron, much like the ones readily available on Amazon today (and conveniently linked in the recipe card), was more than just a kitchen tool; it was a symbol of love, tradition, and the enduring sweetness of family memories, passed down through generations. Making these cookies today feels like a warm embrace from the past, connecting me to my mother’s kitchen and the spirit of the holidays.