
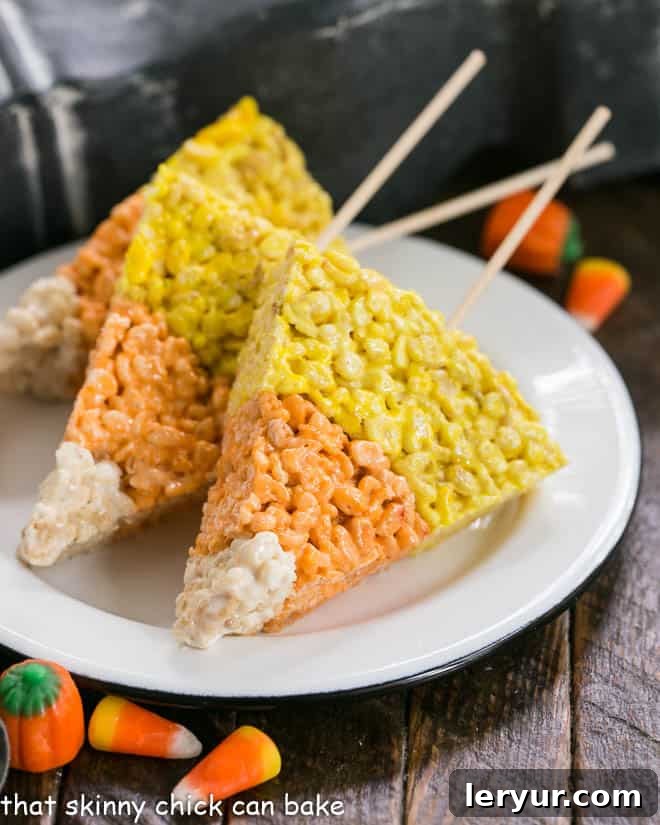
Get ready to transform a beloved childhood classic into a show-stopping Halloween delight with these vibrant Candy Corn Rice Krispie Treats! This incredibly fun and easy recipe takes the simple cereal and marshmallow squares you know and love and gives them a festive, layered twist. Prepare for squeals of delight from kids and nostalgic smiles from adults – these treats are guaranteed to be a hit at any Halloween gathering or fall celebration. Say goodbye to plain squares and hello to a creative, no-bake dessert that everyone will rave about!
This unique Rice Krispie Squares Recipe offers a fresh perspective on the traditional snack. Crafted with minimal ingredients and requiring absolutely no baking, it stands out as the ultimate Halloween Dessert, perfect for busy parents and aspiring home bakers alike. These appealing tri-colored treats are not only simple to assemble but also capture the iconic look of candy corn, making them an irresistible addition to your spooky season menu. Whether you’re planning a big Halloween bash or just looking for a fun activity with the kids, these easily customizable treats are sure to bring smiles and delicious memories.
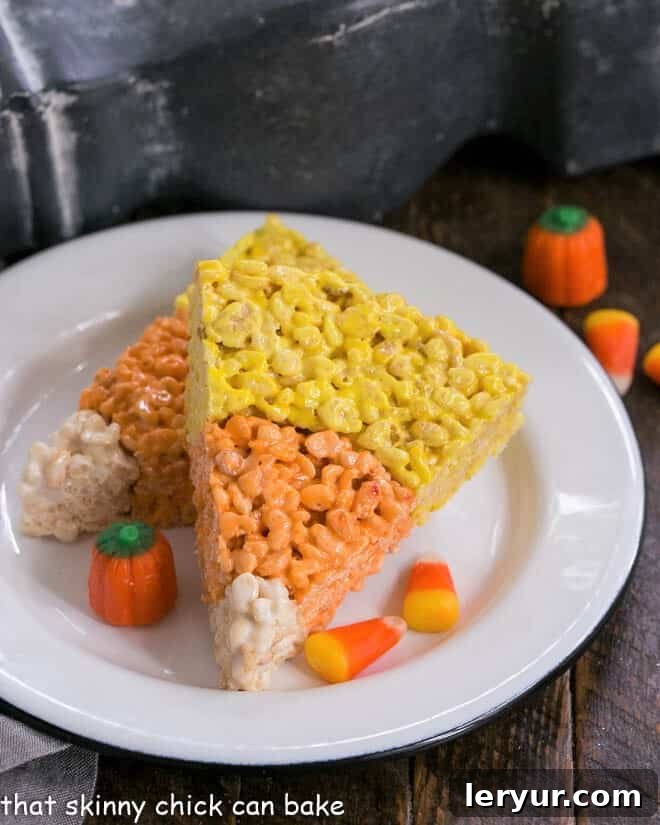
Why These Candy Corn Rice Krispie Treats Are a Must-Make This Halloween
If you’re searching for the perfect addition to your Halloween festivities, look no further. Our Candy Corn Rice Krispie Treats offer a trifecta of benefits that make them an absolute must-try:
- Irresistibly Delicious: Just like the classic cereal bars, these treats are incredibly yummy and delightfully gooey. The combination of crispy cereal, soft marshmallows, and a hint of butter creates a texture and flavor profile that is truly addictive. Each bite offers a satisfying crunch followed by a sweet, chewy marshmallow goodness that will have everyone reaching for more.
- Effortless No-Bake Perfection: Forget about preheating ovens and complex baking steps! This recipe requires absolutely no baking, making it an ideal choice for a quick and easy Halloween Party Food. It’s perfect for those last-minute party preparations or for involving younger helpers in the kitchen without the need for hot appliances. Spend less time cooking and more time enjoying the spooky season!
- A Universal Crowd-Pleaser: From the littlest trick-or-treaters to seasoned Halloween enthusiasts, Rice Krispie Treats are universally adored. Their familiar taste and playful appearance appeal to all ages, ensuring that your festive dessert will be enjoyed by everyone at your gathering. They evoke a sense of nostalgia for many, bringing back fond memories of childhood snacks, while new generations will simply love their fun colors and delicious taste.
While achieving perfectly precise candy corn colors can sometimes be a fun challenge with food dyes, don’t worry if your shades aren’t absolutely identical to the real thing. The joy of these tri-colored, candy corn-inspired Rice Krispie Treats comes from their festive spirit and delightful taste, and they’ll be recognizable and loved regardless. These delightful confectionery creations are more than just a recipe; they carry sentimental value, making their way to college care packages filled with love. I recall sending a batch to my youngest, Nick, at Indiana University. Along with some homemade M&M-studded brownie cookies, they provided his dorm with a delightful sugar boost for several nights. I even treated him and his friends to a steak dinner, and those growing boys absolutely devoured these Halloween Rice Krispie Treats, proving their universal appeal!
Essential Ingredients for Your Candy Corn Rice Krispie Treats
Crafting these delicious and festive treats starts with selecting the right ingredients. While the recipe is straightforward, paying attention to the quality and type of each component will ensure the best possible results. Here’s what you’ll need:
- Rice Krispies Cereal: This is the foundation of our treats! You’ll need approximately 5 cups in total, divided for the different colored layers. Ensure your cereal is fresh for the best crispiness and flavor. Stale cereal can lead to a less appealing texture.
- Mini Marshmallows: For that signature gooey, chewy texture, mini marshmallows are key. You’ll need at least 5 cups in total. Mini marshmallows melt more quickly and evenly than larger ones, making the mixing process smoother and ensuring a perfectly consistent marshmallow coating for your cereal.
- Butter: Butter is crucial for both flavor and binding. Salted butter is generally preferred in this recipe, as the touch of salt helps to balance the sweetness of the marshmallows and enhance the overall flavor profile of your treats. If you only have unsalted butter, you can add a tiny pinch of salt (about 1/8 teaspoon) to the melted butter and marshmallow mixture.
- Yellow and Orange Gel Food Coloring: To achieve the vibrant, distinct layers of candy corn, gel food coloring is highly recommended over liquid food coloring. Gel colors are more concentrated, meaning you need less to achieve deep, rich hues without adding excess moisture to your mixture, which can alter the texture of your treats. A little goes a long way!
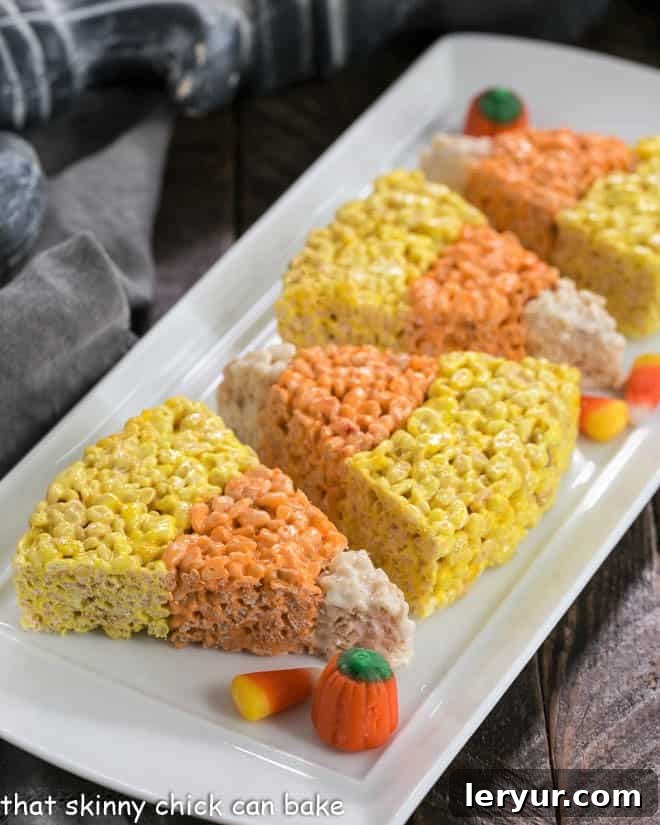
Expert Tips for Perfect Rice Krispie Treats Every Time
Even though a Rice Krispie Treats Recipe is famously simple, a few expert tips can elevate your creation from good to absolutely amazing, especially when adding the vibrant layers for a candy corn design. The core recipe relies on just three ingredients – Rice Krispies, butter, and marshmallows – with food coloring being the delightful fourth addition for this festive version.
- Precise Measurement is Key: Always measure your ingredients carefully. When it comes to marshmallows, having a few extra is better than not enough, as this ensures a consistently gooey texture. Using fresh, soft marshmallows is crucial for the best results, and mini marshmallows are ideal because they melt more quickly and evenly.
- PRO-Tip: Gentle Melting for Soft Treats: The secret to soft, chewy Rice Krispie treats lies in how you melt the butter and marshmallows. Do it very gently! I recommend using short bursts in the microwave (15-20 seconds at a time), stopping and stirring frequently until just melted and smooth. Alternatively, melt them in a saucepan over very low heat, stirring constantly. Overheating this mixture can lead to hard, brittle treats once they cool, so patience is a virtue here.
- Fresh Cereal Makes All the Difference: If your box of Rice Krispies has been sitting in the pantry for a while, it’s best to invest in a new one. Stale cereal won’t give you that desirable crispiness, resulting in a less satisfying treat. Freshness ensures the best flavor and texture.
- Mix with a Light Hand: When incorporating the cereal into the marshmallow mixture, use a gentle touch. A silicone spatula works wonders here. Fold the mixture carefully until all the cereal is coated, but avoid over-mixing, which can crush the cereal and compromise the texture.
- PRO-Tip: Grease Everything! This mixture is notoriously sticky. Ensure your baking pan is thoroughly greased with cooking spray or butter. Additionally, have extra butter available to grease your hands and spatula generously before pressing the mixture into the pan. This will prevent frustrating stickiness and make the process much smoother.
- Grease Your Shaping Tools: If you’re using cookie cutters, rings, or small bowls to help form the candy corn layers, make sure to grease these tools well too. This will ensure they release cleanly from the sticky mixture.
- Strategic Pressure for Layers: Typically, you want to press Rice Krispie treats down lightly to maintain their airy, gooey consistency. However, for this layered candy corn design, you can apply a *little* extra pressure, especially when firming up the edges of each color section. This helps to create distinct layers with minimal gaps, ensuring your candy corn pattern looks sharp and holds together beautifully when sliced.
- Optimal Storage for Freshness: Store your finished Rice Krispie Treats in a sealed, airtight container at room temperature for up to 2-3 days to maintain their best texture. If you need to keep them longer, they can be refrigerated for up to 5 days. Just remember to let them come to room temperature before serving, as cold treats can become quite firm. For longer storage, they can be frozen for up to 3 months; thaw them overnight in the refrigerator and bring to room temperature before enjoying these delightful Halloween treats.
How to Assemble Your Festive Candy Corn Rice Krispie Treats
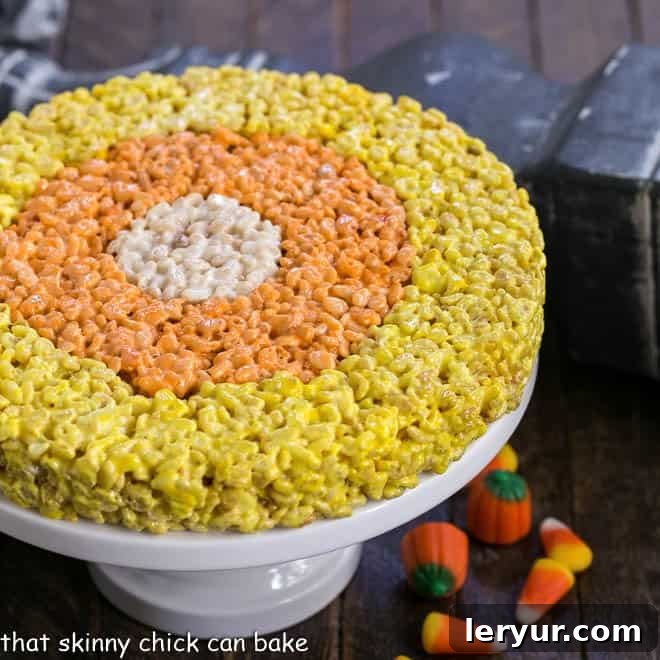
Creating the iconic candy corn design is simpler than you might think, especially with the right tools. These delightful Candy Corn Rice Krispie Treats are primarily assembled in an 8-inch round cake pan. This method allows for the distinct, concentric colored rings that mimic the classic Halloween candy. Here’s a breakdown of the process:
- Start with the Yellow Ring: Begin by preparing the yellow batch of Rice Krispie treats. Once mixed, this warm, pliable mixture is pressed carefully into a 1½-inch ring around the very perimeter of your greased 8-inch cake pan. Ensure it’s evenly distributed and lightly firmed to create a solid outer layer.
- Add the Orange Layer: Next, prepare the slightly smaller orange batch. This mixture is then pressed immediately next to the yellow ring, forming another 1½-inch diameter ring. Work quickly while the mixture is still warm to ensure it adheres nicely to the yellow layer and achieves a smooth transition.
- Complete with the White Center: Finally, the smallest batch of uncolored Rice Krispie treats is prepared. This white mixture is then pressed into the remaining 2-inch round space in the very center of the pan, completing the candy corn motif. A quick hand helps ensure all layers are evenly pressed before cooling.
Shaping and Serving Tips for Your Candy Corn Masterpiece
Once your treats are layered, the fun isn’t over! These tips will help you perfectly shape and serve your gorgeous Halloween Rice Krispie Treats:
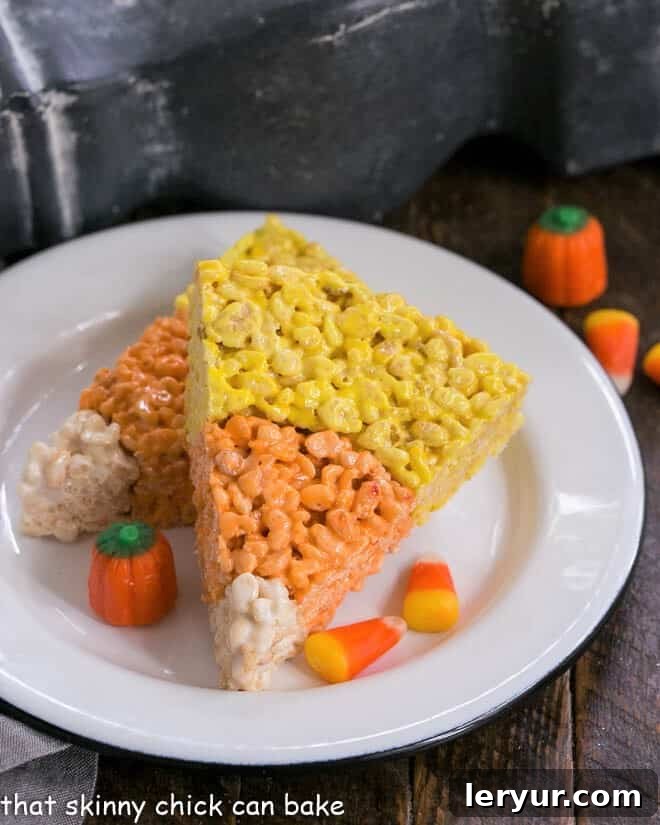
- Effortless Release and Slicing: Make sure your cake pan is exceptionally well-greased. This ensures that when the treats have cooled sufficiently, the entire round will pop out easily onto a cutting board. Once released, simply slice the round into 6-8 equal wedges, and voila! You’ll have perfect candy corn-shaped treats ready to impress.
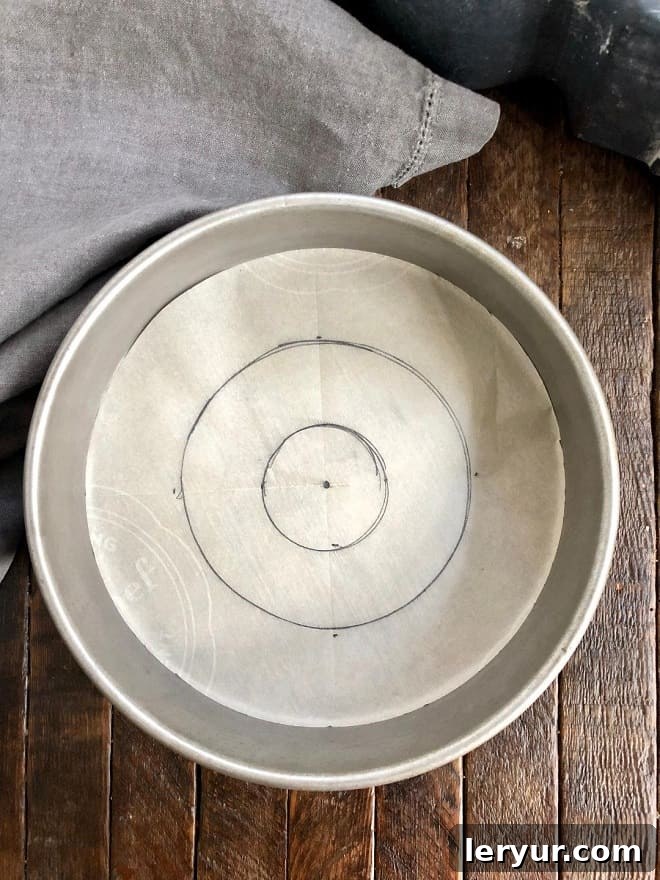
- PRO-Tip: The Parchment Paper Guide: For impeccable layering and easy removal, I highly recommend using a round of parchment paper fitted into the bottom of your greased cake pan. Before placing it, you can lightly mark off the sections (1½-inch for yellow, 1½-inch for orange, 2-inch for white center) on one side of the parchment. Turn the marked side down so your Rice Krispie treats are pressed onto the clean, unmarked surface. These lines act as invaluable guidance for where each colored section should begin and end.
- Utilize Shaping Aids: For even greater precision in creating your distinct layers, consider using appropriately sized, *greased* cookie cutters or small mixing bowls. Place the cookie cutter or bowl in the center of the pan (or at the boundary of a layer) to provide a firm division. Then, pack the Rice Krispie treat mixture into the desired area around the tool. Once that section is firm, carefully remove the tool and proceed to the next layer.
- Achieve a Smooth Finish: Use a flat-bottomed spatula or a piece of buttered parchment paper to gently press down evenly across the surface of each layer of Krispie treats. This helps to create a smooth, level surface and ensures that all layers are compressed uniformly, preventing large air gaps and giving your candy corn design a professional finish.
Frequently Asked Questions About Rice Krispie Treats
The secret to truly outstanding Rice Krispie Treats lies in a few key factors. First and foremost, always ensure your ingredients are fresh, especially the Rice Krispies cereal and the marshmallows, as freshness directly impacts texture and flavor. Secondly, avoid overmixing the cereal into the marshmallow mixture; this can cause the cereal to break into smaller pieces, leading to a denser treat. Finally, when pressing the mixture into the pan, use a light hand. Over-compressing them will result in hard, tough treats that are less enjoyable to eat. A touch of vanilla extract can also enhance their flavor beautifully, adding a warm, inviting aroma.
Yes, Rice Krispie Treats can easily be made gluten-free! The key is to carefully check the labels of both your chosen crisp rice cereal and marshmallows. Many brands offer gluten-free versions of these staples. It’s also important to ensure that the products are manufactured in a facility that prevents cross-contamination from gluten-containing products. Always look for certified gluten-free labels to be certain.
To keep your Rice Krispie Treats at their best, store them in an airtight container at room temperature. They will remain wonderfully fresh and chewy for 2-3 days. For extended freshness, you can refrigerate them for up to 5 days, though they may become a bit firmer. If refrigerating, allow them to come to room temperature for about 15-30 minutes before serving for optimal texture. For even longer storage, Rice Krispie Treats freeze exceptionally well for up to 3 months. When ready to enjoy, simply defrost them in the refrigerator overnight, then let them reach room temperature before serving.
While you can use large marshmallows, mini marshmallows are highly recommended for Rice Krispie Treats. Mini marshmallows melt faster and more evenly, ensuring a smoother, more consistent marshmallow coating for your cereal. If you only have large marshmallows, you’ll need to cut them into smaller pieces to help them melt more quickly and prevent scorching, or simply allow extra melting time and stir very frequently.
If your treats end up hard, it’s usually due to one of two reasons: either the marshmallow and butter mixture was overheated during melting, or the treats were pressed too firmly into the pan. To avoid this, melt the marshmallows and butter slowly over low heat or in short bursts in the microwave, stirring often until just smooth. And remember to press the mixture into the pan with a gentle hand to maintain that desirable soft, gooey texture.
Explore More Halloween & Fall Treat Ideas
If you loved making these festive Candy Corn Rice Krispie Treats, you’re in for a treat! Discover more spooky and sweet ideas to make your Halloween and autumn celebrations unforgettable:
- 50 of the Best Halloween Treats: A vast collection of ideas for every ghoulish craving.
- 20+ Halloween Treats: More delightful recipes to fill your holiday with sweetness.
- Tunnel of Doom Cake: A decadent and eerie cake perfect for a spooky centerpiece.
- Candy Corn Cupcakes: Another charming candy corn-themed dessert.
- Spider Web Cookie Cake: An easy and impressive treat with a spooky design.
- Witches Fingers Cookies: Creepy and delicious cookies that are always a hit.
- Easy Mummy Cookies: Adorably spooky cookies that are simple to decorate.
- Bloody Creme Brulee: An elegant yet haunting dessert for sophisticated palates.
- More Holiday Recipes: A collection of treats for every festive occasion.
Stay in touch and share your delicious creations! Follow us on Instagram, Facebook, and Pinterest. Don’t forget to tag me when you try one of my recipes! And if you love the results, please consider leaving a 5-star rating and comment on the blog post. Your feedback helps others discover these wonderful treats!
Festive Candy Corn Rice Krispie Treats
30 minutes
1 minute
31 minutes
8 servings
Transform classic cereal treats into a vibrant, layered candy corn spectacle using food coloring and a simple cake pan. This easy recipe makes the ultimate Halloween treat that’s perfect for parties and gatherings!
Ingredients List
For the Yellow Outer Ring:
- 2 ¼ cups Rice Krispies cereal
- 2 ½ cups mini marshmallows
- 1 ½ tablespoons unsalted butter
- Yellow gel food coloring
For the Orange Middle Ring:
- 1 ⅜ cups Rice Krispies cereal
- 1 ¾ cups mini marshmallows
- 1 tablespoon unsalted butter
- Orange gel food coloring
For the White Center:
- 1 cup Rice Krispie cereal
- 1 ¼ cup mini marshmallows
- 1 tablespoon unsalted butter
Step-by-Step Instructions
- Prepare Your Pan: Spray an 8-inch round cake pan generously with non-stick cooking spray. Set it aside. Have a small amount of butter ready to grease your hands and a spatula, as these treats are sticky.
- Prepare the Yellow Ring Mixture: Begin by forming one ring at a time, starting with the yellow layer. In a microwave-safe bowl, combine the marshmallows and butter designated for the yellow ring.
- Melt Gently & Add Color: Gently melt the marshmallow and butter mixture in the microwave using 15-second intervals. Stop and stir frequently after each interval until the mixture is smooth and fully melted. Add yellow gel food coloring gradually until you achieve your desired bright yellow hue. Stir well. Then, fold in the yellow portion of Rice Krispies cereal until all flakes are evenly coated.
- Form the Yellow Ring: With lightly greased hands and a greased spatula, carefully pat the yellow Rice Krispie mixture around the perimeter of the cake pan. Aim to form an even 1 ½-inch wide ring along the outer edge. Press gently but firmly enough to ensure it holds its shape.
- Prepare and Form the Orange Ring: Repeat the melting, coloring (using orange gel food coloring), and mixing process with the ingredients designated for the orange ring. Once ready, press this orange mixture into a second 1 ½-inch wide ring, directly next to the yellow layer, leaving the very center of the pan open for the white layer.
- Prepare and Form the White Center: Finally, repeat the melting and mixing process with the last batch of marshmallows, butter, and Rice Krispies (this layer remains uncolored). Press this white mixture firmly into the open center space of the pan, completing your candy corn design.
- Cool, Slice, and Serve: Allow the layered treats to cool completely for at least 30 minutes at room temperature. Once firm, gently flip the entire round out of the pan onto a cutting board. Using a sharp, buttered knife, slice the round into 8 equal wedges to beautifully resemble candy corn. Serve immediately and enjoy!
Recipe Notes & Pro-Tips
Helpful Tools for Success (affiliate links):
- Nesting Mixing Bowls: Essential for preparing separate batches of colored treats.
- Silicone Spatulas: Ideal for gently mixing and pressing the sticky mixture without sticking.
- 8-Inch Round Cake Pan: The perfect size for achieving the classic candy corn shape.
Important Reminders:
- Work Quickly: The Rice Krispie treat mixture is easiest to work with when warm and pliable. Once melted, proceed promptly to mix in the cereal and press it into the pan before it cools and hardens.
- Recipe Inspiration: This delightful recipe is adapted from the creative minds at Glorious Treats.
Recommended Products for This Recipe
As an Amazon Associate and member of other affiliate programs, I earn from qualifying purchases.
- Nesting Mixing Bowls
- Silicone Spatulas
- 8-inch Cake Pan
Nutrition Information (per serving):
Yield:
8
Serving Size:
1 wedge
Amount Per Serving (estimated):
Calories: 223
Total Fat: 5g
Saturated Fat: 3g
Trans Fat: 0g
Unsaturated Fat: 2g
Cholesterol: 13mg
Sodium: 152mg
Carbohydrates: 44g
Fiber: 0g
Sugar: 23g
Protein: 2g
How Much Did You Love This Recipe?
Please leave a comment on the blog or share a photo on Pinterest!