
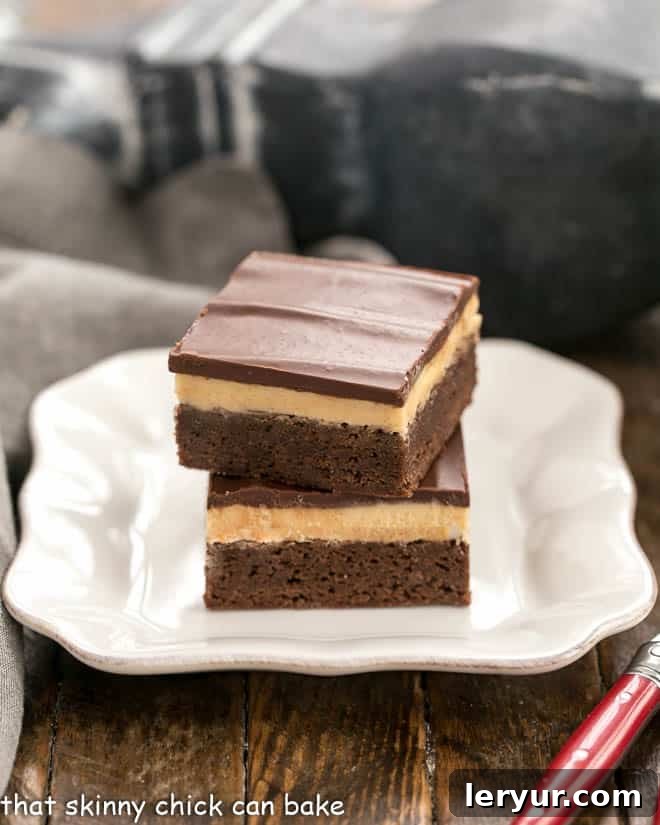
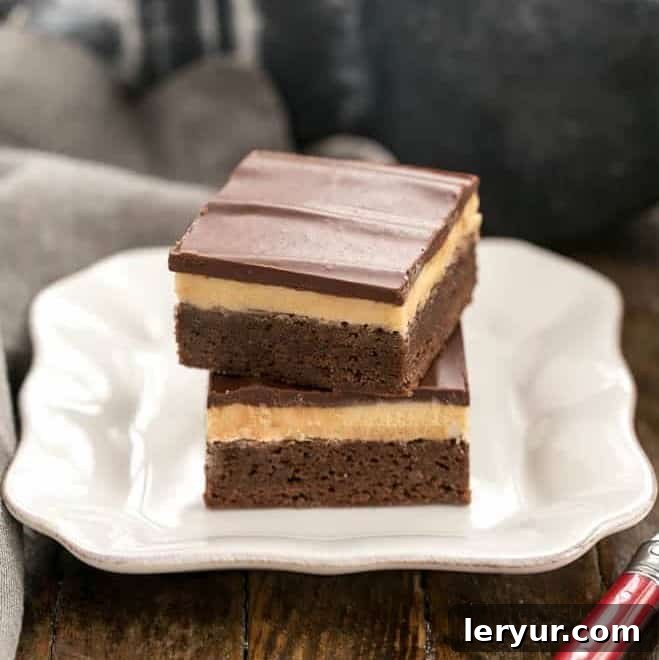
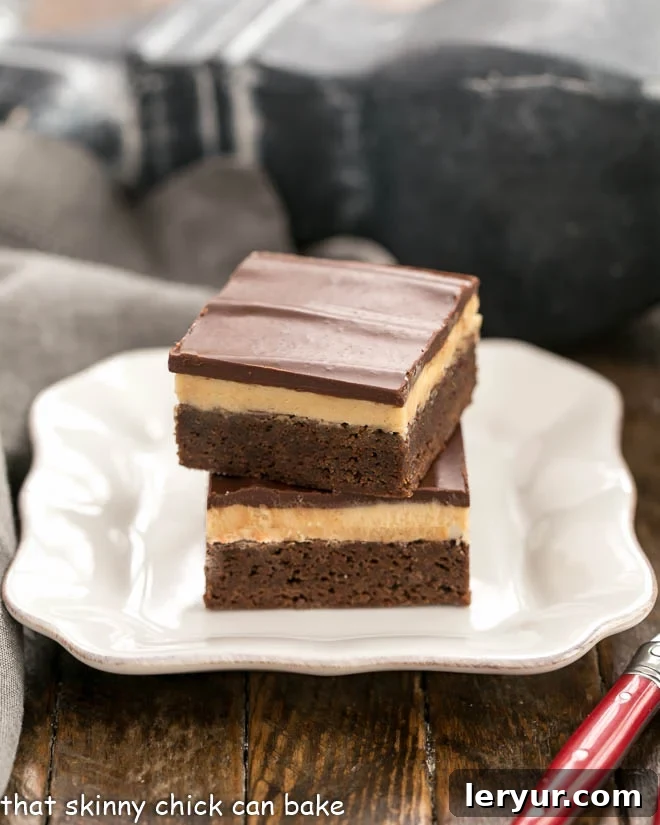
Indulge in an extraordinary dessert experience with these irresistible Peanut Butter Truffle Brownies! This recipe masterfully unites the universally adored duo of rich chocolate and creamy peanut butter, elevating classic brownies into a truly gourmet treat. Imagine a layer of intensely fudgy chocolate brownie, generously topped with a luscious, light-as-air peanut butter truffle filling, all crowned with a glistening, silky chocolate ganache. Each bite delivers a harmonious blend of textures and flavors that will captivate your taste buds and leave you craving more.
Forget store-bought candies for a moment; these spectacular layered peanut butter brownies offer a homemade alternative that is far superior. Perfect for impressing guests or simply treating yourself, they transform a humble brownie into a show-stopping confection that rivals any bakery creation.
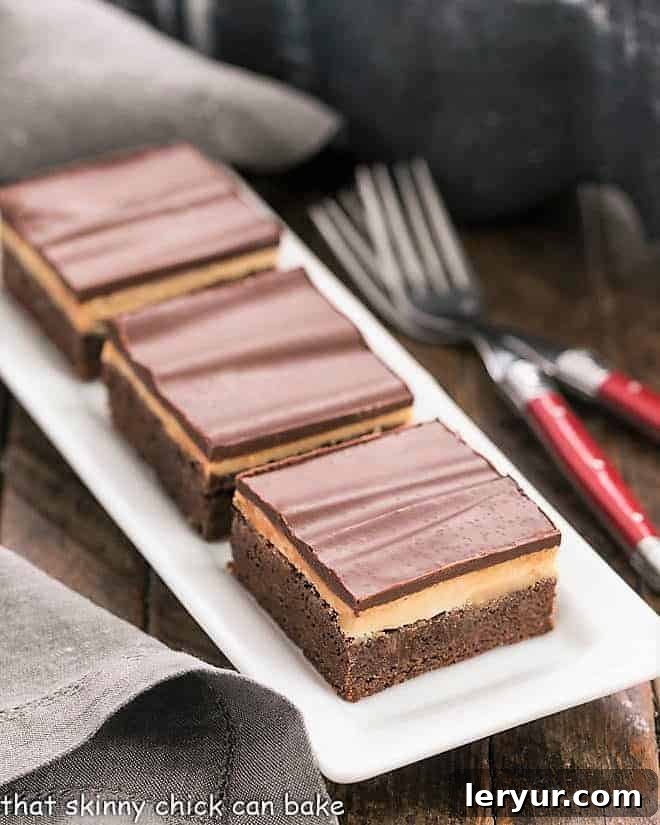
Why You Must Make These Irresistible Brownies
These aren’t just any brownies; these are the kind of brownies that evoke fond memories and create new ones. I first whipped up a batch of these glorious peanut butter brownies back in 2011 for a cherished college reunion. Surrounded by sorority sisters with whom I once shared endless bags of chips and M&M’s, and late-night microwave nachos, I knew these decadent treats would be the ultimate hit for our tailgate gathering.
Cut into neat squares and carefully packed into a cooler, these delightful Buckeye Brownies embarked on a journey across three states to a homecoming football game at my alma mater. While my attention to the actual game was perhaps as fleeting as it was during my college days (my husband still can’t believe I attended the Rose Bowl and Peach Bowl!), the brownies certainly stole the show. They were devoured with enthusiasm, proving their undeniable crowd-pleasing power.
There are countless reasons why these Peanut Butter Truffle Brownies deserve a prime spot in your baking repertoire:
- Effortless Portability: These brownies are perfectly suited for on-the-go enjoyment. Their sturdy, layered structure makes them an ideal candidate for picnics, potlucks, tailgates, or any event where you need a convenient yet impressive dessert.
- Perfect Finger Food: No forks required! Easily cut into individual servings, they are the quintessential finger food, making them hassle-free for both hosts and guests.
- Iconic Flavor Pairing: The timeless combination of chocolate and peanut butter is a guaranteed winner. If you’re a devoted fan of Reese’s Peanut Butter Cups, prepare to be utterly smitten by these homemade layers of bliss.
- Crowd-Pleaser Guaranteed: Time and again, these brownies have proven to be an absolute smash hit. The distinct layers and rich flavors ensure they disappear quickly at any gathering, earning you rave reviews.
- Simple yet Sophisticated: While they look incredibly impressive, the process for making these brownies is surprisingly straightforward, making them accessible for bakers of all skill levels.
Glowing Reader Endorsement:
Don’t just take my word for it! Here’s what Susan shared in the comments:
“Made these last night. Brought them to work today, and they had rave reviews! I was told that this was a keeper recipe. The peanut butter layer is so light and fluffy.”
Such feedback truly highlights the delightful texture and incredible taste of these brownies, confirming their status as a universally loved dessert.
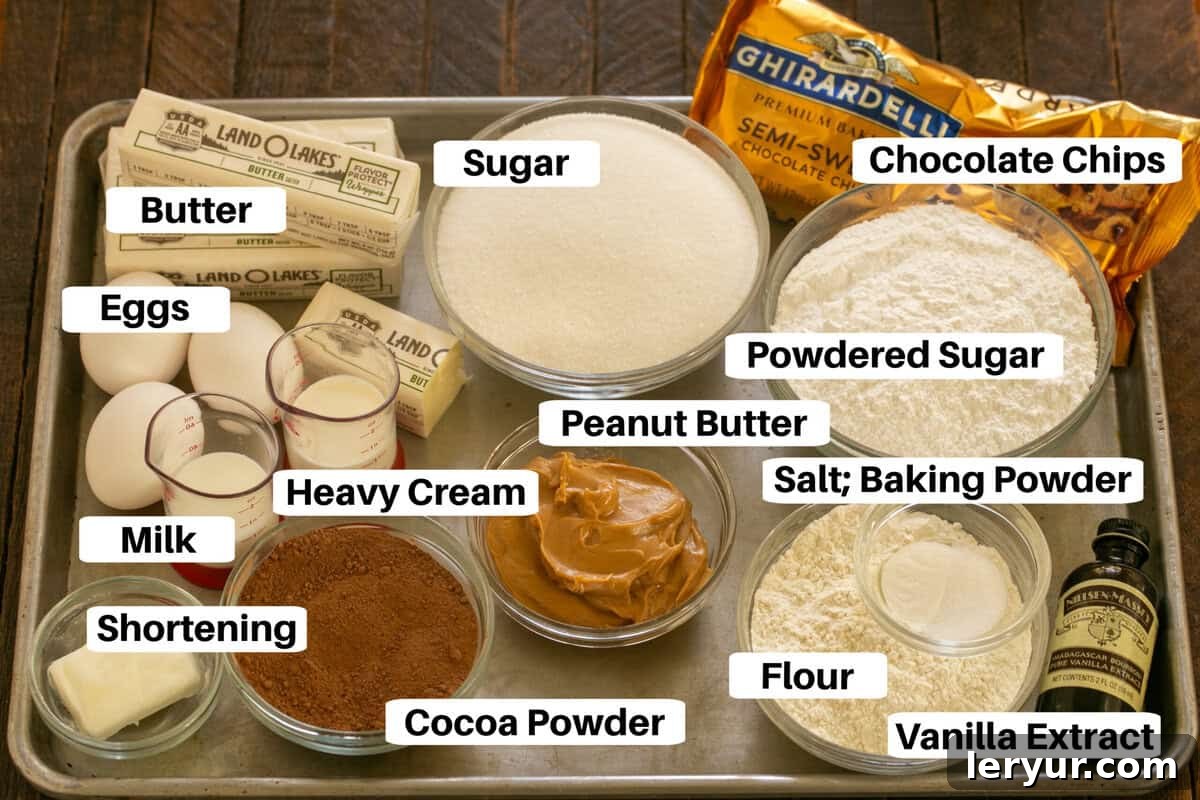
Ingredient Notes for Perfect Brownies
Crafting exceptional Peanut Butter Truffle Brownies starts with understanding your ingredients. While many are common pantry staples, a few key details can make all the difference in achieving that perfect fudgy texture, rich flavor, and smooth finish.
- Kitchen Staples: You’ll need granulated sugar, all-purpose flour, fine sea salt, and milk. Ensure your flour is fresh and not compacted, and use good quality salt for optimal flavor enhancement.
- Butter (for Brownies and Filling): For the brownie base, salted butter is perfectly acceptable as the quantity isn’t enough to make the final product taste overly salty. In fact, salt acts as a crucial flavor enhancer, preventing desserts from tasting bland or “flat.” For both brownie batter and peanut butter filling, it’s essential to have your butter at room temperature. Softened butter creamed with sugar creates air pockets, resulting in a lighter, more tender crumb for the brownies and a smoother, fluffier filling.
- Eggs: All my recipes, including this one, call for large eggs unless explicitly stated otherwise. Just like butter, eggs incorporate much more easily and evenly into batter when they are at room temperature. Pull them out of the refrigerator about an hour before you plan to begin mixing.
- Vanilla Extract: Quality matters here. Always opt for real vanilla extract. Artificially flavored vanilla simply cannot replicate the complex, aromatic depth that genuine vanilla brings to baked goods. It’s a subtle but significant difference.
- Cocoa Powder: I typically reach for reputable brands like Ghirardelli or Hershey’s for their consistent quality and rich chocolate flavor. If your cocoa powder has a tendency to clump, a quick sift before adding it to the mixture will ensure a smooth, lump-free batter. This prevents pockets of dry cocoa and ensures even chocolate distribution.
- Baking Powder: This leavening agent is critical for giving your brownies a slight lift without making them cakey. It is *not* interchangeable with baking soda, as these two chemicals react differently in recipes. Baking powder tends to lose its efficacy faster than baking soda, so it’s always wise to check its freshness. To do so, place a spoonful into a cup of hot water; if it bubbles vigorously, it’s still active and ready to use. If it doesn’t, replace it before starting your baking.
- Creamy Peanut Butter: The creamy peanut butter forms the heart of our truffle filling. My family has a strong preference for the Jif brand due to its smooth texture and balanced flavor, but feel free to use your preferred creamy peanut butter. Avoid natural peanut butter that separates, as it can alter the texture of the filling.
- Powdered Sugar (Confectioners’ Sugar): Also known as confectioners’ sugar, this ingredient is key for the smooth, melt-in-your-mouth texture of the peanut butter truffle layer. Like cocoa powder, powdered sugar can sometimes develop lumps. Sifting it before use will guarantee a silky-smooth filling.
- Semisweet Chocolate Chips (for Ganache): For the luscious ganache topping, semisweet chocolate chips are a reliable choice. Ghirardelli and Nestlé brands are both excellent and melt beautifully. However, as noted in the tips section, some bakers prefer chocolate bars for a slightly smoother melt.
- Shortening: A small amount of shortening, such as Crisco sticks, is added to the ganache. Its purpose is to help the chocolate topping achieve and maintain a beautiful, glossy shine once it cools and sets, enhancing the visual appeal of your brownies.
- Heavy Cream (Optional for Ganache): While optional, I strongly recommend adding heavy cream, especially if you are using chocolate chips for your ganache. The cream helps create a richer, more luxurious ganache with a smoother consistency, making it easier to spread and giving it a more decadent mouthfeel.
How to Make Peanut Butter Truffle Brownies: Step-by-Step
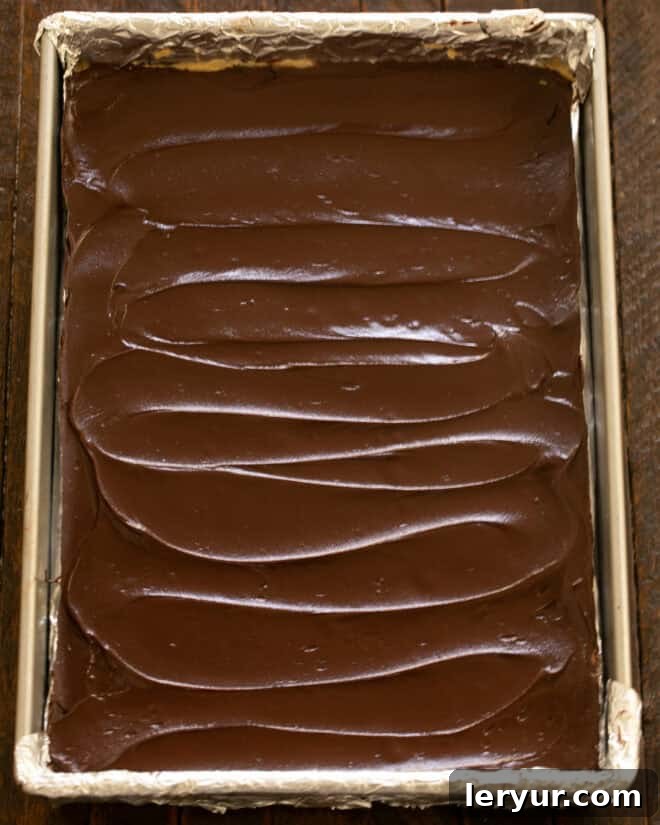
Creating these layered masterpieces is a joyful process. Follow these visual steps to ensure each layer is perfectly crafted:
Recipe Tips for Flawless Peanut Butter Truffle Brownies
Achieving bakery-quality brownies at home is entirely possible with a few insider tips. Before you even begin, always make it a habit to read through the entire recipe and instructions. This familiarizes you with the steps and ensures you have all necessary ingredients and equipment on hand, preventing any last-minute scrambling.
- Room Temperature Ingredients: While part of the butter for the brownie base is melted, it’s crucial for the butter designated for the peanut butter filling and all eggs to be at room temperature. This allows them to cream together more smoothly, creating an emulsified mixture that results in a lighter, more even texture in both the brownie and the filling.
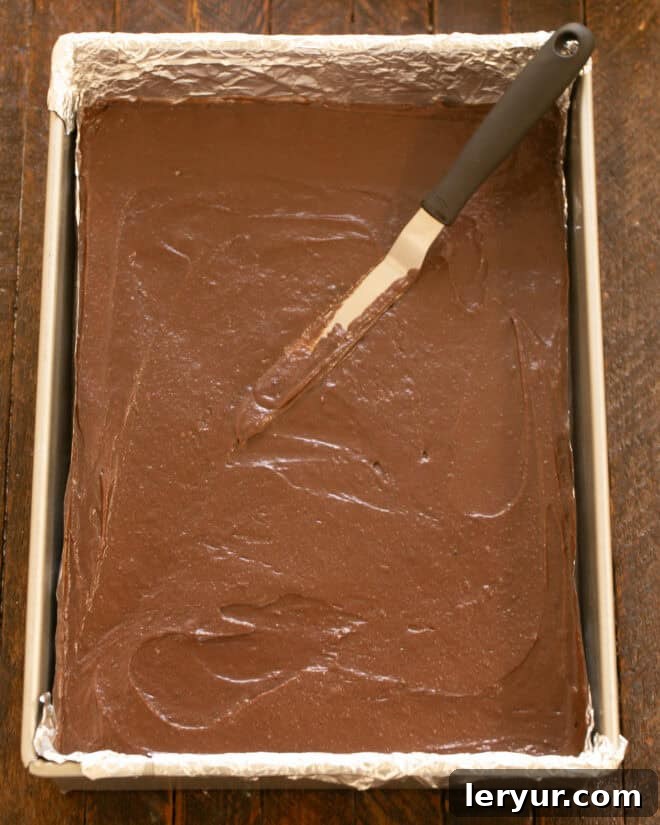
- Even Spreading: For a beautifully uniform and professional-looking presentation, I highly recommend using an offset spatula to spread both the brownie batter and the peanut butter truffle filling evenly across their respective layers. This simple tool makes a significant difference in achieving smooth, consistent layers.
- Chocolate Choice for Ganache: For the ganache topping, you have options. While a bag of semisweet chocolate chips works well, many bakers, myself included, find that high-quality chocolate bars (like Ghirardelli) tend to melt into a silkier, more stable ganache. Feel free to use 12 ounces of either chocolate chips or finely chopped chocolate bars. If you opt for chocolate chips, you might need to add an extra 1-2 tablespoons of heavy cream to achieve the desired smooth consistency.
- Cutting Perfection: These brownies, like most layered bar desserts, are best cut after they have been thoroughly chilled in the refrigerator for at least a few hours, or even overnight. For clean, sharp cuts through the rich ganache, use a warm, dry knife. Dip the knife in hot water and wipe it completely dry between each cut. This prevents sticking and smudging, ensuring every slice looks as good as it tastes. For even more detailed guidance on achieving perfect cuts, refer to my comprehensive post on How to Cut Perfect Cookie Bars.
- Storage and Shelf Life: Store these Peanut Butter Truffle Brownies in an airtight container in the refrigerator for up to 5-7 days. The chilled ganache and peanut butter truffle filling maintain their best texture when kept cool.
- Freezing Instructions: These brownies freeze beautifully! Once completely set and cut into squares, arrange them in a single layer on a baking sheet and freeze until firm. Then, transfer them to an airtight freezer-safe container, separating layers with parchment paper to prevent sticking. They can be frozen for up to 2-3 months. Thaw them in the refrigerator before serving.
Frequently Asked Questions
- Can I use natural peanut butter? It’s generally recommended to use creamy, processed peanut butter (like Jif or Skippy) for the truffle filling. Natural peanut butter tends to separate and can result in a greasier or less stable filling texture.
- What if my ganache is too thick/thin? If your ganache is too thick, stir in a tiny bit more warm heavy cream (1 teaspoon at a time) until it reaches a spreadable consistency. If it’s too thin, let it sit for a few minutes at room temperature to thicken slightly, or place it in the refrigerator for 5-10 minutes, stirring occasionally.
- Can I make these ahead of time? Absolutely! These brownies are an excellent make-ahead dessert. You can prepare them a day or two in advance and store them in the refrigerator. In fact, chilling them thoroughly improves their texture and makes them easier to cut.
- Can I add nuts? For an extra crunch, you could sprinkle chopped peanuts over the peanut butter truffle layer before adding the ganache, or even mix some into the brownie batter.
You May Also Like These Peanut Butter & Chocolate Treats:
- Better Than Reese’s Peanut Butter Bars
- Stuffed Peanut Butter Rice Krispie Treats
- Frozen Chocolate Peanut Butter Pie
- Tagalong Cookie Bars
- No-Bake Chocolate Peanut Butter Cookies
Having explored numerous decadent versions of these Buckeye Brownies across the internet, I’ve carefully curated and combined elements from various recipes, infusing them with my own unique twist to create this truly unforgettable dessert. My dearest college friends can attest to their allure—these layered peanut butter brownies were absolutely devoured!
These little gems are outrageously rich, profoundly satisfying, and undeniably delicious. If you find yourself captivated by the classic combination of chocolate and peanut butter, then a batch of these decadent peanut butter truffle brownies is an absolute must-try. Prepare to fall in love with your new favorite dessert!
Peanut Butter Truffle Brownies
30 minutes
30 minutes
1 hour
24 brownies
Rich, fudgy brownies topped with a creamy peanut butter truffle filling and iced with a glossy chocolate ganache!
Ingredients
Fudgy Brownies:
- 1 cup (2 sticks) unsalted butter
- 2 cups granulated sugar
- 3 large eggs
- 1 tablespoon pure vanilla extract
- ⅔ cup unsweetened cocoa powder (Ghirardelli or Hershey’s recommended)
- 1 cup all-purpose flour
- ½ teaspoon fine sea salt
- ½ teaspoon baking powder
Creamy Peanut Butter Filling:
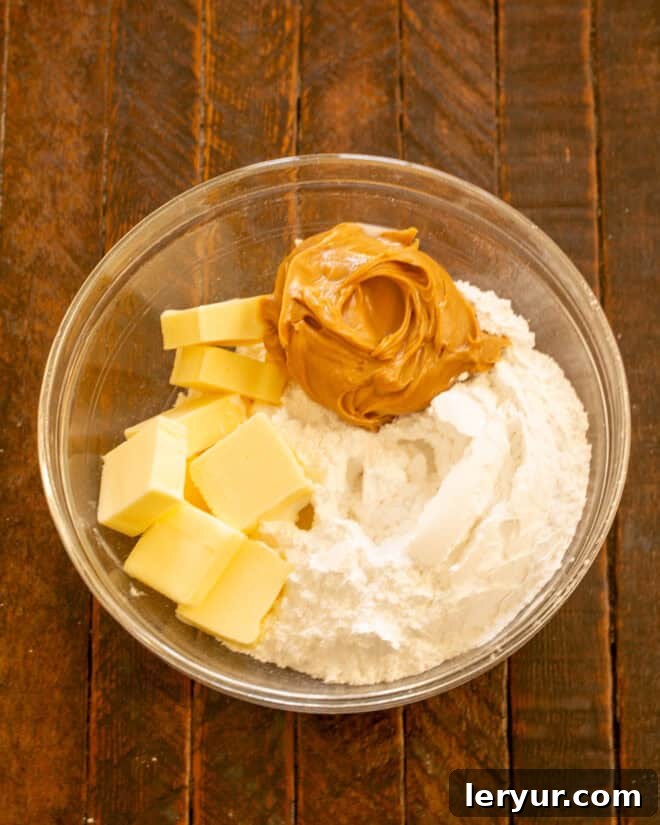
- ½ cup (1 stick) unsalted butter (at room temperature)
- ½ cup creamy peanut butter (Jif recommended)
- 2 cups powdered sugar, sifted
- 2-3 teaspoons milk (add gradually)
Silky Chocolate Ganache Topping:
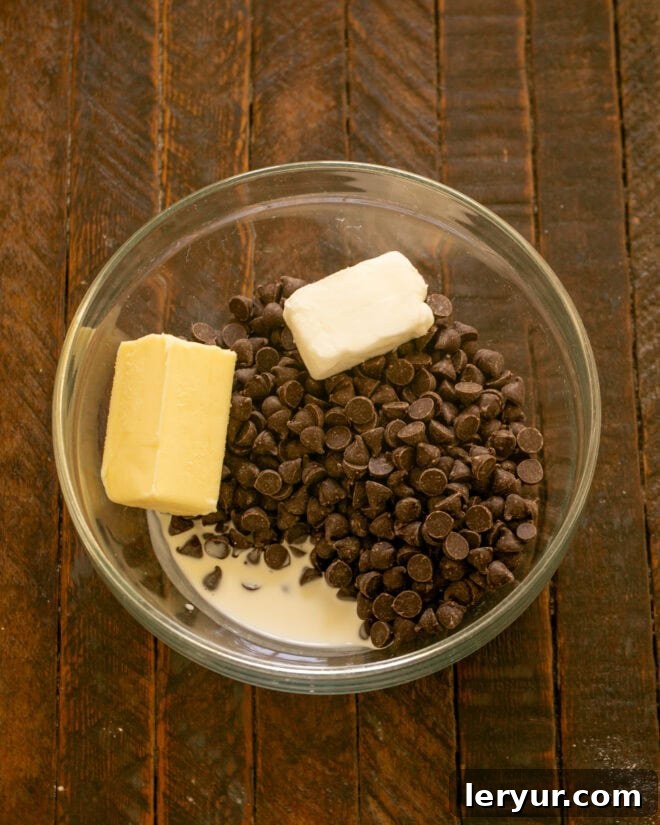
- 2 cups semi-sweet chocolate chips (or 12 oz chopped semi-sweet chocolate bars)
- ¼ cup (½ stick) unsalted butter
- 2 tablespoons shortening (Crisco recommended for shine)
- 2 tablespoons heavy cream, optional (highly suggested if using chocolate chips)
Instructions
- Preheat your oven to 350ºF (175ºC).
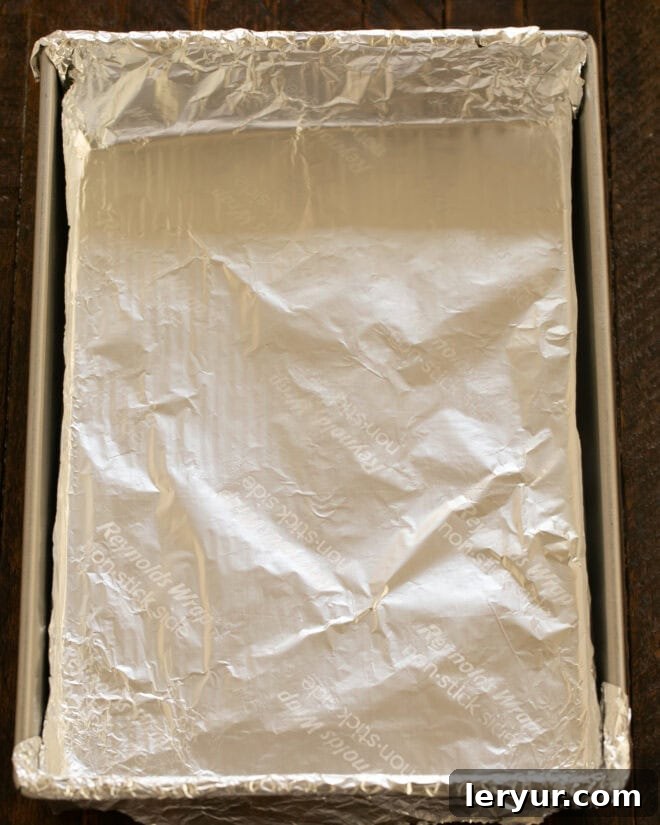
- Line a 9 x 13-inch baking pan with non-stick foil, leaving an overhang on the sides to easily lift out the brownies later. Set aside.
- In a large microwave-safe bowl, melt the 1 cup of butter in the microwave. Heat in 30-second intervals, stirring until completely melted.
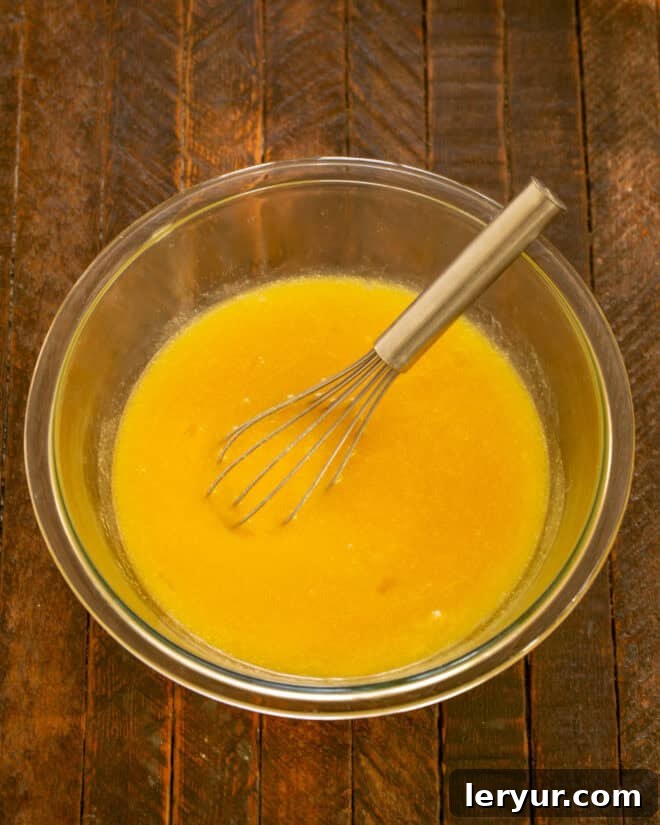
- To the melted butter, mix in the granulated sugar. Then, beat in the eggs one at a time, followed by the vanilla extract, until the mixture is smooth and well combined.
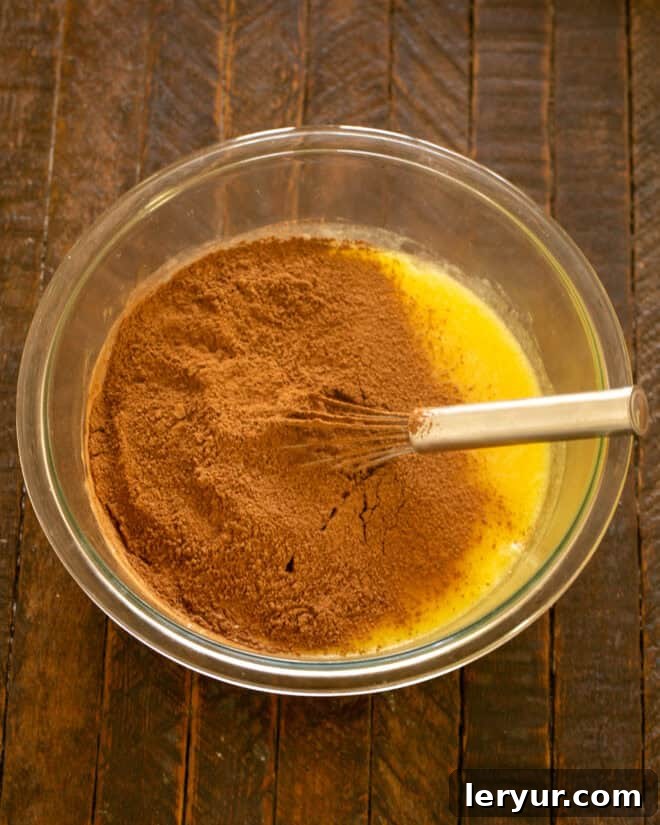
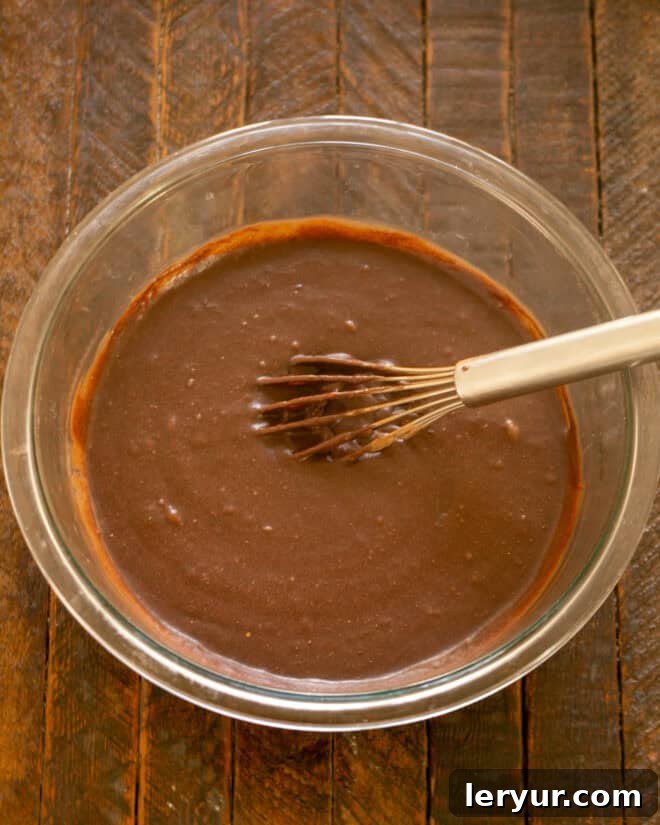
- Sift the cocoa powder into the egg mixture, along with the salt and baking powder. Mix thoroughly until no dry streaks remain.
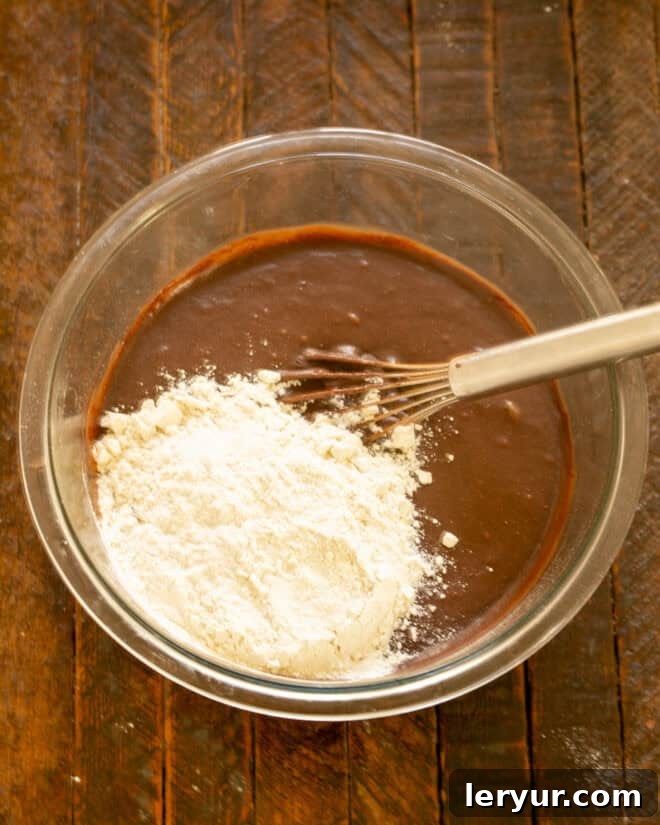
- Add the flour to the batter, mixing just until it is combined. Be careful not to overmix. Scrape the batter into your prepared pan and use an offset spatula to smooth the top evenly.
- Bake for approximately 25-30 minutes, or until a toothpick inserted into the center comes out with moist crumbs. Do not overbake. Cool completely in the pan on a wire rack.
- While the brownies are cooling, prepare the peanut butter filling. In a medium bowl, beat the ½ cup of room temperature butter and creamy peanut butter until light and fluffy.
- Gradually add the sifted powdered sugar, beating until smooth. Add 2 teaspoons of milk, and if the mixture is too thick to spread, add the third teaspoon of milk until it reaches a spreadable consistency. Spread this filling evenly over the cooled brownies using an offset spatula.
- Chill the brownies with the peanut butter layer in the refrigerator for at least 30 minutes to set the filling.
- Once the peanut butter layer is chilled, prepare the chocolate ganache. In a microwave-safe bowl, combine the chocolate chips (or chopped chocolate), ¼ cup butter, shortening, and heavy cream (if using).
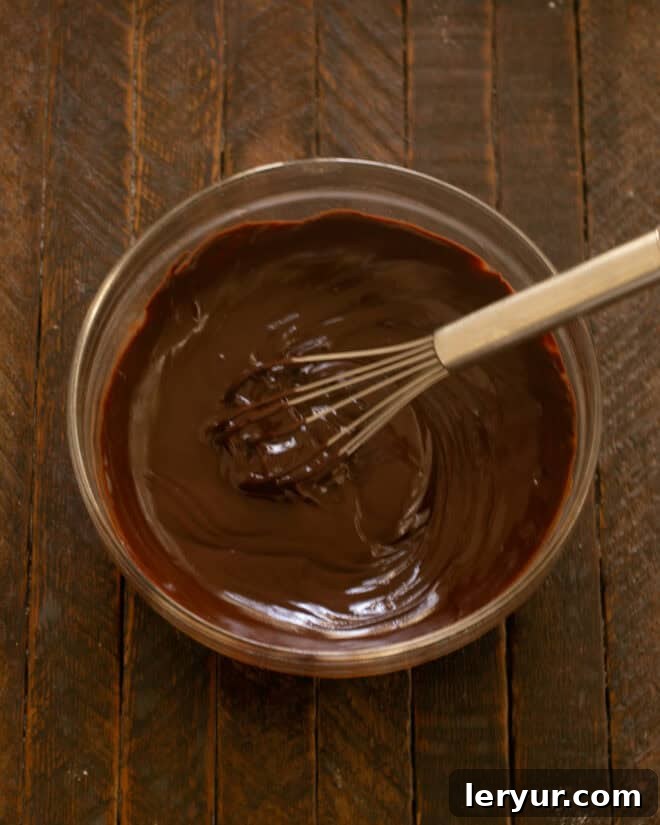
- Microwave gently in 30-second increments, stirring well after each interval, until the mixture is completely melted and smooth. Be careful not to overheat the chocolate.
- Pour or dollop the warm ganache over the chilled peanut butter layer. Carefully spread it evenly across the surface with a small offset spatula. Return the brownies to the refrigerator to allow the ganache topping to set completely before slicing. Once set, lift the brownies out of the pan using the foil overhang, slice into squares, and serve.
Notes
This recipe has been adapted and perfected over time, drawing inspiration from classic recipes by Betty Crocker, Loves to Eat, and Sweet Pea’s Kitchen.
Baking Powder Freshness Test: Always check the expiration date on your baking powder. Unlike baking soda, it tends to expire much faster. If you’re unsure of its activity, simply put a spoonful into a cup of very hot water. If it bubbles vigorously, it’s still good to use. If not, it’s time to replace it.
Room Temperature for Best Results: Ensure butter for the peanut butter filling and all eggs are at room temperature. This is crucial for a smooth, homogenous mixture and a tender crumb in your brownies and a fluffy, even filling.
Nutrition Information:
Yield:
24
Serving Size:
1 brownie
Amount Per Serving:
Calories: 373Total Fat: 23gSaturated Fat: 13gTrans Fat: 1gUnsaturated Fat: 8gCholesterol: 61mgSodium: 198mgCarbohydrates: 42gFiber: 2gSugar: 34gProtein: 4g
HOW MUCH DID YOU LOVE THIS RECIPE?
Please leave a comment on the blog or share a photo on Pinterest