
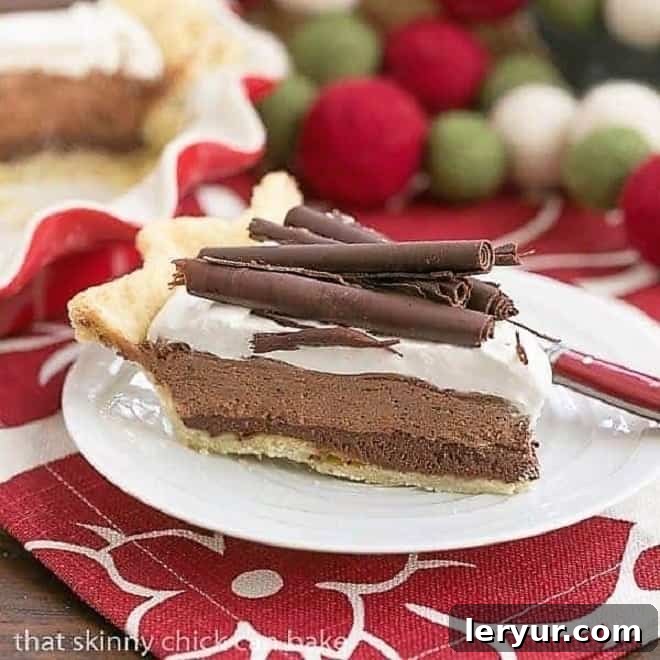
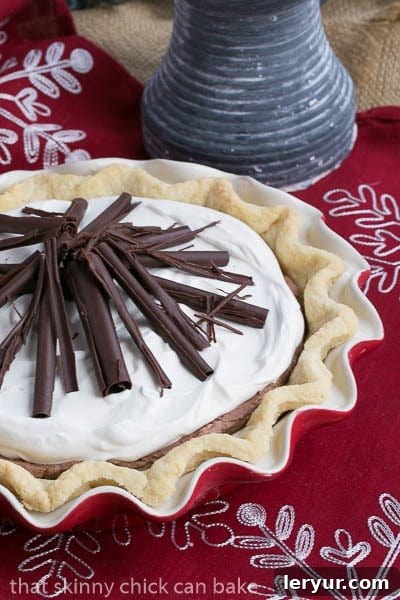
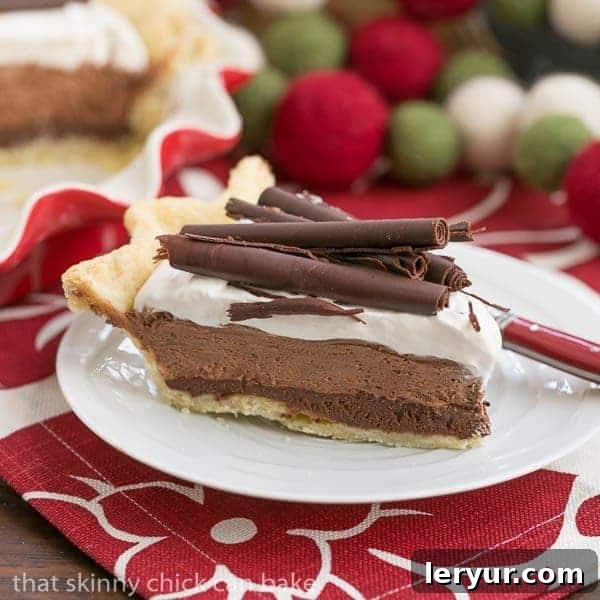
Indulge in pure bliss with this exquisite Black Bottom Chocolate Mousse Pie. Featuring a perfectly baked pastry crust, rich layers of decadent chocolate ganache and airy mousse, topped with luscious whipped cream and elegant chocolate curls, this dessert is a true masterpiece.
My family declared this magnificent Chocolate Pie Recipe an absolute triumph, a true home run in the world of desserts! And I wholeheartedly agree. It’s not just a pie; it’s an experience, a celebration of chocolate in its most divine forms. From its inviting aroma to the last delightful bite, this pie promises to captivate your senses and leave an unforgettable impression.
Why This Black Bottom Chocolate Mousse Pie Will Be Your New Favorite
A rich chocolate pie is an undeniable staple at our family gatherings, especially during the holidays. Traditionally, we’ve often gravitated towards a classic French silk pie, but this year, I decided to venture slightly off the beaten path, transforming the traditional pie crust into a vessel for something even more extraordinary: a luscious mousse. However, my culinary creativity didn’t stop there; my mind was brimming with ideas to elevate this dessert to an unparalleled level of decadence.
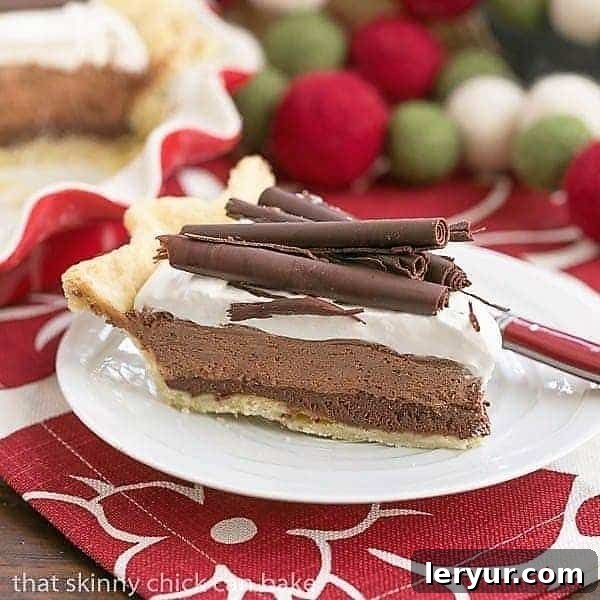
- Unforgettable Layers of Delight: We believe that when it comes to chocolate, more is always better! That’s why we’ve introduced a foundational layer of rich, velvety ganache, creating the “black bottom” that gives this Chocolate Mousse Pie its distinctive name and deeply satisfying flavor.
- A Symphony of Textures: Prepare for a truly sensational experience with every bite. This pie boasts THREE distinct and delicious layers of filling: a dense, fudgy ganache, a light and airy chocolate mousse, and a cloud-like topping of whipped cream. Each layer contributes to a complex, harmonious texture that’s simply irresistible.
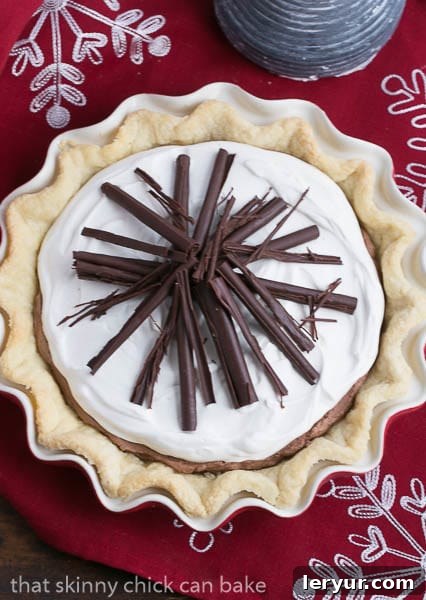
- Elegance in Every Detail: Make this dessert truly memorable and visually stunning by garnishing it with homemade chocolate curls. These delicate, artistic adornments not only add an extra touch of chocolatey goodness but also transform your pie into a show-stopping centerpiece worthy of any special occasion.
- A Versatile Crowd-Pleaser: Whether it’s a festive holiday feast, a birthday celebration, or just a weekend treat, this pie is guaranteed to impress. Its sophisticated flavor profile appeals to all chocolate lovers, making it a reliable choice for any event.
Essential Ingredients for Your Perfect Chocolate Mousse Pie
Creating a truly exceptional dessert begins with high-quality ingredients. Here’s a closer look at what you’ll need and some tips for selecting the best components for your Black Bottom Chocolate Mousse Pie:
- Kitchen Staples: You’ll need basic baking essentials like Butter, Granulated Sugar, Powdered Sugar, and Shortening. These form the backbone of the pie’s components, from the ganache to the delicate chocolate curls.
- 9-inch Pie Crust, Baked and Cooled: The foundation of our pie. You can opt for the convenience of a good quality store-bought crust, or for an extra touch of homemade goodness, prepare your favorite pastry crust from scratch. Ensure it’s fully baked and completely cooled before assembling the pie to prevent sogginess.
- Heavy Cream (36% Milkfat): This is a crucial ingredient for both the ganache, mousse, and whipped topping. Aim for heavy cream with at least 36% milkfat for the richest flavor, the most stable whipped cream, and the perfect consistency in your mousse. Avoid “whipping cream” with lower fat content if you want truly decadent results.
- Semisweet Chocolate (Chopped): The star of the show! The quality of your chocolate profoundly impacts the final flavor. I highly recommend using premium semisweet chocolate bars, such as Ghirardelli, and chopping them yourself. This ensures even melting and a superior, smooth texture in your ganache and mousse. Avoid chocolate chips as they often contain stabilizers that prevent smooth melting.
- Vanilla Extract: Always use pure vanilla extract, not artificially flavored substitutes. A high-quality brand like Nielsen-Massey will significantly enhance the chocolate’s depth and complexity. Real vanilla elevates the entire flavor profile.
- Kahlua (or Coffee Liqueur): A tablespoon of Kahlua or another coffee liqueur subtly accentuates the chocolate flavor, adding a layer of sophisticated richness without overwhelming the taste. If you prefer to avoid alcohol, you can omit it entirely or substitute with a teaspoon of espresso powder dissolved in a tiny bit of hot water or a few drops of coffee extract.
- Egg Whites (at room temperature): For maximum volume and stability when whipped, your egg whites should be at room temperature. It’s imperative to use pasteurized eggs to ensure food safety, especially since they are consumed raw in the mousse. Carefully separate the whites, ensuring absolutely no traces of yolk are present, as any fat can prevent them from whipping properly.
- Shortening (for Chocolate Curls): A small amount of shortening, when melted with chocolate, helps create the perfect consistency for making delicate, flexible chocolate curls. It makes the chocolate more pliable and easier to scrape into elegant ribbons.
The Importance of Pasteurized Eggs for Mousse Perfection
I cannot overstate the importance of using pasteurized eggs, especially when preparing recipes like this Black Bottom Chocolate Mousse Pie, where egg whites are consumed raw or lightly cooked. Pasteurized eggs are heat-treated to eliminate harmful bacteria such as salmonella, which is often associated with raw or under-cooked eggs. This step is critical for ensuring the safety of your dessert, particularly if you are serving it to vulnerable individuals, such as the very young, the elderly, pregnant women, or those with compromised immune systems.
For this recipe, I specifically recommend Davidson’s Safest Choice Pasteurized Eggs, which have become more widely available in many markets. However, if you can’t find pasteurized eggs, you can safely pasteurize them at home. The key is to maintain a precise temperature: gently heat the eggs in a water bath, ensuring the water temperature stays between 140°F and 142°F for exactly 3 minutes. The goal is for the internal temperature of the yolks to reach 138°F, effectively killing any salmonella bacteria without actually cooking the egg.
Once you have your pasteurized eggs, here are some crucial tips for achieving perfectly whipped egg whites:
- Temperature Matters: While it’s best to separate eggs when they are cold (as the yolks are firmer and less likely to break), allow the egg whites to come to room temperature before whipping. Room temperature whites incorporate more air and achieve greater volume and stability.
- Patience is Key: Pasteurized egg whites can sometimes take a bit longer to reach firm, glossy peaks compared to unpasteurized ones. Be patient and continue beating until they hold their shape beautifully.
- Cleanliness is Paramount: The ultimate enemy of well-whipped egg whites is grease or any trace of yolk. Ensure your mixing bowl and whisk attachments are scrupulously clean and completely free of any fat residue. Even a tiny speck of yolk or oil can prevent your whites from whipping up properly. Take extra care during preparation to avoid this common pitfall.
How to Craft Elegant Homemade Chocolate Curls
While simple chocolate shavings or a light dusting of cocoa powder make lovely finishing garnishes for this delightful Chocolate Mousse Pie, if you’re aiming for a truly show-stopping dessert, especially for holiday feasts or special celebrations, I highly recommend trying your hand at making chocolate curls. This technique, which I discovered on The Pioneer Woman’s blog, is surprisingly achievable. Although I don’t always achieve perfect curls 100% of the time, I find that a beautiful mix of full curls and partial ribbons creates an exquisite and artistic presentation that truly elevates the pie.
Here’s a step-by-step guide to creating your own beautiful chocolate curls:
- Prepare the Chocolate Mixture: Begin by melting 3 ounces of high-quality semisweet chocolate with one tablespoon of shortening. You can do this gently in a microwave-safe bowl, heating in short bursts and stirring until completely smooth and free of lumps. The shortening is key here, as it adds flexibility to the chocolate, making it easier to curl.
- Spread and Chill: Once melted, spread the warm chocolate mixture thinly and evenly across the back of a smooth, clean sheet pan. A small offset spatula works wonderfully for this. Aim for a consistent, thin layer. Then, carefully transfer the sheet pan to the freezer for approximately 3 to 5 minutes. The goal is for the chocolate to set, but not become too hard or brittle.
- Scrape the Curls: After chilling, remove the pan from the freezer. Using a sturdy bench scraper or a wide metal spatula, hold the scraper at about a 45-degree angle against the chocolate. Apply gentle, even pressure and push the scraper firmly across the surface of the chocolate. As you push, the chocolate should peel back and curl into delicate ribbons.
- Temperature Control is Key: This step requires a bit of finesse and temperature management. If the chocolate is too soft, it will simply smear rather than curl. Pop the sheet pan back into the freezer for another minute or two. If, however, the chocolate is too hard and brittle (meaning it shatters instead of curls), let it warm up slightly at room temperature for about a minute or so. Finding that sweet spot where the chocolate is firm but still pliable is essential for perfect curls.
- Handling and Storage: Once formed, carefully transfer the delicate chocolate curls to a plate using a small spatula or your fingertips (try to avoid direct contact as much as possible to prevent melting). Keep them refrigerated until ready to garnish your pie.
For visual learners, I highly recommend checking out Ree’s post on The Pioneer Woman blog for step-by-step photos that truly illustrate this method. I’ve also discussed this technique in more detail in my post for Fluffy Chocolate Dessert. With or without these elegant chocolate curls, this Black Bottom Chocolate Mousse Pie is undeniably a dessert that will dazzle and delight anyone lucky enough to receive a slice!
Discover More Decadent Chocolate Desserts You’ll Adore:
If you’re a true chocolate enthusiast, you’re in for a treat! After mastering this Black Bottom Chocolate Mousse Pie, be sure to explore these other fantastic chocolate creations from our kitchen:
- Peanut Butter Chocolate Mousse Cake: A delightful combination of nutty and chocolatey goodness.
- Triple Chocolate Mousse Pie: For those who can’t get enough chocolate, this one’s a dream come true.
- Irish Chocolate Mousse Cake: A sophisticated dessert with a hint of Irish charm.
- Flourless Chocolate Cake with Marshmallow Frosting: Rich, dense, and naturally gluten-free, topped with fluffy marshmallow.
- Double Chocolate Cheesecake: A creamy, chocolatey indulgence that’s sure to impress.
- Easy Chocolate Mousse Bars: A simpler way to enjoy the lightness of chocolate mousse in bar form.
- Death by Chocolate Cake: The ultimate dessert for serious chocolate fanatics, unbelievably rich.
- Explore even more Homemade Chocolate Recipes to satisfy all your cravings!
We love connecting with our baking community! Stay in touch through social media @ Instagram, Facebook, and Pinterest. Don’t forget to tag me when you try one of my delicious recipes! And if you absolutely adore the results, please consider giving it a 5-star rating in the recipe card below. Your feedback and shares mean the world to us!
Black Bottom Chocolate Mousse Pie
1 hour
1 hour
8 servings
A truly decadent chocolate pie, perfect for any celebration or when you simply crave an extraordinary dessert!
Ingredients
- 1 9-inch pie crust, baked and cooled
For the Decadent Ganache Layer:
- ½ cup heavy whipping cream
- 1 tablespoon unsalted butter
- 4 ounces semisweet chocolate, finely chopped
- ½ teaspoon pure vanilla extract
For the Light Chocolate Mousse:
- 5 ounces semisweet chocolate, finely chopped
- 1 cup heavy cream, divided (¼ cup for melting chocolate, ¾ cup for whipping)
- 1 tablespoon Kahlua or other coffee liqueur (optional, for enhanced flavor)
- 3 large egg whites, at room temperature (ensure they are pasteurized for safety, and absolutely no traces of yolk)
- 3 tablespoons granulated sugar
For the Whipped Cream Topping:
- 1 cup heavy cream, chilled
- ¼ cup powdered sugar
- 1 teaspoon pure vanilla extract
For Elegant Chocolate Curls (Optional Garnish):
- 3 ounces semisweet chocolate, finely chopped
- 1 tablespoon shortening
Instructions
- Prepare the Ganache: In a medium-sized, heat-safe bowl, combine ½ cup whipping cream and butter. Heat in the microwave until the mixture is hot and steaming (but not actively boiling), typically 1-2 minutes.
- Melt Chocolate for Ganache: Add the chopped 4 ounces of semisweet chocolate to the hot cream mixture. Let it rest for 5 minutes to allow the chocolate to melt. Then, stir thoroughly with a rubber spatula until the ganache is completely smooth and glossy. Stir in ½ teaspoon vanilla extract until well combined.
- Set the Ganache Layer: Pour and spread the prepared ganache evenly into your baked and cooled 9-inch pie crust. Place the pie crust in the refrigerator to chill while you prepare the chocolate mousse. This will help the ganache set firmly.
- Prepare Chocolate for Mousse: For the mousse, place the 5 ounces of chopped chocolate and ¼ cup of the heavy cream into a large, heat-safe bowl. Gently heat in the microwave in 30-second intervals, stirring in between, until the chocolate is very soft and mostly melted. Stir with a rubber spatula until smooth and uniform. Mix in the Kahlua (if using) and set the chocolate mixture aside to cool slightly.
- Whip Egg Whites: Place the room temperature egg whites into the impeccably clean bowl of a stand mixer fitted with the whisk attachment. Beat on high speed until stiff peaks form. If you are using pasteurized eggs, this process might take slightly longer than 5 minutes, so exercise patience. It’s crucial that your bowl and whisk are perfectly clean and free of any yolk or grease, as any fat will prevent the whites from whipping properly. If necessary, transfer the whipped egg whites to another clean bowl if you need to use your mixer for the next step.
- Whip Remaining Cream: In the same stand mixer bowl (or a clean one), add the remaining ¾ cup heavy cream and the 3 tablespoons of sugar. Whip on high speed until stiff peaks just begin to form. Be careful not to over-whip, which can turn the cream grainy.
- Fold Mousse Components: With a rubber spatula, gently fold half of the whipped cream into the slightly cooled chocolate mixture. Once incorporated, gently fold in the remaining whipped cream. Finally, carefully fold in the whipped egg whites until they are just incorporated, ensuring you do not overmix, which can deflate the airy texture of the mousse.
- Chill the Mousse Pie: Spoon the light and fluffy chocolate mousse over the chilled ganache layer in the pie crust. Carefully smooth the top with a spatula. Refrigerate the pie for at least 2 hours, or ideally until completely set, to allow the mousse to firm up and the flavors to meld beautifully.
- Garnish and Serve: Before serving, if desired, prepare chocolate curls (refer to the instructions in the main blog post for detailed guidance on making them). For the topping, whip 1 cup of chilled heavy cream with ¼ cup powdered sugar and 1 teaspoon vanilla extract until stiff peaks form. Pile the whipped cream generously on top of the set chocolate mousse. Garnish with your homemade chocolate curls, elegant chocolate shavings, or a simple dusting of cocoa powder for a sophisticated finish. Serve chilled and enjoy this truly decadent dessert!
Notes
If you are serving this delicious pie to individuals who are very young, elderly, pregnant, or immune-suppressed, it is highly recommended to use pasteurized eggs to ensure safety. Alternatively, you can learn how to safely pasteurize eggs at home by following detailed instructions, such as those found on Simply Recipes.
Recommended Products for Effortless Baking
As an Amazon Associate and member of other affiliate programs, I earn from qualifying purchases, supporting the creation of more delicious recipes.
- Reliable Egg Separator
- Versatile Small Offset Spatula
- Premium 9-inch Ceramic Deep Dish Pie Plate
Nutrition Information:
Yield:
8
Serving Size:
1
Amount Per Serving:
Calories: 639
Total Fat: 49g
Saturated Fat: 28g
Trans Fat: 1g
Unsaturated Fat: 18g
Cholesterol: 112mg
Sodium: 156mg
Carbohydrates: 49g
Fiber: 3g
Sugar: 35g
Protein: 7g
HOW MUCH DID YOU LOVE THIS RECIPE?
Please leave a comment on the blog or share a photo on Pinterest – we’d love to see your creations!