
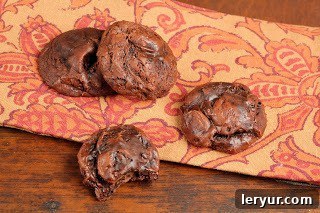
Experience the ultimate indulgence with these remarkable Flourless Fudge Cookies. Despite their finicky reputation, these little devils consistently receive rave reviews, particularly from even the toughest critics. You’ll be absolutely astonished that something this rich, decadent, and utterly delicious could be made without a single speck of flour! These aren’t just cookies; they’re a revelation for anyone seeking a profoundly satisfying chocolate treat, especially those navigating a gluten-free diet.
Prepare to swoon over these decadent Chocolate Chocolate Chip Cookies. Each bite offers a delightful contrast: a slightly crisp exterior giving way to a luxuriously rich, fudgy center, absolutely laden with melty chocolate chips. For true chocoholics, that first bite is pure bliss—a moment of intense chocolate pleasure that will have you coming back for more. They strike the perfect balance between a chewy cookie and a dense, moist brownie, making them an unparalleled dessert for any occasion.
Why These Flourless Fudge Cookies Are a Must-Bake
In a world full of cookies, these Flourless Fudge Cookies stand out. They are more than just a dessert; they are an experience, offering a dense, chewy, and intensely chocolatey bite that satisfies on every level. Whether you’re a seasoned baker or just starting, these cookies promise a delightful reward. Here’s why you absolutely need to add this recipe to your repertoire:
- Perfect for Gluten-Free Diets: If you or your loved ones follow a gluten-free lifestyle, these cookies are a dream come true. Crafted without any traditional flour, they provide a delicious and safe treat, proving that gluten-free baking can be just as indulgent and satisfying as its conventional counterparts. You won’t miss the flour, guaranteed!
- A Double Dose of Decadent Chocolate: Prepare for an explosion of chocolate flavor! This recipe masterfully combines two powerhouse chocolate ingredients: dark, rich Dutch Process Cocoa and generous quantities of semi-sweet chocolate chips. This dynamic duo creates a profound chocolate depth that is both complex and intensely satisfying, making these cookies an undeniable favorite for any chocolate aficionado.
- Fudgy Brownie Texture in a Cookie Form: Do you adore the chewy, fudgy texture of a perfectly baked brownie? Then you will fall head over heels for these cookies. They boast that same irresistible dense, moist, and delightfully chewy center that brownie lovers crave, all neatly packaged in a convenient and delicious cookie. It’s the best of both worlds!
- Simple Ingredients, Incredible Flavor: Despite their luxurious taste, these cookies are made with accessible ingredients. The magic happens in the proportions and preparation, transforming basic pantry staples into a gourmet-level dessert that feels special yet is surprisingly easy to make.
- Impressive Yet Effortless: While they might look like they came straight from a high-end bakery, the actual process is straightforward. With clear instructions and a little attention to detail, you can create a batch of these show-stopping cookies that will impress everyone who tries them, making you look like a baking wizard!
Unlocking the Perfect Fudgy Texture: Key Ingredients
Each ingredient in this Flourless Fudge Cookie recipe plays a crucial role in achieving their signature rich flavor and irresistible fudgy texture. Understanding these components will elevate your baking experience and ensure perfect results every time. Pay close attention to the details to truly master these delightful treats:
- Kitchen Staples: Powdered Sugar and Salt – Powdered sugar, also known as confectioners’ sugar, is essential here not just for sweetness but for the cookies’ delicate structure and melt-in-your-mouth texture. Its fine consistency contributes to the smooth, fudgy interior without the graininess sometimes associated with granulated sugar. A touch of salt is vital to balance the sweetness and enhance the deep chocolate flavors, making them pop.
- Espresso Powder: The Secret Flavor Enhancer – Don’t skip the espresso powder! I highly recommend the Medaglia D’Oro brand of Instant Espresso Coffee for its quality and potency. While you won’t taste coffee directly, a teaspoon of espresso powder dramatically intensifies and deepens the chocolate flavor. It acts as a flavor enhancer, bringing out the nuances of the cocoa and making the chocolate taste “more chocolatey.”
- Dutch Process Cocoa Powder: The Heart of the Chocolate Flavor – This is not your average cocoa powder! Dutch Process Cocoa is treated with an alkali to neutralize its natural acidity, resulting in a darker color and a milder, less bitter, and richer chocolate flavor. It reacts differently in baking compared to natural cocoa (which is acidic and typically paired with baking soda). For these cookies, it’s crucial for achieving that characteristic dark hue and profound, mellow chocolate taste. My go-to brand is Droste, known for its superior quality.
- Egg Whites: The Essential Binder – Eggs separate best when cold, as the yolk is less likely to break, but it’s often recommended to use room temperature egg whites for better volume in meringues. For these cookies, the egg whites serve as the primary binder and structure provider in the absence of flour. They help create the chewy, slightly crisp exterior and the dense, fudgy interior that defines these cookies. Ensure they are well incorporated.
- Vanilla Extract: A Touch of Aromatic Sweetness – Always opt for real vanilla extract over artificial vanilla flavoring. The complexity and warmth of genuine vanilla enhance the overall flavor profile of the cookies, complementing the rich chocolate beautifully. It adds a subtle aromatic sweetness that rounds out the deep cocoa notes.
- Chocolate Chips: The Melty Morsels of Joy – I typically use Ghirardelli Semi-Sweet Chocolate Chips for their consistent quality and delicious melt. However, feel free to customize! You could use milk chocolate chips for a sweeter, creamier cookie, or opt for bittersweet chocolate chips for an even more intense, less sweet chocolate experience. Chocolate chunks or wafers also work wonderfully, providing varying textures and melt patterns.
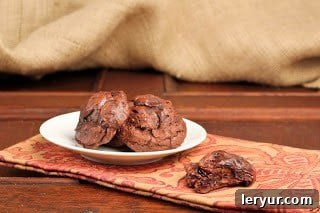
Mastering the Art of Flourless Fudge Cookies: Essential Tips for Success
Baking these Flourless Fudge Cookies to perfection might seem daunting, especially if you’re aiming for that glossy, crackled finish and truly fudgy interior. While my own oven has had its share of temperamental moments – leading to underdone batches and inconsistent gloss – the delicious outcome still won my husband’s ringing endorsement, even over my truffle brownies! He doesn’t care much for looks, but he certainly cares about taste! With these expert tips, you can navigate any potential challenges and achieve consistently spectacular results:
- Prepare Your Baking Sheets Thoughtfully: Always line your baking sheets with parchment paper. This is a non-negotiable step for non-stick results and easy cleanup. I’ve found King Arthur Flour’s parchment paper to be excellent, with its sleek glazed surface minimizing sticking. However, if you notice any sticking, a light spray of nonstick cooking spray like Pam onto the parchment can provide extra insurance. Properly prepared sheets ensure your delicate cookies lift off beautifully once cooled.
- Precision in Measuring: The Scoop and Swipe Method: Accuracy is paramount in baking, particularly in flourless recipes where ingredient ratios are critical for texture. For dry ingredients like powdered sugar or cocoa powder, use the “scoop and swipe” method. Scoop your measuring cup into the ingredient bin until overflowing, then use a straight edge (like an offset spatula or the back of a knife) to level off the excess across the top of the cup. This prevents over-measuring, which can lead to dry or crumbly cookies.
- Customize Your Chocolate Intensity: While semi-sweet chocolate chips offer a balanced flavor, don’t hesitate to experiment. If you crave an even deeper, more intense chocolate flavor with less sweetness, substitute bittersweet chocolate chips. This simple swap can transform the cookie’s character, appealing to those who prefer a darker chocolate profile.
- Prevent Overcrowding for Even Baking: Resist the urge to cram too many cookie dough mounds onto one baking sheet. Overcrowding inhibits proper air circulation around each cookie, leading to uneven baking, irregular shapes, and potentially softer, less crisp edges. Leave ample space – at least 2 inches – between each cookie to allow them to spread and bake evenly.
- Observe for Doneness: The Visual Cues: Baking for exactly 8 minutes is a guideline. Ovens vary, so keep a close eye on your cookies. They are typically done when they appear shiny, set around the edges, and have developed a few delicate cracks on top. They might seem slightly underbaked in the center, but this is key to their fudgy texture; they will firm up as they cool. Avoid overbaking, which can result in a dry, cake-like cookie.
- The Critical Cooling Process: Patience is a virtue, especially with these cookies. After removing them from the oven, allow them to cool completely on the baking pan. These cookies are quite delicate when warm, and attempting to move them too soon can cause them to break or fall apart. Cooling on the pan allows them to set fully and develop their proper structure and texture before being transferred to a wire rack for final cooling.
Suggested Baking Tools for Effortless Cookies
Having the right tools can make all the difference in your baking endeavors. For these Flourless Fudge Cookies, a few key items will ensure a smooth and successful process:
- Durable Cookie Sheets: Essential for even baking and managing multiple batches.
- Tablespoon Cookie Scoop: Ensures uniform cookie size for consistent baking and a professional appearance.
- Parchment Paper: For non-stick baking and easy cleanup.
- Mixing Bowls: Various sizes for combining ingredients.
- Rubber Spatula: For scraping down the bowl and folding in chocolate chips gently.
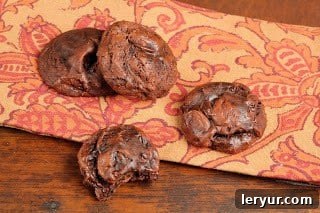
Decadent Flourless Fudge Cookies
20 minutes
8 minutes
28 minutes
24 delicious cookies
These rich, fudgy, and utterly delightful flourless cookies are a chocolate lover’s dream come true. With a perfect balance of crisp edges and a chewy center, they’re naturally gluten-free and incredibly easy to make. Get ready for an explosion of chocolate flavor in every bite!
Ingredients You’ll Need
- 2 ¼ cups powdered sugar
- ¼ teaspoon salt
- 1 teaspoon espresso powder (enhances chocolate flavor)
- 1 cup Dutch process cocoa powder (for deep color and rich taste)
- 3 large egg whites
- 2 teaspoons pure vanilla extract
- 2 cups chocolate chips, wafers, or chunks (semi-sweet recommended)
Step-by-Step Instructions
- Prepare Your Oven and Baking Sheets: Preheat your oven to 350ºF (175ºC). Line two large cookie sheets with parchment paper or Silpat baking mats. This crucial step prevents sticking and makes for easy cleanup.
- Combine Dry Ingredients: In a large mixing bowl, thoroughly stir together the powdered sugar, salt, espresso powder, and Dutch process cocoa powder. Ensure there are no lumps and the mixture is uniform. Initially, the mixture might seem very dry, but it will come together once the egg whites are added.
- Incorporate Wet Ingredients: Add the egg whites and vanilla extract to the dry mixture. Mix well, scraping down the sides of the bowl periodically to ensure all ingredients are fully incorporated. Continue mixing until a thick, glossy, and cohesive dough forms. This may take a few minutes as the egg whites work to bind the cocoa and sugar.
- Fold in Chocolate Chips: Gently stir in the chocolate chips (or wafers/chunks) until they are evenly distributed throughout the dough. Avoid overmixing once the chocolate chips are added.
- Scoop and Bake: Using a tablespoon-sized cookie scoop, drop rounded portions of the dough onto the prepared cookie sheets, leaving about 2 inches between each cookie to allow for spreading. If needed, gently reshape any irregular dough mounds with your fingers.
- Bake to Perfection: Bake for 8 minutes. The cookies are ready when they appear shiny with a few delicate cracks on top and the edges are set. The centers might still look slightly soft, which is perfect for a fudgy interior.
- Cool Completely: Allow the cookies to cool completely on the baking pan before attempting to transfer them. They are very delicate when warm and will firm up as they cool, achieving their ideal chewy-fudgy texture. Once cooled, carefully remove them to a wire rack.
Chef’s Notes & Variations
This recipe is a delightful adaptation from the renowned King Arthur Flour. For an extra touch, consider adding a sprinkle of flaky sea salt on top of the cookies right after they come out of the oven to enhance the chocolate flavor. You can also experiment with different chocolate chip varieties, such as white chocolate or peanut butter chips, for unique flavor combinations. Ensure all your ingredients are fresh for the best results.
Nutrition Information:
Serving Size:
1 cookie
Amount Per Serving (estimated):
Calories: 74Total Fat: 1gSaturated Fat: 0gTrans Fat: 0gCholesterol: 0mgSodium: 43mgCarbohydrates: 16gFiber: 1gSugar: 11gProtein: 1g
HOW MUCH DID YOU LOVE THIS RECIPE?
We’d love to hear from you! Please leave a comment on the blog below or share a photo of your delicious creation on Pinterest. Your feedback and photos brighten our day!
Frequently Asked Questions About Flourless Fudge Cookies
To help you achieve perfection and answer common queries, here are some frequently asked questions about these delectable flourless fudge cookies:
- Can I use natural cocoa powder instead of Dutch process? While you technically can, it is highly recommended to stick to Dutch process cocoa for this recipe. Dutch process cocoa is less acidic, resulting in a darker color and a milder, richer chocolate flavor that is crucial for the fudgy texture and deep taste of these cookies. Natural cocoa will yield a lighter color and a slightly different flavor profile.
- My cookies spread too much/didn’t spread enough. What went wrong? Cookie spreading can be affected by several factors. If they spread too much, your butter (if using, though this recipe uses egg whites for binding) might have been too soft, or your oven temperature might be too low. If they didn’t spread enough, your oven might be too hot, or your ingredients weren’t measured precisely. Ensure accurate measurements and a properly calibrated oven.
- How do I store these cookies, and how long do they last? Store these cookies in an airtight container at room temperature for up to 3-4 days. For longer storage, you can freeze them for up to 2-3 months. Thaw them at room temperature before serving.
- Can I add nuts or other mix-ins? Absolutely! Feel free to customize. Chopped walnuts or pecans would add a lovely crunch. Mini marshmallows, a sprinkle of sea salt before baking, or even a dash of peppermint extract (reducing vanilla slightly) could offer exciting variations.
- Are these cookies truly gluten-free? Yes, as the recipe does not call for any wheat flour, these cookies are inherently gluten-free. However, if you are baking for someone with severe gluten intolerance or celiac disease, ensure all your ingredients (like cocoa powder and chocolate chips) are certified gluten-free to avoid cross-contamination.
Conclusion: Your New Favorite Gluten-Free Chocolate Indulgence
There you have it – a comprehensive guide to baking the most exquisite Flourless Fudge Cookies you’ll ever taste. These aren’t just cookies; they’re a celebration of rich chocolate, fudgy texture, and accessible gluten-free baking. With their crisp edges and intensely chewy centers, they are guaranteed to satisfy even the most ardent chocoholic. So, gather your ingredients, follow these tips, and prepare to create a batch of cookies that will become a beloved staple in your kitchen. Happy baking!
Print This Recipe
Linked to Foodie Friday~
Linked to Sweets for a Saturday~